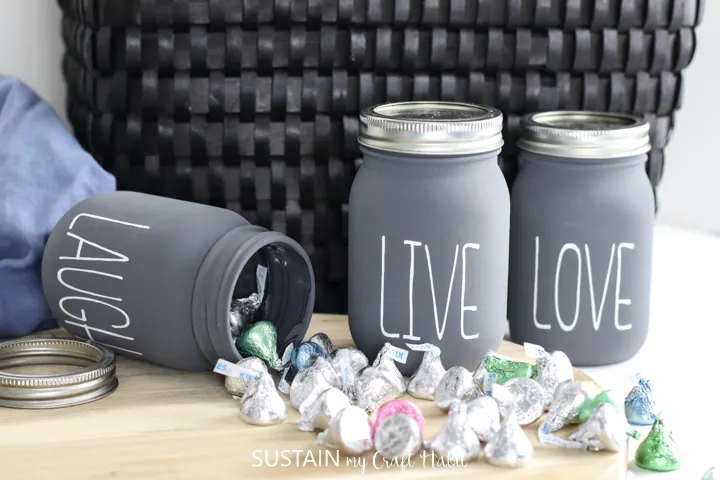
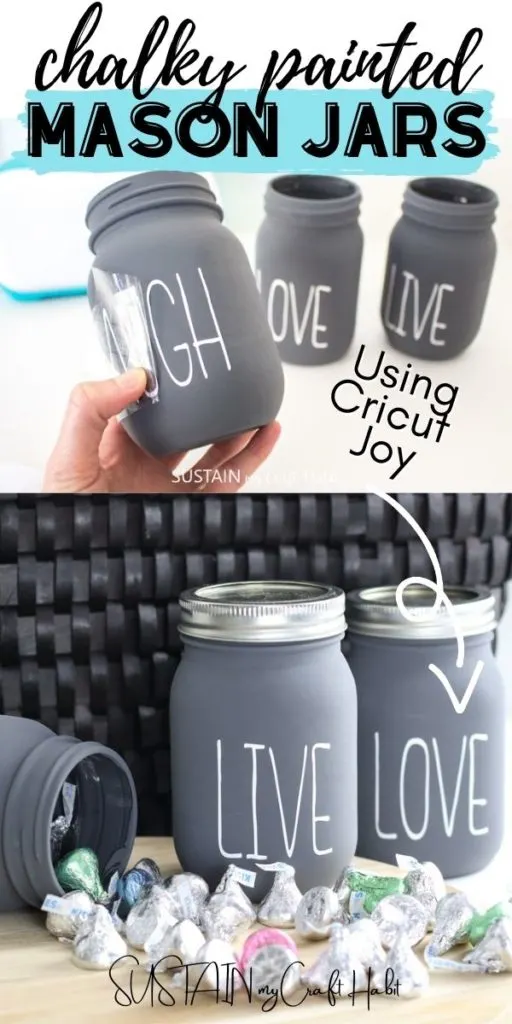
With the start of a new year, we’re jumping right on in with some fun and inspiring new years crafts. These chalky painted mason jars using Cricut vinyl cut lettering is the latest DIY of the year.

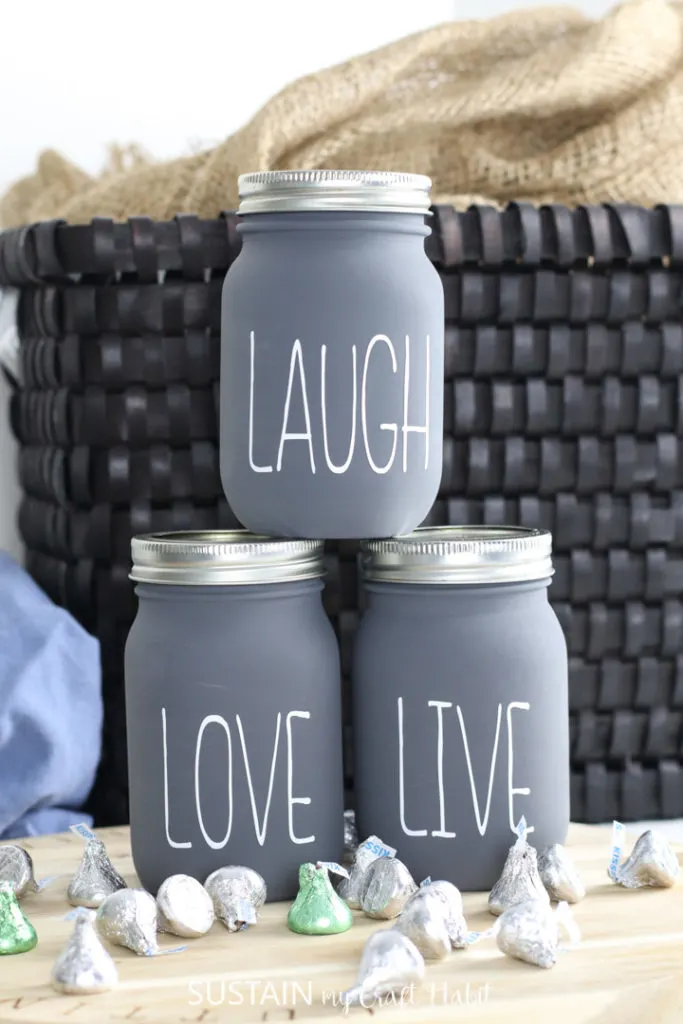
New Years Crafts: Live, Love and Laugh More this Year
Are you the type of person that sets new year’s resolutions? I personally never considered myself to be one of those people as I really don’t like the disappointment of not succeeding. But truthfully, I use the new year as a reminder to focus on the important things in life. For me, that will be to live more in the moment and avoid over-thinking everything.
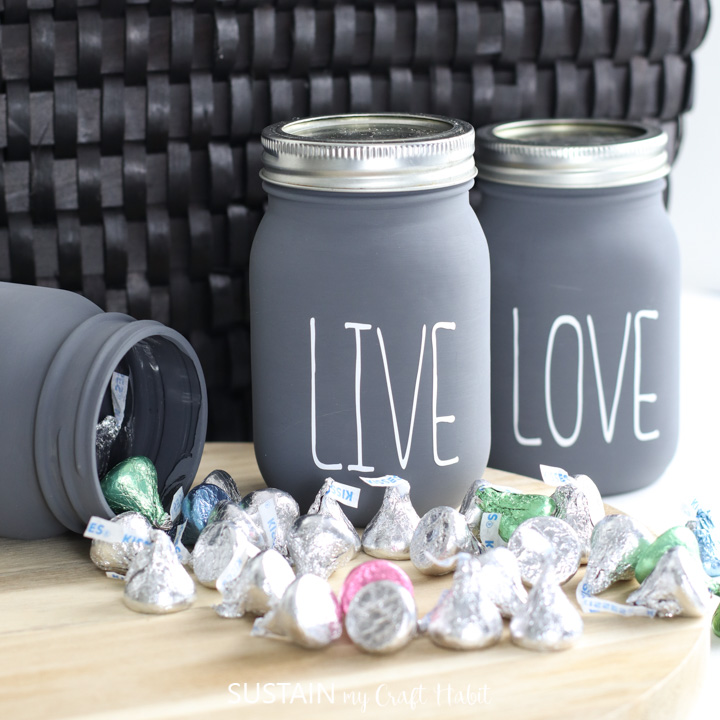

Although I chose LIVE, LOVE and LAUGH for my chalky painted jars, you can customize this craft to suit your own goals by choosing different vinyl words to cut with the Cricut. As I use these jars to hold sweets or even my cutlery on the dining table, I will be reminded to live more, love more and laugh more this new year.
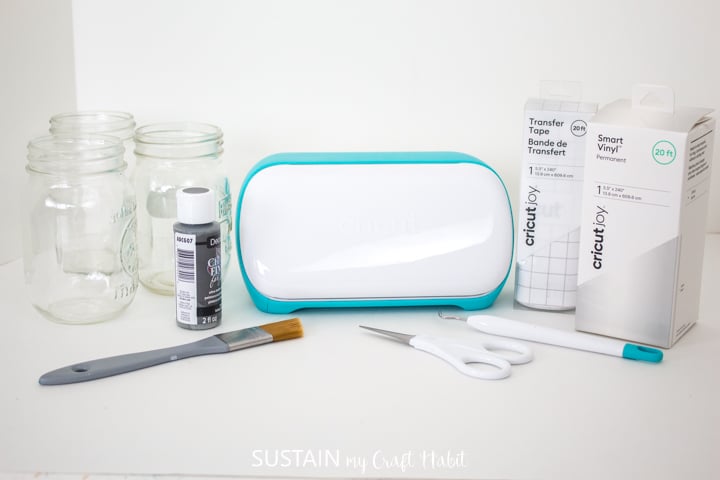
Materials Needed:
Disclosure: This post continues affiliate links for your shopping convenience. You can find our full disclosure policy here.
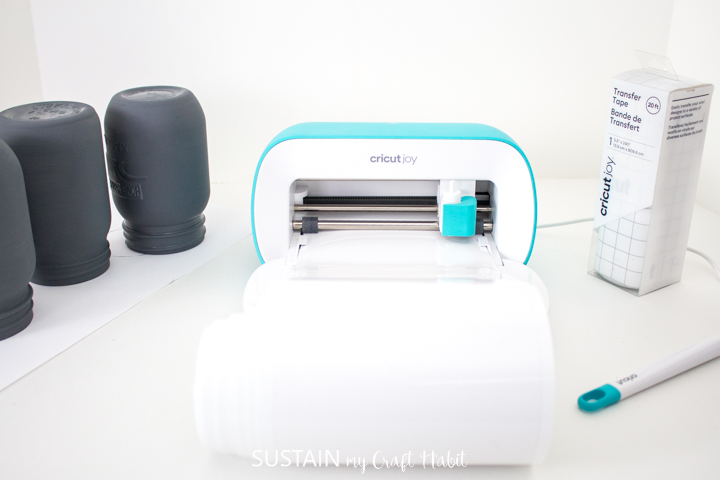
- Cricut Joy (or Cricut Maker) with Fine Point Blade
- Smart Vinyl, Permanent) in white
- 3 Mason Jars with rims (optional), 16oz
- Scissors
- Weeder tool (optional)
- Americana Chalky Finish (for Glass) in Relic
- Paintbrush

How to Make Chalky Painted Jars:
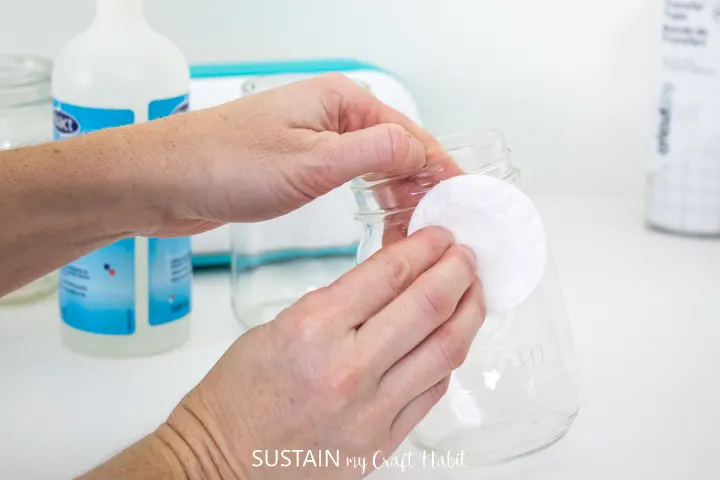
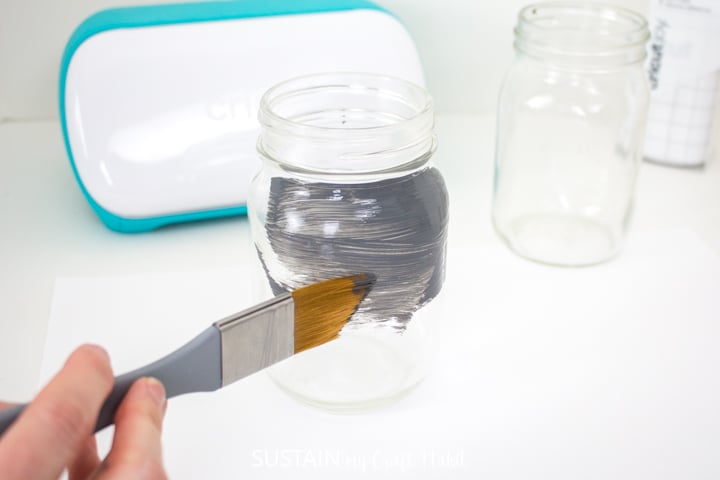
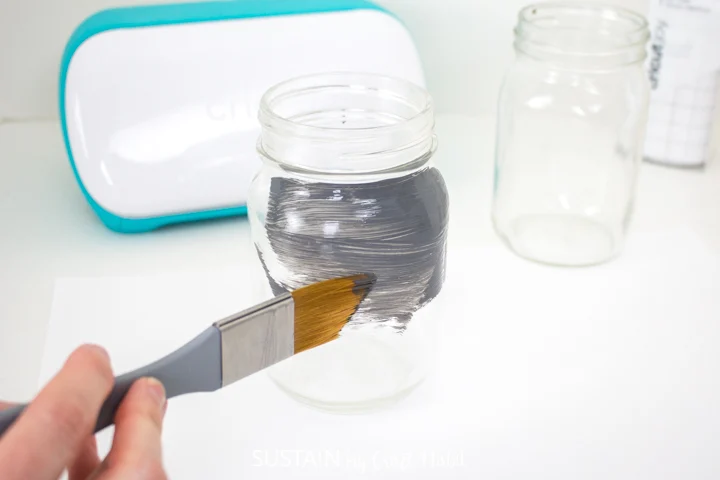
Thoroughly wash jars with soap and hot water and let them dry completely before using. Wipe the surface of the jars with rubbing alcohol before painting.

Preparing the Mason Jars
Apply a thick coat of chalky finish paint to each of the mason jars. Put aside to dry fully and repeat with additional coverage as needed. Leave enough time to dry fully between coats of paint, approx. 4-6 hours.


Creating the Text in Design Space
Open a blank canvas in Design Space. Select the text icon from the toolbar and type LOVE.
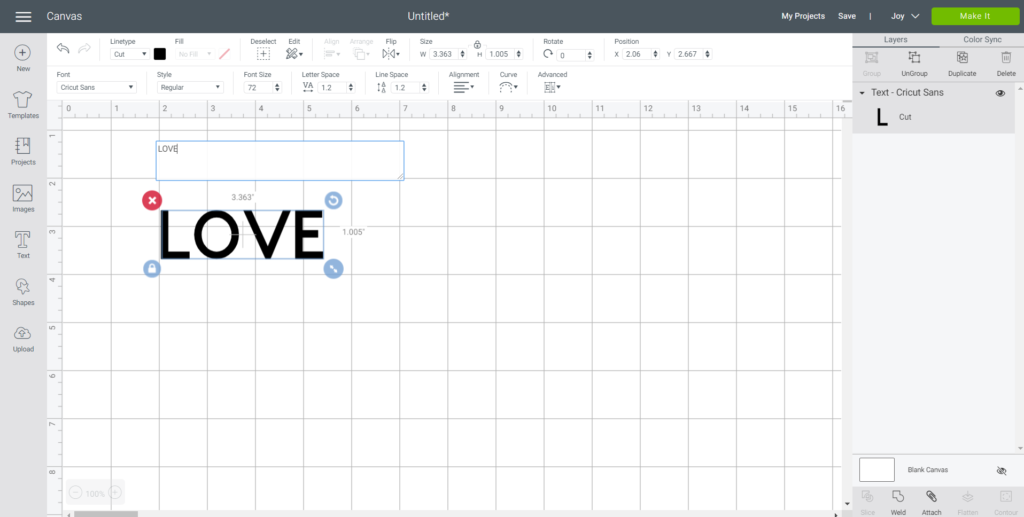
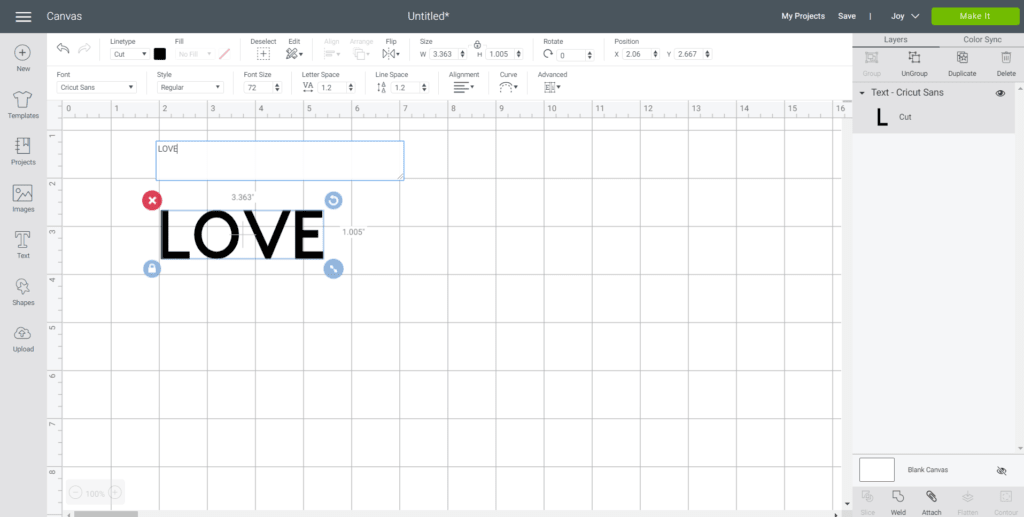
Change the font to “Little White Lies”. With the word highlighted, adjust the letter spacing to 0.7.
Stretch the lettering by clicking on the lock symbol above the size section and adjusting the height to 1.7” while keeping the width the same.
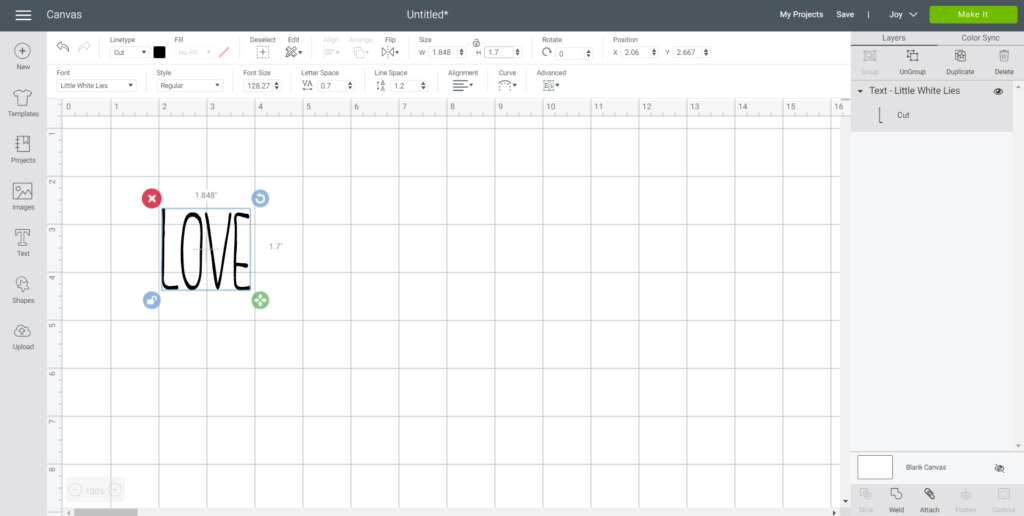
Next, click on the unlock symbol and adjust the word height to 2”. With the word highlighted, click on the “Attach” button.
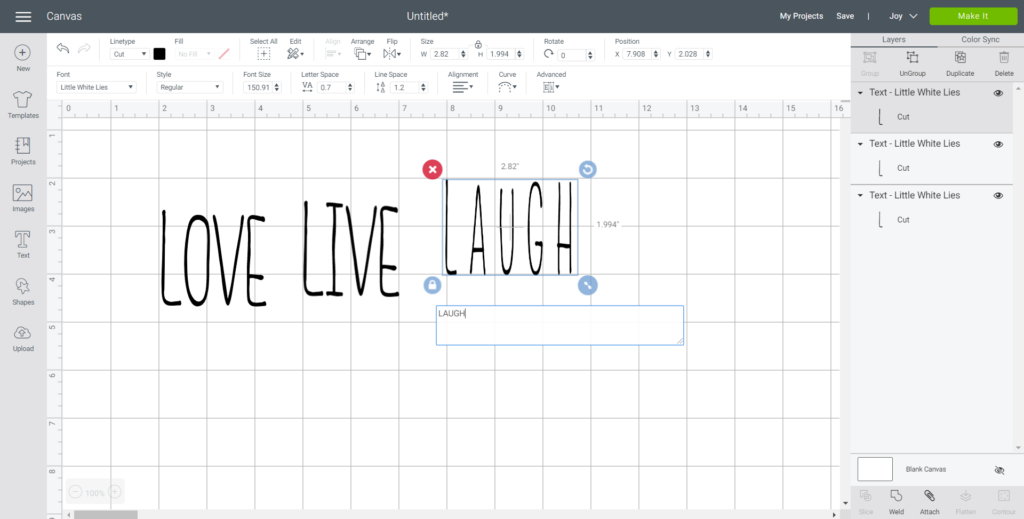
Steps 5-11 for the other words: LIVE and LAUGH.

Cutting
Select “Make It” in Design Space and choose without mat to cut Smart Vinyl.
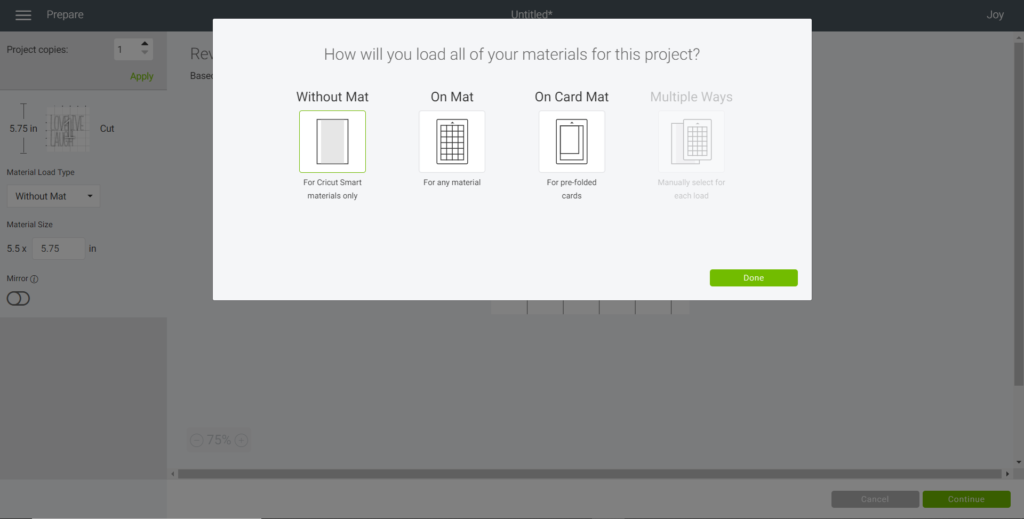
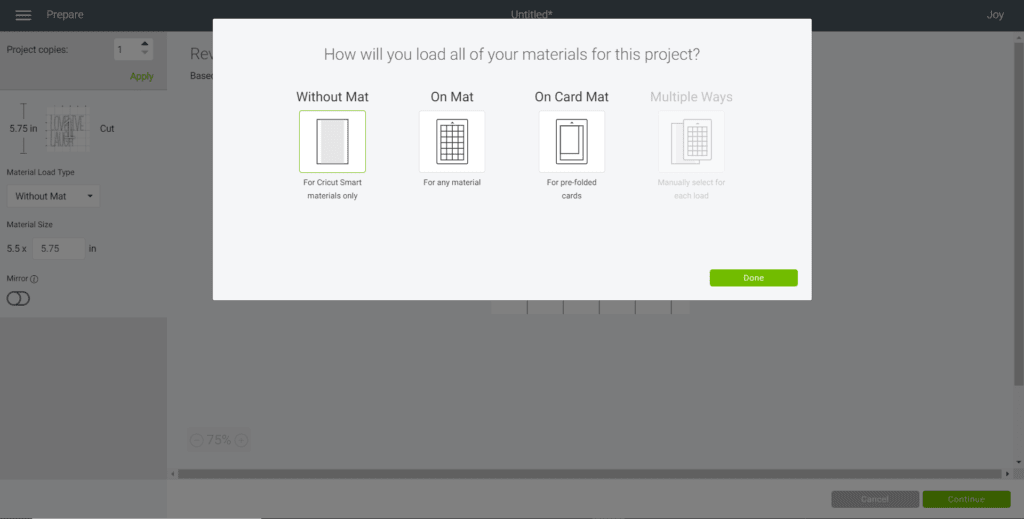
For cutting the words, set the material type to Smart Vinyl.
Follow prompts for loading the mat into the Cricut Joy and cutting the Smart Vinyl. When prompted, unload the vinyl from the cutting machine.

How to Assemble the Jars
Cut around each word with a pair of scissors.


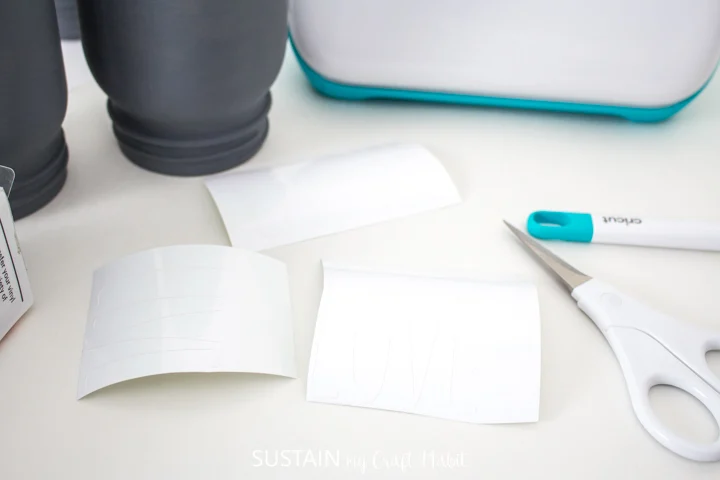
Peel away the excess vinyl around the cut images and discard.

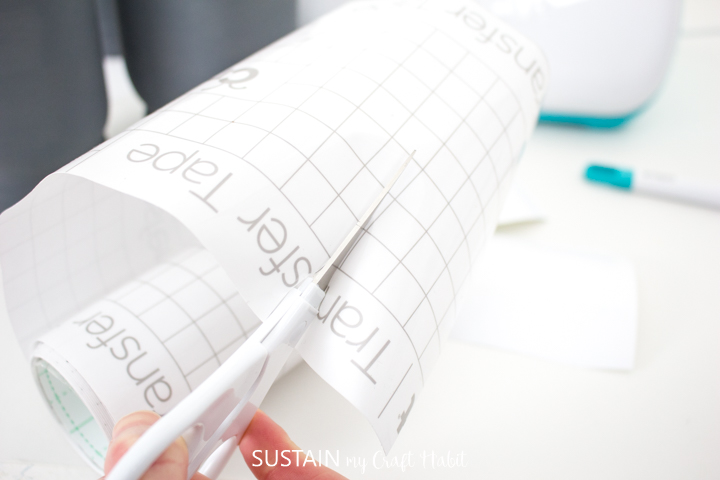
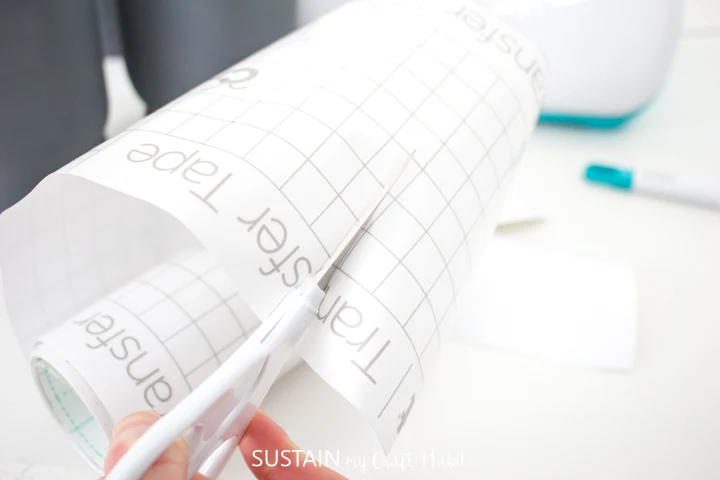
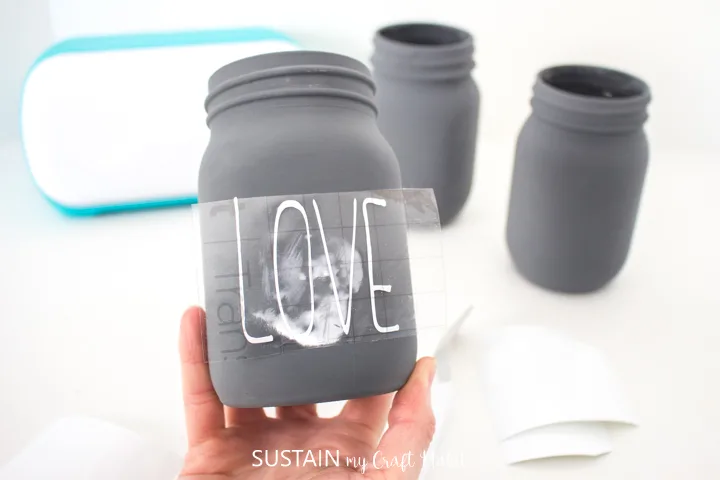
Cut a piece of transfer tape a bit larger than the size of the text.
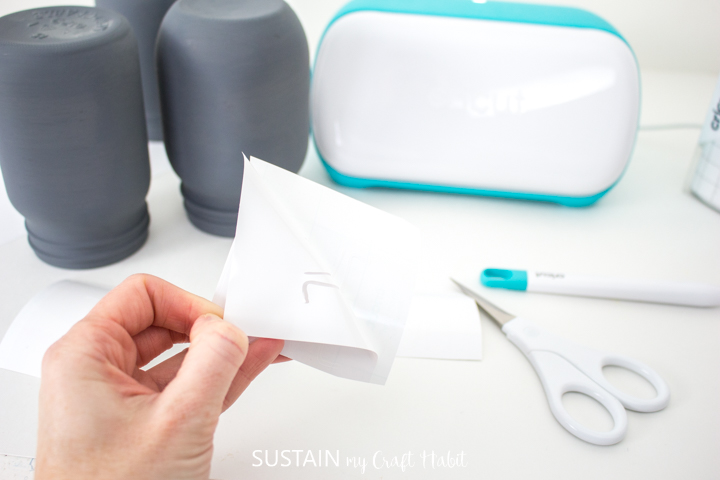
Peel away the transfer tape backing but ensure the transfer tape is not overly sticky.
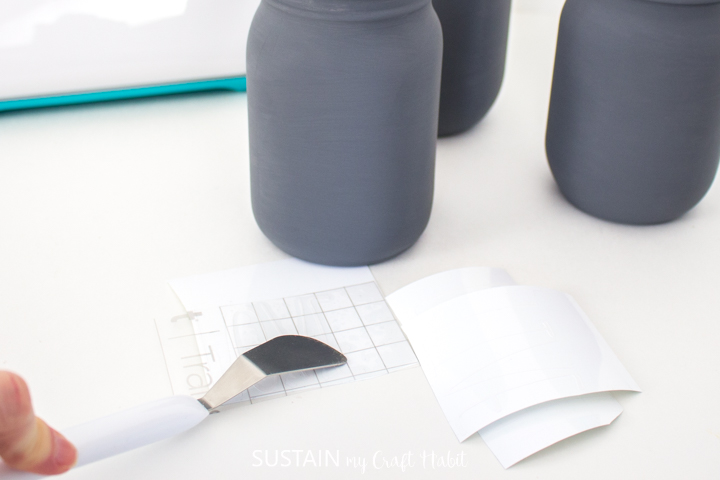
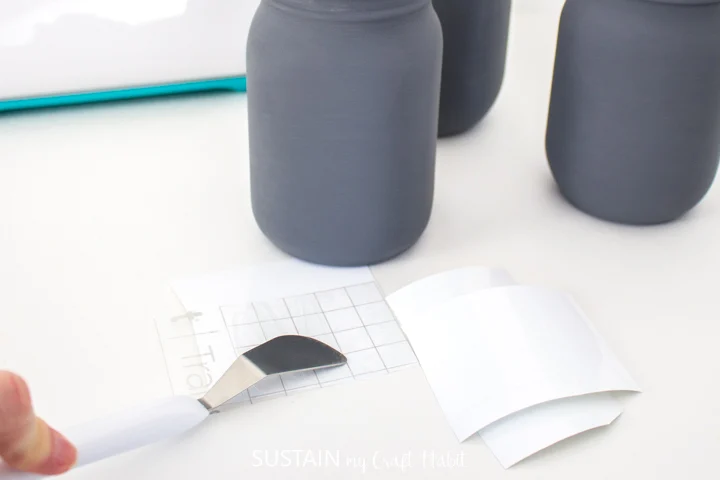
Dab the sticky side of the transfer tape with your hand to weaken the adhesive.
Place the transfer tape overtop of the cut word. Gently rub the vinyl to help it stick to the transfer tape. Peel away the vinyl backing, leaving just the image adhered to the transfer tape.


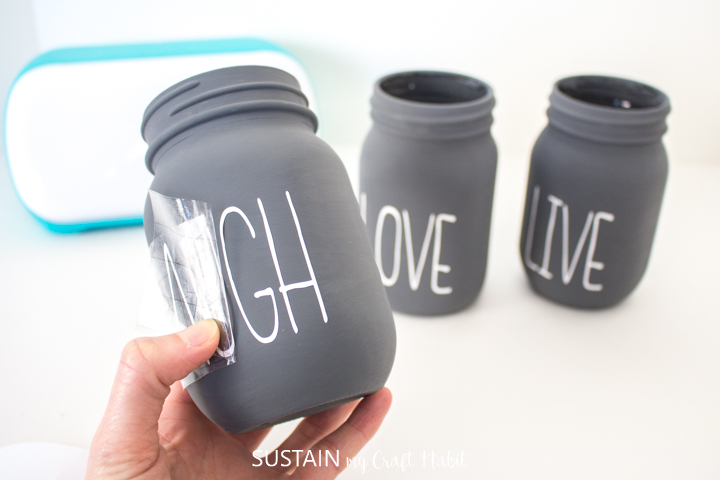
Position the phrase with the transfer tape on to the smooth side of a jar and press in place. Press the vinyl phrase down with your fingers to help it to stick to the painted glass jar. Slowly and carefully remove the transfer tape leaving the vinyl image on the jar.

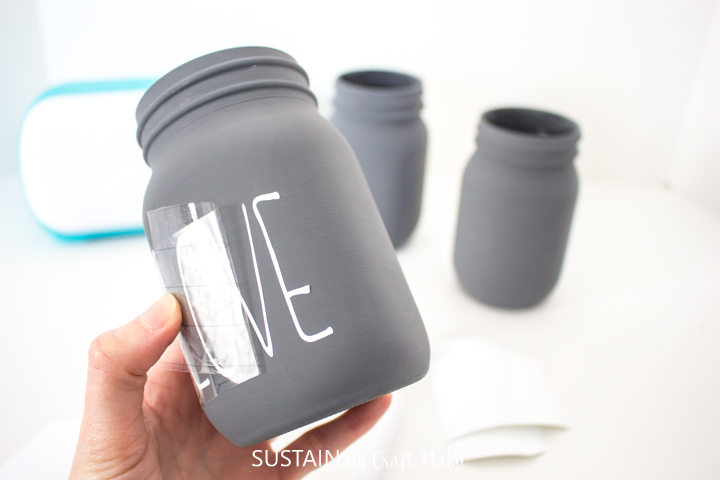

Repeat for the other mason jars.

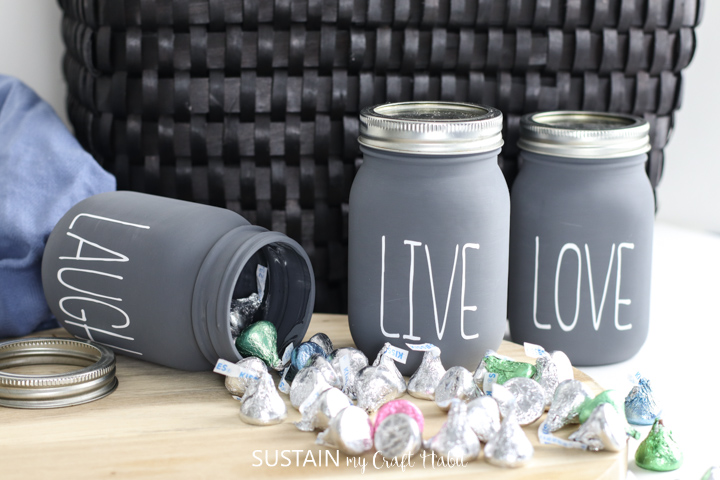
To finish, fill the containers with greenery, sweets, a candle or even use the jars to store cutlery. And place the jar rims and lids back on the jars if desired.
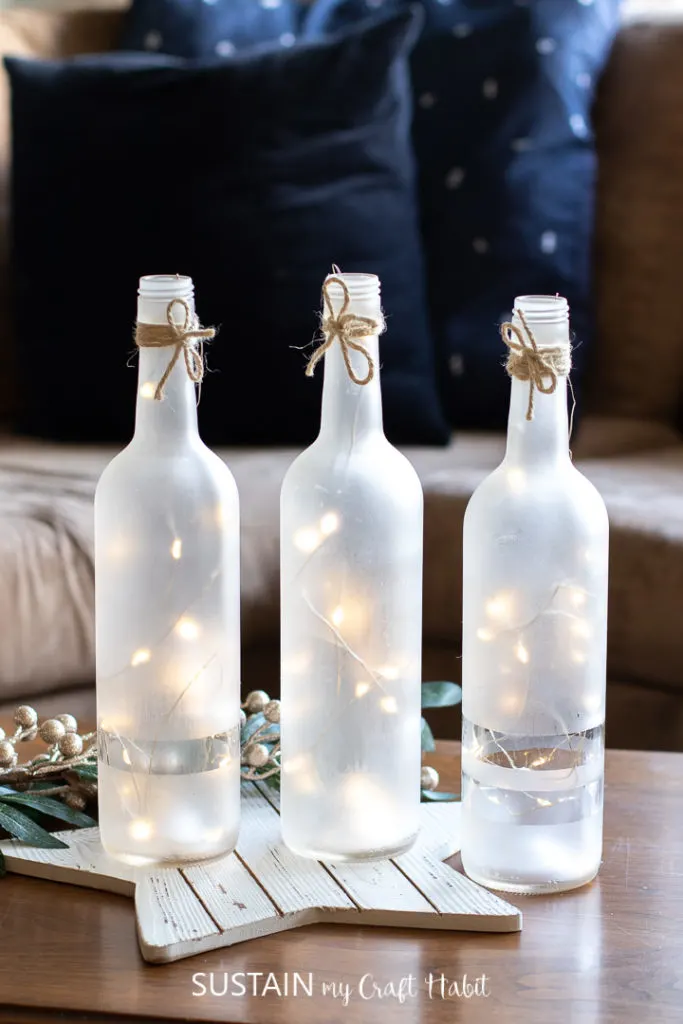
More New Years Crafts!
If you’re looking for crafts to ring in the new year, then you’ll love this metallic painted star garland and this upcycled frosted wine bottle centerpiece idea.


Frosted WIne Bottles 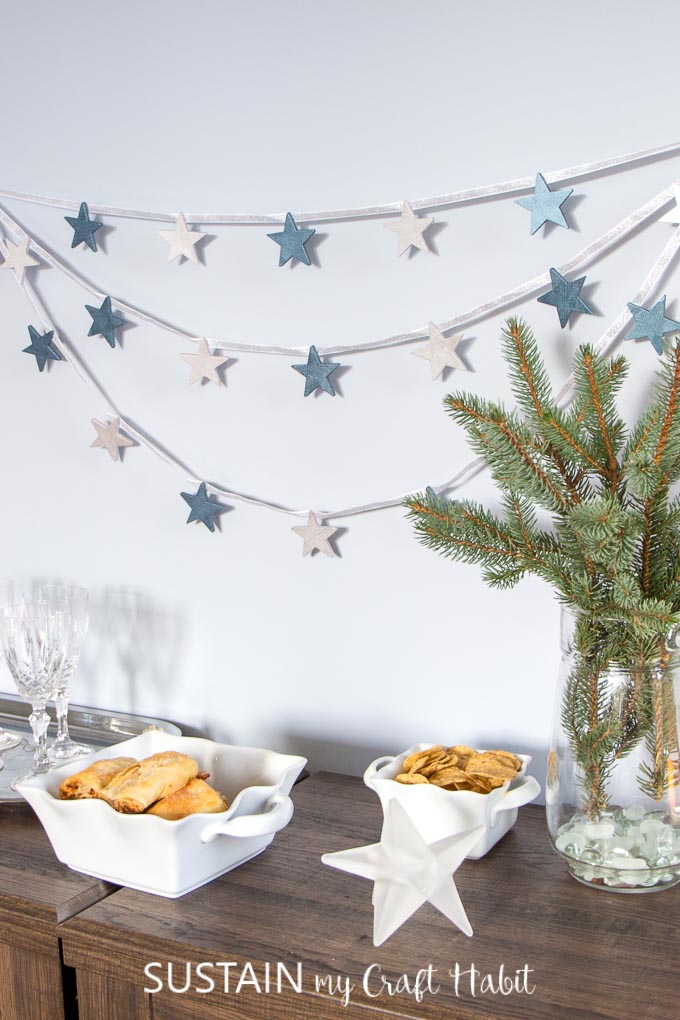

Winter Party Decor

Check Out These Other Mason Jar Crafts
- Chalky painted mason jar flower vases
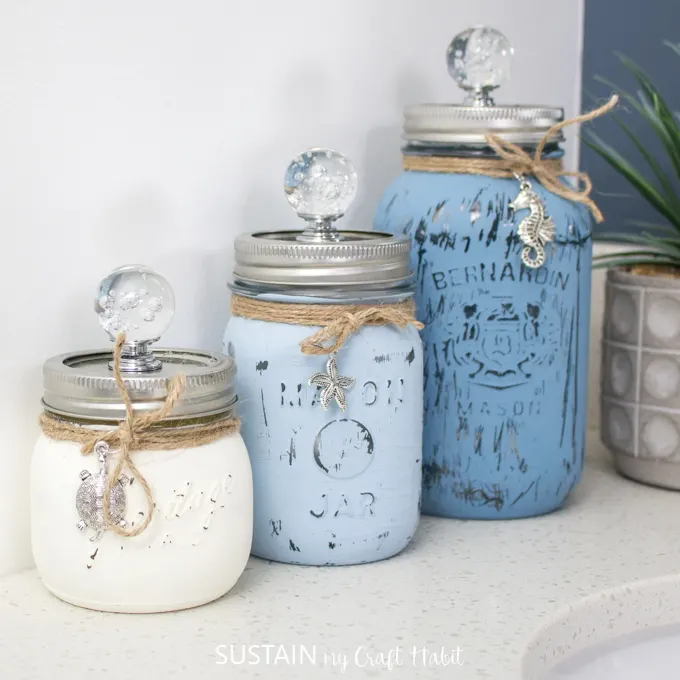
- Beachy painted mason jar containers
- Mason jar candle holders
- Mason jar Christmas crafts
- 50+ mason jar crafts to sell
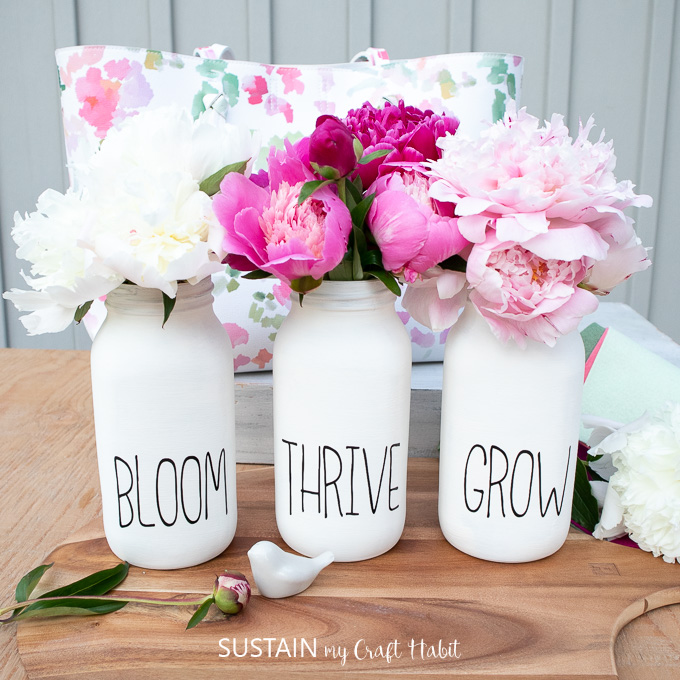

Chalky Painted Flower Vases 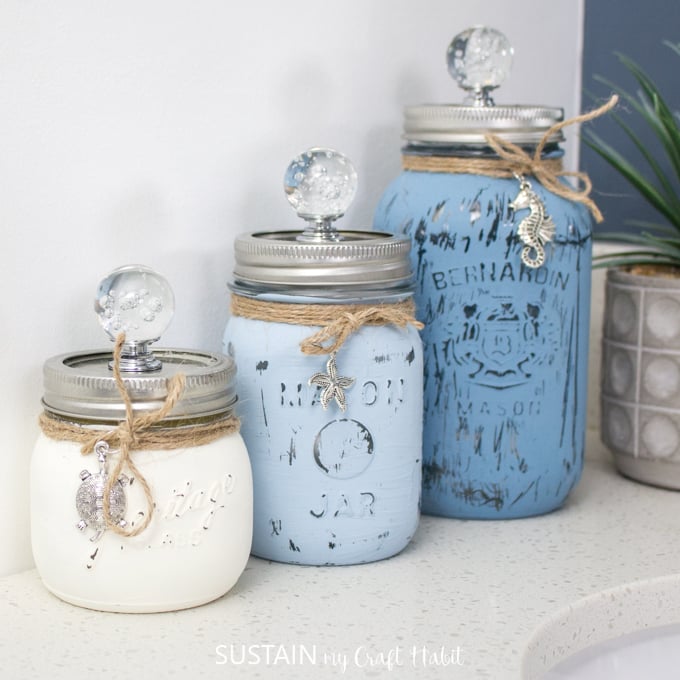
Beachy Bathroom Jars 
Painted Candle Holders 

Mason Jar Christmas Crafts 
50+ Mason Jar Crafts to Sell


Like it? Pin it for later!

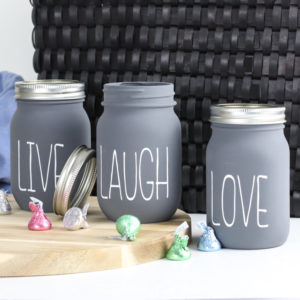

Chalky Painted Jars for the New Year
Materials
- Cricut Joy or Cricut Maker with Fine Point Blade
- Smart Vinyl (Permanent) in white
- 3 16 oz Mason Jars with rims (optional)
- Scissors
- Weeder tool optional
- Americana Chalky Finish for Glass in Relic
- Paintbrush
- Decorative ribbon optional
Instructions
- Thoroughly wash jars with soap and hot water and let them dry completely before using. Wipe the surface of the jars with rubbing alcohol before painting.
Preparing the Mason Jars
- Apply a thick coat of chalky finish paint to each of the mason jars.
Creating the Text in Design Space
- Open a blank canvas in Design Space.
- Select the text icon from the toolbar.
- Type LOVE.
- Change the font to “Little White Lies”.
- With the word highlighted, adjust the letter spacing to 0.7.
- Stretch the lettering by clicking on the lock symbol above the size section and adjusting the height to 1.7” while keeping the width the same.
- Next, click on the unlock symbol and adjust the word height to 2”.
- With the word highlighted, click on the “Attach” button.
- Steps 5-11 for the other words: LIVE and LAUGH.
Cutting
- Select “Make It” in Design Space.
- For cutting the words, set the material type to Smart Vinyl.
- Follow prompts for loading the mat into the Cricut Joy and cutting the Smart Vinyl. When prompted, unload the vinyl from the cutting machine.
How to Assemble the Jars
- Cut around each word with a pair of scissors.
- Peel away the excess vinyl around the cut images and discard.
- Cut a piece of transfer tape a bit larger than the size of the text.
- Peel away the transfer tape backing but ensure the transfer tape is not overly sticky.
- Place the transfer tape overtop of the cut word. Peel away the vinyl backing, leaving just the image adhered to the transfer tape.
- Position the phrase with the transfer tape on to the smooth side of a jar and press in place.
- Slowly and carefully remove the transfer tape leaving the vinyl image on the jar.
- Repeat for the other mason jars.
- To finish, fill the containers with greenery, sweets or a candle. Place the jar rims and lids back on the jars if desired.