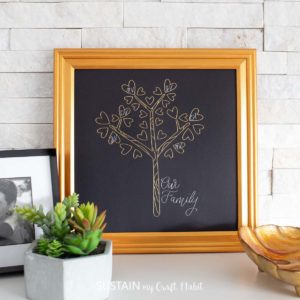
Making a Family Tree Craft Using Cricut Foil Transfer
Create a beautiful and personalized piece of framed art with this family tree craft using Cricut Transfer Foil.
Ingredients
- Cricut Maker or Cricut Explore
- Design Space #M127428AA Love Tree Draw
- Standard Grip Mat
- Cricut Foil Transfer kit medium and bold housing tips
- Cricut Foil in gold and silver
- Cardstock in black
- Paper Trimmer
- Photo frame, 10”x10”
Instructions
Preparing the Image in Design Space
- On a blank Design Space canvas, click on the “Template” button and search #M127428AA design. Insert the image on to the canvas.
- Adjust the size of the tree to 8.5” high.
- Open the linetype drop down menu and change the linetype to FOIL with the tip set to BOLD. Change the foil color to gold.
- To personalize the family tree, add your family member’s initials inside the individual leaves by click on the text button and typing out one set of initials.
- Change the font to Angel Kisses and adjust the letter spacing to 1.2. Reduce the size of the font to fit inside the leaves.
- Change the linetype to FOIL with the tip set to MEDIUM. Change the foil color to silver.
- Duplicate and add as many family member’s initials as desired and place each of the initials inside the leaves.
- Add the phrase “Our Family” in a similar way, except change the font to regular Pen & Ink.
- Select “ungroup letters” and then shift each individual letter right up next to the prior one. Continue until all letters are connected and then highlight the text and select Attach to join the letters.
- Adjust the size of the phrase to 2.25” wide and place it next to the tree trunk. Highlight the entire image and select Attach to proceed.
Applying the Foil
- Select “Make It” in the upper right corner to proceed with cutting. Position the image in the center of the mat if using a 12”x12” piece of cardstock.
- Choose the Cardstock from the list of options in the drop down menu.
- Be sure to move the pressure wheels off to the side.
- Place a sheet of silver foil over top of black cardstock and tape along ALL the edges to hold the foil in place.
- Change the housing tip as prompted and proceed.
- Once down, DO NOT UNLOAD, simply remove the silver foil and replace it with the gold foil.
- When fully complete, unload the mat and peel off the foil.
Finishing the Framed Art
- Cut down the cardstock to fit inside your picture frame. Reassemble frame, style and enjoy!
Tried this recipe?Let us know how it was!