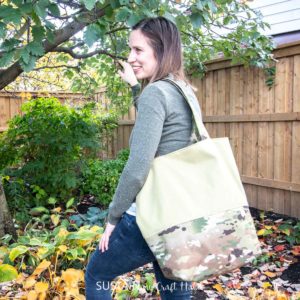
Making a Camo Tote Bag with Free Pattern
Tutorial for making a large camo tote bag with a durable reinforced base.
Ingredients
- 1.5 yards 100% Cotton Duck Canvas, 10oz in khaki in khaki (or other color)
- 1 yard 500 Denier OCP Camo fabric, 100% polyester
- Printable Large Tote Bag Pattern
- Fabric scissors
- Chalk, ruler, measuring tapeIron and ironing board
- Sewing machine and matching thread color
Instructions
Cutting
- Print off the large tote bag pattern on 16 sheets of 8.5x11 paper. Align the paper edges and tape the pieces together.
- Place the pattern pieces on top of the fabric aligning the grainlines. The lower half of the bag and the straps are cut out of the camo fabric while the other remaining pieces (and lining) is cut out of the cotton canvas. Cut along the solid line.
Sewing the Inner Patch Pocket
- Press the edges of the pocket piece in by 1/2". Fold the top edge another 1/2" and topstitch pocket opening in place.
- Pin the pocket to the lining piece matching small dots.
- Sew the sides and bottom of the pocket to the lining and remove pins.
Sewing the Lining
- Fold the large lining piece in half lengthwise and sew the side seams together. Leave one side with a 5” gap opening to use later when turning the sewn piece right side out.
- Once the sides are sewn with the square cut out at the bottom, fold the lining piece to form a triangular peak so that the bottom of the side seam aligns with the center point of the bag.
- Sew across with a ½” seam allowance stitching the edges together. Repeat on the other side.
Sewing the Outer Shell
- Sew the lower half (camo base) to the upper half of the bag (solid canvas) matching notches. Fold seam allowance to one side and top stitch the seam to reinforce.
- Next, fold the outer shell piece in half lengthwise and sew the side seams together, similar to how you did the lining except there is no need to leave a gap opening along the outer shell side seams.
- Once the sides are sewn with the square cut out at the bottom, fold the outer shell piece to form a triangular peak so that the bottom of the side seam aligns with the center point of the bag.
- Sew across with a ½” seam allowance stitching the edges together. Repeat on the other side.
Sewing the Straps
- Fold the long strap in half with WRONG sides together and turn edges in by 1/2". Stitch folded edges together to form strap.
Finishing
- With right sides together, align the top edge of the lining piece with the top edge of the outer shell piece and sew them together with a ½” seam allowance. Turn the lining piece to the inside using the 5” gap opening along the inside to turn the piece right side out. Stitch the gap opening closed.
- Press the top edge of the bag opening with an iron so it lays flat. Topstitch the opening for added reinforcement.
Tried this recipe?Let us know how it was!