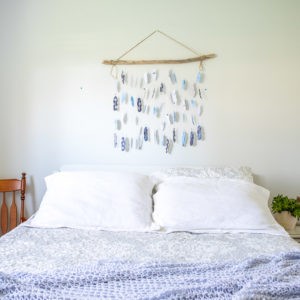
Pretty Paper Feather Wall Decor
Ingredients
- Cricut Maker
- Cricut Deluxe Paper Hostess with the Mostess Winter Sparkle, assorted papers
- Cricut Standard Grip Mat
- Cricut Design Space’s Feather Patterns variety of feather images
- Cricut Spatula
- Driftwood or tree branch measuring 24” long
- Fishing line
- Sewing needle
Instructions
- On a new canvas in Cricut’s Design Space, select Images from the toolbar and search "feathers."
- Choose a variety of feather images and insert on to a blank canavs,
- Duplicate the feathers four times to have a total of 36 feathers.
- Maintain the size of the feathers.
- Move to the Color Sync tab to sort images by paper color.
- With the machine set to Cricut Maker, select “Make It” in Design Space.
- Place the first paper color onto the standard grip mat.
- Follow prompts for loading cardstock paper into Cricut Maker and cutting. When the cut is complete, unload the mat from the machine and remove the paper feathers.
- Repeat for the remaining feathers and papers.
- To assemble the feather wall hanging, hang your piece of driftwood on the wall to work one strand at a time.
- Thread a needle with a long strand of fishing line and poke a hole through the top of the paper feather and pull one end of the fishing line all the way through.
- Next, poke the needle through the second feather pulling the line through. Loop the fishing line through the hole again to secure in place about 4” above the first feather.
- Repeat for the third and fourth feathers.
- Tie the end of the fishing line to the driftwood and continue with the remaining strands.
Tried this recipe?Let us know how it was!