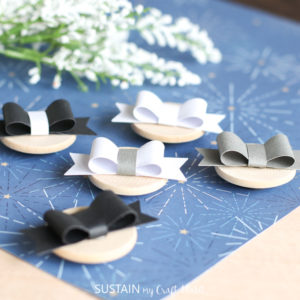
Making A Paper Bow Magnet
Make some pretty paper bow magnets for the fridge with this simple and fun Cricut craft.
Ingredients
- Bow SVG or PDF for cutting by hand
- Cricut Maker or other Cricut cutting machine with Fine Point Blade
- Cricut Standard Grip Mat
- Cardstock paper in black, white and grey
- Wood circles 1.25” diameter
- Wood dowel 0.25” thickness (or any similar size)
- Scissors
- Hot Glue Gun with clear glue sticks
- Ceramic Magnets 0.75”
Instructions
Uploading the Bow SVG File
- Click on the “+” sign to start a new project in Cricut Design Space.
- Click on the Upload button from the toolbar to insert the downloaded Bow SVG file onto the canvas.
- Maintain the size of the shapes.
- Move to the color sync tab to see all the pieces sorted by color and adjust if desired to match your cardstock paper color.
Cutting
- With the machine set to Cricut Maker, select “Make It” in Design Space.
- Follow prompts for loading cardstock paper into Cricut Maker and cutting. When the cut is complete, unload the mat from the machine.
- Remove the cut pieces from the cutting mat.
- Repeat for the remaining bow pieces and papers.
Assembling the Bows
- Each bow consists of 3 pieces. Using the wood dowel, gently curl the edges of the largest and smallest bow pieces.
- Apply a bead of hot glue to the center of the largest bow piece and press the ends into the glue to form the bow loops. Hold in place until glue sets.
- Apply a dab of hot glue to the center of the uncurled bow piece and press the flat side of the looped piece on top.
- Glue one end of the curled rectangular piece to the back side of the prepared bow and then wrap it snugly around the center and glue the other end in place to hold the shape.
- Repeat with the remaining cut pieces to make more bows.
Making the Bow Magnets
- Glue the back side of each bow to one wood circle piece.
- Glue the magnet to the back side of the wood circle to finish. Repeat for all remaining magnets.
Tried this recipe?Let us know how it was!