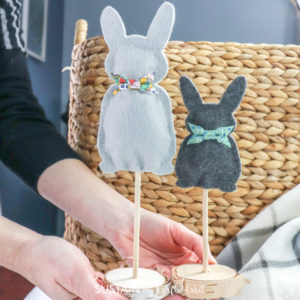
Felt Bunny Easter Decor
Create your own easy Easter decorations with this adorable DIY felt bunny craft.
Ingredients
- Printable Bunny template
- Felt sheets in 2 coordinating colors we used Silver and Graphite from BenzieDesigns
- Fabric scissors
- Hot glue gun and clear craft glue
- Wooden dowel ¼” diameter and 8” long for larger bunny / 6” long for smaller bunny
- Birch slices pre-drilled in the center
- Polyester batting
- Decorative craft bows
- White pom-poms ¼” and ½” diameters
Instructions
Preparing the Materials
- Drill a hole in the center of the stump the same size as the wooden dowel.
Cutting Felt Out by Hand
- Print off pattern template on 8.5x11 sheet of paper.
- Cut around each of the pattern pieces. Cut 2 pieces for each bunny.
Using Cricut to Cut the Felt
- Open a blank canvas in Cricut Design Space.
- Upload the Bunny SVG File into Design Space.
- Select “Make It” in Design Space.
- Set material type to Felt.
- Follow prompts for loading the mat into the Cricut cutting machine and cutting the felt. When prompted, unload the mat from the cutting machine.
- Continue cutting 2 pieces for each bunny.
Assembling the Felt Bunnies
- Preheat hot glue gun. Apply hot glue to the bunny ears on one of the cutouts.
- Place the other bunny shape on top and press the ears together.
- Continue glueing the two shapes together. Apply glue along the outer edge of the bunny cutout leaving the center of the bunny without glue.
- Leave an opening at the bottom of the bunny unglued.
- Gently fill the bunny with batting.
- Insert the dowel and push it all the way to the top. Glue the bottom opening closed with the dowel inserted.
- Glue decorative bow to one side at neck area.
- Glue pom-pom to the reverse side for bunny tail.
- Insert the bottom end of the dowel into one of the wood slices.
- Repeat for the other bunny shape.
Tried this recipe?Let us know how it was!