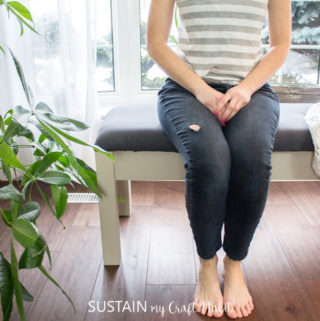
DIY Tufted Bench with Canvas Upholstery
We’re sharing our latest furniture upcycling project with this DIY tufted bench
Ingredients
- 100 % cotton bull denim in Graphite from Canvas Etc 1 yard
- Fabric scissors
- 4 Tufting buttons made using these buttons or reusing fabric covered buttons
- Monofilament thread or similar durable thread
- Staple Gun with upholstery staples
- 2" thick Foam cut to 17″ wide x 48″ long and batting
- Embroidery Needle or upholstery needle, at least 6” long
- ½" thick Plywood cut to 48” long x 17” wide
- 4 Pieces of pine blocks measuring 2.5” wide x 16.5” long
- 2 Pieces of pine boards measuring 4” wide x 43” long
- 2 Pieces of pine boards measuring 4” wide x 12” long
- 1 Piece of pine board cut to fit the center support
- Hardware for attaching frame
- Drill and assorted drill bits
- Screws
- Circular saw
- Miter Saw
- Hand Sander
- Paint Americana Decor Satin Enamel in biege
Instructions
Preparing the Bench Frame
- Since we are reusing the wood from our old butcher block table, we started by dismantling it into pieces.
- We determined the height of our bench would be 18.5″ high including the tufted seat so that meant we needed to cut the legs to 16.5″ high. Using a pencil and square, we marked the length for cutting.
- For any holes visible on the wood, we added wood filler and plugs (if needed) and sanded the edges after the filler dried.
- Next, we cut the pieces for the base of the bench seat. Reuseing the short ends from the butcher block table (which measures 4″high x 12″ long), we needed two new long pieces for the base to measure 4″ high x 43″ long.
- We then notched the inside of the longer base pieces (to match the shorter existing frame pieces) and predrilled the holes for the screws for the existing butcher block hardware to fit into.
- With all the piecees prepped, we assembled them together to form the bench frame.
Painting the Bench Frame
- Paint the bench frame in any color of your choosing.
Making the Tufted Seat
- Cut a piece of ½” thick plywood to cover the bench frame, in our case it measures 17” wide x 48” long.
- Determine how many tufted buttons to attach to the bench seat. Then measure and mark the placement for the tufted buttons with a pencil on to the plywood.
- Drill out two holes side by side (at least 1/8″ apart) in the marked spots.
Making Fabric Covered Buttons for Tufting
- I started by cutting out circles in the fabric I’m using to upholster the bench. The circles need to be larger than the button so that there is enough to fold over to the back side of the button.
- Using monofilament thread or a comparable strong thread, sew straight stitches around the edge of the circle using a basting stitch.
- Pull on the long thread ends to cinch in the circle.
- As the circle cinches, insert the button inside with eyelet side facing out.
- Keep pulling on the thread to tighten the fabric cap around the button. Tie off the ends to secure. If needed add hot glue gun underneath the fabric to help hold it further.
Upholstering the bench seat
- To upholster the bench seat, place the fabric, batting, foam and plywood on a flat surface in that order. Make sure the right side of the fabric is facing down.
- Keep the center of the bench parallel with the finished edge of the fabric (selvedge). Cut the fabric to the needed size.
- Take the center of the fabric along one side and fold it up and around the bench seat. Secure it in place with a staple gun.
- Continue along one side until you are about 2” from the corner.
- Take the opposite side and pull snugly to staple in place. Repeat this with the other two shorter sides.
- Cut excess fabric at the corner and secure in place with several staples. Repeat on all four corners.
Adding the Tufting Buttons
- Using a really strong thread such as a monofilament thread that won’t break when pulled, thread the eye of a long upholstery needle.
- Thread the needle through the eyelet on the back of the tufting buttons.
- Using another long needle poke the needle through the other hole from the back side and push it through to the front.
- Push the thread needle down through the foam using the other needle as a guide and fish it through the second hole.
- Once through, pull the needle all the way and remove the other needle.
- Cut off the needle at the eye. Pulling the thread ends tightly, tie the two ends together into a secure knot.
Finishing
- Place the upholstered bench seat onto the painted frame. Turn the seat and chair upside down on the work surface and secure the seat in place with screws and metal brackets.
Tried this recipe?Let us know how it was!