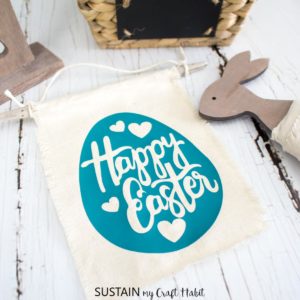
Mini DIY Happy Easter Banner
Tutorial for making a DIY Happy Easter banner using a Cricut cutting machine and Easy Press.
Ingredients
- Happy Easter SVG
- Cricut Joy
- Smart Iron On in Teal
- Weeding Tool
- EasyPress 2 and mat
- 100% Cotton canvas in a natural color 6” x 8” with frayed edges
- Scissors
- Wooden dowel stick or driftwood, ⅜” thick, 8” long
- Hot glue gun and clear glue sticks
- Natural twine cut to 12” long
Instructions
Preparing the Materials
- Cut a piece of 100% cotton canvas woven fabric measuring 6” wide x 8” high.
Preparing the Iron On
- Upload the Happy Easter Egg SVG file into a blank canvas in Design Space.
- With settings set to Cricut Joy, select “Make It” and choose “without mat” for cutting Smart Iron On.
- Turn the Mirror On toggle button to on and continue.
- Upload the Smart Iron On into the Joy with the shiny side down and proceed with the cut following the instructions on the screen.
- Remove the image and discard the excess vinyl using the wedding tool.
Using the EasyPress
- Position the mat on a flat surface.
- Set the temperature following the chart for the type of vinyl and material being used or use this EasyPress Interactive Quick Reference Guide.
- Pre-press the canvas for 5 seconds.
- Place the “Happy Easter” iron on the image face down with the shiny side up onto the canvas and apply heat for 30 seconds.
- Turn over and press on the back side for an additional 15 seconds.
- Let cool and peel the plastic part of the vinyl off carefully and discard.
Finishing
- Preheat glue gun. Working quickly and on the wrong side of the banner, apply a dab of glue along the top edge of the canvas and press it against the stick. Roll the stick over and apply another dab of glue to hold it in place.
- Tie a piece of twine to both ends of the stick and hang to enjoy!
Tried this recipe?Let us know how it was!