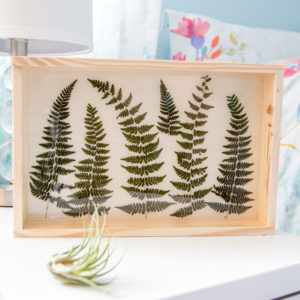
Sealing Fern Art in Resin
Preserving the beauty of nature in resin with a simple fern art craft.
Ingredients
- Pressed fern Fronds
- Unfinished Wood Plaque
- Ultra Seal Multi-Purpose Sealer / Glue or any clear drying craft glue
- Paint brush
- EnviroTex Lite Pour On
- Plastic mixing cups
- Wooden craft sticks
- Gloves
- Straw
Instructions
- Brush a generous coat of clear drying sealer to the inside surfaces of the wood plaque.
- While the glue/sealer is still wet, gently place the pressed fern fronds onto the surface. Press down the fern fronds onto the glue. Let dry completely (ideally overnight).
- Mix exactly equal amounts of Resin and Hardener into one measuring cup. The size of your piece will determine how much resin you need.
- Stir continuously for 2 minutes, scraping the sides of the container.
- Pour the mixture into a second cup and stir for an additional minute, scraping the sides of the container and stir stick.
- Slowly pour the resin mixture over the ferns.
- Tilt the plaque to get the resin over the entire surface. The resin will settle and level itself out over time.
- Cover to keep dust from settling in. Ensure your tray is placed on a level surface. After about 15 minutes, remove any bubbles that have risen to the surface by gently blowing over the piece through a straw. Use a clean toothpick to release any larger bubbles.
- Cover and allow to cure overnight (will fully cure over 72 hours).
Tried this recipe?Let us know how it was!