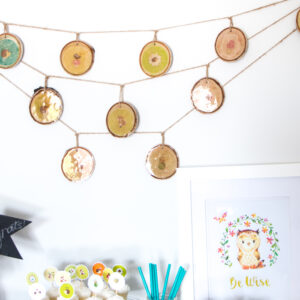
Woodland Nursery Decor with Wood Slice Garland
Create your own wood slice garland in a sweet woodland theme.
Ingredients
- 11 wood slices approx 3” in diameter and 1/8inch thick, drilled with hole for hanging
- Images you want to transfer cut to size
- Photo transfer medium paint brush, cloth
- Water based sealer
- Resin
- Twine
- Scissor
Instructions
- Apply photo transfer medium to the front side of the image and onto the wood slice where you plan to place it. Apply the image to the wood slice face side down.
- Wet the paper with a damp cloth and let sit for a few minutes. Gently rub off the paper with your finger or the cloth.
Applying the Resin
- Mix equal amounts of the EasyCast Clear Casting Epoxy Resin and Hardener into a small measuring cup.
- Taking care to scrape the sides and bottom of the measuring cup, I stirred the mixture thoroughly for 2 minutes.
- After the two minutes of mixing, I poured the blended resin solution into a second cup, mixing for another minute.
- Once thoroughly mixed I applied the resin to the surface of the sealed wood slices using a disposable paint brush.
- Finally, about 30 minutes after brushing the resin onto the wood slices, I waived a lighter about 4″ over the wood slices to remove any air bubbles that had risen to the surface. You could also use a straw and gently blow over the slices.
- Once cured for 2 hours, repeat with second side if desired.
To Assemble the Garland
- Cut 3 pieces of twine each 75” long. Strong and tie the wood slices on the twine in your desired pattern.
Tried this recipe?Let us know how it was!