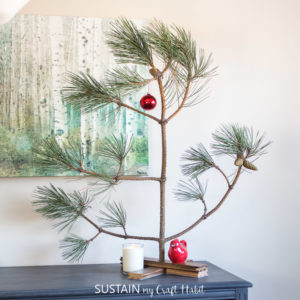
DIY Charlie Brown Christmas Tree
Add some nostalgia to your home with this classic DIY Charlie Brown Christmas tree.
Ingredients
- Cutting of pine tree about 2-3' long
- Divided Wood planks measuring about 2 1/4” wide x ¾” thick; 38” long in total
- Miter Saw for cutting wood planks
- Drill Press with drill bit
- Drill with screws
- Measuring tape
- Pencil
- Felt fabric scissors
- hot glue gun (optional)
- Ornament red (optional)
Instructions
- Begin by getting a cutting of pine that measures about 2-3’ feet tall.
- Prepare the wood for making the “X” shaped tree stand.
- Using a miter saw, cut two of the boards to roughly 14" long (it doesn't have to be an exact measurement).
- Measure the diameter of the tree branch across the very bottom of the cutting. This measurement will determine the size of the drill bit to use.
- Measure and mark the halfway point along the 14” long wood boards and using a drill press, drill a hole through the center of both boards.
- To make the tree stand stable, extra planks are needed underneath the top board. Cut two more wood boards at 5.5” long each.
- Screw these shorter boards under one of the longer boards, aligning the short ends, leaving a gap in the middle.
- Stack the boards into a “X” shape with the flat board on the bottom.
- Insert the bottom of the pine into the pre-drilled holes.
- Add a single ornament to the top of the tree to complete the Charlie Brown Christmas tree.
Tried this recipe?Let us know how it was!