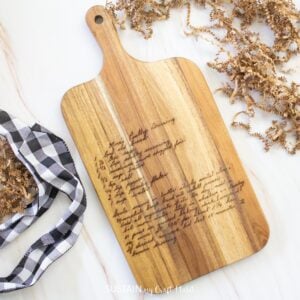
How to Engrave Recipe on Cutting Board with xTool P2
Walking you through the step-by-step process of how to laser engrave handwritten recipes on to cutting boards with xTool P2.
Ingredients
- Laser Engraver xTool P2
- Recipe card scanned or uploaded as a photo
- Cutting Board Charcuterie Board or other wood surface
Instructions
- Take a photo of the written recipe from your mobile device.
- Next, upload the image of the recipe onto a blank canvas in the Creative Space software.
- Use the magic eraser to erase any large, dark unwanted areas.
- Then use the magic tool to remove the blotchy and or shaded areas.
- Next, we suggest doing a test run of the engraving before engraving directly onto the cutting board. I used a scrap piece of 3mm basswood.
- I placed the board in to the xTool on top of the slats. Because of the weight I didn’t use any clamps.
- After refreshing the screen, I positioned the recipe on to the cutting board making sure the alignment was perfect. You can use the quick shot to zoom in on the edges of the cutting board.
- I selected 12mm cherry wood surface and then adjusted the settings to 35% power with 170mm / seconds. I wasn’t certain if that setting would work but luckily it did.
- If your engraving is too light, then simple hit process again without moving the board for a second time.
Tried this recipe?Let us know how it was!