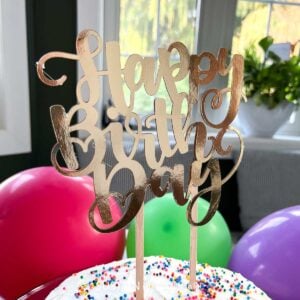
DIY Birthday Cake Topper with Cricut
Looking to add a personal touch to your next bday celebration? Look no further than making your own DIY birthday cake toppers with cricut!
Ingredients
- Happy Birthday template in Design Space
- Cricut Maker or other Cricut cutting machine with Fine Point Blade
- Cricut Light Grip Mat
- Foil Paper in gold or any color of your choosing
- Hot glue gun with clear hot glue sticks
- Wood craft sticks
Instructions
Uploading the Pattern
- Open Cricut Design Space.
- Click on the “+” sign to start a new project, opening up a blank canvas.
- Click on the Images button from the toolbar.
- Search “happy birthday” image (#xx) and then click on the image to insert the pattern on the canvas.
- Resize the phrase to 6” high or whatever size you want the cake topper to be.
- Duplicate the image so two are showing on the canvas.
Cutting
- With the machine set to Cricut Maker, select “Make It” in Design Space.
- Set material type to Foil Paper.
- Place the gold paper onto the light grip mat.
- Follow prompts for loading paper into Cricut Maker and cutting. When the first cut is complete, unload the mat from the machine.
- Remove the cut pieces from the cutting mat.
- Turn on the mirror toggle button to flip the happy birthday phrase. And repeat cutting instructions to finish the second happy birthday cut-out.
Assembling the Cake Topper
- Place both cut pieces down on a flat surface with the gold side facing down.
- Using a hot glue gun, attach the craft sticks to the bottom of one of the cut-outs.
- Glue to the wrong sides of the cut-outs together being careful to align them perfectly.
- Insert ends of craft sticks into cake to complete the look.
Tried this recipe?Let us know how it was!