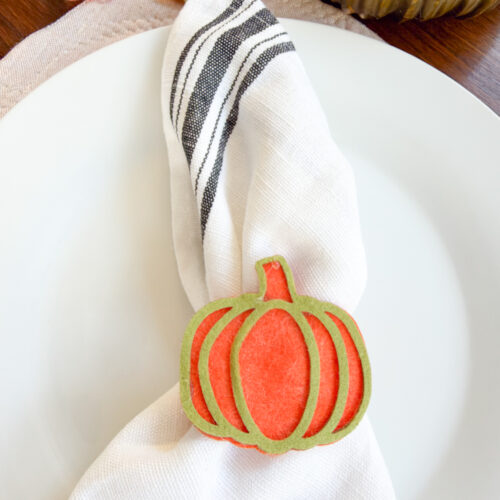
DIY Thanksgiving Felt Napkin Rings: Easy Pumpkin Table Decor
These DIY Thanksgiving felt napkin rings are an easy, budget-friendly way to add a little handmade charm to your tablescape.
Ingredients
- Pumpkin Napkin Ring Printable Pattern
- Felt Sheets
- ¼" wide Elastic
- Hot glue
- Scissors
Instructions
- Gather materials from the materials list above and download the festive napkin rings cut file.
How to Cut Felt Sheets with Cricut Cutting Machine
- To begin, cut a piece of transfer tape to 12″x12″ and place on the cutting mat with the sticky side up. Although this is not a madatory step, this will help protect the cutting mat over time.
- Place a sheet of felt fabric on the transfer sheet (lined cutting mat) and press. Refer to the instructions in Design Space and follow the steps including inserting the rotary blade and selecting felt, acrylic as the material to cut.
- Cut all the different colored pattern pieces for the particular napkin ring you are making.
How to Cut Felt Sheets BY HAND
- You can also cut these pumpkin shapes out by hand using a pair of scissors and the printable PDF pattern pieces. Simply place the pattern piece on top of the felt sheet and cut around the solid lines.
ASSEMBLING
- Assemble the napkin ring pieces using fabric adhesive or hot glue: start by layering the felt pieces on to the base shape.
- Apply the glue just along the outer edges.
- Lastly, cut a piece of elastic about 3″ long and glue the ends to the back of the felt pumpkin to form the “ring”.
- I chose to add another strip of felt to the length of the elastic giving it a ruffled effect. This is totally optional!
Tried this recipe?Let us know how it was!