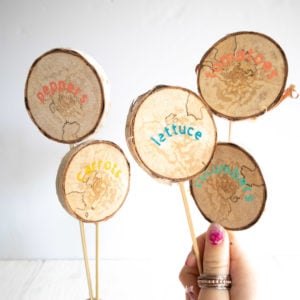
DIY Wood Slice Garden Markers with Cricut Joy
These adorable rustic wood slice garden markers made with the new Cricut Joy are a great way to keep track of what you planted.
Ingredients
- Cricut Joy
- Cricut Smart Vinyl Permanent in Beachside Sampler
- Cricut Transfer Tape
- Weeder
- Scissors
- Wood slices 2.25” diameter
- Wooden skewers
- Drill
Instructions
- Prepare the wood slice by drilling one small hole into the slice.
- Insert wooden skewer into drilled hole. Repeat with all wood slices and put aside.
- On a new canvas in Cricut’s Design Space, select Images from the toolbar.
- Select the vegetable images you want to use, such as tomatoes, lettuce, carrots, peppers, cucumbers.
- Insert the vegetable images onto the blank canvas.
- Select the image and hide all the drawing lines from the layers toolbar.
- Select the image again and adjust the size to 2” high (or wide), whichever side is biggest.
- Select one image and then click on “Ungroup.”
- Move to the Color Sync tab to sort images by color of Smart Vinyl
- Add text for the back side of the garden markers.
- Select Text from the toolbar and type out the vegetable names and adjust the size to fit the wood slices.
- Weld the lettering together and move the text layer to the appropriate color sync layer.
- Ensure the cutting machine is set to Cricut Joy. Select “Make It” in Design Space.
- Set material type to Smart Vinyl, Permanent.
- Follow prompts for loading Smart Vinyl into Cricut Joy and cutting.
- Cut around each image and lettering with a pair of scissors. Using the weeding tool, peel away the excess vinyl around the cut images (and lettering) and discard.
- Cut a piece of transfer tape a bit larger than the size of the image.
- Peel away the transfer tape backing and place the transfer tape overtop of the cut vinyl. Gently rub the vinyl to help it stick to the transfer tape.
- Peel away the vinyl backing, leaving just the image adhered to the transfer tape.
- Position the image with the transfer tape on to the center of the wood slice and press in place.
- Slowly and carefully remove the transfer tape leaving the vinyl image on the wood.
- Repeat with the lettering on the reverse side of the wood slice.
Tried this recipe?Let us know how it was!