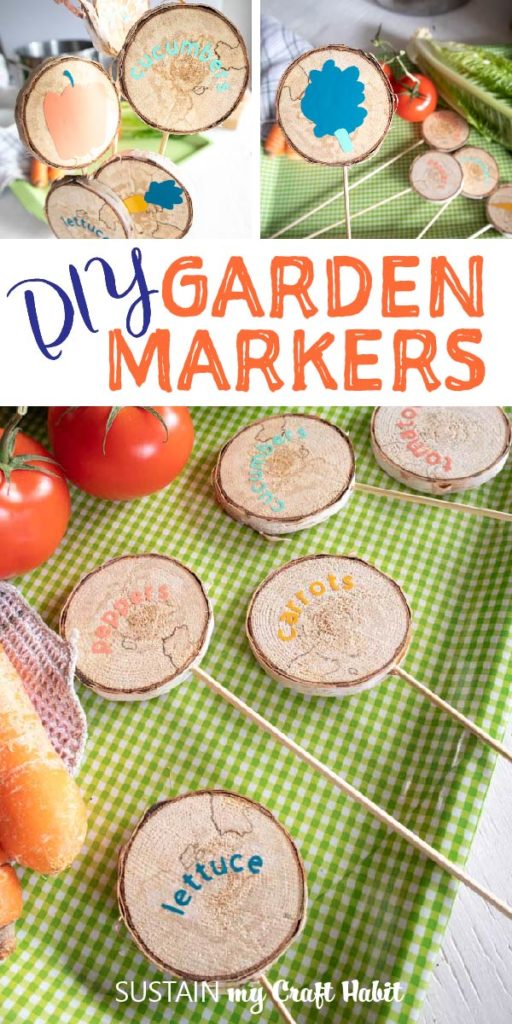
DIY Wood Slice Garden Markers with Cricut Joy
The warmer days are signalling that special time when we can get back into the garden. These adorable rustic wood slice DIY garden markers made with the new Cricut Joy are a great way to keep track of what you planted.
Cute DIY Garden Markers
If you’ve been following along here on Sustain my Craft Habit, you’ll know that we love to spend time in our gardens. Ever since we were kids our family has always enjoyed a backyard vegetable garden. Over on our sister blog Sustain my Cooking Habit we’ve actually recently launched a new beginner gardening series which helps anyone create a 5’ by 7’ vegetable garden in their backyard.
Since we are in a pretty northern climate (Zone 6b) we start our gardening indoors in early March. At first we plant our tomato and pepper seeds which end up in our gardens in late May. Cucumber, carrot, onion and lettuce seeds end up directly in the garden in late April and early May.
I’ve always wanted a set of garden markers to keep track of my seedlings. Several years ago I made some for our herb garden but never yet had any for my veggies.
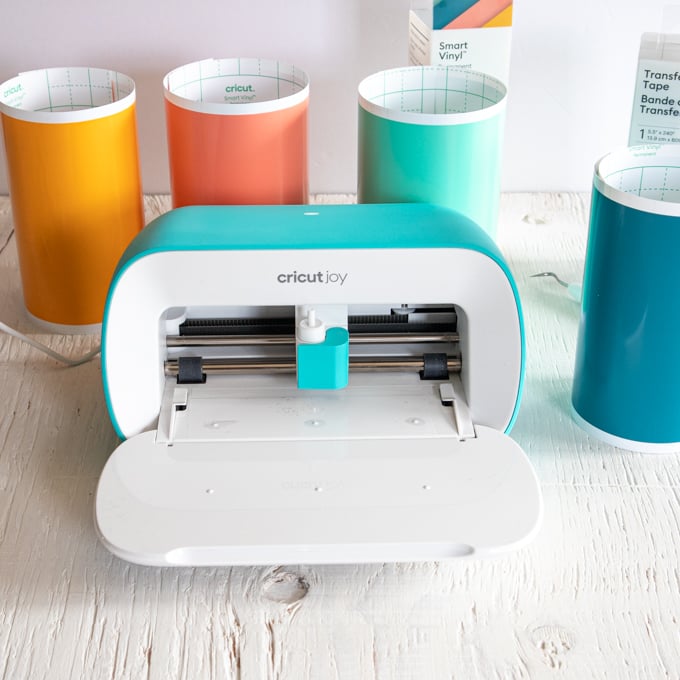
The Cricut Joy is the latest innovation from Cricut. It’s tiny but mighty and we were so excited to try it out when it arrived a few weeks ago. Stay tuned for some additional Cricut Joy projects coming soon!
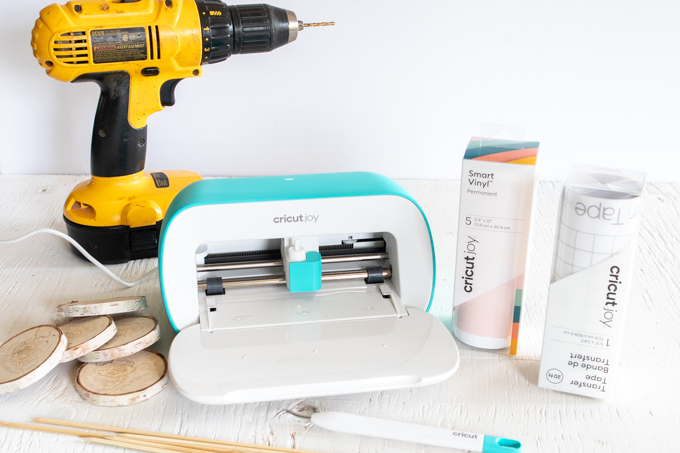
Materials Needed to make these DIY Garden Markers:
- Cricut Joy
- Cricut Smart Vinyl, Permanent in Beachside Sampler
- Cricut Transfer Tape
- Weeder
- Scissors
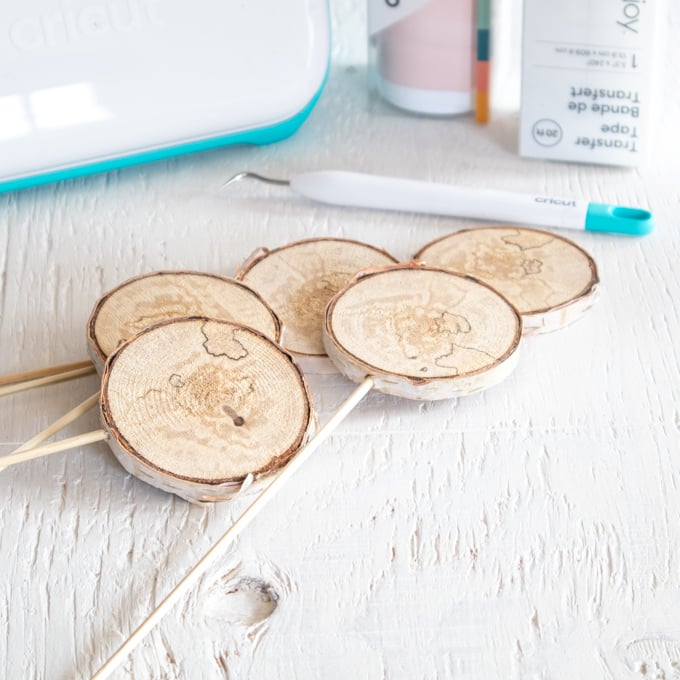
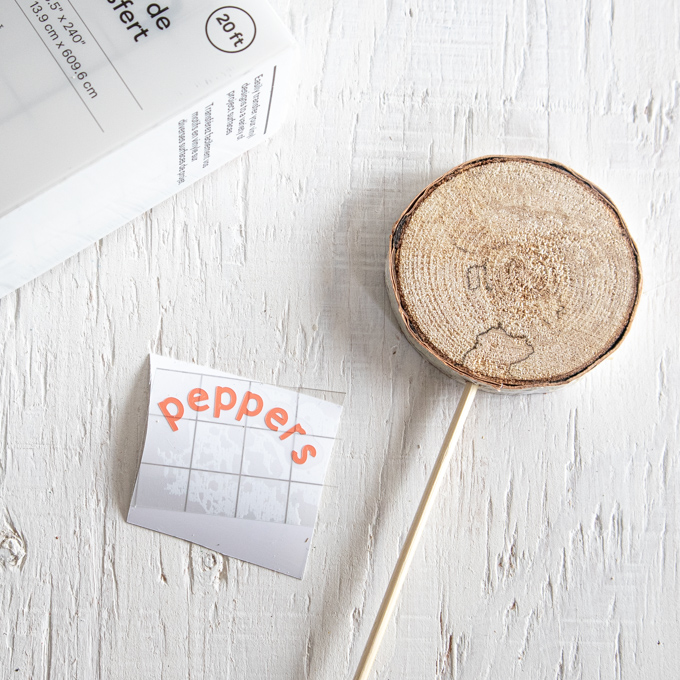
- Wood slices, 2.25” diameter
- Wooden skewers
- Drill
How to Make Garden Markers with the new Cricut Joy:
Using a drill bit the same size as the wooden skewer, prepare the wood slice by drilling one small hole into the slice as shown.
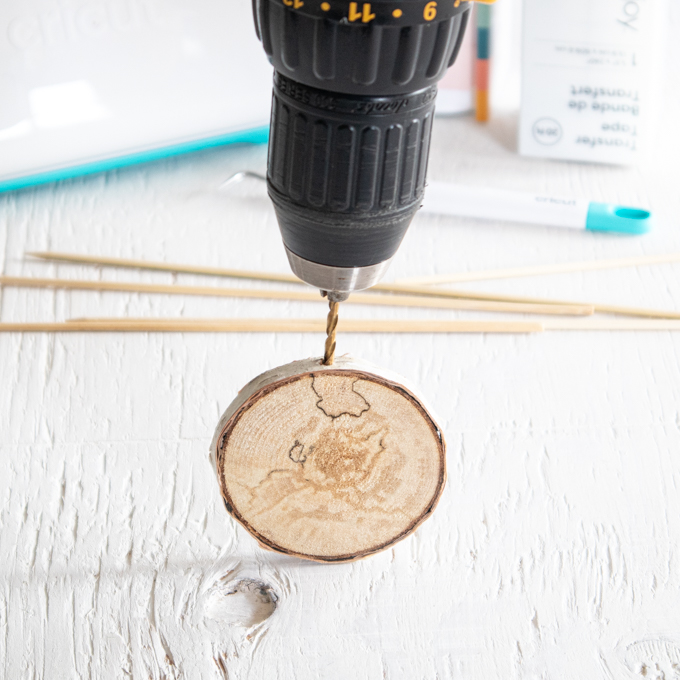
Insert wooden skewer into drilled hole. Repeat with all wood slices and put aside.
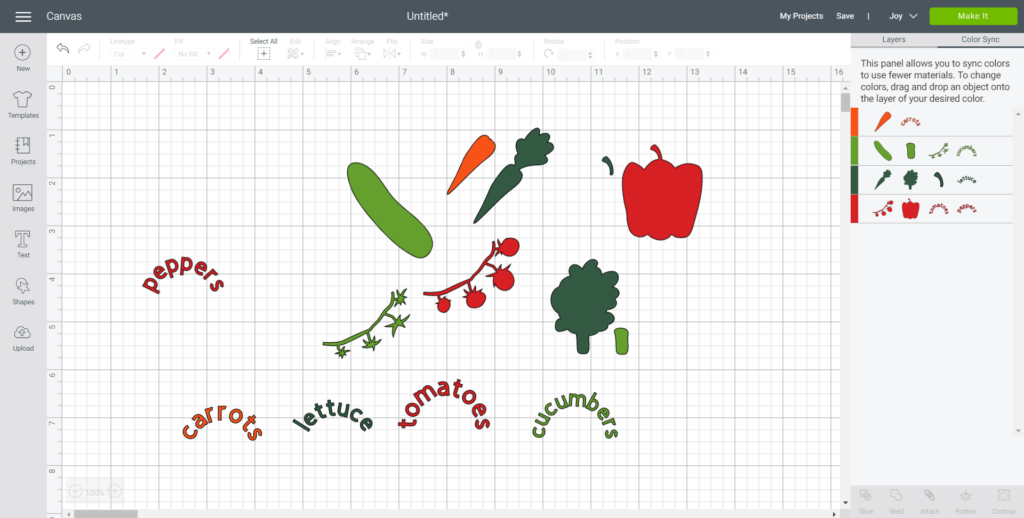
On a new canvas in Cricut’s Design Space, select Images from the toolbar.
Click on the Food and Kitchen theme and then type “vegetables” in the search engine.
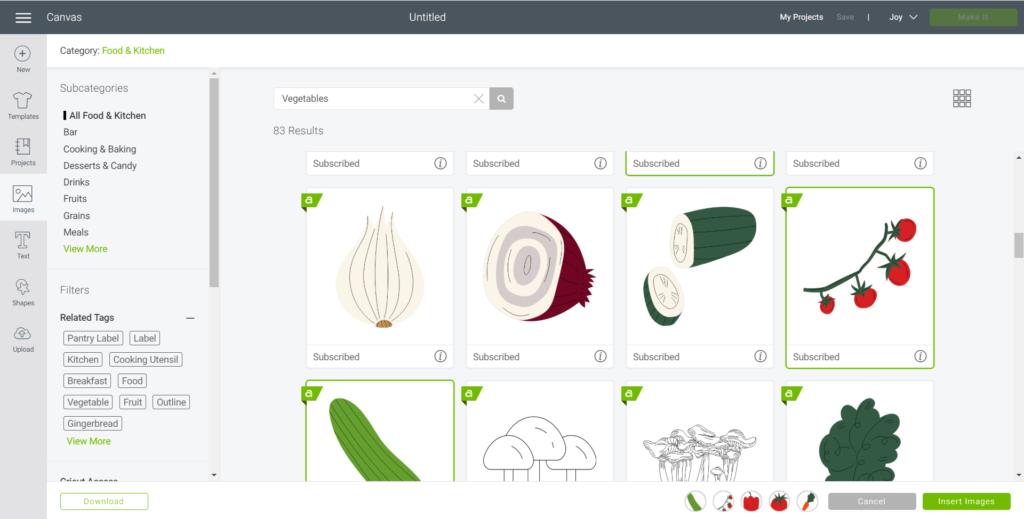
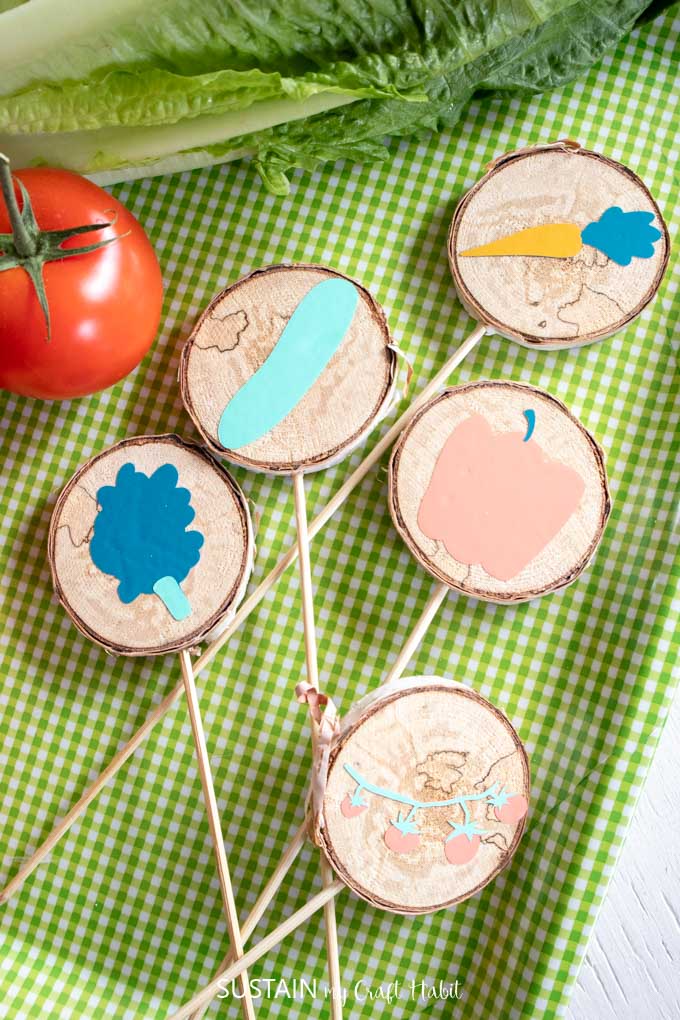
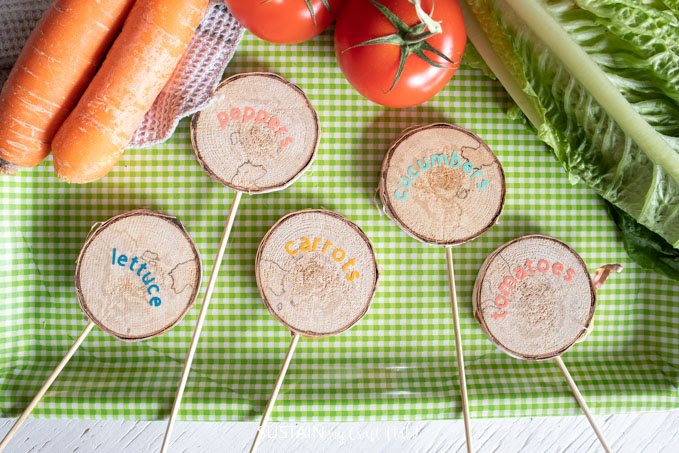
Select the vegetable images you want to use, such as tomatoes, lettuce, carrots, peppers, cucumbers.
Insert the vegetable images onto the blank canvas.
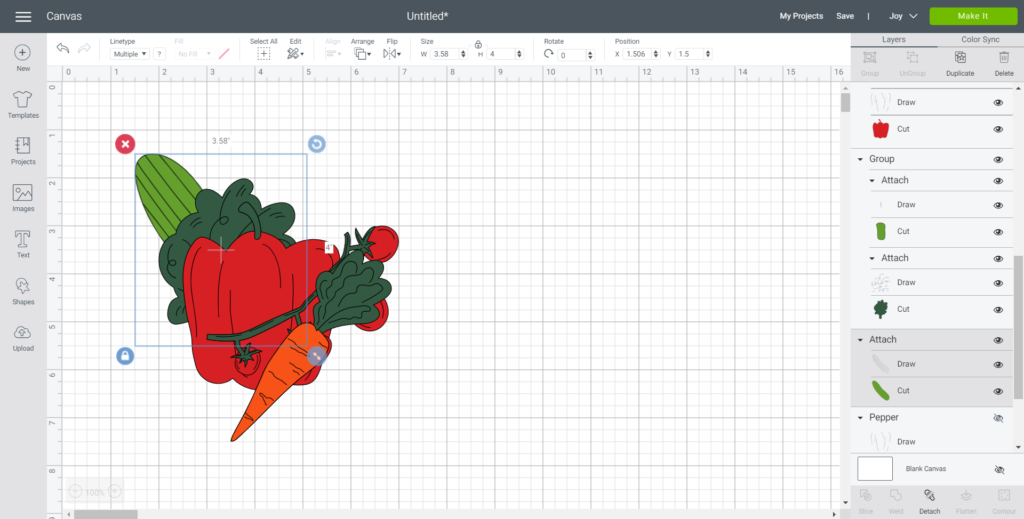
Select the image and hide all the drawing lines from the layers toolbar.
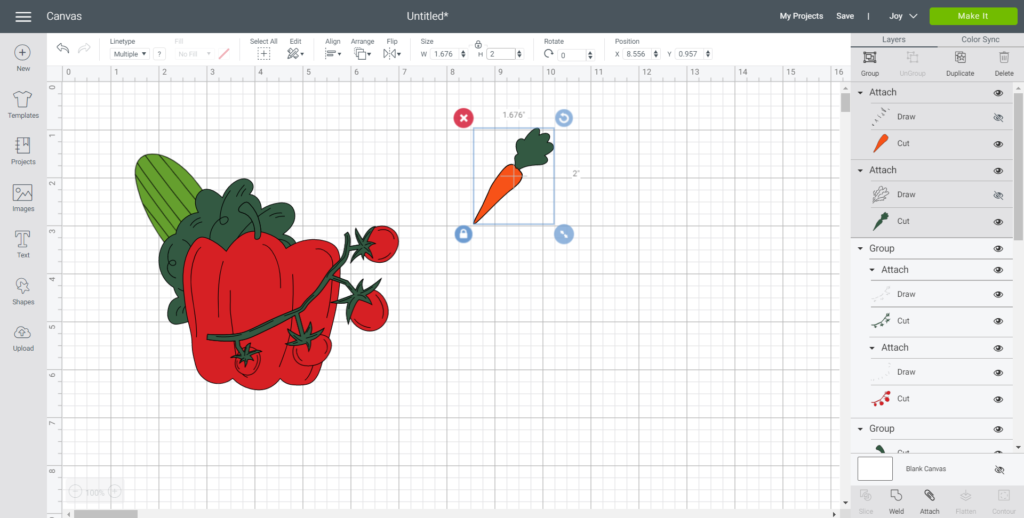
Select the image again and adjust the size to 2” high (or wide), whichever side is biggest.
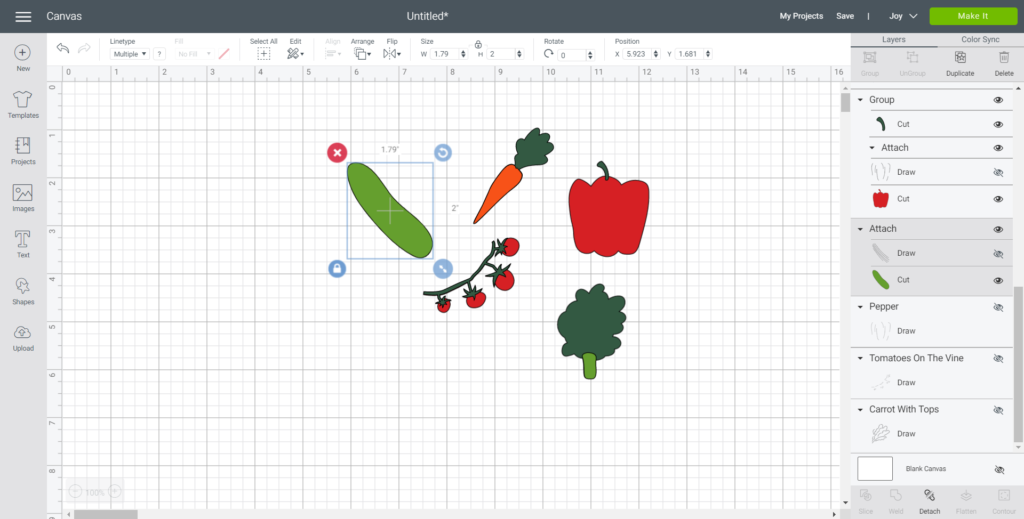
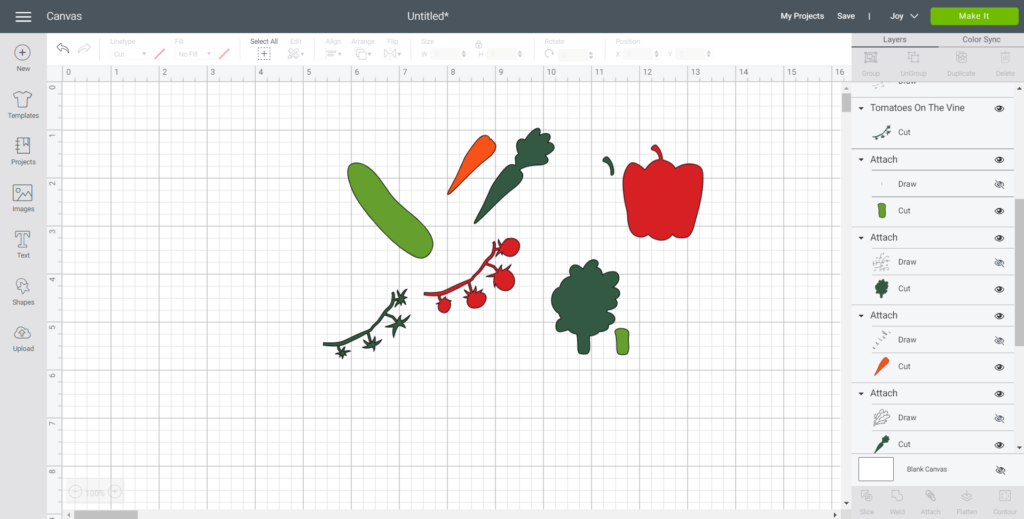
Select one image and then click on “Ungroup”. If the image is still attached, click on the “detach” button. This will separate the image pieces into their own layer.
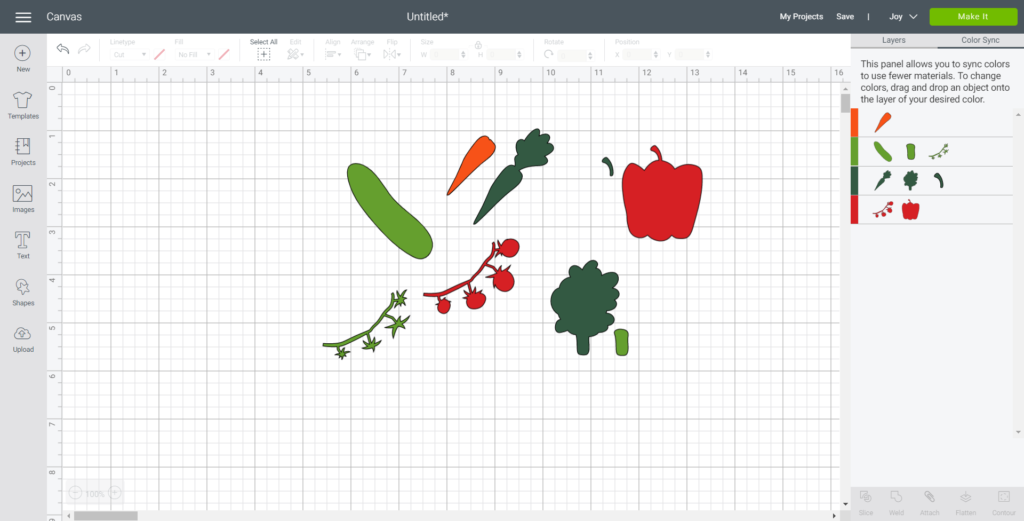
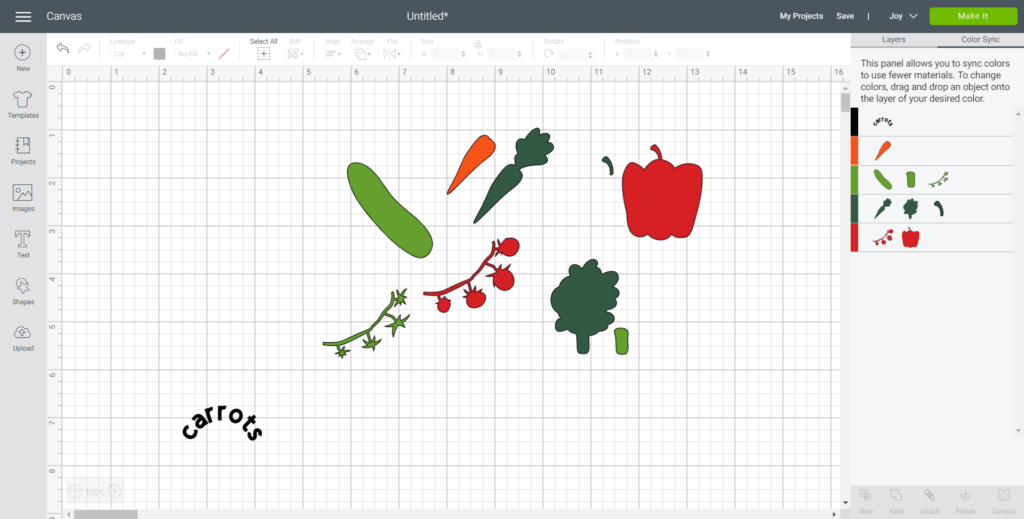
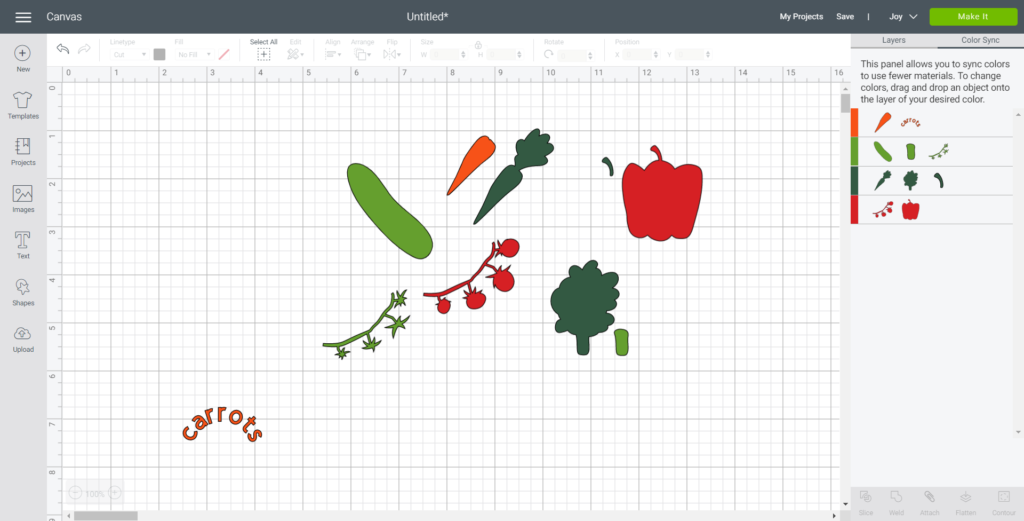
Move to the Color Sync tab to sort images by color of Smart Vinyl: cut carrot in tangerine; cut cucumber and leafy portion of carrot and tomatoes in mint; cut lettuce in teal; cut tomatoes and peppers in coral.
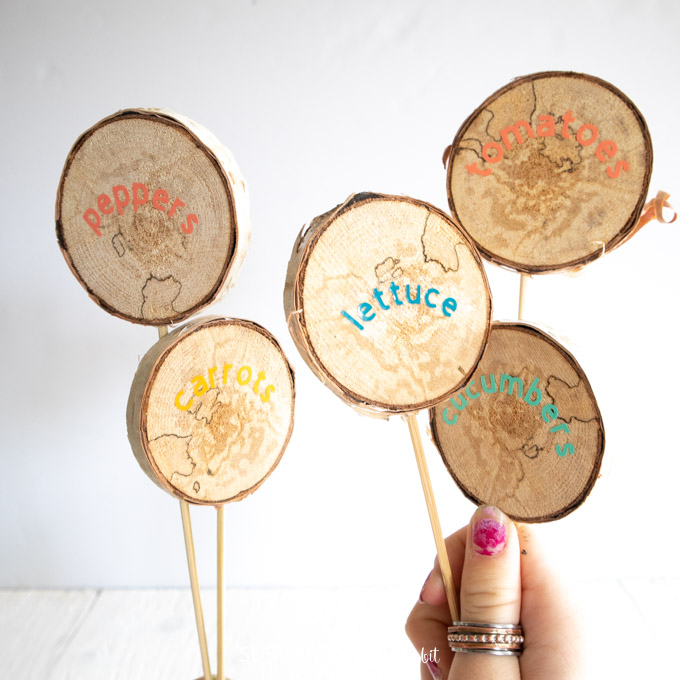
Add text for the back side of the garden markers.
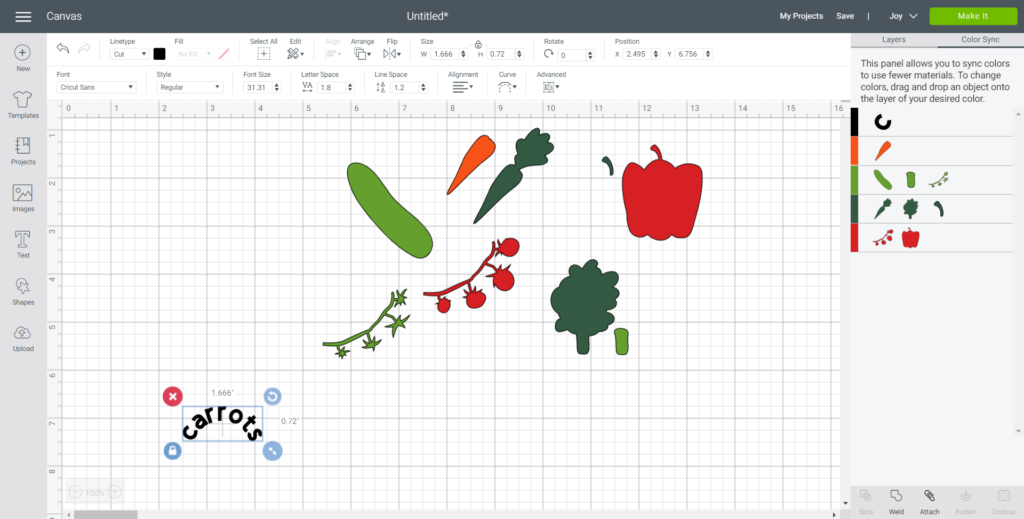
Select Text from the toolbar and type out the vegetable: carrots.
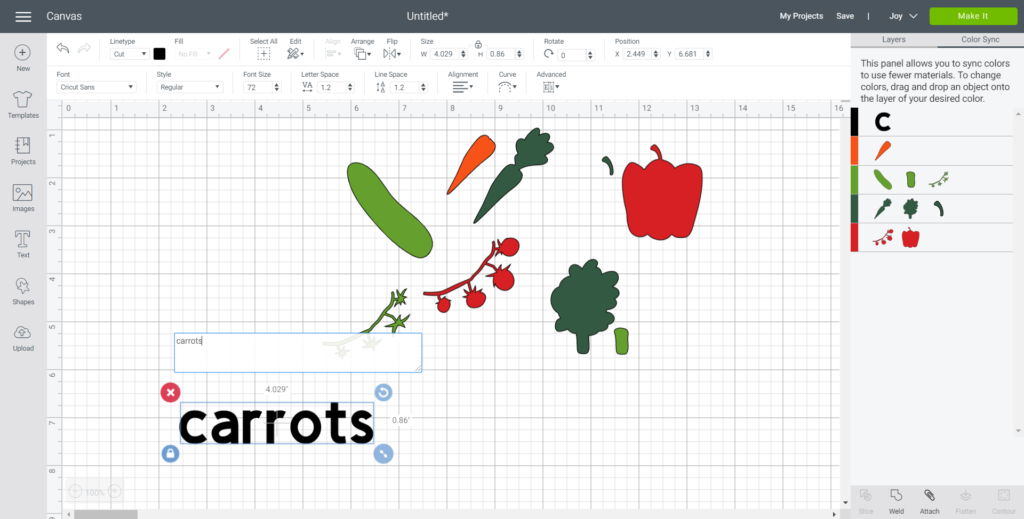
Adjust text size to 0.375” high.

Adjust the curve to 1.5.
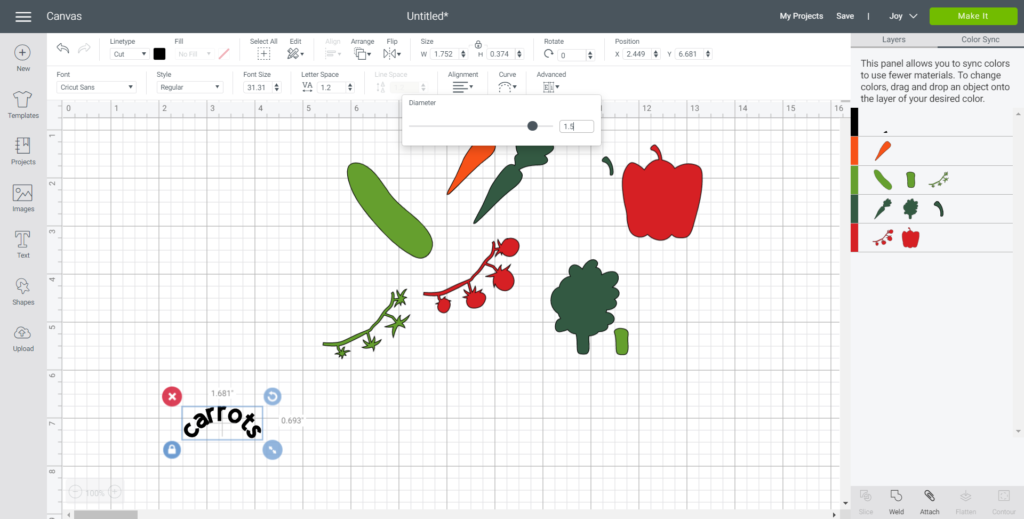
Adjust the letter spacing to 1.8.
Weld the lettering together and move the text layer to the appropriate color sync layer (for example “carrots” to be cut out in tangerine Permanent Smart Vinyl).
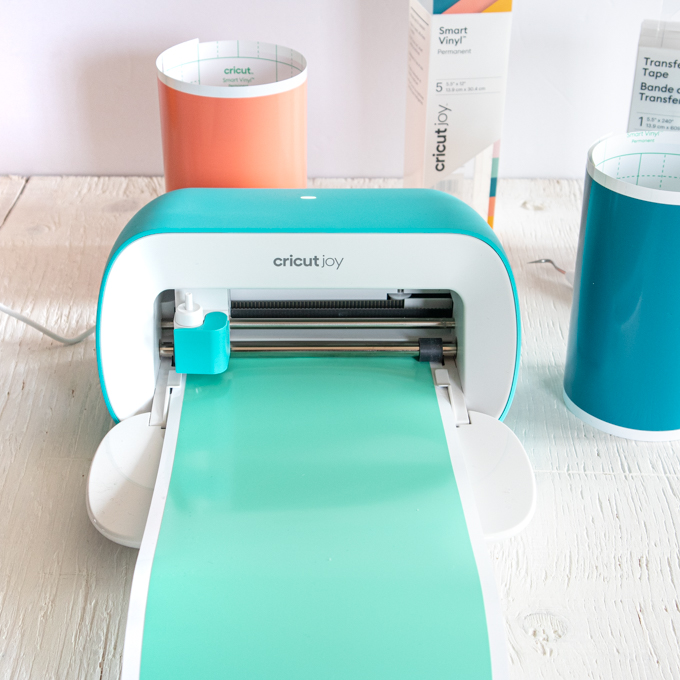
Ensure the cutting machine is set to Cricut Joy. Select “Make It” in Design Space. Set material type to Smart Vinyl, Permanent and choose “No Mat” from the list of cutting options.
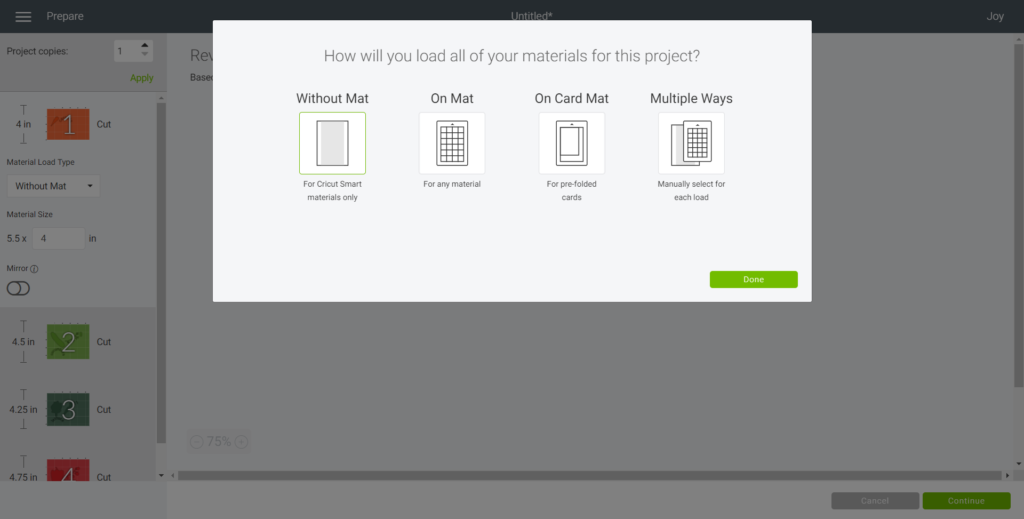
Follow prompts for loading Smart Vinyl into Cricut Joy and cutting. When the cut is complete, unload the mat from the machine.
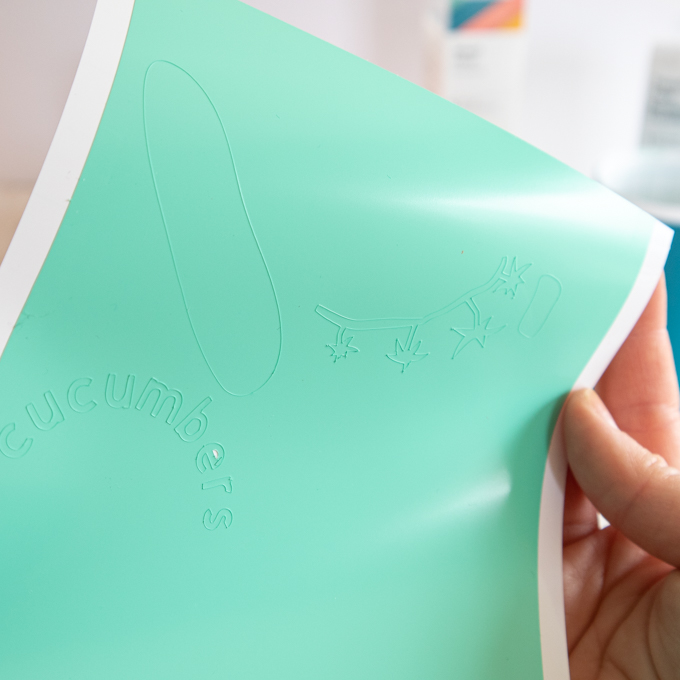
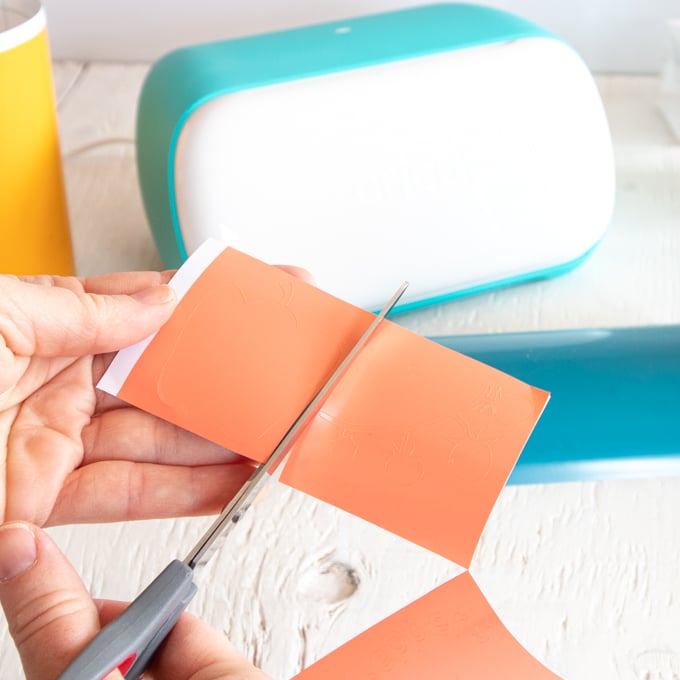
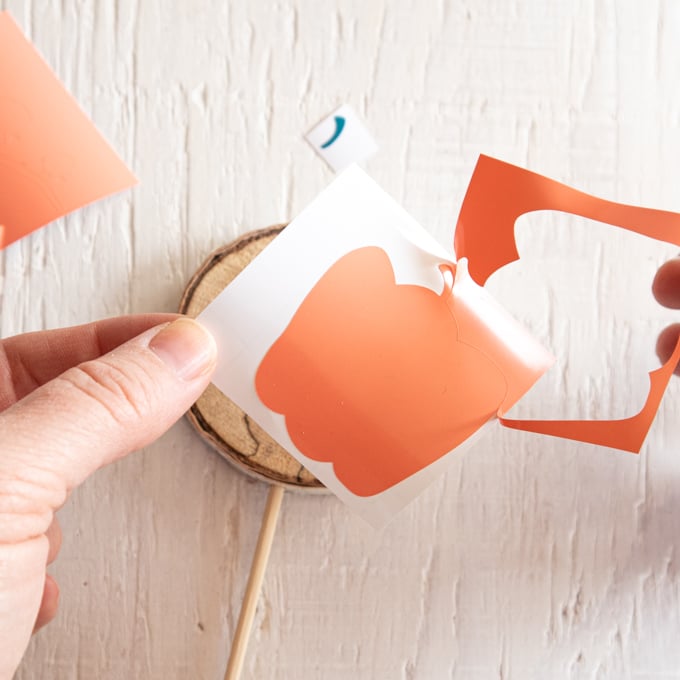
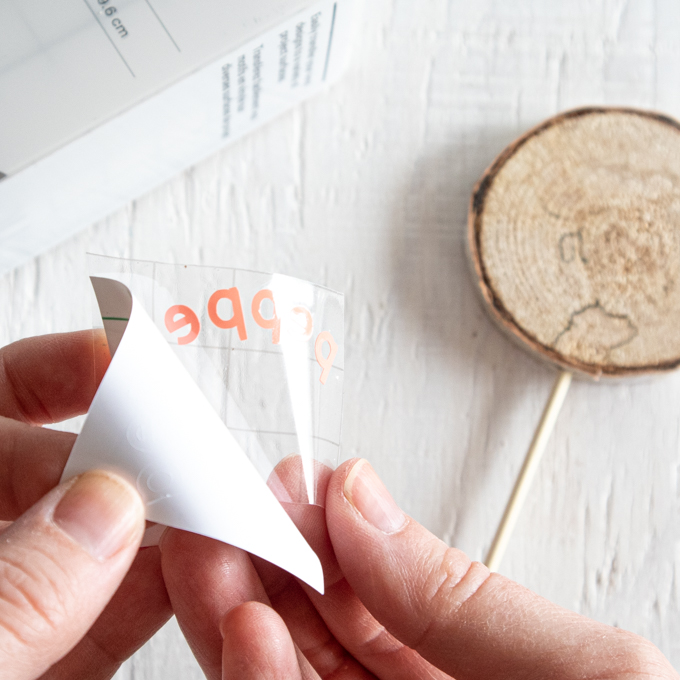
Cut around each image and lettering with a pair of scissors. Using the weeding tool, peel away the excess vinyl around the cut images (and lettering) and discard.
Cut a piece of transfer tape a bit larger than the size of the image.
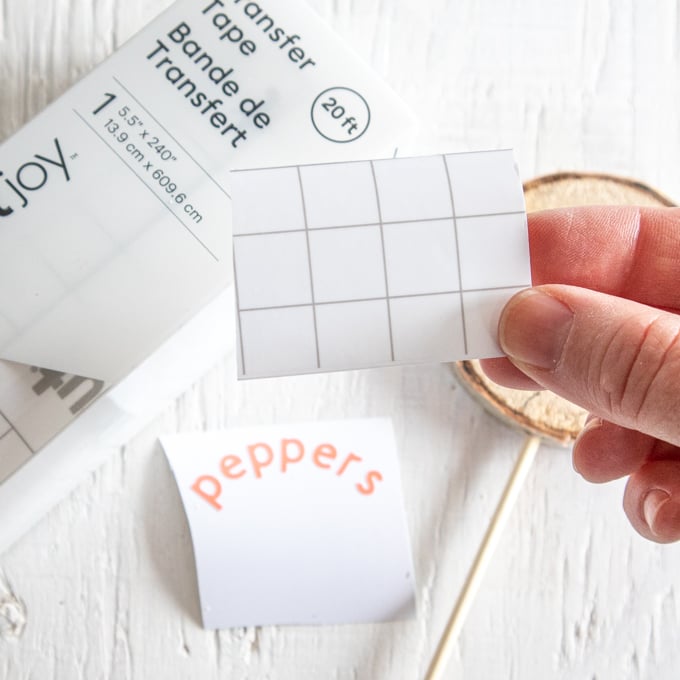
Peel away the transfer tape backing and place the transfer tape overtop of the cut vinyl. Gently rub the vinyl to help it stick to the transfer tape.
Peel away the vinyl backing, leaving just the image adhered to the transfer tape.
Position the image with the transfer tape on to the center of the wood slice and press in place.
Press the Smart Vinyl image down with your fingers or with the Cricut scraping tool to help it to stick to the wood slice.
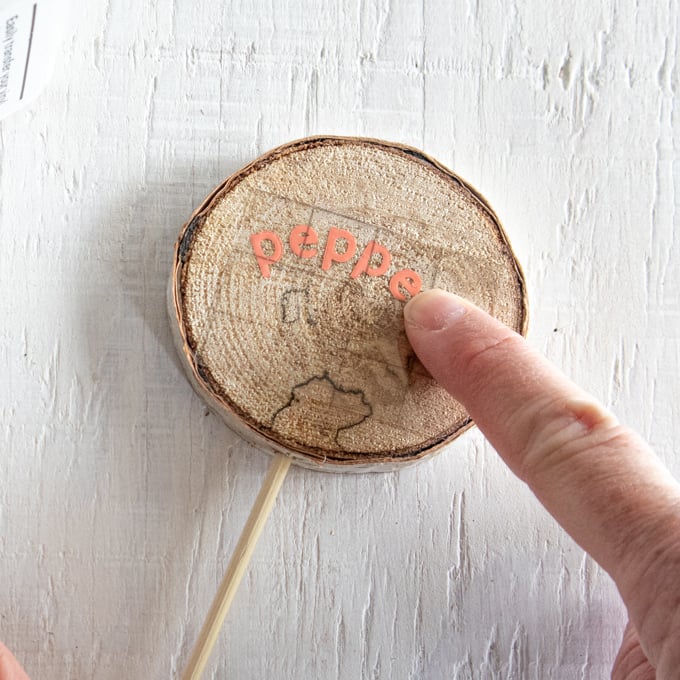
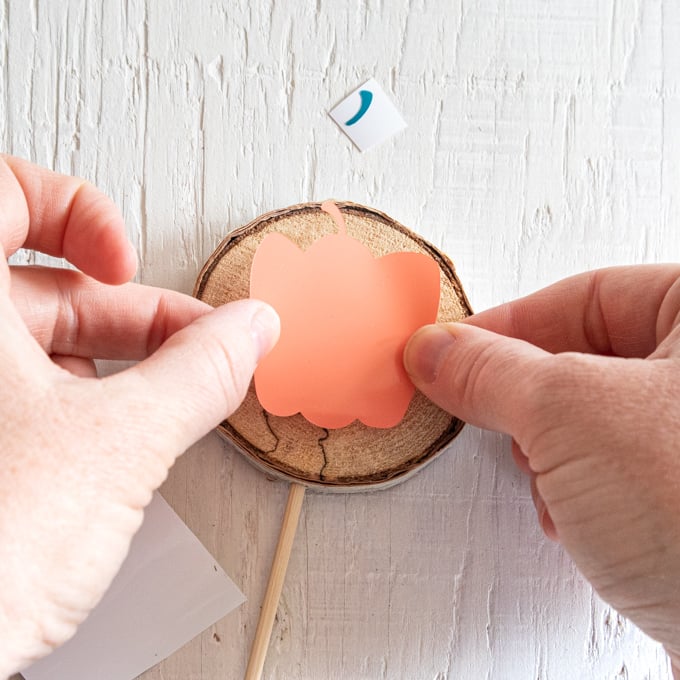
Slowly and carefully remove the transfer tape leaving the vinyl image on the wood.
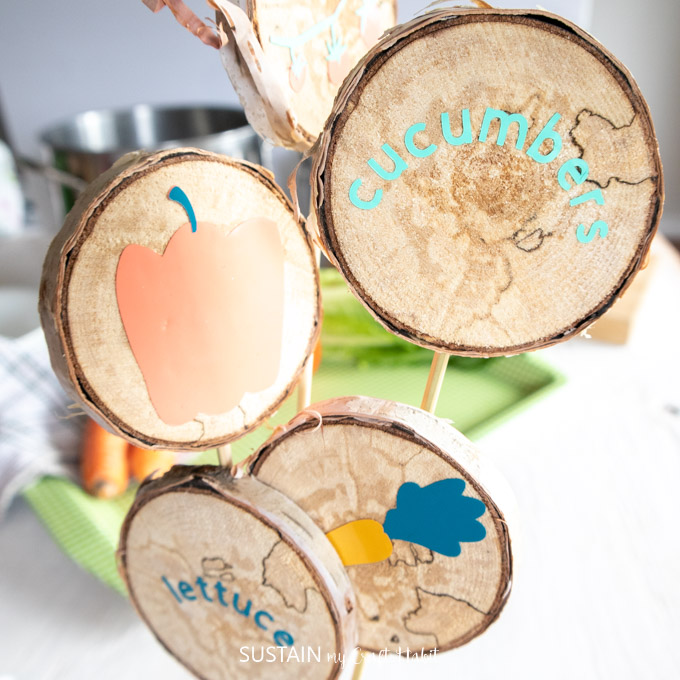
And continue these same steps for the remaining garden markers. Repeat with the lettering on the reverse side of the wood slice.
Which vegetables do you plant in your garden?
Like it? Pin it for later!

DIY Wood Slice Garden Markers with Cricut Joy
Materials
- Cricut Joy
- Cricut Smart Vinyl Permanent in Beachside Sampler
- Cricut Transfer Tape
- Weeder
- Scissors
- Wood slices 2.25” diameter
- Wooden skewers
- Drill
Instructions
- Prepare the wood slice by drilling one small hole into the slice.
- Insert wooden skewer into drilled hole. Repeat with all wood slices and put aside.
- On a new canvas in Cricut’s Design Space, select Images from the toolbar.
- Select the vegetable images you want to use, such as tomatoes, lettuce, carrots, peppers, cucumbers.
- Insert the vegetable images onto the blank canvas.
- Select the image and hide all the drawing lines from the layers toolbar.
- Select the image again and adjust the size to 2” high (or wide), whichever side is biggest.
- Select one image and then click on “Ungroup.”
- Move to the Color Sync tab to sort images by color of Smart Vinyl
- Add text for the back side of the garden markers.
- Select Text from the toolbar and type out the vegetable names and adjust the size to fit the wood slices.
- Weld the lettering together and move the text layer to the appropriate color sync layer.
- Ensure the cutting machine is set to Cricut Joy. Select “Make It” in Design Space.
- Set material type to Smart Vinyl, Permanent.
- Follow prompts for loading Smart Vinyl into Cricut Joy and cutting.
- Cut around each image and lettering with a pair of scissors. Using the weeding tool, peel away the excess vinyl around the cut images (and lettering) and discard.
- Cut a piece of transfer tape a bit larger than the size of the image.
- Peel away the transfer tape backing and place the transfer tape overtop of the cut vinyl. Gently rub the vinyl to help it stick to the transfer tape.
- Peel away the vinyl backing, leaving just the image adhered to the transfer tape.
- Position the image with the transfer tape on to the center of the wood slice and press in place.
- Slowly and carefully remove the transfer tape leaving the vinyl image on the wood.
- Repeat with the lettering on the reverse side of the wood slice.


Cute idea, wonder how they will stand up to being outside in all kinds of weather.
Thanks, Linda. The permanent vinyl is for outdoor use as well so I’m hoping they will withstand at least one season. I have them in the garden now so I’ll track how well they hold up!