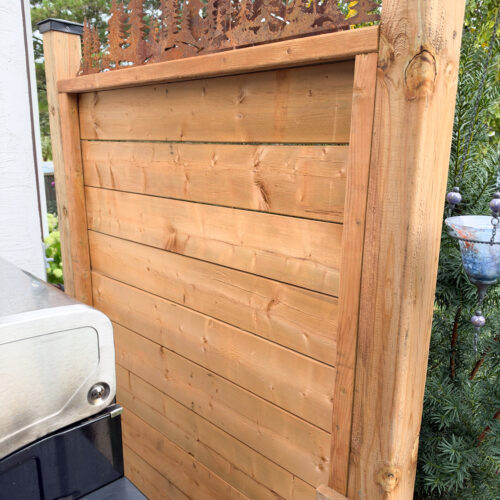
How to Build a Temporary Outdoor Privacy Wall (DIY Windbreaker)
Block neighboring eyes and harsh breezes with this easy DIY temporary outdoor privacy wall!
Ingredients
- 10 Fence boards - knotty cedar boards 1”x6”x6’ long
- 2 4”x4”x8’ long post pressure treated
- 2 1”x1”x48” long nailing strip pressure treated
- 2 in. 11x 11 in. x 7 in. Grey Concrete Deck Blocks
- Drill and fencing screws
- Level
- 2 4”x4” fence caps
Instructions
- Position the deck blocks on a flat surface and space them apart the distance of your wall. In our case, we made our wall 4’ wide.
- When secure and levelled, insert a 4”x4” post into each deck block.
- Use a level to straighten the post and drill a temporary wood spacer between the two posts closer to the top.
- Align one of the nailing strips to the center of the post (along the inside edge of the wall) and drill into place. Again ensure to use a level to make sure it’s straight and evenly positioned.
- Do the same with the other nailing strip on the other inner edge of the 4”x4” post.
- Measure the space between the posts.
- Cut fence boards to match the spacing, minus ¼”.
- Position the first fence board 20” up from the deck block, in front of the nailing strip. Use a level to ensure the fence board is straight and then drill it in place to the nailing strip.
- Continue working your way up the post, using a level for each board.
- Add as many fence boards as you need. In our case, we made our windbreaker wall xx” high.
- Cut the 4”x4” down to the height of the wall and finish them with post caps.
Tried this recipe?Let us know how it was!