How to Use XTool M1 for Laser Engraving Jewelry
Learn how the XTool M1 can personalize handmade jewelry with the laser enraving function taking jewelry making to the next new level.
Ingredients
- xTool M1 10W with Riser Base Honeycomb Panel and Air Assist
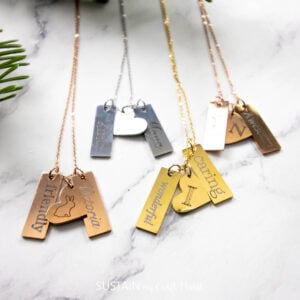
- Stainless Steel Heart and Bar Necklace pk of 6
- Jewelry pliers
Instructions
Preparing the Jewelry for Engraving
- Start by disassembling the pendants from the necklaces. This will ensure that the pendant lies level on your engraving surface.
- Remove any protective wrapping from the jewelry. These pendants were tightly wrapped in a plastic film that needed to be peeled off.
Preparing the Designs in xTool Creative Space
- Each of these necklaces has 6 pendants (two bars and a heart). I decided to engrave both sides of each piece (six surfaces). So for each person I was making a necklace for, I used their first name, monogram (initial), one shape and three words to describe them.
Engraving the Pendants
- On the home screen for a new project I selected “Jewelry Set” from the Materials drop down list.
- I engraved three pieces at one time: I placed them onto the honeycomb panel and closed the lid.
- A preview image loaded onto my device (I used my iPhone and the xTool Creative Space App). It was a bit difficult to see the pendants because they’re relatively small. However, once I found them in the image I dragged one word onto each surface and then resized it to fit on the surface.
- In the Parameter Setting tab I made sure to select “Score”. Next I clicked process to start the engraving.
- When done I flipped each piece over and repeated the steps to engrave other words/designs on the opposite side.
Assembling the Necklaces
- Using the pliers, I opened the connecting link (6mm jump ring) and threaded it through the hole of one pendant and around the chain of the necklace. I closed the link to complete it and then added the other pendants.
Tried this recipe?Let us know how it was!