Painting Tile Backsplash: Updating Ugly Kitchen Tiles (3 Easy Steps!)
We are really excited to share our latest DIY project with you today. We think it will be very helpful to anyone considering a budget-friendly kitchen remodel or a simple kitchen makeover. Painting tile backsplash is a great option and easy DIY project for anyone that is on a budget, a time constraint or both. Read on for our simple 3-step process and tips for success!

Painting Tile Backsplash in 3 Easy Steps!
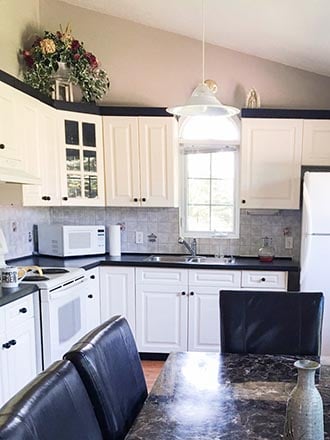
When it came to our coastal cottage kitchen renovation plans, we were pretty torn on what to do with the backsplash.
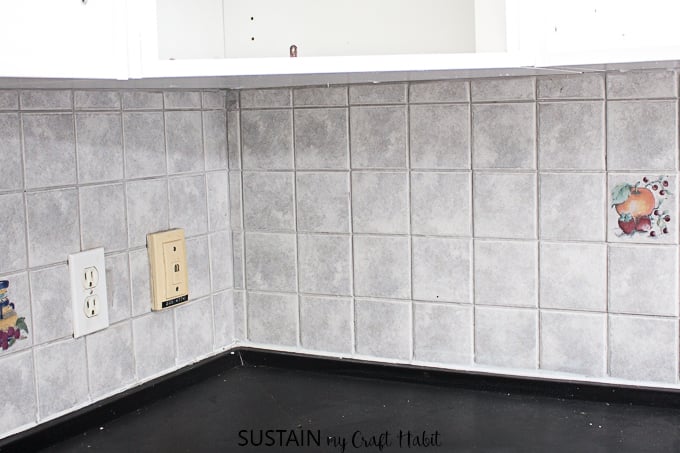
Hands down, we knew the existing tiles wouldn’t work with our new coastal cottage kitchen design ideas: the fruit and vegetable decals throughout the kitchen tile backsplash was not exactly the calming beach feel we were going for. However, we didn’t have it in our budget and timeline to completely replace the existing tile.
On goes the light bulb: let’s try a painted tile backsplash instead!
Now that all the work was done, we are very pleased with the final cottage kitchen design. You can also see how to paint kitchen cabinets without sanding, which can also have huge savings on an overall kitchen remodeling budget.
Is painting kitchen backsplash a good idea?
With a little prep work and using the right materials, painting a tile backsplash is an easy way to update a kitchen or bathroom on a budget. These tiles don’t typically experience the same wear and tear as tile floors leavng less concerns about chips and peeling.
There are numerous reasons you’d opt for painting tile backsplash versus replacing it including:
- Skip the mess – no need to painstakingly remove existing tiles with a tile chipper or hammer and chisel.
- Cost – removing existing tile, re-dry walling damaged areas, mudding and finally adding new tile and grout is very labour intensive which adds to cost. Not to mention the added cost of purchasing tile that ranges for different types.
- Time – all the steps to removing and replacing existing tile backsplash is tedious and time consuming. Depending on the size of your kitchen, re-tiling could add weeks to a kitchen remodel.
- Minimal skill needed – unlike tiling, painting tile backsplash is quite simple. Continue reading for the full how-to instructions.
Which Tile Paint to Use for a Backsplash?
When painting ceramic tile you want to keep a few things in mind: adhesion, durability and finish.
As we cover in detail below, for optimal adhesion you want to clean the tile completely and then prime it. The primer will help your paint to stick to the tile and prevent pealing over time.
For maximum durability, be sure to use an acrylic or expoxy paint that’s built for high traffic and moisture. Look for a high-quality kitchen and bath paint, or paints that can be used both for interior/exterior.
Finally, for both durability and acheiving the right “look” for a tile backsplash, consider a semi-gloss paint or high-gloss finish paint. High gloss paints are generally easier to clean, more durable and can look more elegant for a backsplash.
OK, now that the basics are covered, let’s get started with with our painted ceramic tile backsplash!
Materials Needed for the Best Results:
Disclosure: This post contains affiliate links for your shopping convenience. Should you choose to purchase through these links we will earn a small commission at no additional cost to you. You can find our full disclosure policy here.
- White Paint (Behr Interior/Exterior High Gloss Enamel in white, tinted to match our new painted kitchen cabinets)
- Primer, water based for all surfaces (we used Bullseye 123 Primer by Zinsser)
- Paintbrush
- Foam roller (small sized) and tray
- Cotton cloth
- Heavy duty cleaner and degreaser such as TSP or Krud Kutter
- Drop cloth
- Painters tape (optional)
How-to Paint Tile Backsplash:
Always wear protective gloves, glasses, working clothing and optimize ventilation when possible (open windows, use fans) .
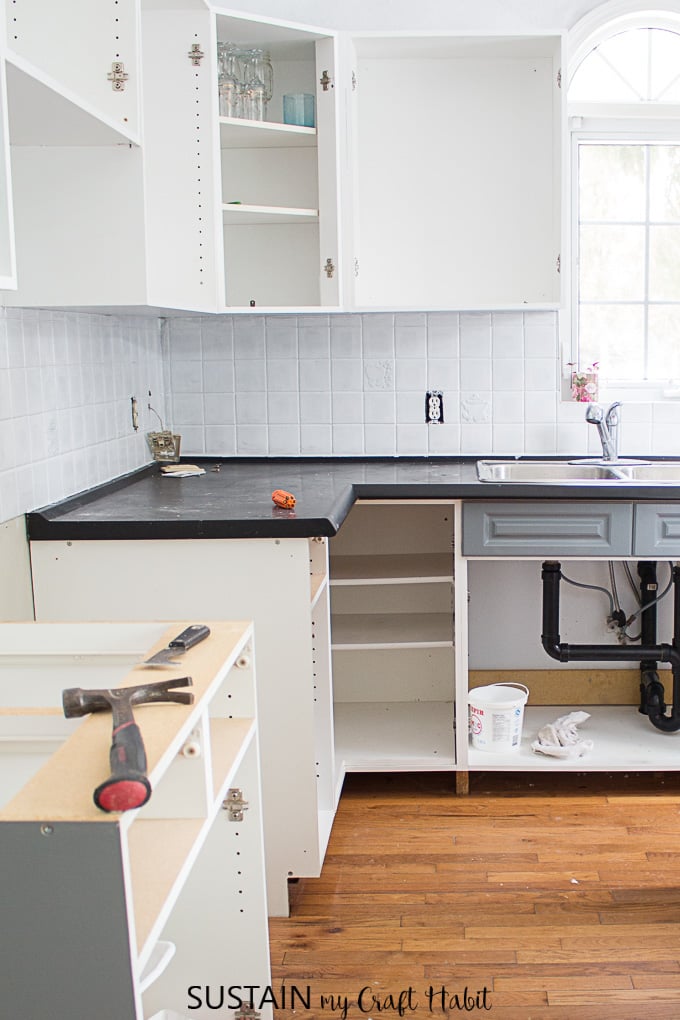
The first thing you’ll want to do is clear off the kitchen countertop and cover it with a drop cloth to protect the surface (if you plan to keep the counters). In our case, we were planning to replace them so we left them uncovered and unscrewed them from the lower cabinets. You’ll also want to remove any outlet covers.
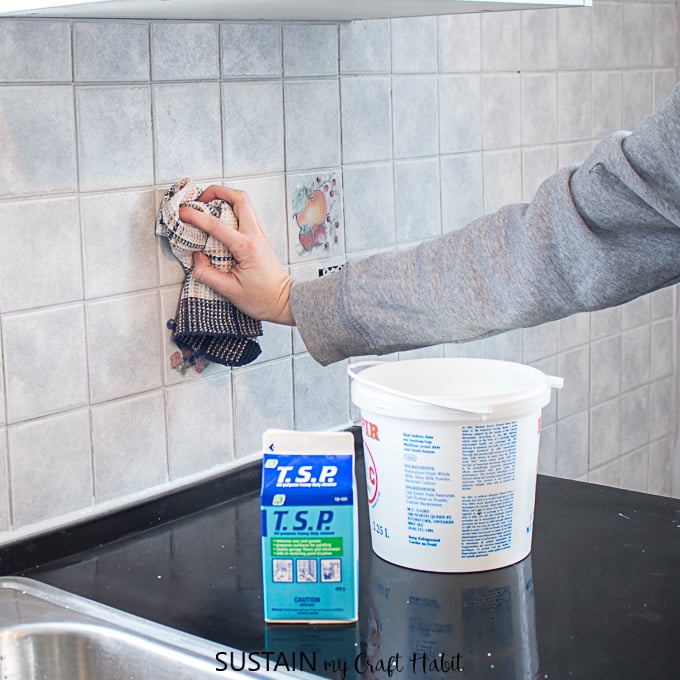
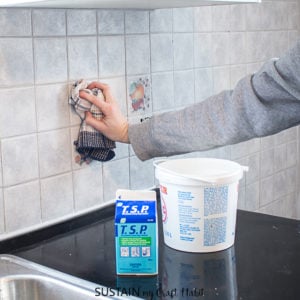
Step 1: Prepare the Tile Surface for Painting
Thoroughly clean the tiled back splash using a degreaser and a cloth or rag. Scrub the tile surfaces and in the grout lines for a proper cleaning. Leave the backsplash to dry fully after cleaning before painting. In our case, we left it to dry for 24 to 48 hours.
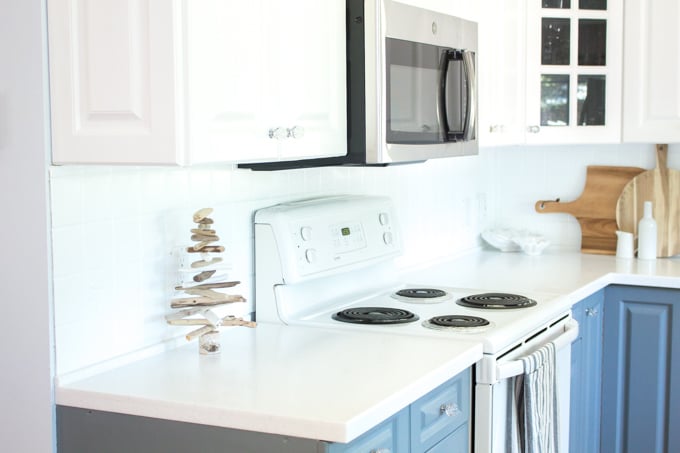
In some areas that the grease was not removed well, we found the primer and paint did not adhere well. So although this step may seem tedious, it is a crucial step. Take the time to clean off the surface, use a scrub rush if necessary to remove all grease especially in and around the stove area.
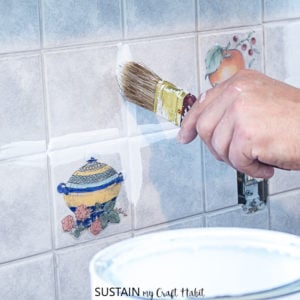
Step 2: Prime the Backsplash Tile
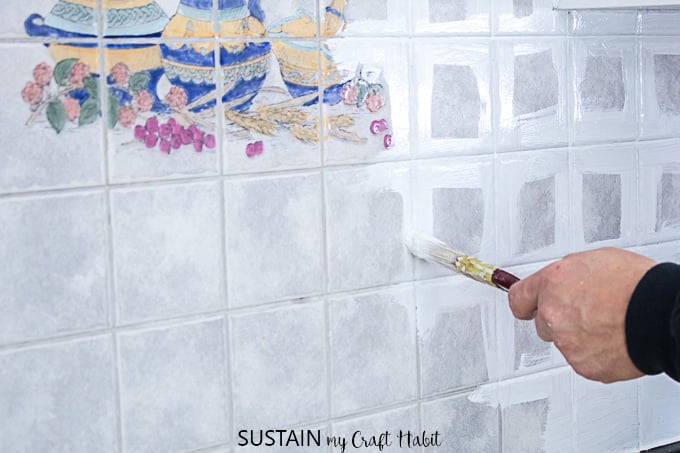
Apply a good coat of primer using a paint brush for all the grout lines and any decals in the tile.
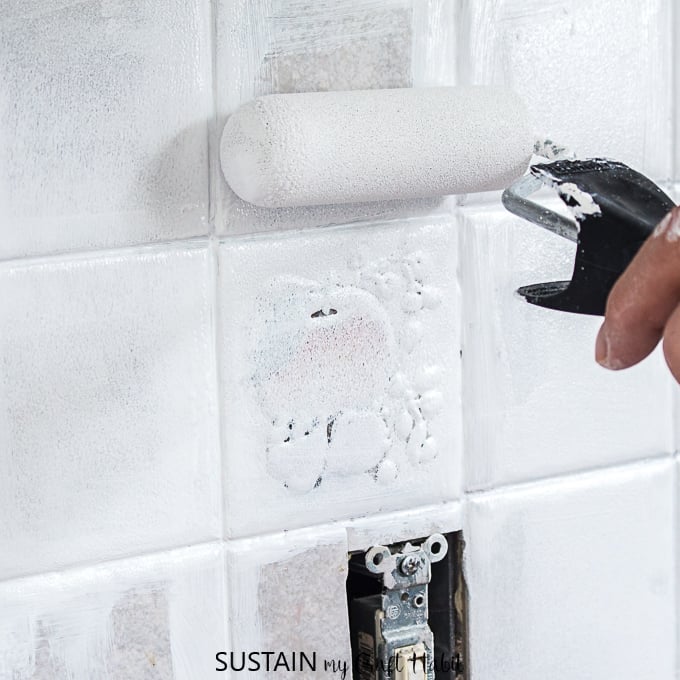
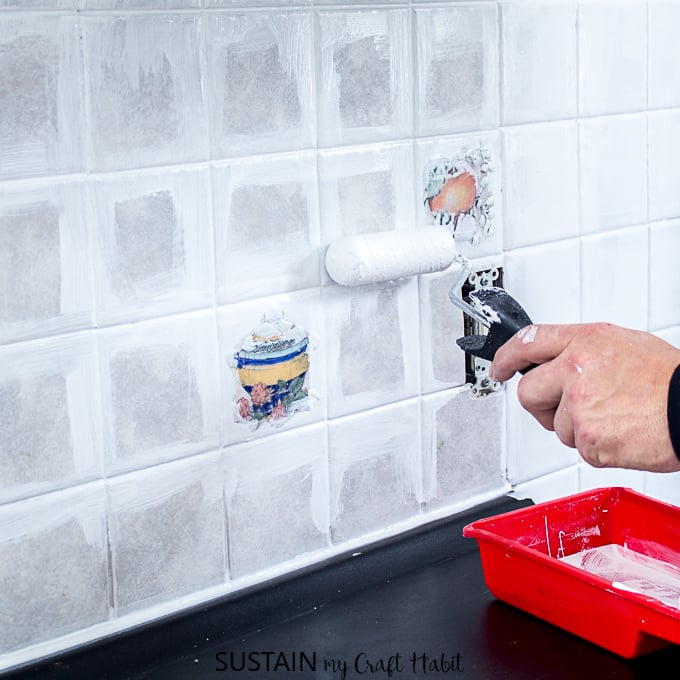
Using a small roller, apply the primer to the entire ceramic tile surface of the backsplash. Depending on the color and texture of existing back splash, a two coats of primer might be needed. If so, apply a second coat of primer.
Leave the backsplash to dry fully between primer coats and before switching to the next step: applying the paint.
Step 3: Paint the Ceramic Tile Backsplash
Once the primer is dry, apply the first coat of paint the same way as you applied the primer: paint brush for grout lines and roller for the entire surface.
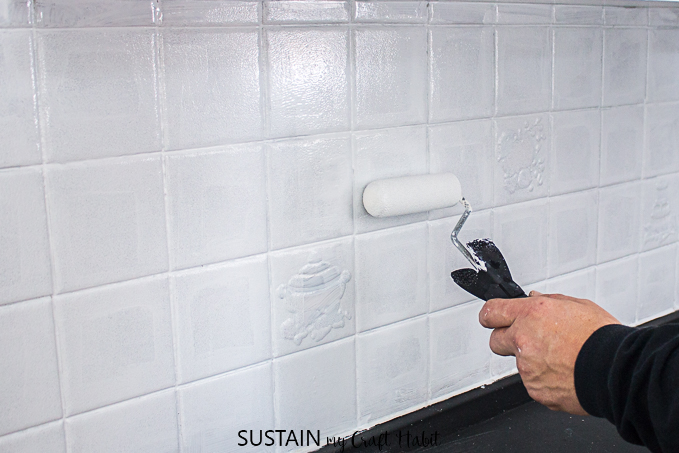
Work in small sections and repeat as necessary until you achieve your desired coverage. In our case, we applied two coats of surface paint with one coat of primer.
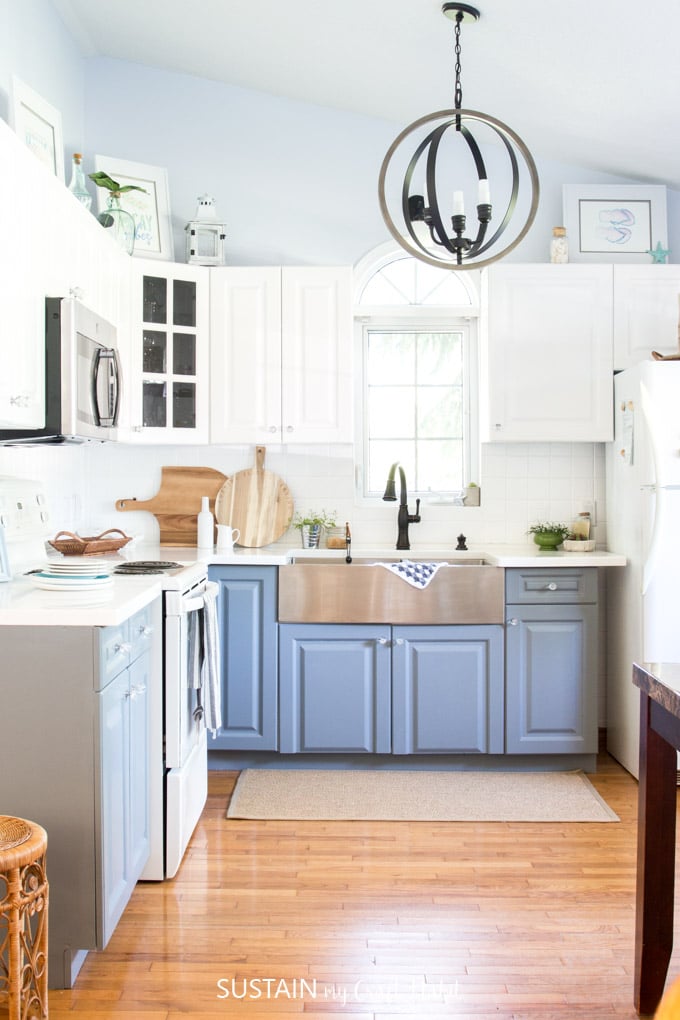
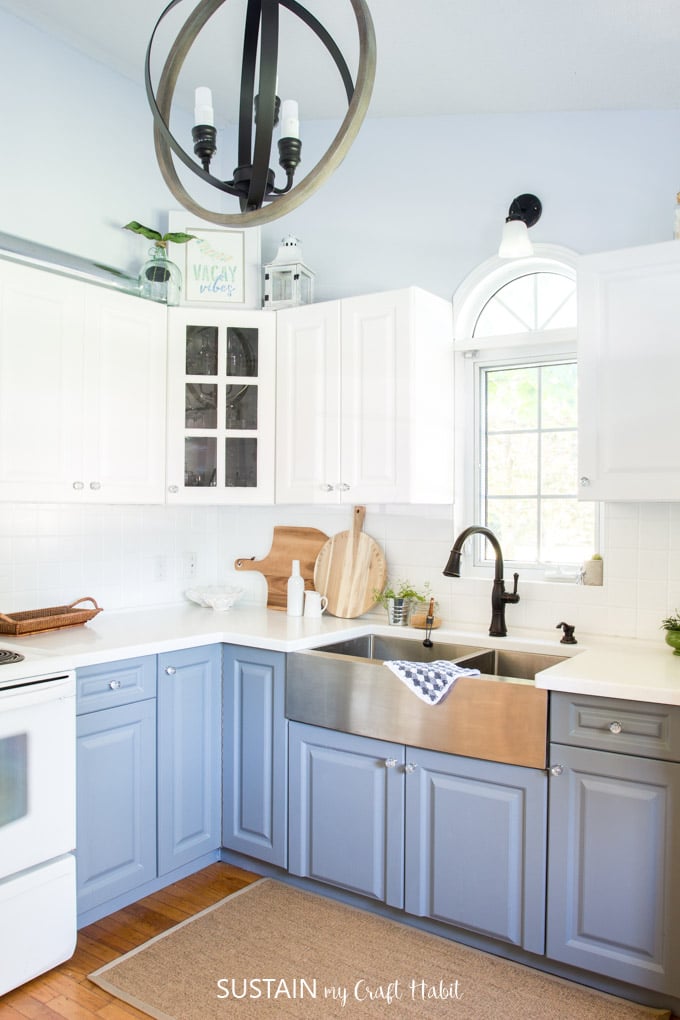
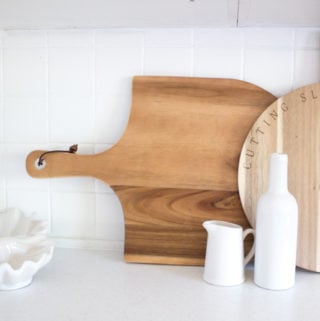
We are pretty amazed at the huge impact painting the tile back splash made on the overall look of the kitchen renovation. The painted kitchen backsplash looks beautiful with the new painted kitchen cabinets and new quartz countertop, don’t you think?
Here is the painted tile backsplash before and after:
Five Year Update: We’re happy to report that the painted tile backsplash has held up really well over time. There are oly a few spots that chipped when a sharp object hit it.
I will most likely do this option for my home kitchen as well when I go to update the existing cabinets, flooring and backsplash.
There are so many beautiful tiles available that it can be very tempting to want to replace the tile. And chances are if it were in our budget and timeline, we would have chosen this fish scale tile* for our coastal cottage kitchen renovation.
But for now, we are very happy to have kept our existing tile backsplash and updated the look simply with a few coats of paint.
Are you considering a kitchen makeover?
Like it? Pin it for later!

How to Paint Tile Backsplash in 3 Easy Steps
Equipment
- Heavy duty cleaner and degreaser
- Cotton cloth for cleaning
- High gloss acrylic paint in color of your choice
- Water based primer
- Paintbrush
- Paint roller (small sized) and tray
- Drop sheet
Instructions
- Thoroughly clean the tiled back splash using a degreaser and a cloth or rag.

- Apply a good coat of primer using a paint brush for all the grout lines and any decals in the tile.
- Once dry, begin to apply the surface paint the same way as you applied the primer: paint brush for grout lines and roller for the entire surface.


Woah, Your ideas are really inspiring, but I am having quartz tiles on my walls of the kitchen so would you let me know if we can paint quartz tiles too?
How has the paint held up?
Easy to do nice job doing this one, Thanks for sharing this informative article.
It’s very pretty and your kitchen looks brighter. Thank you for showing us this wonderful makeover.
Wow! This made such a huge difference in your kitchen. I am obsessed with how this turned out. I just moved into a new house in Brevard County and I am going to have to give this a try. With the updated backsplash and a kitchen cabinet color change, I am hoping my kitchen will look as good as yours. Thanks for all the great tips!
That sounds so exciting, hope the move has gone well. Painting the backsplash really did make a huge difference for us and on a low-budget! All the best, Sonja
I’m curious how the paint has held up since you completed the project. Also, you didn’t need to lightly sand the tile? Thanks!!
Hi Kate. It’s been four years now since we painted the tile and overall it’s held up really well. The paint adhered (hasn’t peeled off) and still looks great. There are a few spots where the paint chipped off that must have been dinged by a sharp object. We touched them up with a bit of the leftover paint. And no- sanding the tile wasn’t needed. -Jane
It’s nice to see a tile backsplash painting tutorial NOT using oil-based paint. I don’t want to deal with the smell or mineral spirits! I already have a ton of that primer from when I painted all of our 90’s orange-y oak woodwork. I just need to get some paint to cover up my tile.
Great job and thanks for the tips. I would like to do this in my kitchen, but I’d like to preserve the grout lines which aren’t in bad shape. Also I think the finished product would look more authentically like tiles when complete. Have you ever heard of anyone doing this?
That sounds really interesting. I haven’t heard of anyone doing it, but think it would work. Would just take a LOT more time as you’d need to paint each tile individually (or somehow mask the grout lines). Let us know if you decide to do it! -Jane
hi, can you share what paint you used?
@bobbi, It says White Paint (Behr Interior/Exterior High Gloss Enamel in white, tinted to match our new painted kitchen cabinets). 🙂