Gorgeous Free Round Crochet Pillow Pattern
Everyone says that changing up your throw pillows is a great way to update your living room look. I must admit, I don’t often do this so when we received a rich deep teal wool from Topsy Farms I was determined to make a crochet pillow cover to showcase the gorgeous colour and texture. We’re happy to share the free crochet pillow patterns and tutorial with you!
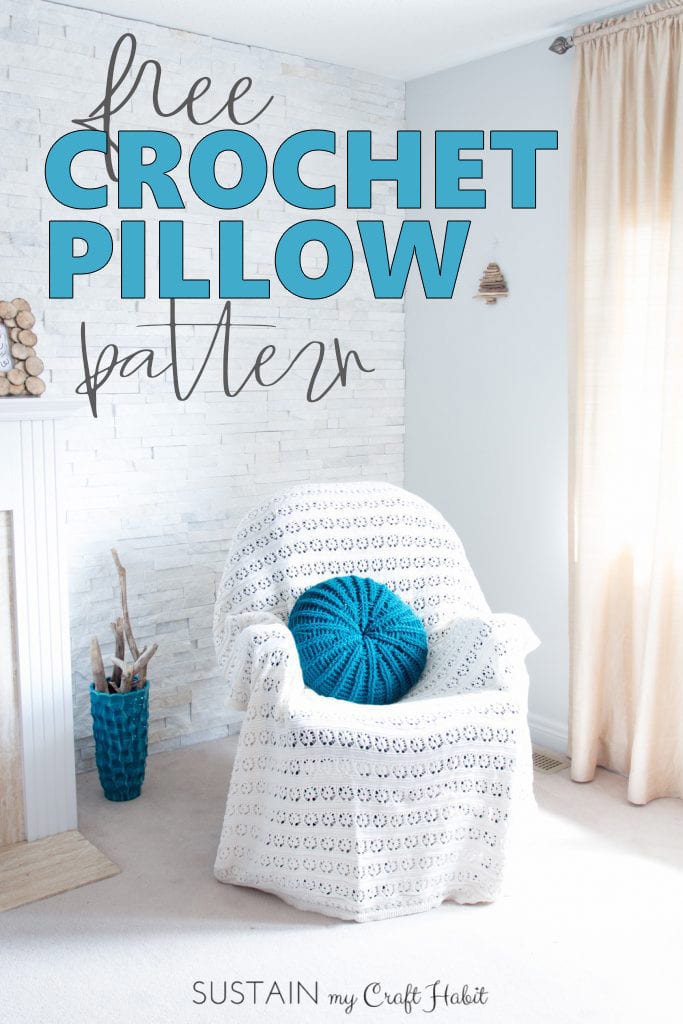
Free Crochet Pillow Patterns
As we’ve written in recent weeks, wool has a number of unique benefits as compared to other fibers including excellent moisture absorbancy and temperature regulation properties. You can read more about the 100% Canadian, non-chemically processed, pure wool yarn available at Topsy Farms here.
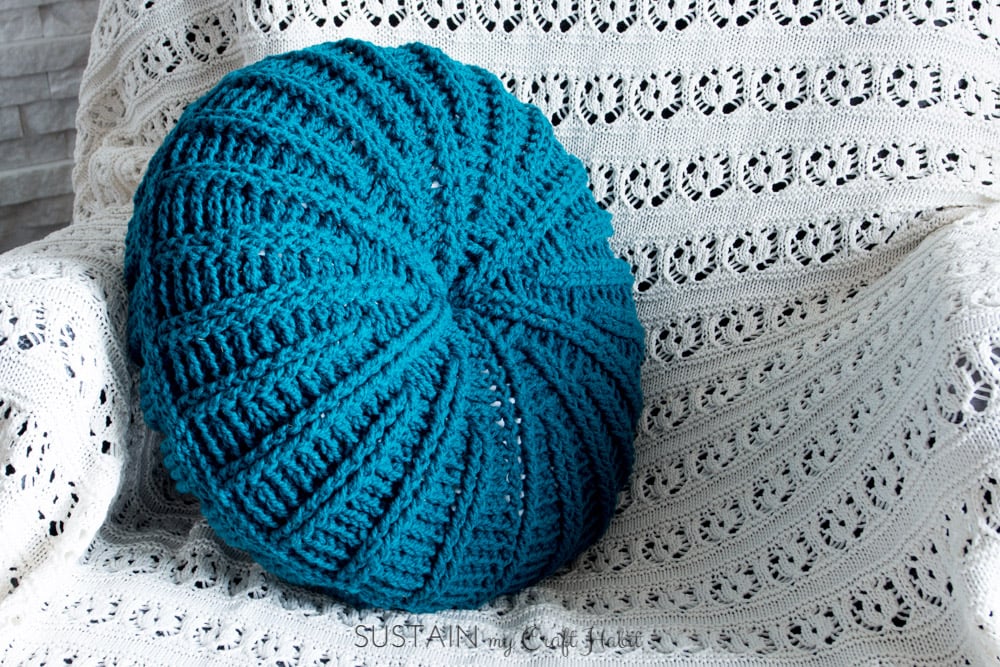
In addition to our recent Sand Pebbles Diamond Crochet Afghan Square and our Simple Sunrise Shrug Knitting patterns, we’re happy to share this new Sand Dollar Crochet Pillow Cover pattern with you.
To Make your Round Crochet Pillow Cover:
This pattern makes one round crochet pillow cover, approximately 16” in diameter when completed.
Supplies Needed to Make the Round Crochet Pillow Cover:
- 3 skeins of 2-ply worsted-weight wool yarn (100g each). We used Topsy Farms’ Teal 2-ply fine wool yarn which comes in generous 100g skeins (double the size of usual wool skeins you may find in the store). If you are in the downtown Toronto area you can also stop by Yarns Untangled, the only Toronto distributor of Topsy Farms yarn.
- Crochet hook (USN/9.0mm)
- Pillow insert (such as the 16” pillow form from Amazon (affiliate link) or make your own using an old standard pillow like we described here)
- Darning needle
Free Crochet Pillow Pattern:
You will need to crochet two of these rounds, one for each side of the crochet pillow cover.
dc, double crochet; bp, back post; fp, front post; sl st, slip stitch; sts, stitches
Round 1: dc magic ring 12 (leave long tail for attaching button and pulling in to pucker later) 10-12 inches tail. Sl st to top of starting chain 2. (12 sts)
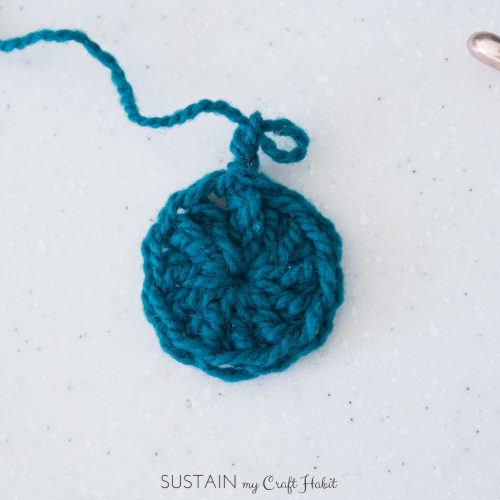
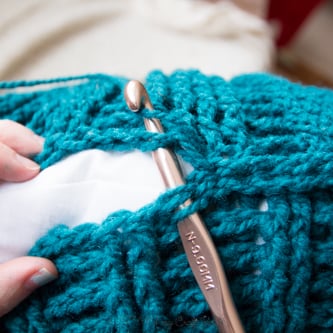
Round 2: chain 2, dc fp same dc from round 1,
(2dc bp next dc, 2dc fp next dc) 5 times,
2dc bp next dc, sl st (back to front) to starting chain 2. (24 sts)
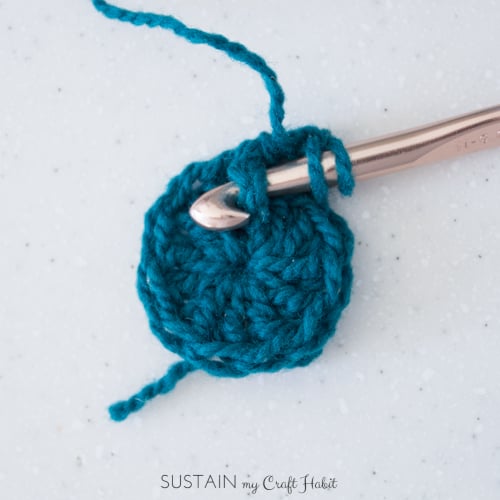
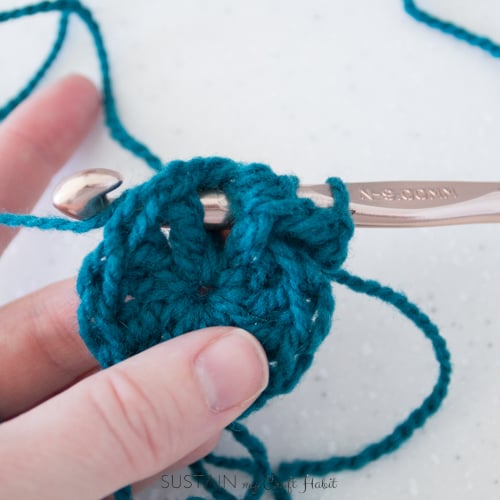
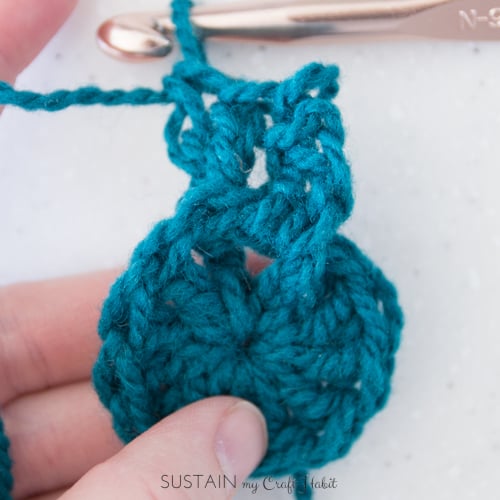
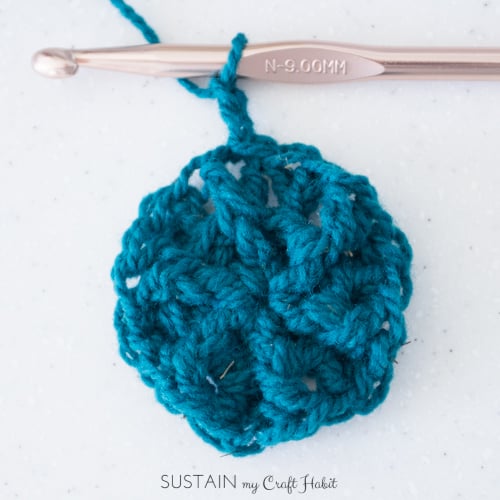
Round 3: chain 2, dc fp next dc,
(dc bp next 2 dc, dc fp next 2 dc) 5 times,
dc bp next 2dc, sl st (back to front) to starting chain 2. (24 sts)
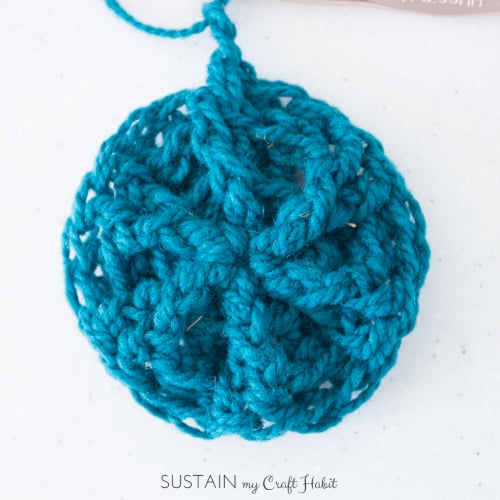
Round 4: chain 2, dc fp next dc,
(2dc bp next 2 dc, dc fp next 2 dc) 5 times,
2dc bp next 2dc, sl st (back to front) to starting chain 2. (36 sts)
Round 5: chain 2, dc fp next dc,
(dc bp next 4 dc, dc fp next 2 dc) 5 times,
dc bp next 4 dc, sl st (back to front) to starting chain 2. (36 sts)
Round 6: chain 2, dc fp next dc,
(2dc bp next 4 dc, dc fp next 2 dc) 5 times,
2dc bp next 4 dc, sl st (back to front) to starting chain 2. (60 sts)
Round 7: chain 2, dc fp next dc,
(dc bp next 3 dc, 2dc fp next 2 dc together, dc bp next 3dc, dc fp next 2 dc) 5 times,
dc bp next 3 dc, 2dc fp next 2 dc together, dc bp next 3dc, sl st (back to front) to starting chain 2. (60 sts)
Round 8: chain 2, dc fp next dc,
(dc bp next 3 dc, dc fp next 2 dc, dc bp next 3dc, dc fp next 2dc) 5 times,
dc bp next 3 dc, dc fp next 2 dc, dc bp next 3dc, sl st (back to front) to starting chain 2. (60 sts)
Round 9: chain 2, dc fp next dc,
(dc bp next dc, 2dc bp next dc, dc bp next dc, dc fp next 2 dc, dc bp next dc, 2dc bp next dc, dc bp next dc, dc fp next 2dc) 5 times,
dc bp next dc, 2dc bp next dc, dc bp next dc, dc fp next 2 dc, dc bp next dc, 2dc bp next dc, dc bp next dc, sl st (back to front) to starting chain 2. (72 sts)
Round 10: chain 2, dc fp next dc,
(dc bp next 4dc, dc fp next 2 dc) 11 times,
dc bp next 4dc, sl st (back to front) to starting chain 2. (72 sts)
Round 11: chain 2, dc fp next dc,
(2dc bp next 4dc, dc fp next 2 dc) 11 times,
2dc bp next 4dc, sl st (back to front) to starting chain 2. (120 sts)
Rounds 12: chain 2, dc fp next dc,
(dc bp next 3 dc, 2dc fp next 2 dc together, dc bp next 3 dc, dc fp next 2 dc) 11 times,
dc bp next 3 dc, 2dc fp next 2 dc together, dc bp next 3 dc, sl st (back to front) to starting chain 2. (120 sts)
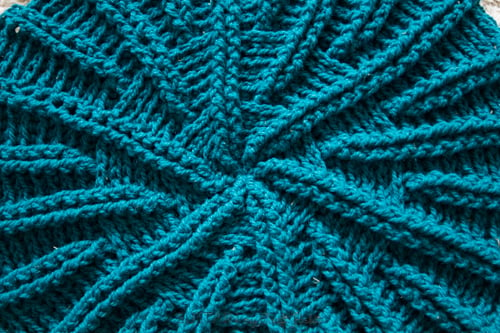
Round 13: chain 2, dc fp next dc,
(dc bp next 3dc, dc fp next 2dc) 23 times,
dc bp next 3dc, sl st (back to front) to starting chain 2. (120 sts)
Round 14: chain 2, dc fp next dc,
(dc bp next 3dc, dc fp next 2dc) 23 times,
dc bp next 3dc, sl st (back to front) to starting chain 2. (120 sts)
Round 15: chain 2, dc fp next dc,
(dc bp next dc, 2dc bp next dc, dc bp next dc, dc fp next 2dc) 23 times,
dc bp next dc, 2dc bp next dc, dc bp next dc, sl st (back to front) to starting chain 2. (144 sts)
Round 16-20: chain 2, dc fp next dc,
(dc bp next 4dc, dc fp next 2dc) 23 times,
dc bp next 4dc, sl st (back to front) to starting chain 2. (144 sts)
Each of the completed crochet pillow round panels will have a distinctive front and back side. You can choose whether to finish the throw pillow with two of the same patterns on the outside or one of each finish on either side. Then just flip the pillow over for a different look each day 🙂 .
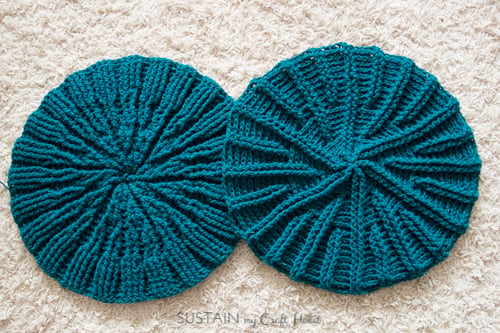
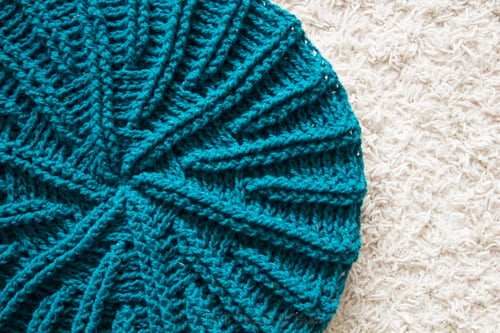
Assembling the crochet pillow cover:
I chose to finish the crochet pillow with a pucker in the center, which is optional. To make the pucker:
1. Measure the pillow form and mark the center with a pencil or pen.
2. Thread the long starting tail that you had left when making the crochet pillow round onto the darning needle, and poke through the center of the pillow form.
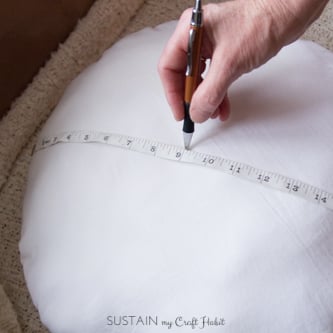
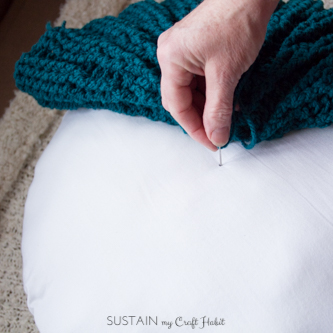
3. Line the starting yarn tail of the second crocheted pillow round with the yarn tail you had just pulled through the pillow form. Tie the ends by pulling them together. The tighter you pull them, the deeper the pucker will be.
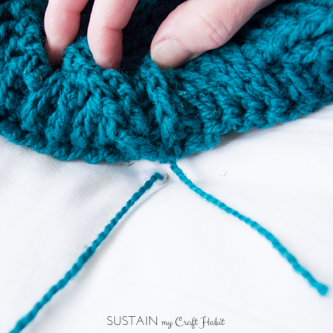
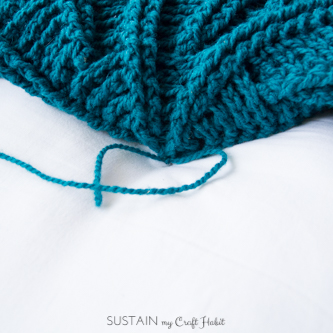
4. Line up the “lines” or rays of each of the crochet rounds and slip stitch them together from the outside all the way around. Fasten off and weave in the leftover yarn tail.
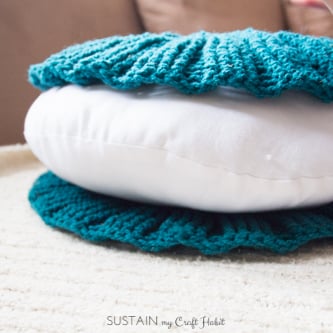
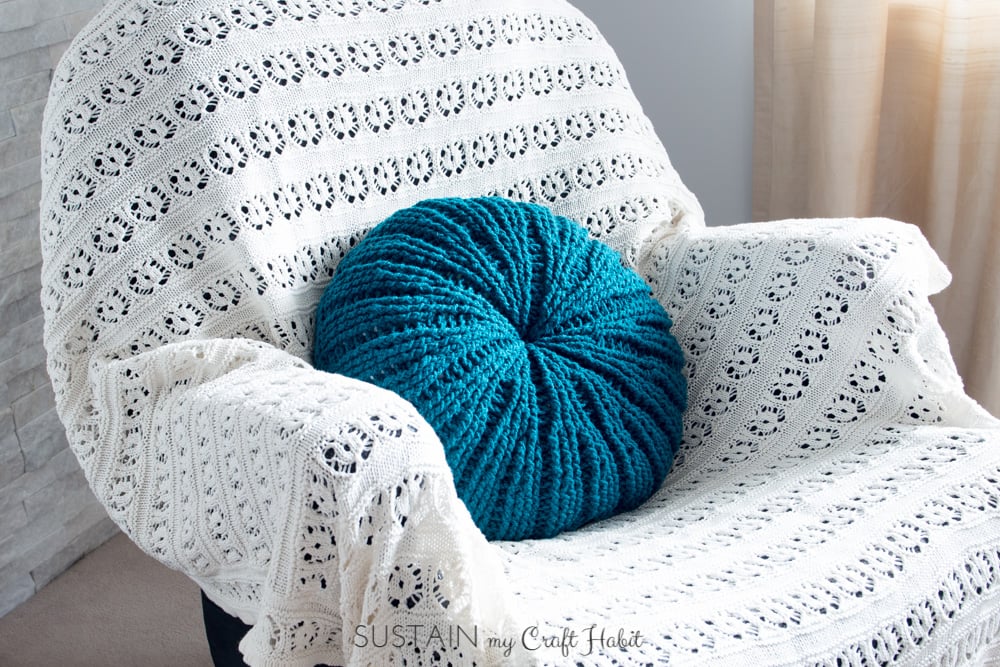
There you have it: a beautiful round DIY crochet pillow cover reminiscent of a sea urchin or sand dollar! If you are looking for more DIY throw pillow inspiration, check out this customizable “quote pillow” by Brooklyn Berry designs, this lovely felted sweater woven throw pillow by Life is a Party, or this upcycled vintage wool blanket throw pillow by Vin’yet Etc.
If you don’t have time to do-it-yourself, we have a collection of some of our favourite coastal throw pillows you can buy.
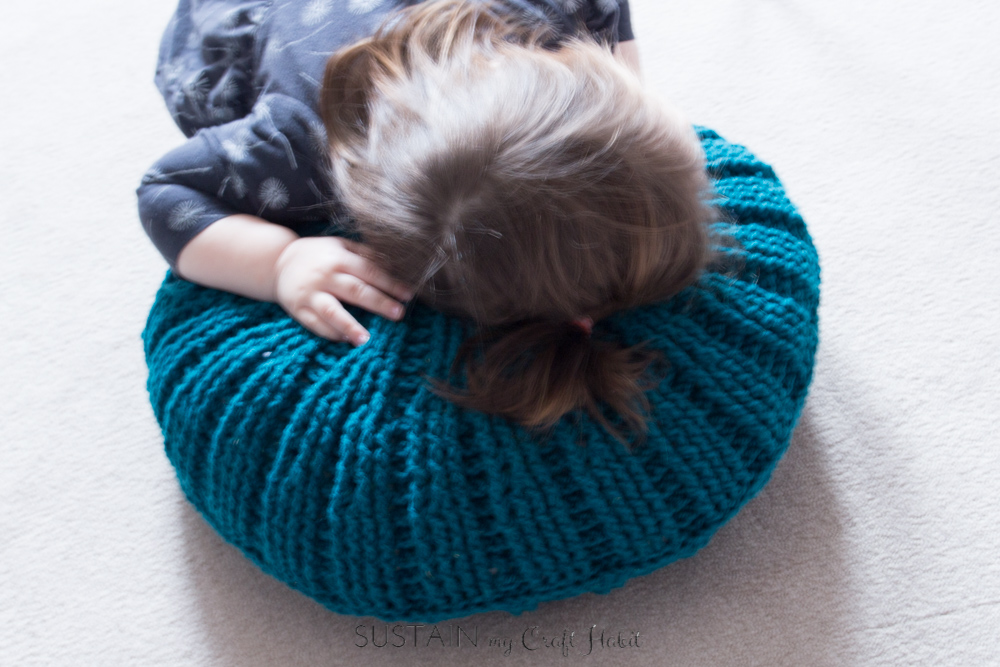
Even the baby likes our new crochet pillow!
Do you have any favourite crochet pillow patterns?
Don’t forget to Pin it for later!


Love the pillow….love the afghan too. Where could I find the pattern for the afghan….so I can make one to go with the pillows I plan to make?
Hi Amy! Thank you for your message and kind comments. We unfortunately don’t have the pattern for the blanket. It’s one we purchased a while back and I don’t quite remember where. 🙁
I also would love to have the pattern for the afghan to go with your beautiful pillow.
Hi Shelley.
Thank you for stopping by! Unfortunately we don’t have the pattern although there seems to be a few people interested in it. We’ll take a look at if we can re-create something similar and share in a future post.
Pattern reads:
Round 11: chain 2, dc fp next dc,
(2dc bp next 4dc, 2dc fp next 2 dc) 11 times,
2dc bp next 4dc, sl st (back to front) to starting chain 2. (120 sts)
Then for Round 12: chain 2, dc fp next dc, (dc bp next 3 dc, 2dc fp next 2 dc together, dc bp next 3 dc, dc fp next 2 dc) 11 times, dc bp next 3 dc, 2dc fp next 2 dc together, dc bp next 3 dc, sl st (back to front) to starting chain 2. (120 sts)
Was the 2dc fp next 2 dc in row 11 a misprint? Or am I reading this wrong?
Hi Kesha! Thank you for your message. We’re so happy you’re making the pattern.
You are right! If is a misprint and should read "dc fp next 2 dc": you are just continuing the "ray" along from previous rows. I will fix the misprint in the pattern. Thank you so much for pointing this out.
We’d love to see a picture of your project along the way and/or completed! Please send along if you can. Thanks!
Hi,
I’m getting stuck on round 12. On round 11, I’m getting 120 stitches correctly, however round 12 I get 140 or 102. When it says 2dc fp next 2dc together, is it one dc for each stitch just together? Or two dc per stitch and then joined? Please help! Thank you!Candice
Hi Candice! Thank you for reaching out. We’re sorry you’re having trouble with the pattern. I just went back and made the correction in Row 11 that I mentioned in response to Kesha’s comment below (thought I had already done it, but looks like the change wasn’t saved).
For Round 12 which you are having trouble with: you should still end up with 120 stitches as we aren’t increasing or decreasing. You’re just starting another "ray" similar to Round 7. Did you have trouble there?
From Round 11 you should have a series of 2 fp crochets and then 8 bp crochets all the way around. In Round 12 you’ll be joining together stitches 4 and 5 from the 8 bp crochets of Round 12. Holding together stitches 4 and 5 you’ll make 2dc to form the V of the new ray you’re starting – each dc will form one line of the ray.
I hope this makes is a bit clearer. Let us know if you’re still having trouble. Thanks!
I’m stuck on round 7. How do you 2 dc fp next 2 st together? Is that all 4 do together? Or dc2tog on each stitch?
Hi Christina! So glad you’re giving the pillow a try.
In Round 7 you’re starting the second set of rays. You’re going to make in essence a "V" to start the ray. So you’re going to pinch together the 2 sts from Round 6 and make 2dc there – one over the other and they’ll look like a "V" . Does this make sense?
Hey guys, this is a beautiful pattern and I really want to give it a try… I just want to make sure I’m not mistaken — you used a 9 mm hook? I just tried it out for myself last night and the stitches were quite loose…if that’s how it’s supposed to be then that’s fine I guess but I just wanted to make sure 🙂
Hi Meg. It depends quite a bit on the yarn you’re using. I’m working on another pillow myself, using a different yarn and a 6.5mm hook. If you have a smaller hook, give it a try and see if you get a tighter result. Let me know if you have any more questions! -Jane
Thanks for the quick feedback, Jane! I’m currently trying again with an 8 mm hook, and it’s starting to look a lot more similar to your pictures 🙂
Hey guys! I wanna show you my project from your pattern: http://ultravillainess.tumblr.com/image/173803028813
So I made it rust-colored because I’ve got a friend who’s starting a hematology residency program, and I thought I’d make her something that looks like an elegant red blood cell and at the same time a cool house warming present! And she loves it very much, so thanks for this beautiful pattern!!
It looks amazing Meg! And what a creative and thoughtful gift idea. I can definitely see how it resembles a red blood cell! Congratulations to your friend – that’s an amazing accomplishment. Thank you so much for sharing. -Jane
Love the pattern. Struggling with Round 8. Don’t know where I went wrong. I always have a 2 fp dc on the sand dollar but it’s not mentioned in the pattern steps. Would you please condiser making a step by step video. Please pretty please.
What weight is the yarn you used? I tried clicking on the link provided but it’s no longer active.
Any help is appreciated. Thanks!
Hi Angie. Thank you so much for letting us know about the link. I’ve gone in and corrected it. We used a 2-ply worsted weight yarn.
I hope that helps!
Jane
Hello! Thank you for this wonderful pattern! It’s working up beautifully and I can’t wait to finish it. My question is in regards to washing the pillow. I’ll be using the pillow for decorative purposes but it’s bound to get dirty at some point…. Do you have any recommendations on how to wash the pillow since the cover will be sewn on and closed?
Beginner crochet-er here, I find it easier to watch videos have you made one for this throw pillow? BTW its gorgeous!!
I’m at the end of my first half of the pillow and am wondering how to finish it off. Do I need to leave a long tail string when I finish it off so I can sew the two pieces together when I’m done? or do I not bother with that and instead use string from my yarn skein to dew the two sides together? thanks!
Hi Mallory. It’s been a while since I made the pillow. I believe I just used a separate piece of thread from the screen (it’s difficult to guess how much you’d need). But I’m sure the other way would work as well.
Warm regards,
Jane
Beautiful pattern thank you for sharing