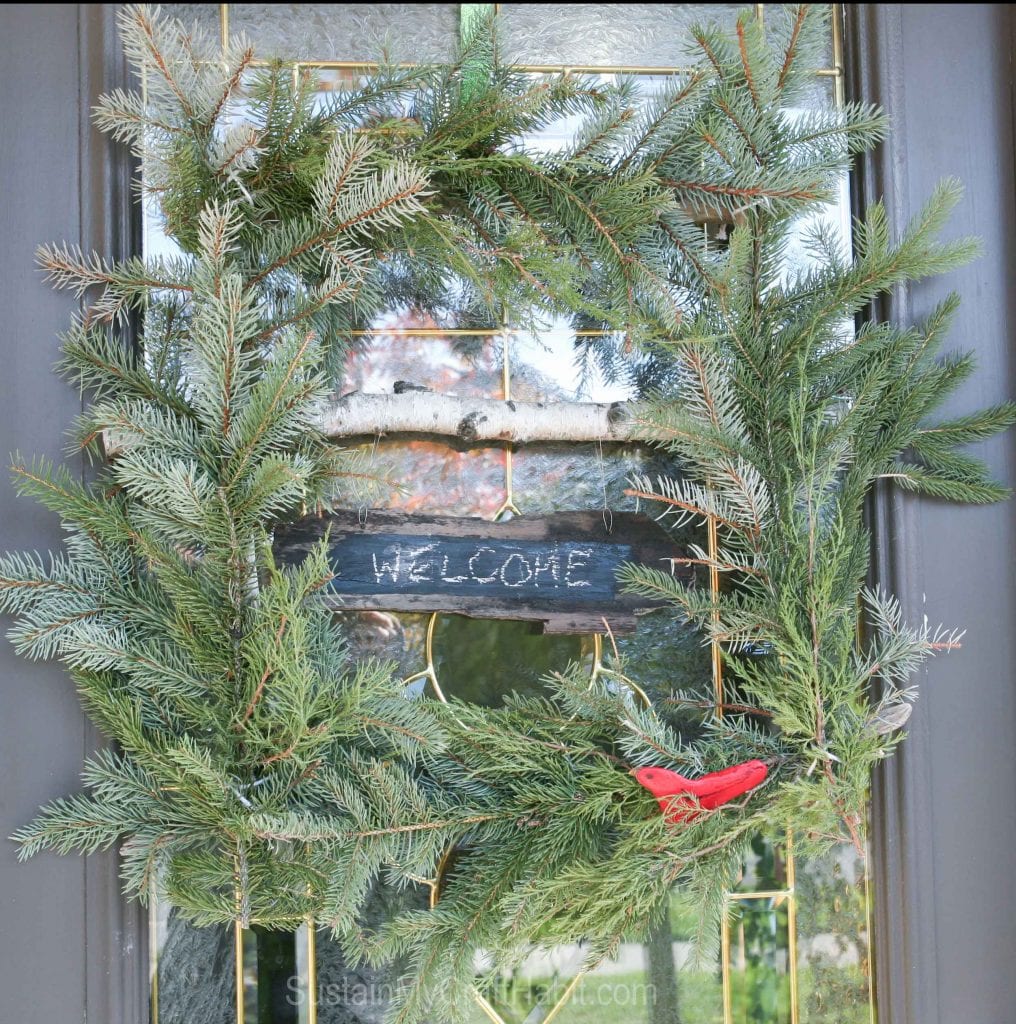
Ruby Bird on a Window Wreath
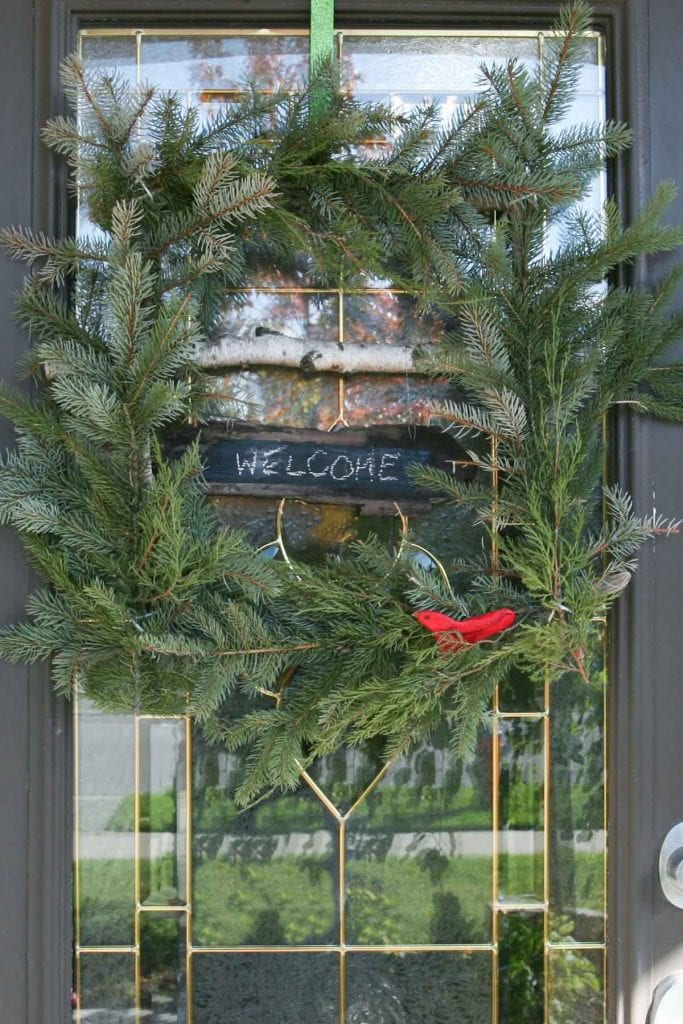
This fresh winter wreath is a twist on our Rustic Driftwood and Fragrant Window Wreath from earlier this summer. And I have to say this new wreath was a lot of fun to make. Somehow magically, it seemed, all the pieces came together to make it. All that was needed was just a bit of time to scavenge the great outdoors for materials.
What you’ll need:
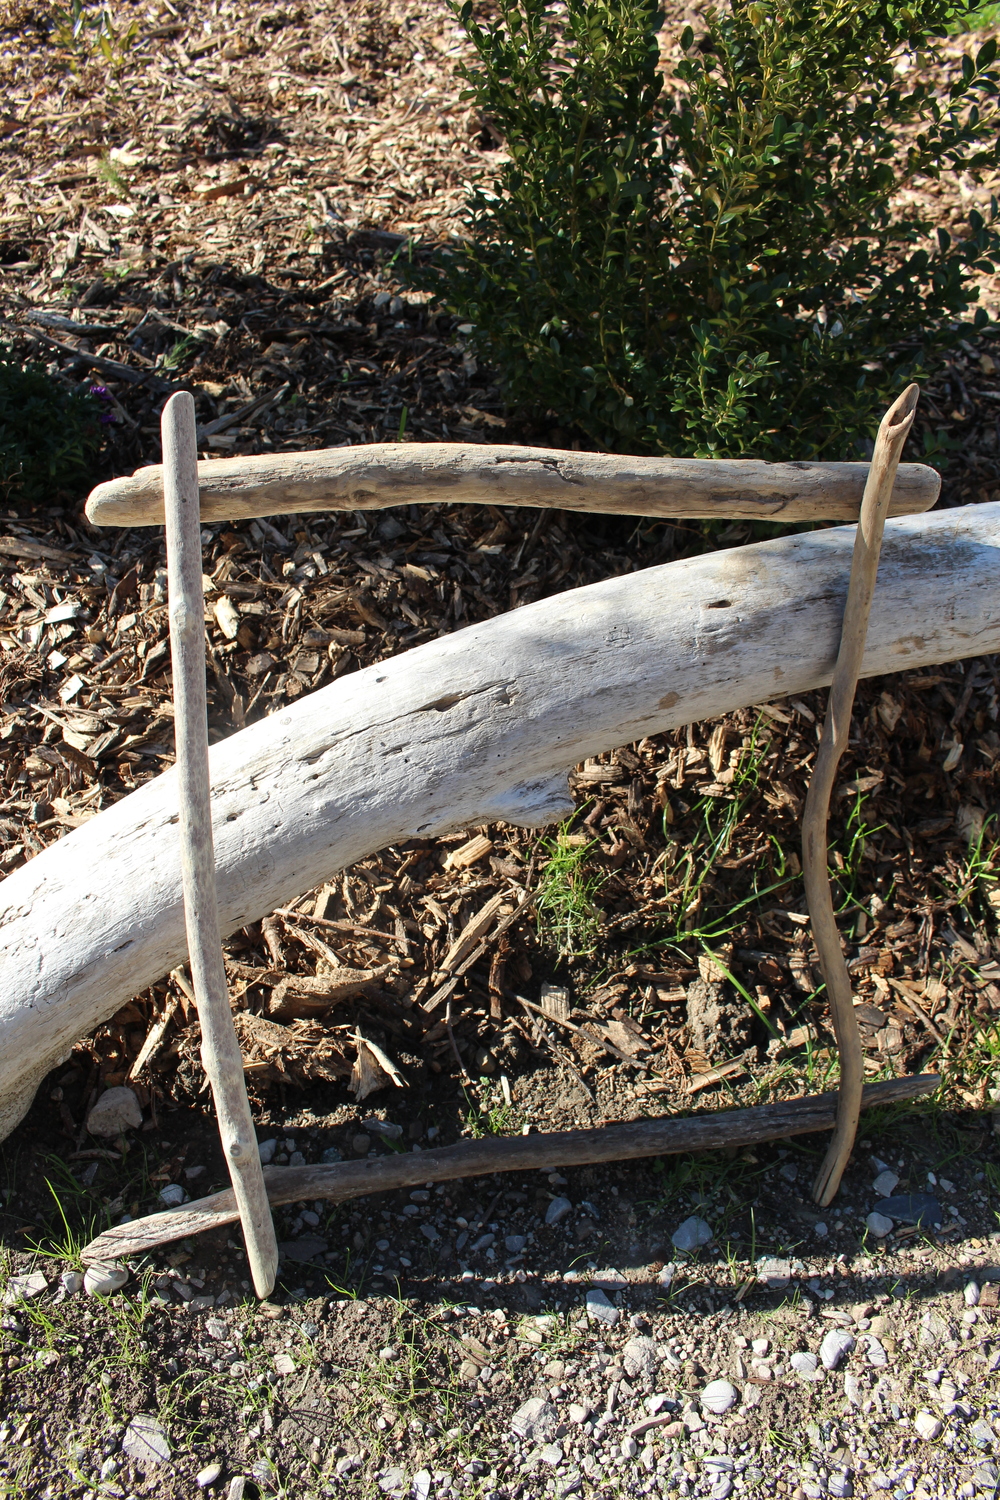
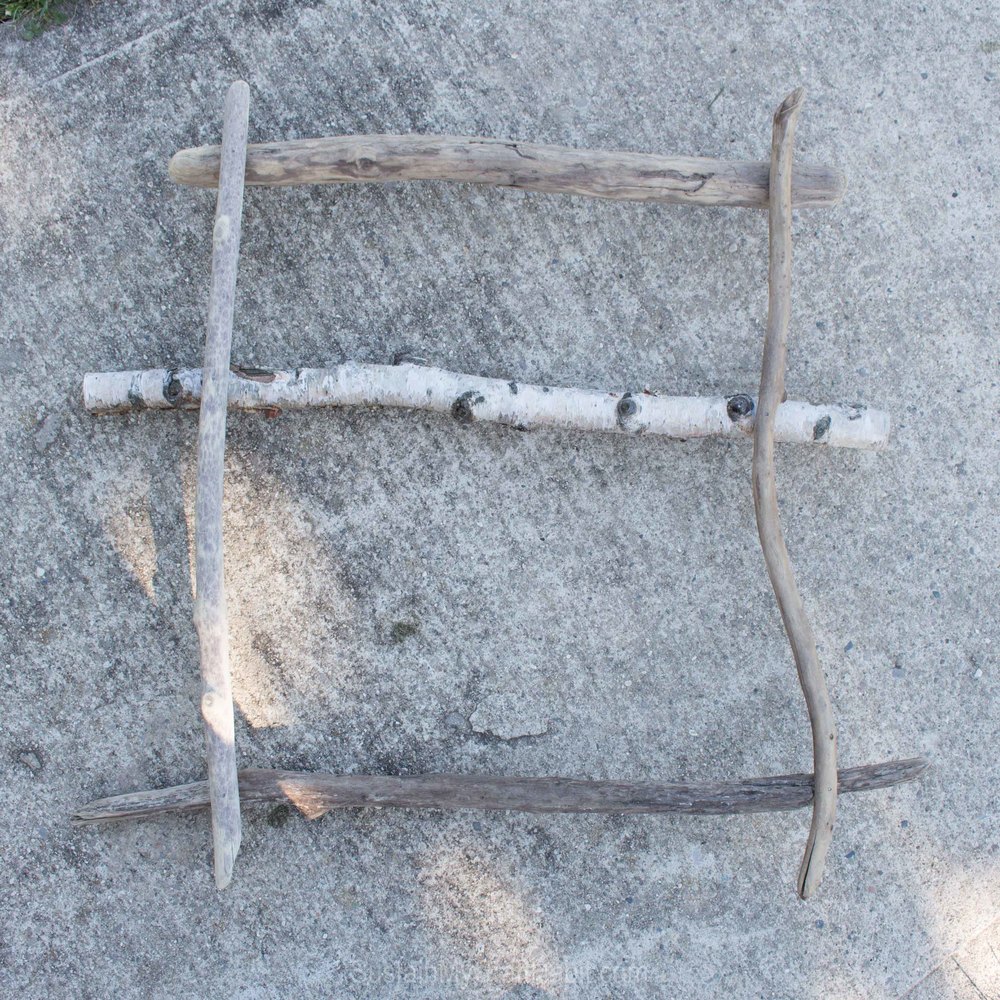
- 4 long pieces of wood (we used driftwood) for the wreath frame – the frame will not be visible under the evergreen
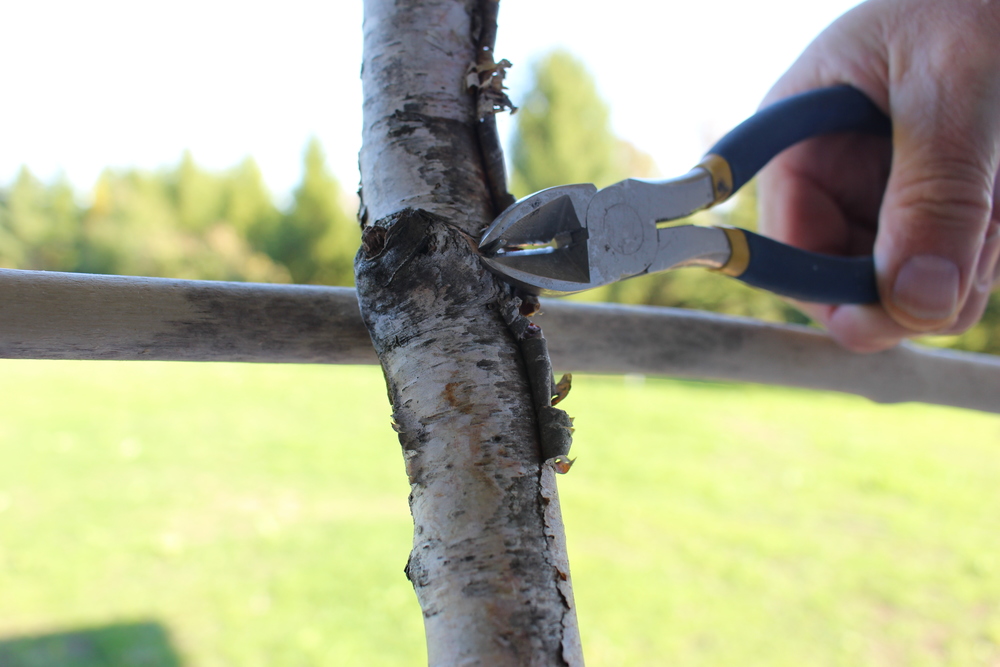
- 1 piece of birch: for center cross bar
- 1 piece of flat tree bark
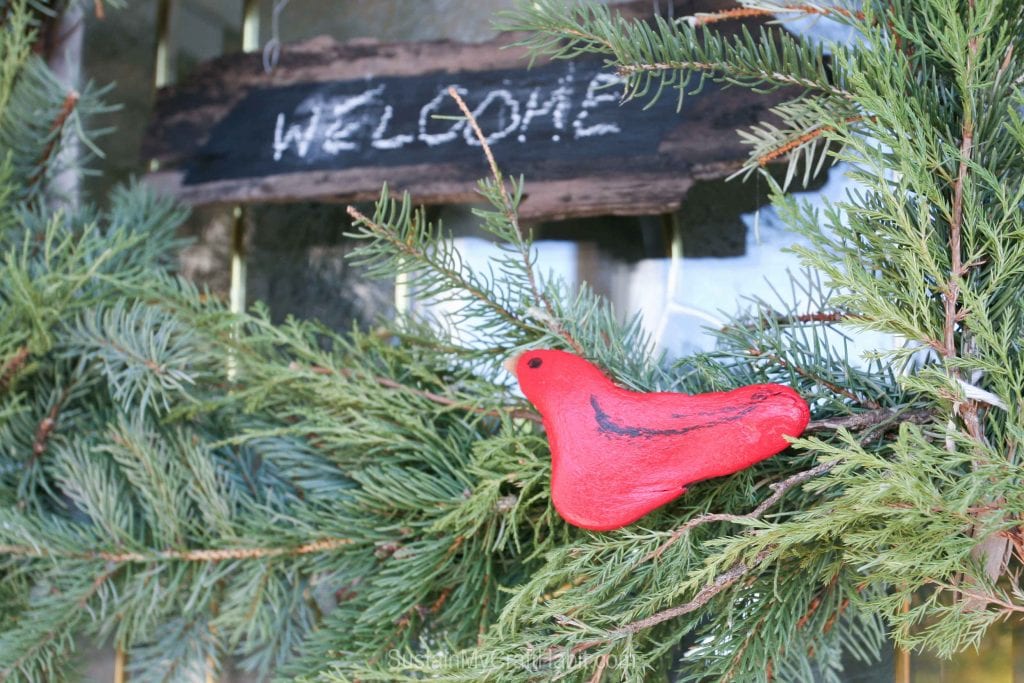
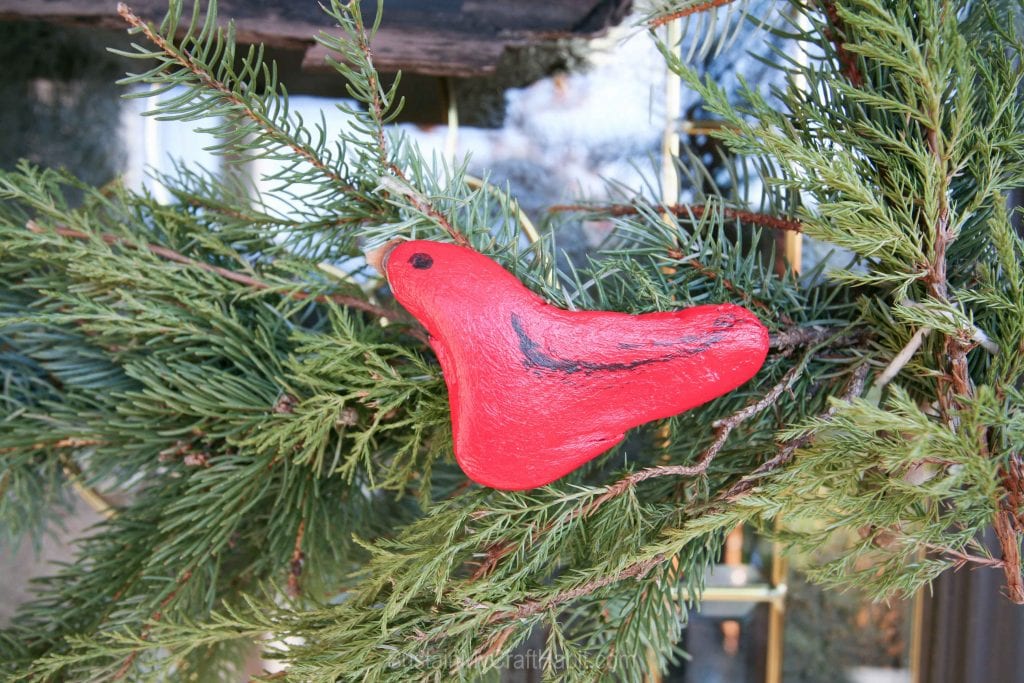
- 1 cardinal – we made ours using an oddly shaped piece of driftwood
- Various types of evergreen, pine branches, etc
- Floral wire or nail gun
- Fishing line
- Garden scissors
- ⅛” drill bit and drill
- Chalkboard paint and paintbrush
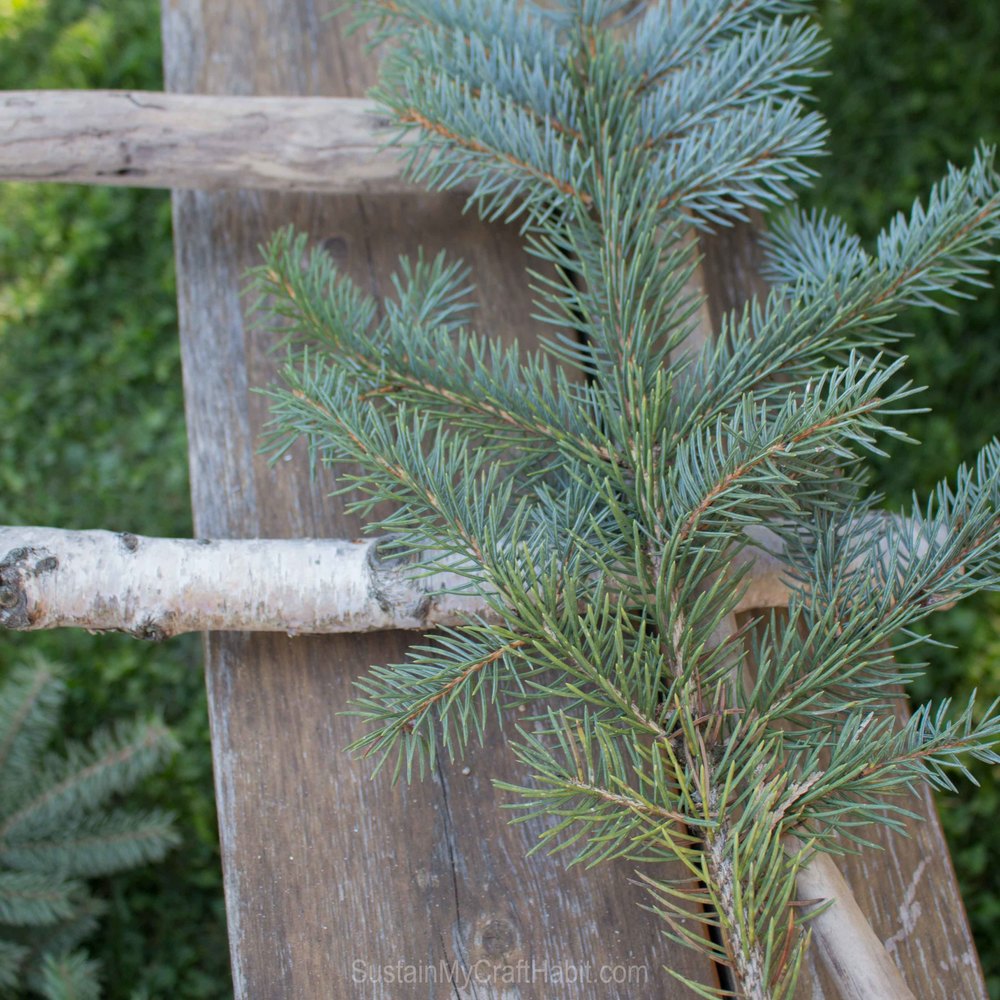
The first step is to form the “window frame”. You can refer to our Rustic Driftwood and Fragrant Lavender Window Wreath post for instructions on how to assemble the frame. Or another option, which we did for this wreath is to assemble the four driftwood pieces into a square shape and nail gun them in place. I can’t lie…it was fun using the nail gun! The next step was to secure the birch cross bar to the window frame.
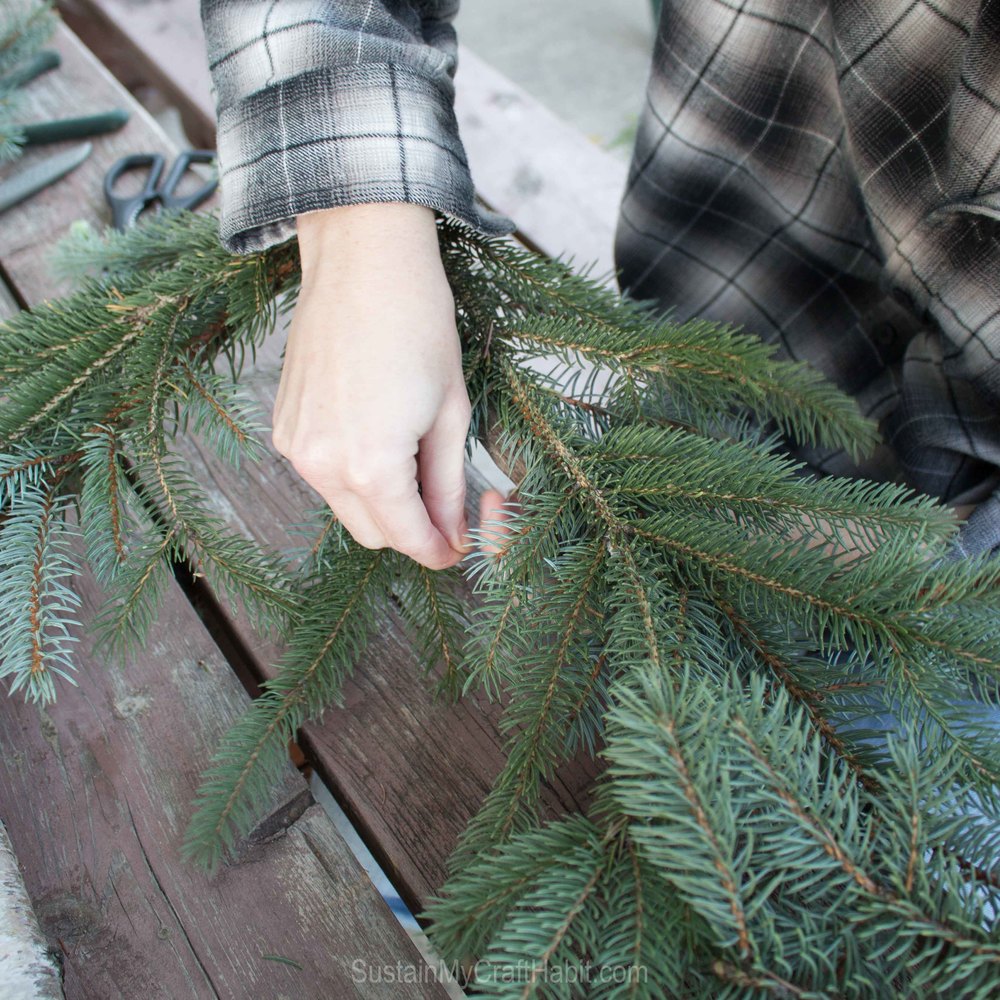
Using the various types of cut evergreens – some blue spruce, pine, and other prickly types – we began to secure them to the wreath frame using fishing line. We started in one corner and worked our way around the square layering with the different types of evergreen.
Separately, we drilled a flat piece of tree bark in two spots close to the top edge. We painted the flat side using black chalk paint aiming for a casual, brush stroke look. The chalk paint will allow us to change the message on the wreath over time …”Welcome”, “Merry”, “Brrr”, etc.
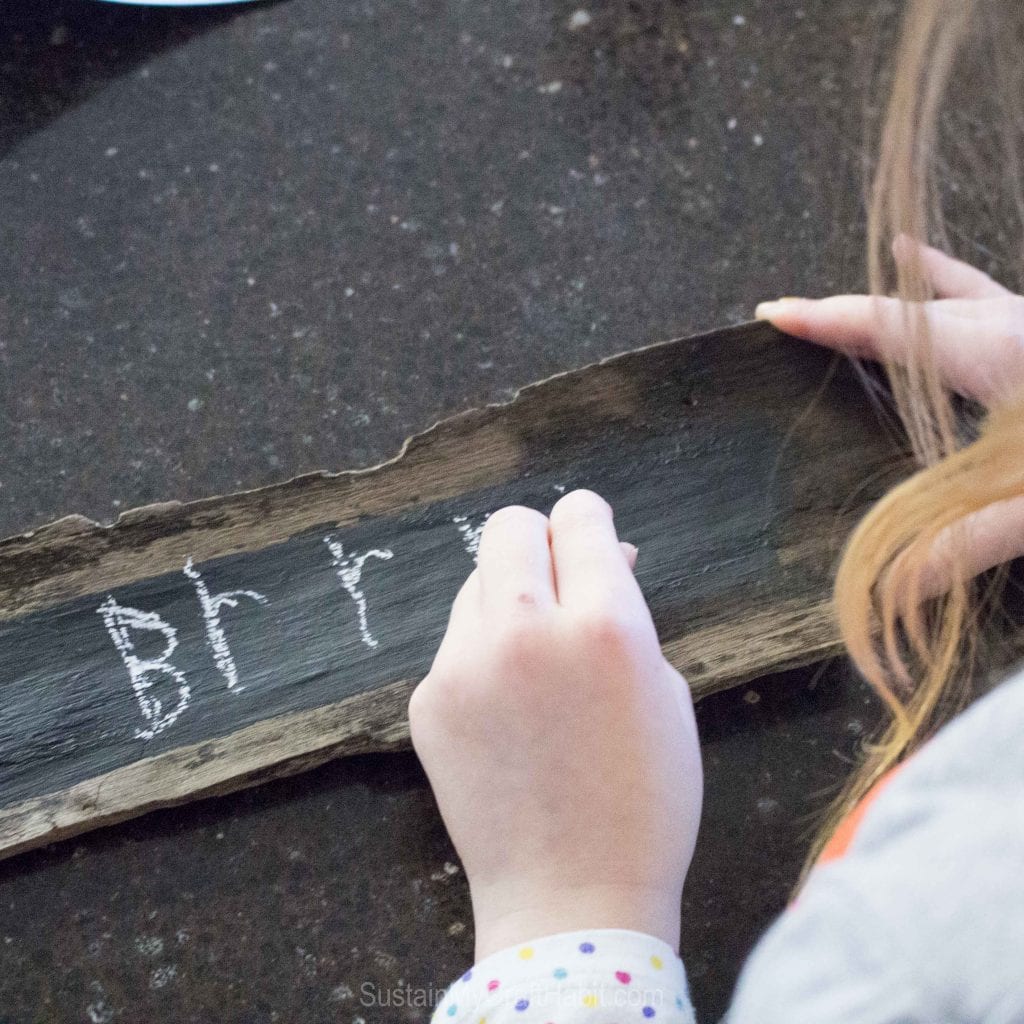
Using fishing line we attached the flat bark to the birch. The bark sign hangs loosely below.
And the final touch was adding a little pop of colour with a red painted cardinal. We hunted through our collection of driftwood until we found one that resembled the shape of a bird. And with Jane’s artistry skills, a cardinal was formed! Refer too our recent post on Making A Driftwood Bird too see how it’s done (a short video is included).
We have to note that the pine needles did start falling off after about four weeks. The weather’s been quite warm so the wreath would likely last longer in the colder weather. Alternatively you could use the similar idea with artificial greenery, or just replace the branches with fresh ones like we plan to do.
Looking for more winter wreath ideas? Be sure to visit each of the blogs below to get ideas and inspiration for your own Christmas wreath.

- New House New Home
- Sustain My Craft Habit
- PMQ for Two
- Lifeovereasy
- Bette’s House
- Life Is A Party
- Love Create Celebrate
- The DIY Mommy
- Lemon Thistle
- Vin’yet Etc.
- Clean and Scentible
- Becoming Martha
- Design For Soul
- AKA Designs
- Personally Andrea
- Time With Thea
- The Happy Housie
- Row House Nest


Right up my alley! Rustic, simple and so natural! I adore this wreath! Pinned!
Thanks, Laurie! Our thoughts exactly.
What a beautiful wreath – very fresh and rustic at the same time – right up my alley! I really like your blog too, glad I found you!!
Thanks so much. Really happy that you stopped by!
This is so adorable! I love fresh wreaths, and the shape and the little birdies make it so unique!
It was such a fun wreath to make and just kind of evolved with all the materials we had collected.
What a sweet wreath! I love the chalkboard- what a neat idea to be able to change the message.
One of new favourite things….chalk paint. First time using it and I’m officially hooked.
What a sweet idea! I love that chalk paint sign – such a nice touch. Thanks for sharing!
Thanks so much for stopping by! We love the versatile you get with chalk paint.
What a great tutorial! I love how it turned out… the chalkboard message, the bird! Gorgeous.
xo
We were really happy with how it turned out too. Unfortunately for me, Jane ended up keeping the wreath so guess I’ll just have to make myself a new one! Big sisters, what can you do?
Love that you went with a different shape! And the chalkboard message.
Cheers,
Meagan
Thanks Meagan! We are big fans of the square shaped wreaths. They are so simple and quick to make.
I love this wreath. And the little red bird is perfect! Great tutorial too!
We were so excited to find that bird shaped piece of driftwood. It was meant to be:)
Love this!! LOVE the addition of the birch piece with chalkboard paint to change the message! I could definitely make this easily 🙂
Absolutely, it’s definitely an easy wreath to make. Have fun making it and thank you for stopping by to visit!
How cute! I love all of the natural elements!
That’s our favourite part too:) Thank you for visiting our blog!
Your wreath is so sweet, love the red bird, and chalkboard, and the birch…just love it all.
Thank you so much! We have such great memories making it. And we love that we can keep the base and just change out the pine branches as needed.
I love, Love, LOVE this wreath! I love how you used natural elements and the highlight is the small little red bird. Very effective!
It’s as natural as you can get. We literally scavenged the property one afternoon and came up with all the materials. Luckily for us we were at our parent’s cottage.
I’m a sucker for birds in Christmas decor! This is so simple and stunning, I love it! Well done ladies 🙂
We are suckers for birds in Christmas decor too. Well actually, all year round! And how exciting it was to find a piece of driftwood that resembled a bird!