Easy DIY Stickers with the Munbyn Thermal Label Printer

If you’re looking for a simple way to make stickers at home, then you’ve come to the right place! We’ll show you how truly quick and easy it is to make DIY stickers with the Munbyn thermal label printer. Whether you’re looking to make unique stickers for your small business or simply for personal use and fun, you’ll love the versatility and ease a Munbyn thermal printer offers.
This post is sponsored by Munbyn. All opinions are our own.

What is a Thermal Printer?
Simply put, it is a type of printer that uses heat to create text and images on thermal labels and papers. A layer of transparent film on the thermal labels darkens as the area is heated. So unlike a regular inkjet printer or laser printer, thermal printers don’t require ink and toner cartridges. It produces an excellent print quality that is both clear and crisp while being cost effective and environmentally friendly.
Different Ways to Use DIY Stickers
Creating stickers at home allows you to add a personal touch to completed crafts, household items, gift tags, greeting cards, invitations, envelopes and so much more.
Munbyn has a variety of thermal labels available in different shapes, sizes and colors, which means there’s something for every purpose and occasion. For example, you can create a cute sticker for water bottles or make some planner stickers to keep yourself organized. Additionally, you can create some pretty flower stickers or clever bumper stickers for the car. With so many creative options, you’ll be making a new project at every chance you get.


Additionally, the labels are BPA free, waterproof, and oil-proof so they can confidently be added to a variety of surfaces and products. An added bonus is that even with its strong adhesive, the Munbyn thermal sticker labels are easy to peel off without leaving behind residue.
How to Make Easy DIY Stickers with Munbyn
Printer Set Up
The first step is to set up your thermal printer by following the instructions in the user guide provided. In no time at all, you’ll be ready to start sticker printing. Although we used our laptop computer, you can even print wirelessly from your iPhone or Android smartphone using the Munbyn Print App.
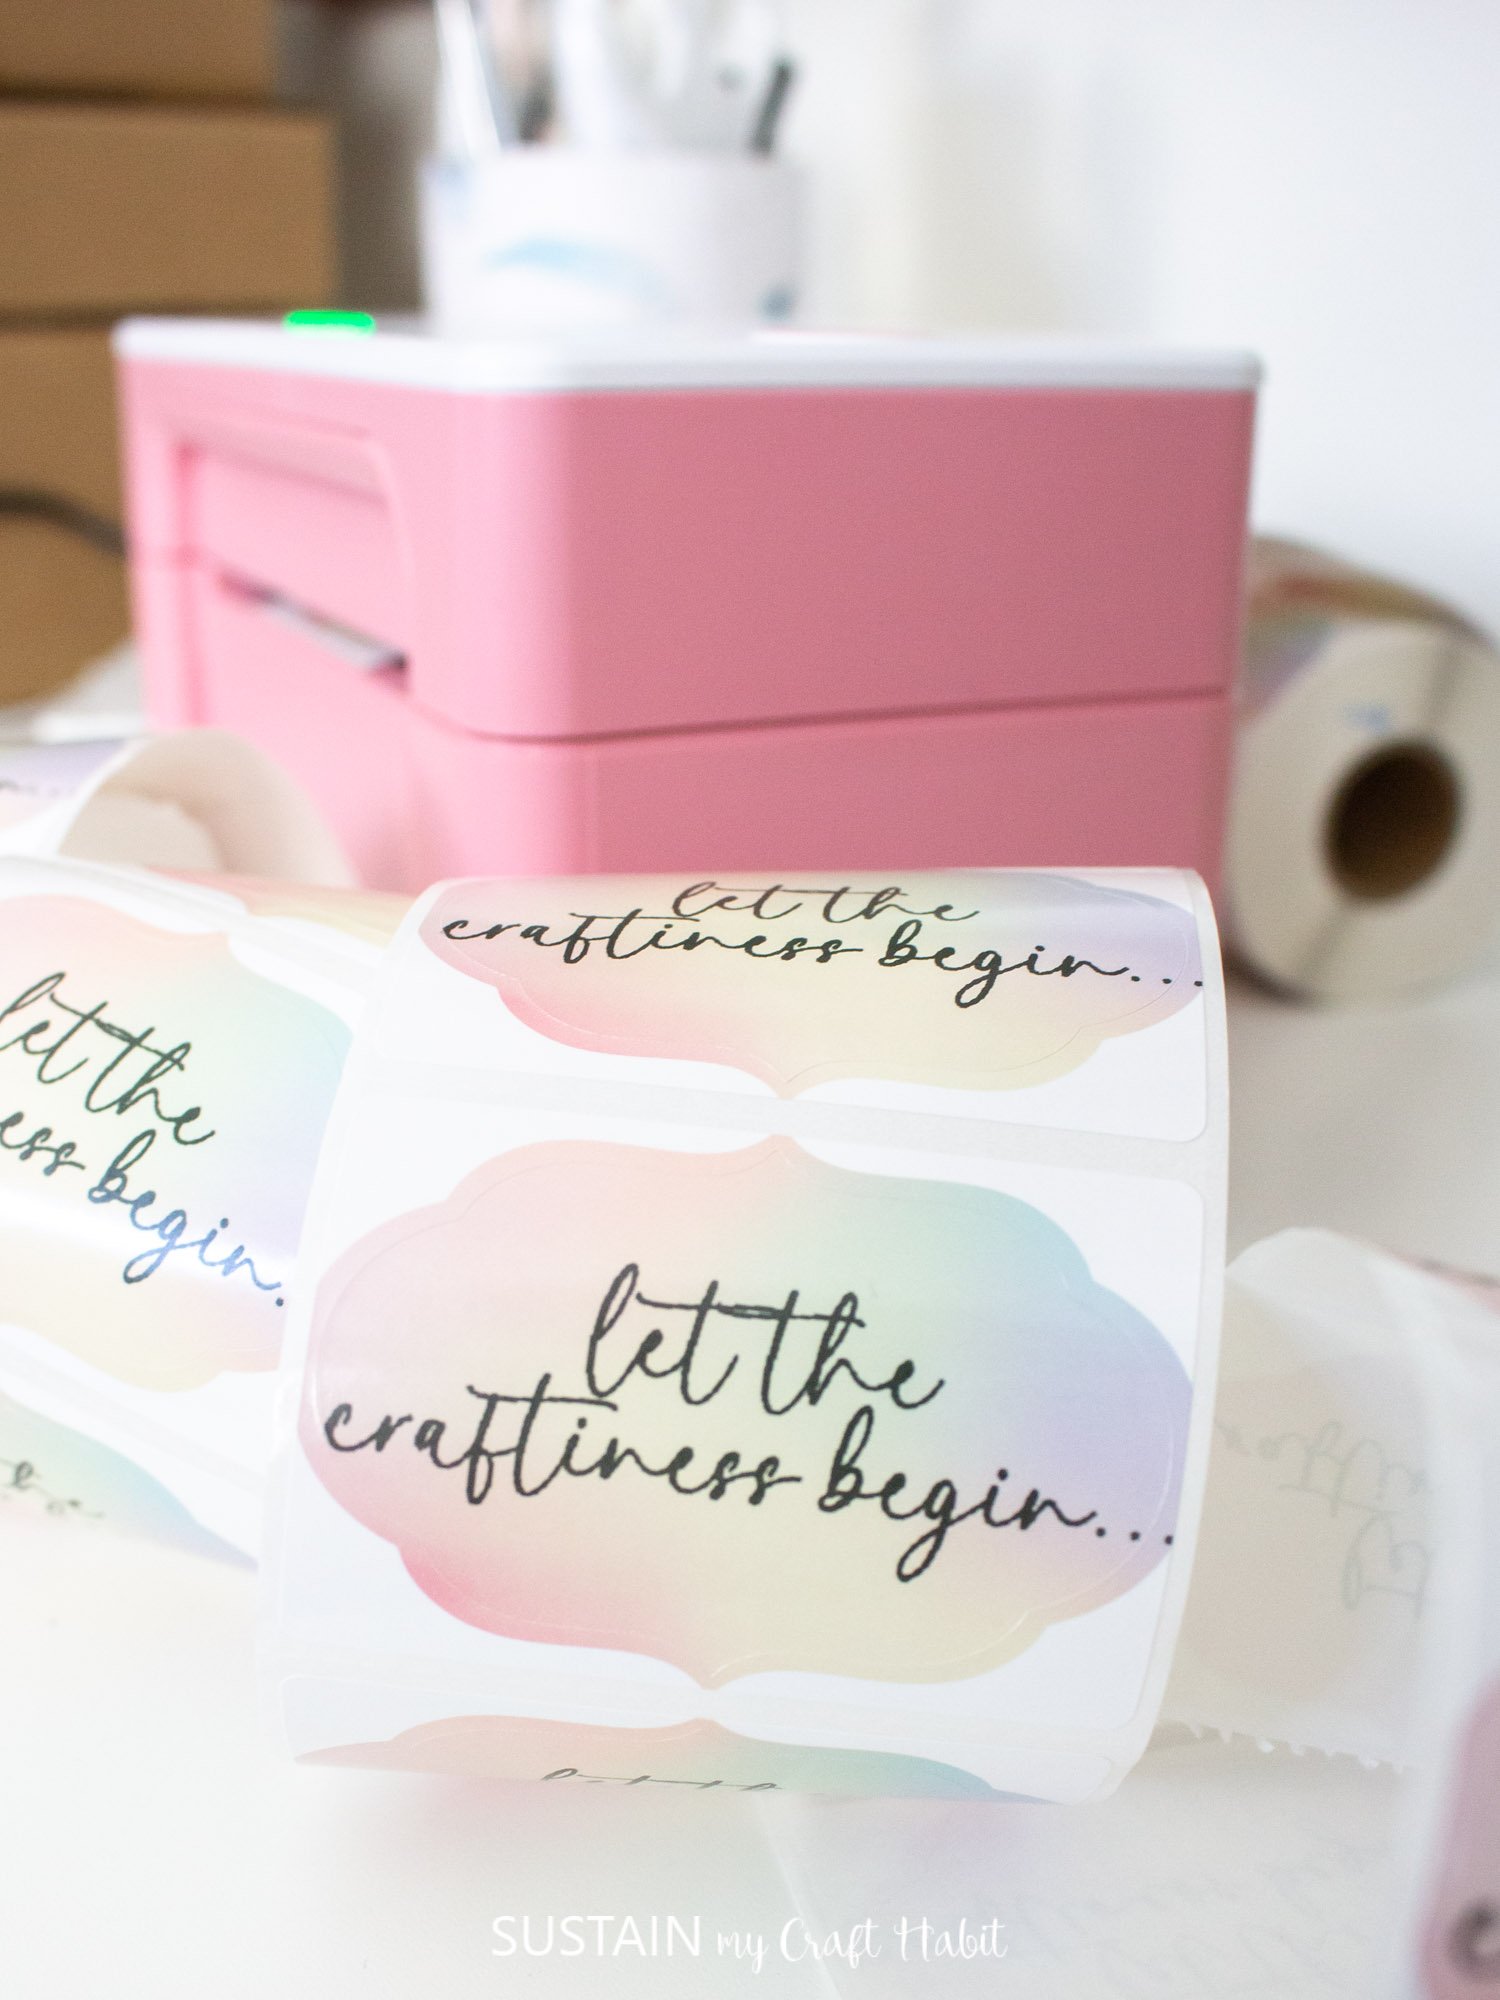
Now that the printer is set up, choose the sticker label you wish to use. Munbyn has a variety of thermal sticker labels available in their online store that come in different colors and creative shapes. We’ve used these irridescent uniquely shaped sticker labels to make our packaging stickers on our craft boxes. Being able to use different labels will instantly give you different looks for your homemade stickers.
Creating the Sticker Design
Next, choose the sticker designs you wish to print. We chose this “let the craftiness begin” svg design to add to our craft kit boxes which gives an extra professional look to our finished product. You can search for digital images to use for your stickers either as a free download or to purchase.

Alternatively, there are several design software programs you can use to create your own design. We use Adobe Illustrator to make our designs but some other convenient options include using free Canva or the Munbyn Print App to design images and text. You can really play around with the different designs when it comes to making your own stickers.
With the design open on your device, adjust the size to fit your label sticker size. In our case, we sized the text to 2.25″ wide since our sticker label was 2.5″ wide.

The next step is to select the print button and then ensure the MUNBYN printer is selected from your printer drop down menu.

Adjust the media size to match the label sticker size you are using.

If the same media size is not available in the drop down menu, you’ll need to create a custom size to match the label sticker size you are using. In the settings folder, choose Printers & Scanners and then adjust the label size under “Page Setup”.

Save the specifications under a new name for easy reference: for example 2.5″x1.5″ (64mm x 38mm) or whatever your sticker label measurements are. Select “apply” to save your settings.

With the new media size selected, the next step is to ensure “Do Not Scale” is selected under the scaling option.

Adjust the number of copies you wish to print and then click on “print”.

With the design open on your device, the next step is to select the print button and then ensure the Munbyn printer is selected from your printer drop down menu.
We suggest doing a test run of the design to ensure the positioning and size of the print is to your liking. Once you’re happy with it, print as many or as few stickers in no time at all. In fact, the thermal label printer can handle large quantities printing up to 72 labels per minute which will save you lots of time so you can keep creating.

Other Uses for the Munbyn Thermal Printer
For our small Etsy business, using the Munbyn shipping label printer to print shipping labels is a must. Now that we’re using the thermal printer regularly, we’re amazed at how we managed without it all these years. Although it meets basic printing needs, it produces a high quality resolution meaning it can even be used to print barcodes and QC codes as needed.
With its compact size and shape, the Munbyn thermal printer can simply be moved out of the way when you’re done using it. I keep mine in my craft room, the pretty pink aesthetic works well with my creative space but it also comes in a solid white color.

After using the Munbyn Thermal Label Printer we were reminded of how much fun stickers can be! Honestly, who doesn’t love stickers? And now that we can make them at home the easy way, the sky is the limit when it comes to making individual stickers!
What DIY stickers would you make with your own Munbyn Thermal printer?
Like it? Pin it for later!