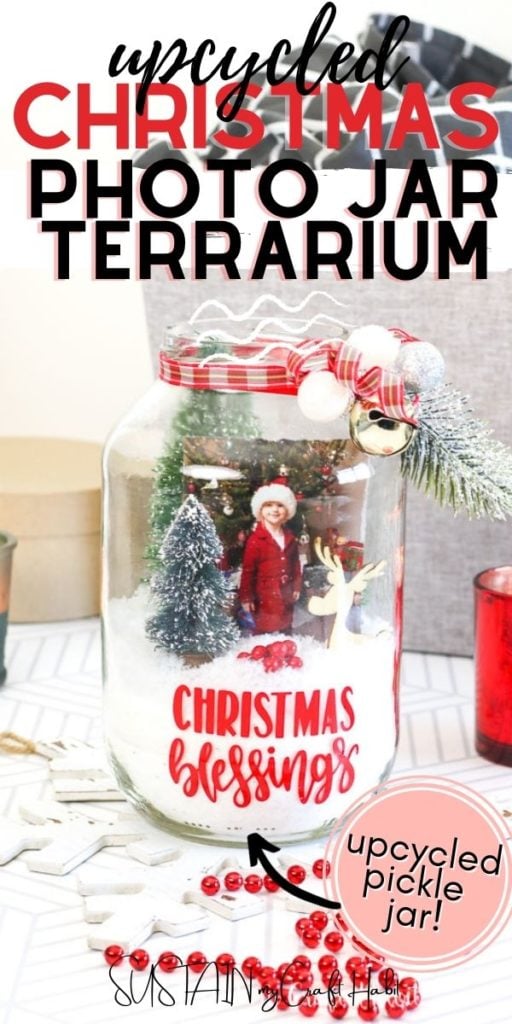
Pickle Jar Christmas Terrarium
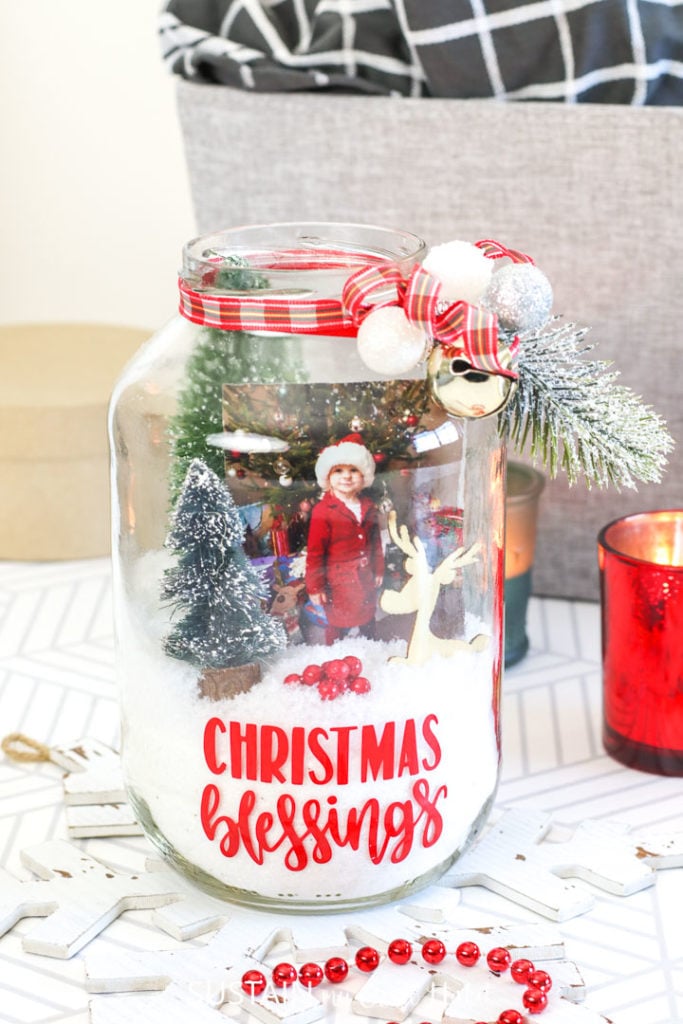
Seriously, how CUTE is this Christmas terrarium we made using an empty glass pickle jar?
Upcycled Pickle Jar Christmas Terrarium
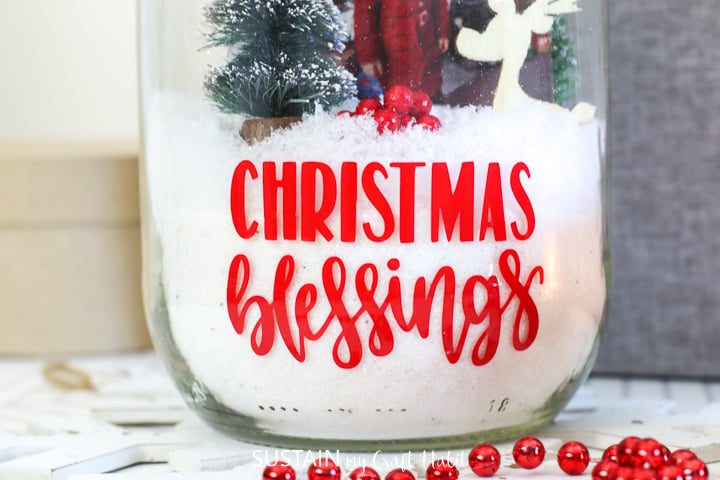
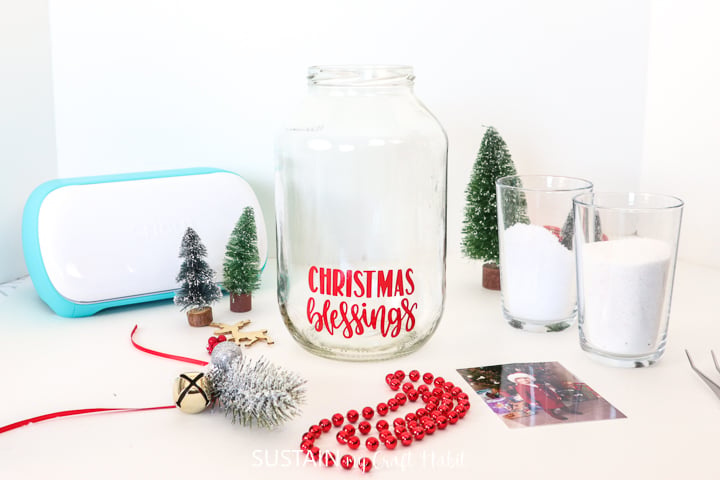
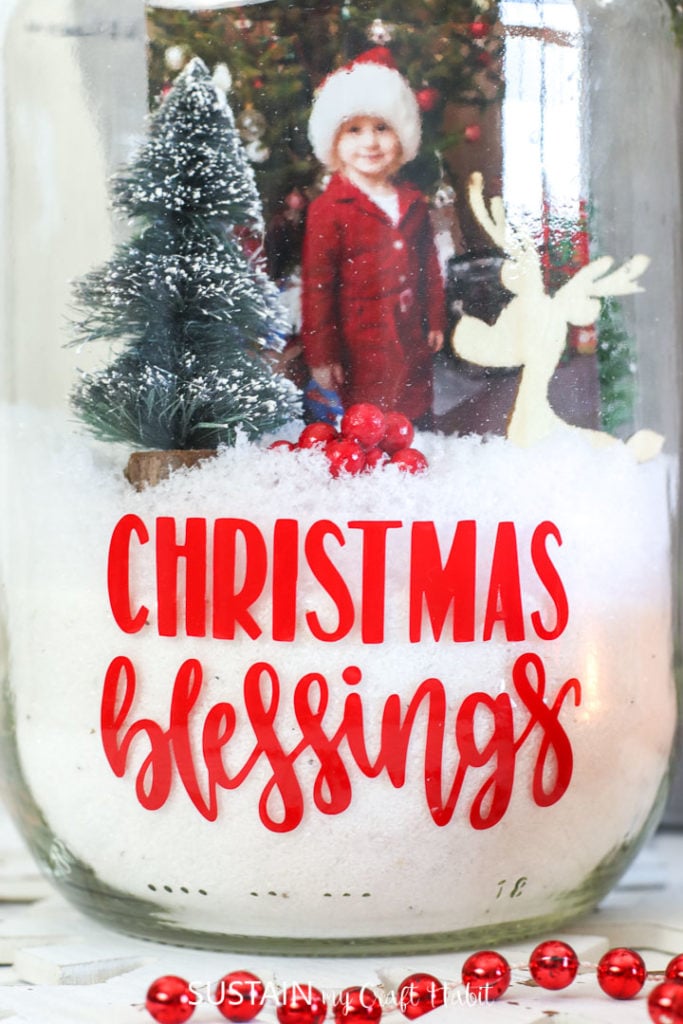
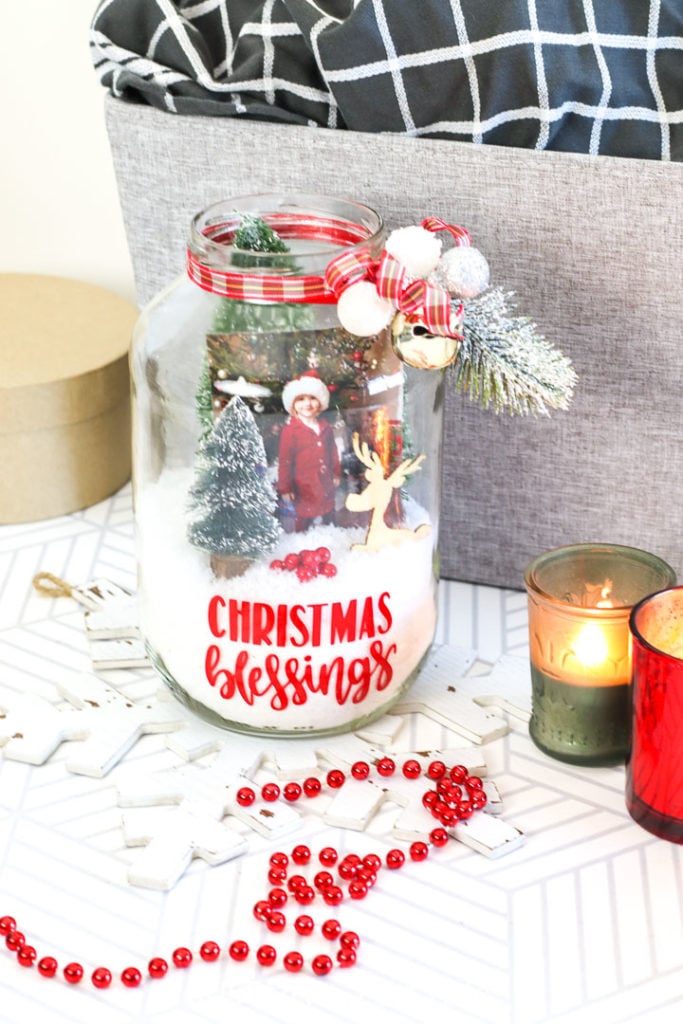
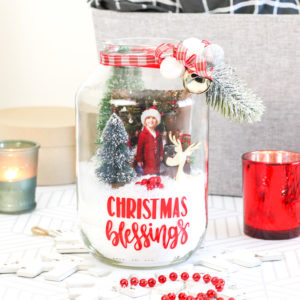
With supplies like these bottle brush trees, a wooden reindeer cutout, soft white snow and a photo of my eldest from Christmas past all captured inside a large glass jar, how could this craft be anything but perfectly adorable? We started off by using our Cricut Joy to cut out the phrase “Christmas blessings” in a pop of red vinyl and then applied it to the front of the jar.
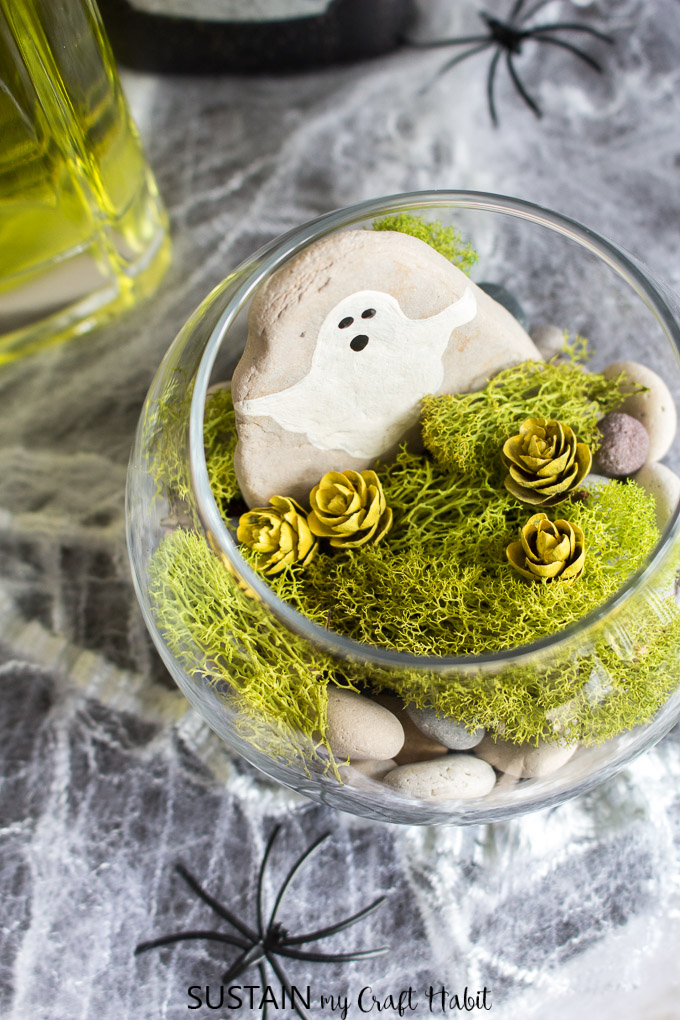
We’ve made other terrariums in the past such as this beachy air plant mini garden and this super cute DIY Halloween terrarium. They are actually a lot of fun to make and assemble and knowing you can use supplies you already have at home make this craft even funner.

Halloween Terrarium 
Beachy Garden Terrarium

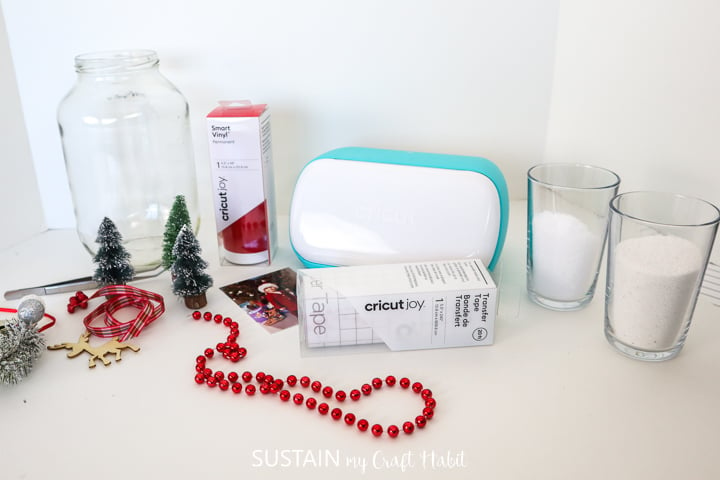
Materials Needed to Make a Christmas Terranium
Disclosure: This post contains affiliate links for your shopping convenience. Should you choose to purchase through them, we will make a small commission at no extra cost to you. You can read our full disclosure policy here.
- Large glass jar and lid; use jar with a smooth, round surface on all sides (such as a large pickle jar)
- 2 cups white sand
- 1 cup fake snow
- Different sized bottle brush Christmas trees
- Decorative ribbon and greenery
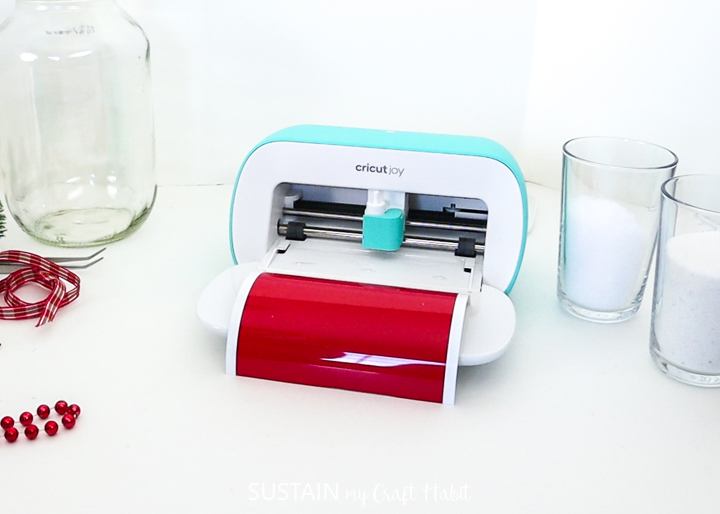
- Cricut Joy
- Smart Vinyl, Permanent in red
- “Christmas Blessings” project template in Design Space – #MC76B557
- Weeding Tool
- Photo of your choice, printed and cut to fit inside the jar
- Other decorative accessories such as reindeer wood cutout, red berries
How to Make a Terranium in a Jar:
Preparing the Supplies
Thoroughly wash out the jar and remove any labels. If warm soap and water doesn’t remove the labels entirely, a product such as Goo-Gone works well.
Open the Design Space site and upload the “Christmas Blessings” project template.
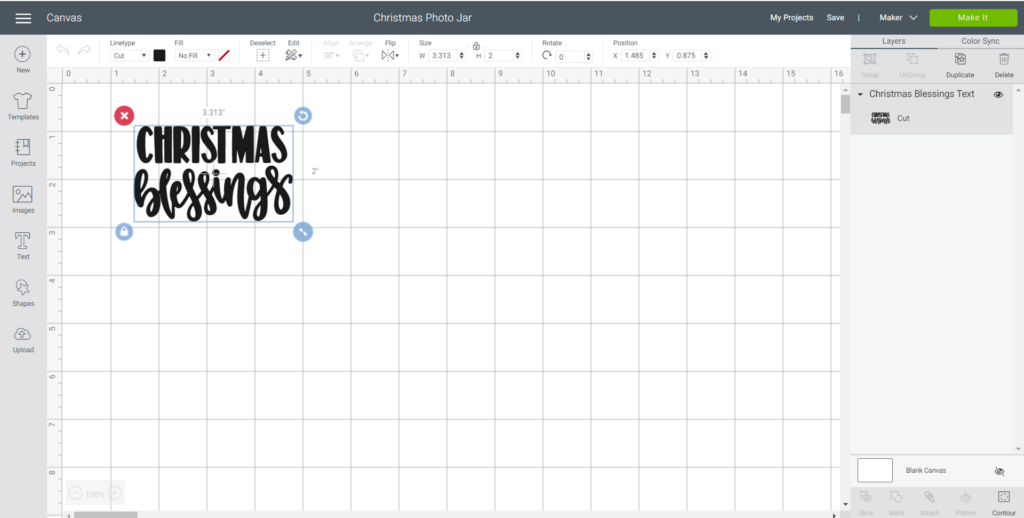
In the toolbar, adjust the width of the template to 2” high. Click “Continue”.
Load the Smart Vinyl into the Cricut Joy cutting machine following the prompts on the screen and unload when complete.
Weed out the lettering discarding the excess vinyl and keeping only the lettering needed.
Apply a piece of transfer tape to the lettering and remove the backing from the vinyl. Then place the vinyl transfer to the bottom third of the glass jar, carefully peel away the transfer tape.
Filling the Jar
Gather the supplies you need for the terrarium.
Start to layer the pieces inside the jar in this order:
- Fill about one the bottom third of the jar with clean sand.
- Pour in the fake sand on top and level.
- Cut down your photo of interest to size and place it standing up in the sand.
- Add the bottle brush trees, largest in the back.
- Place other accessories inside as well.
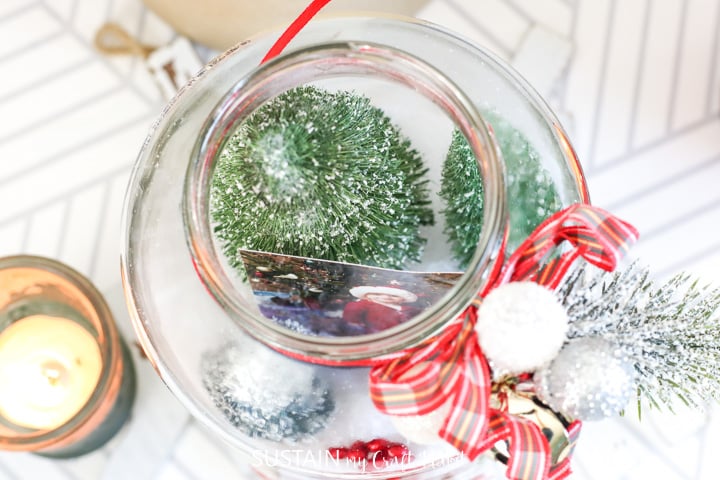
Tie some decorative ribbon and greenery around the neck of the jar and enjoy your new pickle jar terrarium for the holidays!
Like it? Pin it for later!
Pickle Jar Christmas Terrarium
Materials
- Large mason jar and lid; use jar with a smooth round surface on all sides (such as a large pickle jar)
- 2 cups white sand
- 1 cup fake snow
- Different sized bottle brush Christmas Trees
- Decorative ribbon and greenery
- Cricut Joy
- Smart Vinyl Permanent in red
- “Christmas Blessings” project template in Design Space – #XX
- Weeding Tool
- Photo of choice printed and cut to fit inside the jar
- Other Christmas accessories – reindeer cutout red berries
Instructions
Preparing the Supplies:
- Thoroughly wash out the jar and remove any labels. If warm soap and water doesn’t remove the labels entirely, a product such a goo-gone works well.
- Open the Design Space site and upload the “Christmas Blessings” project template.
- Cut out the phrase on a piece of red Smart Vinyl using your Cricut Joy cutting machine.
- Following the instructions on the screen, select “customize” to adjust the size of the phrase in order for it to fit on the mason jar.
- In the toolbar, adjust the width of the template to 2”high.
- Click “Continue”.
- Load it into the cutting machine and unload when complete.
- Weed out the lettering discarding the excess vinyl and keeping only the lettering needed.
- Apply a piece of transfer tape to the lettering and remove the backing from the vinyl.
- Apply the vinyl transfer to the bottom third of the glass jar. Carefully remove the transfer tape.
Filling the Jar
- Fill about one the bottom third of the jar with clean sand.
- Pour in the fake sand on top and level.
- Cut down your photo of interest to size and place it standing up in the sand.
- Add the bottle brush trees, largest in the back.
- Put the photo inside leaning it against the big trees.
- Place other accessories inside as well.
- Tie some decorative ribbon and greenery around the neck of the jar.