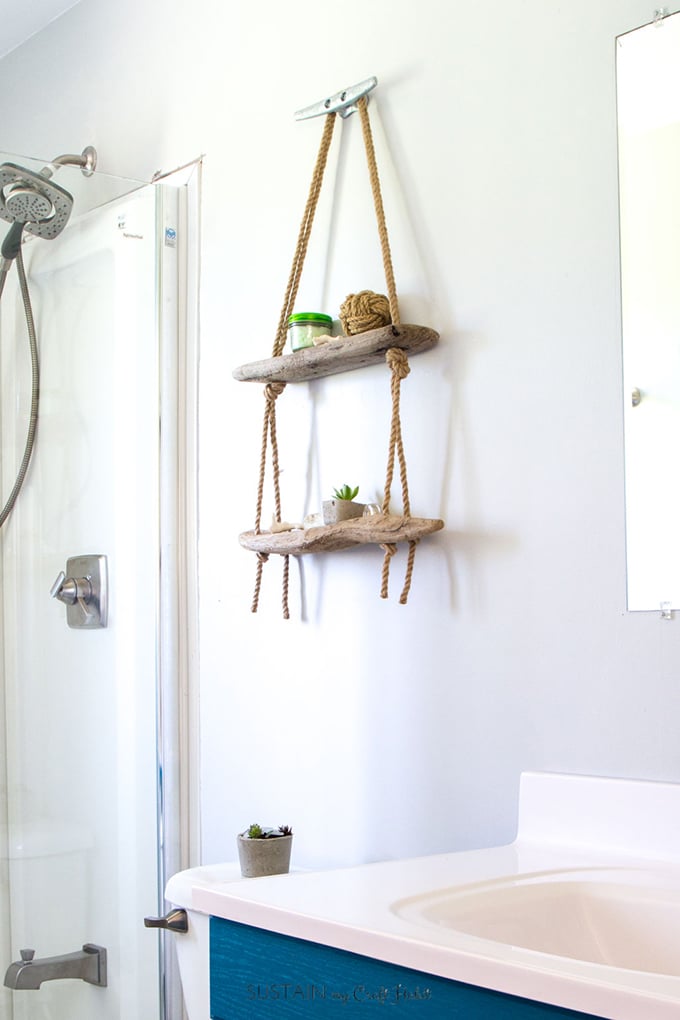
DIY Hanging Rope Shelf with Driftwood
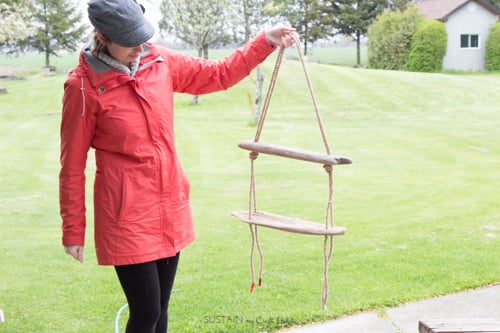
Even I have to admit, this DIY hanging rope shelf is perfectly rustic and fun. It’s coastal style at its best: minimal, functional and natural.
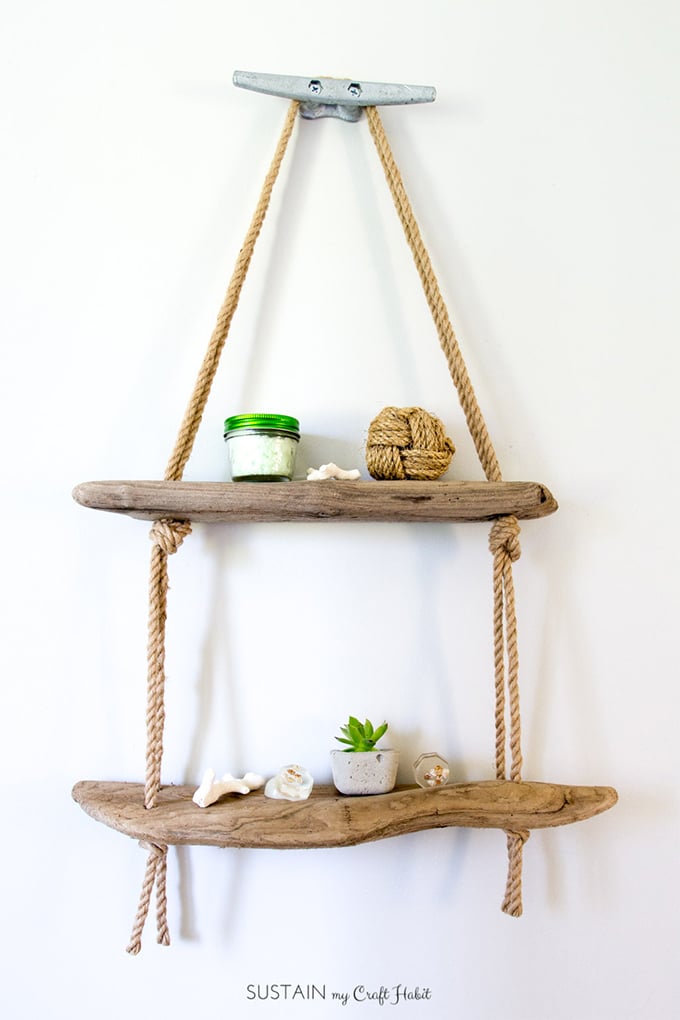
If you haven’t noticed by now, we love our driftwood. We knew we wanted to incorporate it in some way into our beach themed bathroom renovation for the Spring 2017 Edition of One Room Challenge. And at the same time, we knew we needed some additional shelving for some bathroom nick-knacks. Off goes light bulb (ding!). Once we found the perfect driftwood pieces in our collection, the hanging rope shelf idea came together very quickly.
The nice thing about this DIY is that you can also use regular wood planks or reclaimed wood such as barn board instead of driftwood. The same instructions apply! Did you catch our DIY barn board wood table with hairpin legs?
Materials Needed for this DIY Rope Shelf with Driftwood:
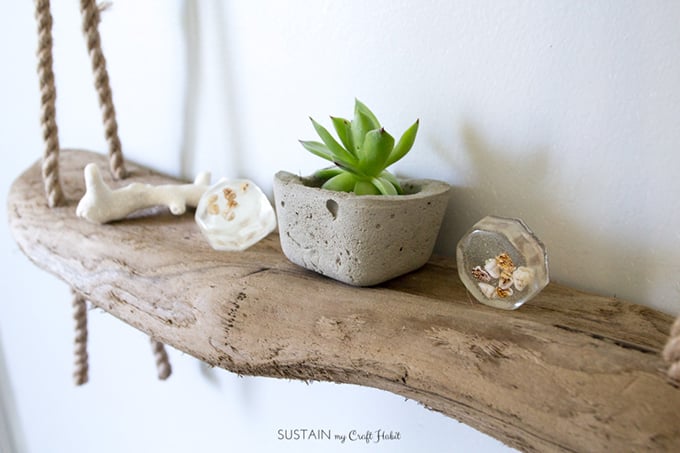
- Driftwood (x2 pieces ranging from 15” to 20” long x 5” wide) OR similarly sized wood planks or reclaimed wood or barn board
- Natural Coloured Jute Rope, 22mm thickness
- 4″ Boat Cleat, galvanized finish
- Screwdriver and large sized drill bits (is based on rope thickness)
- Scissors
- Polyurethane, clear matte spray paint
How to Make your own Hanging Shelves:
Prep Work:
- Dry and clean driftwood before using and sand down any rough edges.
- Seal all sides of the driftwood with a clear polyurethane spray paint.
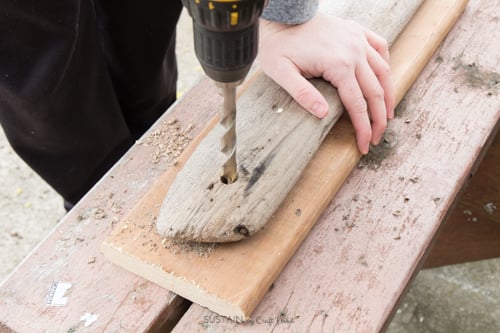
- On the larger driftwood piece (aka “bottom shelf”), mark 2 holes on both ends as shown.
- On the smaller driftwood piece (aka “top shelf”), mark 1 hole centered on both ends.
- Using a large drill bit that measures about the same thickness as your rope, drill holes through the markings. The holes on the top shelf need to be larger since two strands of the rope are threaded through the single holes.
Assembly:
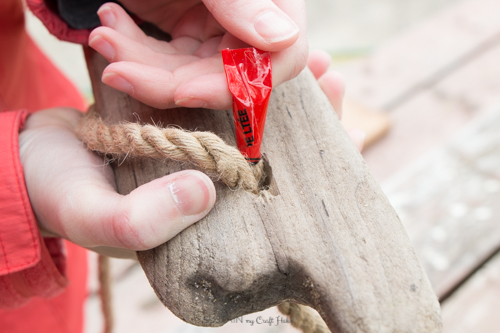
1. Cut 2 strands of rope to the required length. We cut each rope to 7′ long but it will depend on the finished size of your piece.
2. Wrap a piece of packing tape to the cut end of the rope to make it easier to thread rope through drilled holes.
3. Starting at the underside of the bottom shelf, thread a strand of rope through each of the holes on one side. Pull both strands of rope through until approx. 10”-15” of rope hangs freely below. At about 10” above the holes, knot the two strands of rope together. This knot will hold the top shelf in place.
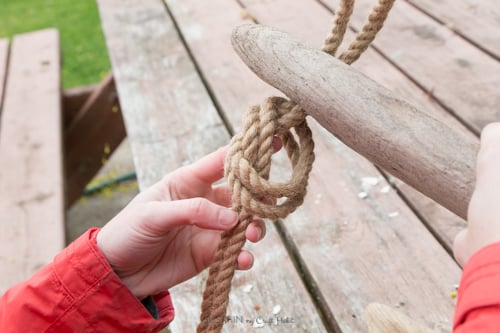
4. Thread the two strands of rope together through the larger single hole in the top shelf.
5. Pull rope over to other side of driftwood leaving long loop for hanging onto wall. Thread the two rope ends through the single hole on opposite side. Pull about 30″ of rope through and knot rope strands together to hold other side of top shelf in place.
6. Thread the single strands through holes on opposite side of bottom shelf.
7. Create a single knot under each of the 4 rope strands making sure the bottom shelf is level. You can also do this step after hanging piece to wall to make sure it’s level.
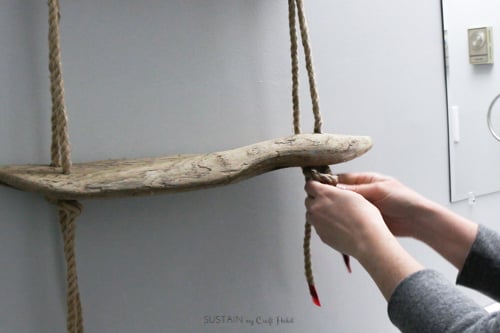
Securing to wall:
- Securely attach boat cleat to wall.
- Hang the long rope loop over the cleat to hold shelves in place.
What rustic elements do you like to bring into your home decor?

I really love this! You guys are giving me so many ideas to keep me busy this winter lol! Our garage is now my workshop .????
Haha! We’ve taken over half of our parents garage at the cottage with driftwood. Who needs to park in there anyway 😉
-Jane
Where can you get drift wood
Hi Kathy. Have you looked on Etsy.com? There are a number of people selling driftwood. You could also check Amazon – sometimes there are independent sellers on there as well.