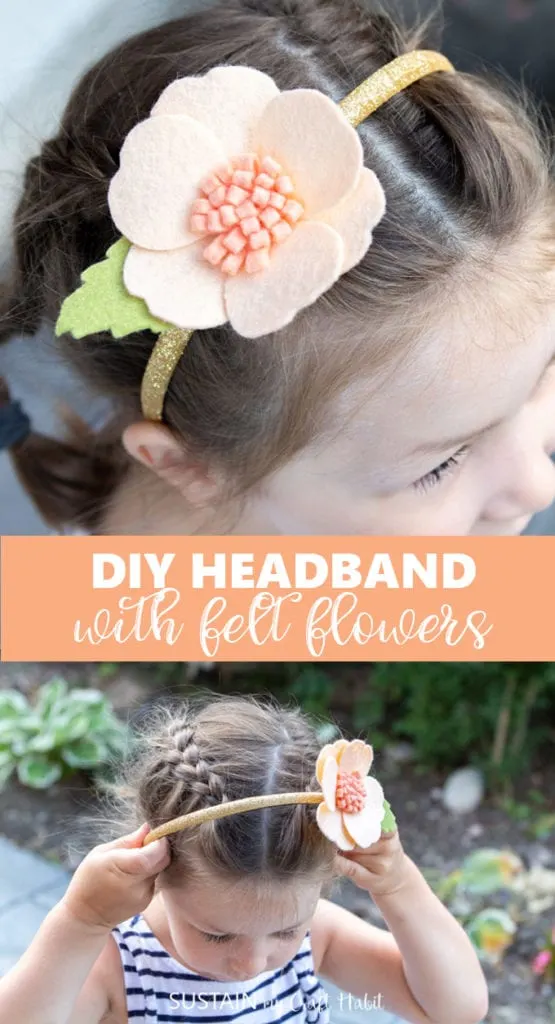
Do you know a girly-girl that loves to dress up and accessorize? If so, we’ll show you how to make her a pretty DIY headband just like this one.

Girl’s Pretty DIY Headband with Felt Flowers
My 4 year old niece only ever wants to wear dresses, the fancier and the frillier, the better. I know this preference won’t last forever so while it does, I’m going to enjoy it. Although she’s not a typical girly-girl in that she gets down and dirty catching crickets and feeding chickens, she does have a sense of style all her own.
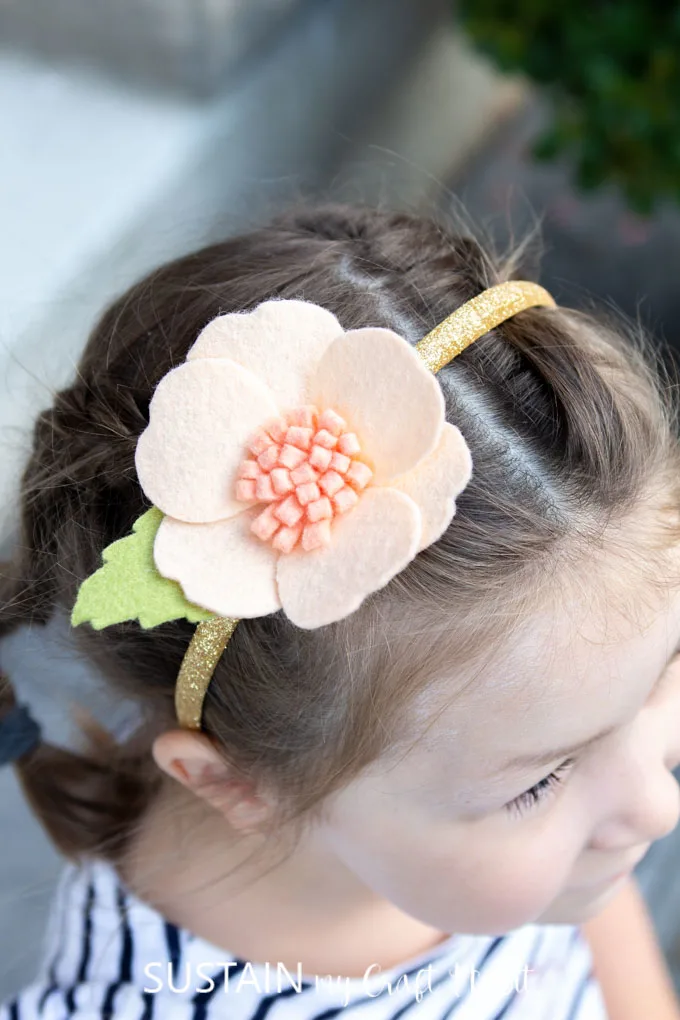
Having made these felt flower patterns earlier this year, we planned to use them in a variety of ways like this centerpiece made with cherry blossom paper flowers, a lovely spring wreath and for a pretty girl’s DIY headband. The package includes 5 different flower patterns: cherry blossom, anenome, cosmos, ranunculus and primrose. For the headband I used the primrose pattern but any one of the patterns would work well or even a combination of the two like ranunculus and cosmos.

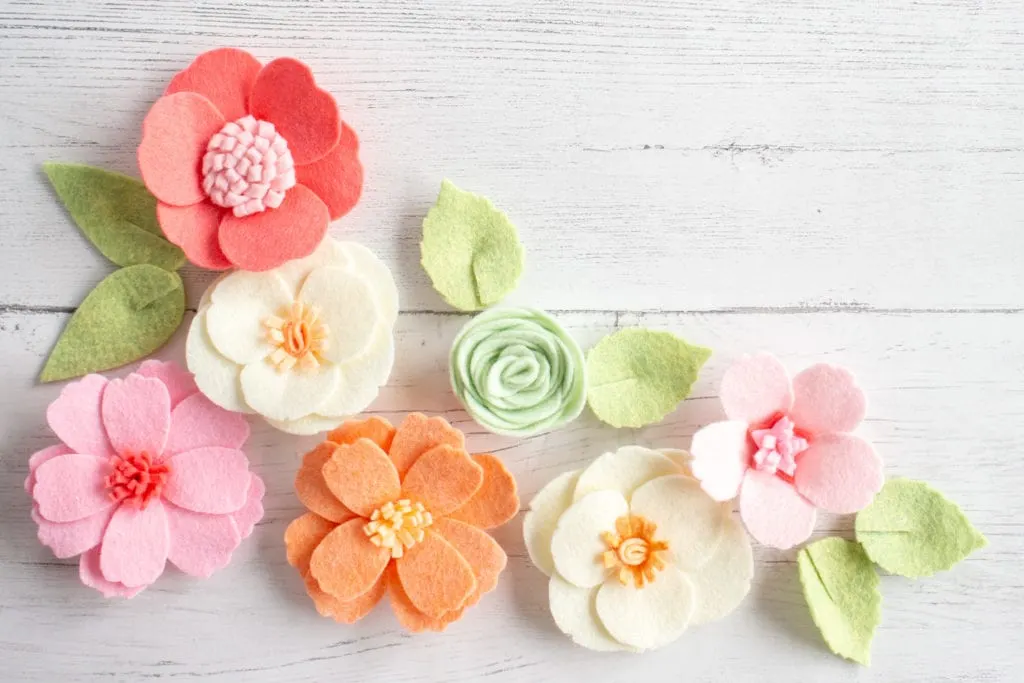
The color combinations make all the difference and we instantly fell in love with the melon sorbet collection of wool felt sheets from Benzie Designs. The felt is merino wool and viscose blend and the color groupings are stunning! Any of the colors you choose in the collection look perfect together. We also purchased the wool felt in succulent colors which we used to make these potted felt succulents with this felt succulent patterns.
Materials Needed for a DIY Flower Headband:
- Felt Flower Pattern, Primrose and Leaf Pattern
- Wool Felt Sheets in melon sorbet colors
- Girl’s Glitter Headband (these simple glitter plastic headbands would work well)
- Glue gun and clear glue sticks
- Sewing needle and matching thread
Instructions for Making a DIY Flower Headband:
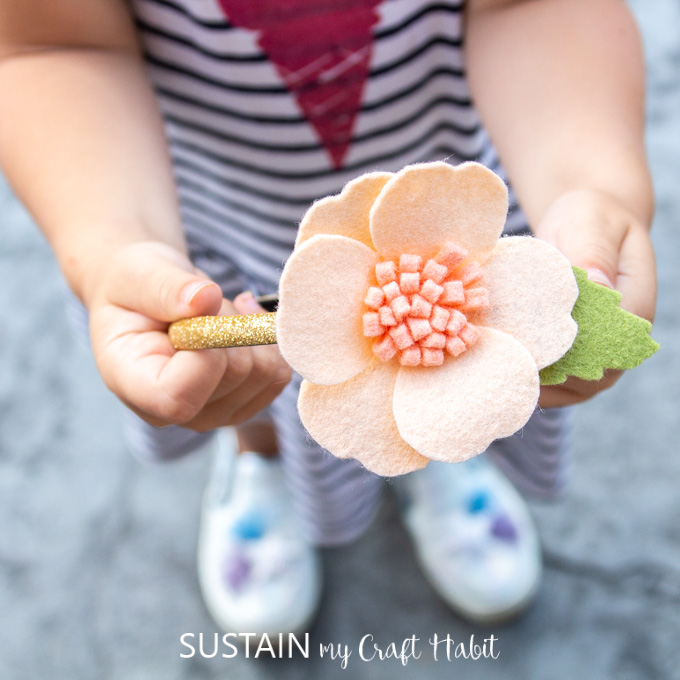
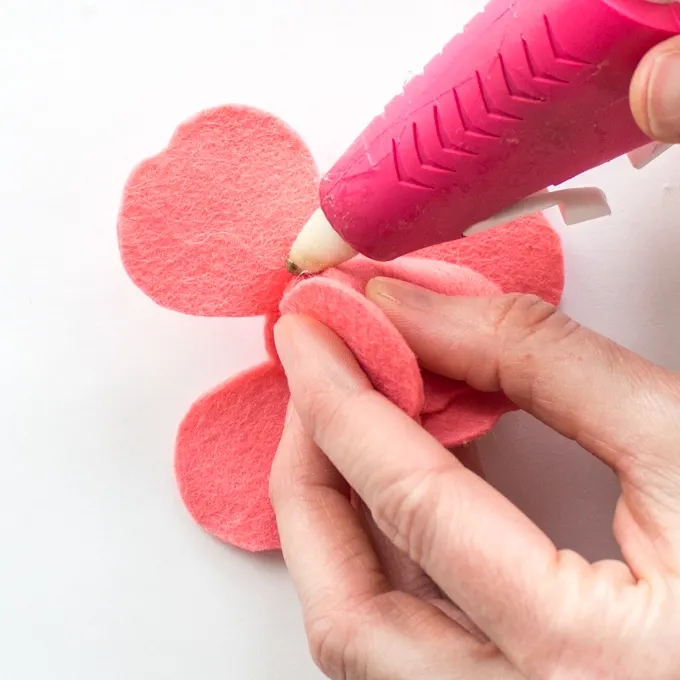
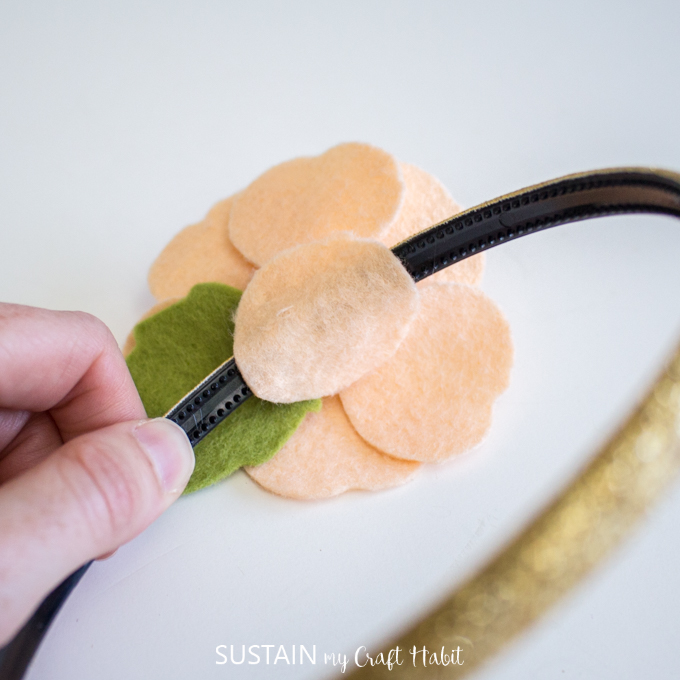
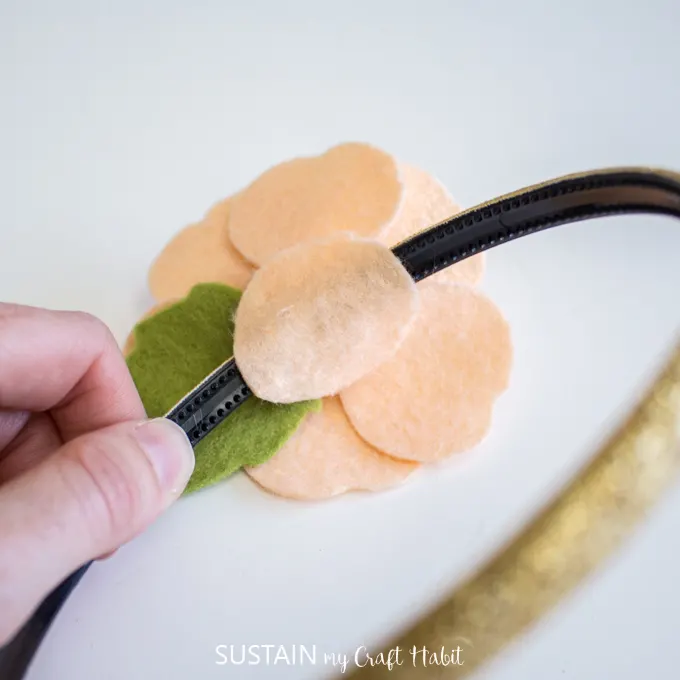
Cut out the primrose flower pattern in the color combination of your choosing. Next, cut out one of the larger leaf patterns as well in a coordinating green color.
Assemble the flower and leaf pieces as instructed in the pattern guide. This is showing another colored felt primrose flower we assembled.

Position the flower a couple of inches away from the center of the headband. Using a sewing needle and matching thread color, attach the bottom of the felt flower to the headband.

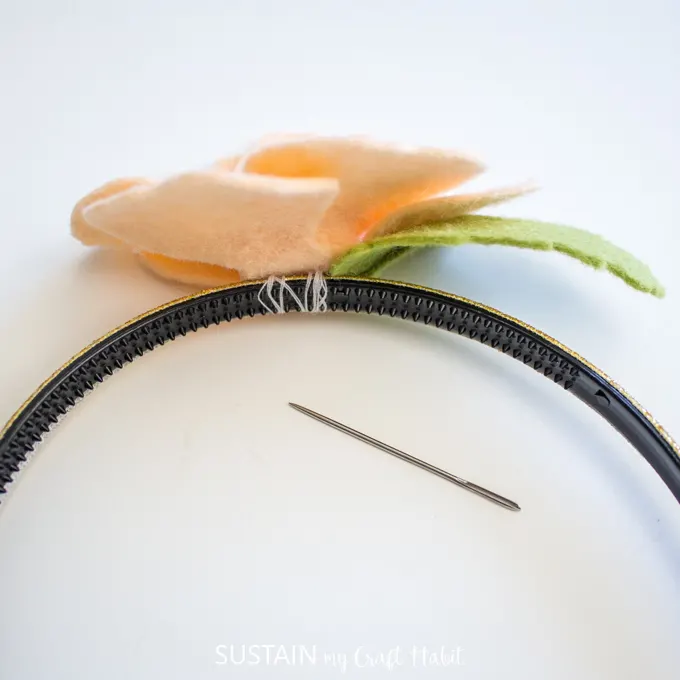

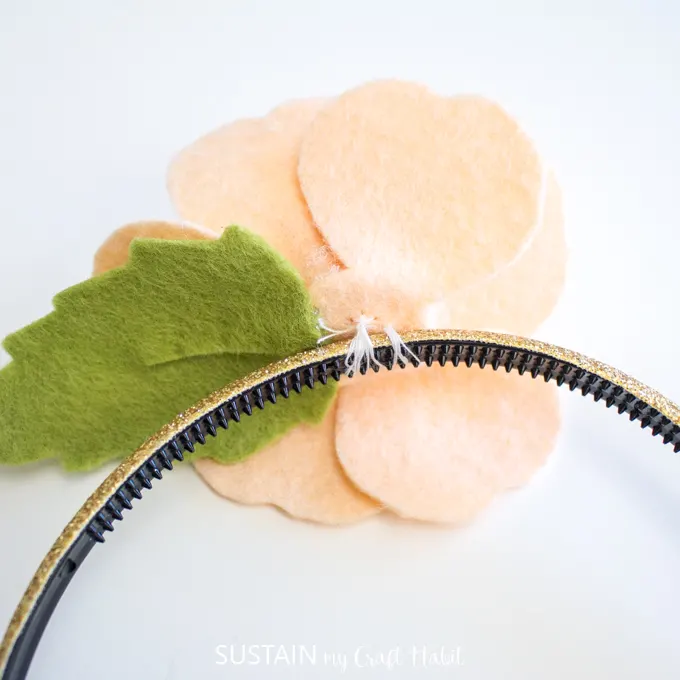
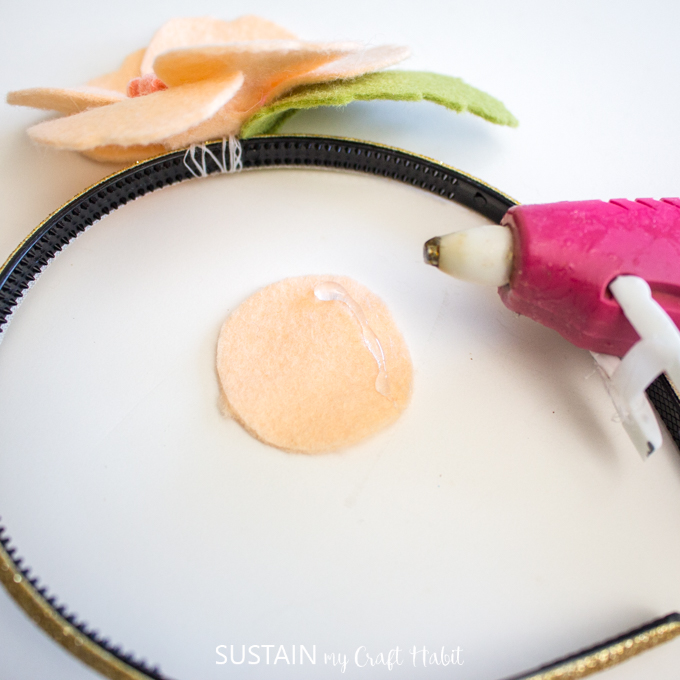
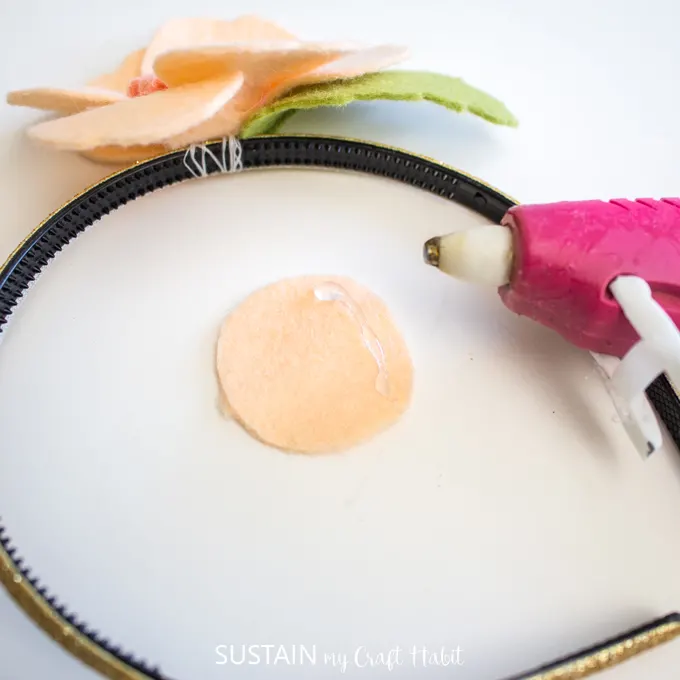
To hide the stitching, you can cut out a small sized circle (about 1” diameter) in the same flower color.


Then heat up the hot glue gun and apply a bead of glue on the circle and place it over top of the stitching as shown.
And with that I now have a pretty flowery headband to give to one beautiful, creative and unstoppable girl. Or for an older fashionista learn how to make a DIY scrunchie – there are three different ways!


Like it? Pin it for Later!