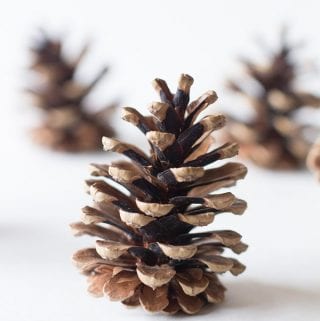
How to Clean Pine Cones for Crafts (3 Easy Steps!)
There are so many creative ways to use pine cones in your crafting, wedding, home decor and more. If you’re wondering how to clean pine cones for crafting, you’ve come to the right place. Whatever your inspiration, we’ll show you a simple and natural way of pine cone cleaning before you start your craft.

How to Clean Pine Cones for Crafting
We love to create rustic decor and crafts using pine cones, such as our DIY wall hanging and our easy DIY burlap wreath. Or create pretty pine cone roses or pine cone flowers for Halloween with them. We even have a whole collection of pine cone Christmas crafts you can make!
We take our cones pretty seriously as we’ve been selling beautiful Canadian pine cones in our Etsy shop for a couple of years now. Over that time we’ve collected and cleaned thousands of pinecones!
Join our crafting community to sustain your craft habit with nature-inspired DIYs and upcycled craft ideas. It feels good to repurpose, upcycle and create with nature!

Do pine cones need to be cleaned?
It’s a good idea to always clean pine cones to ensure they are free of dirt, insects or other clippings and debris. This is particularly important if you are planning to use them in tablescape projects such as a centerpiece, place card holders or napkin weights.
You can check out how we recently used them to make DIY pinecone pineapple party decorations.

Pine cones make great accessories for rustic weddings, supplies for stunning DIY pine cone wreaths and can even be used for practical reasons, such as campfire starters!
When is the Best Time to Collect Pine Cones?
It might surprise you, but pine cones aren’t readily available all year-round. We have the best luck collecting ours in the late spring and early summer when they’re most abudant.
If you have the option, consider collecting them right off the tree rather than after they fall, as they’re likely to be cleaner. Pine cones that stay on the ground start to change color and collect dirt.
And if you’re going pine cone collecting, wait for a dry day. Pine cones close up with moisture, making them more difficult to find and collect.
Now that you’ve got your pine cones, let’s get them cleaned.
Supplies Needed for Cleaning Pinecones:
*This post contains affiliate links for your shopping convenience. You can read our full disclosure statement here.
- Pine cones
- Scrubbing Brush*
- Dish washing detergent
- Warm water
- Cookie baking sheet
- Parchment paper
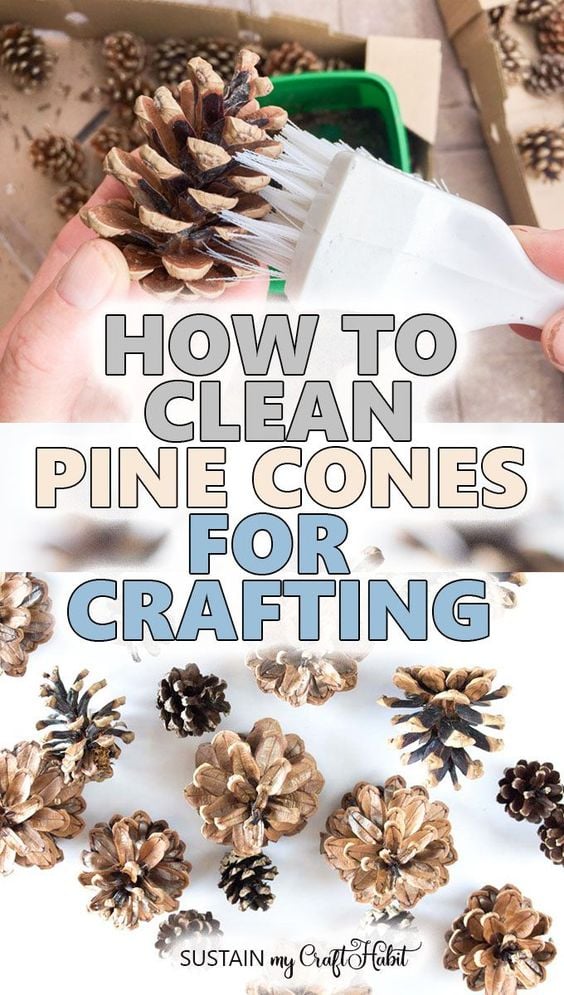
How to Clean Pine Cones:
- Using a coarse brush, scrub away at and in between the scales of the pine cone to loosen the seeds and remove grass and needles.

- If your pine cones have a lot of dirt and dust on them, you may want to wash them as well. Pine cones will close up when wet, so you’ll want to work quickly in small batches. Add the pine cones to a small bucket filled with warm water and a bit of dish washing soap. Before they have a chance to close up, scrub away the dirt. (Note: the pine cones will open back up on their own after 1-2 days).
- Line a flat baking sheet with parchment paper. Place a single layer of scrubbed (and washed, if applicable) pine cones on the lined baking sheet. Preheat oven to 220 degrees F. Bake the pine cones for 25-30 minutes (Note: oven temperatures vary so ensure to closely monitor the pine cones while baking in the oven.).


If you’d rather not go through the trouble of collecting and cleaning your own, or if they aren’t readily available to you, you can purchase beautiful cleaned pine cones directly from our Etsy shop.

Happy pinecone crafting (and cleaning)!
Join our crafting community to sustain your craft habit with nature-inspired DIYs and upcycled craft ideas. It feels good to repurpose, upcycle and create with nature!
How to Clean Pine Cones for Crafts (3 Easy Steps!)
Materials
- Pine cones
- Scrubbing brush
- Dish washing detergent
- Warm water
- Cookie baking sheet
- Parchment paper
Instructions
- Scrub out dirt and seeds with a scrubbing brush.
- If necessary, wash the pinecones in small batches with soap and warm water.
- Bake the cleaned pine cones on a flat baking sheet lined with parchment paper. Oven temperatures vary so ensure to closely monitor the pine cones while baking in the oven.
Like it? Pin it for later!

I would have never thought to search the web for ways to clean a pine cone, but I´m glad I found this post to do it right the next time! I love pine cones for crafts!
Thank you Johlene! We fortunately haven’t had any issues using the pine cones for crafts in the past. However, especially when they’re getting placed on plates, a little extra cleaning doesn’t hurt!
I love your instructions- I went the long route and washed, dried in oven or bleached and dried in the oven. The one step I don’t see is how to “seal” them. What is good to use? Would Mod Podge do the trick? Spray sealer? If I use spray sealer, how long do I wait to decorate them? Thank you for any help you can offer.
Hi Ladies
Thanks so much. I actually have a couple of parrots, one of which loves chomping on pine cones. So now I can clean them up properly and feel satisfied she has a safe and healthy toy to amuse herself.
I was also wondering about the little notes cards. I can’t remember when I signed up but was wondering if this nice monthly gift is up to date. Honestly I am not sure I ever did receive one email regarding a new monthly card. Would love to know if this program will continue. Love…love…love those cards and your watercolor envelope tutorial! Love you guys!
Hi Terri! I didn’t realize parrots liked to play with pine cones – makes total sense.
You are sooooo sweet with your comment about the cards. We’ve had so many things on the go that we’d honestly let them lapse a bit (the last one was released in March). It’s hard to gage sometimes what our lovely readers find the most valuable- your kind words about the cards fill our hearts and were just the kick in the pants we needed to release more. Keep an eye out for the July and August cards next week! Thank you.
I will certainly use this in the future. I love to collect real pinecones! 🙂 Thanks for this
You’re very welcome. Happy pine cone crafting!
We have a big ole pine tree next door to our house but the cones are always so sappy. Is there a trick to getting rid of the sap or is that not a good kind of Cone to use? I wanted to make up some Christmas garlands w small pinecones.
Hi Tina,
Some pine cones definitely have more sap than others. We’ve found that when you bake them, the sap hardens and becomes much less sticky, making the pine cones easier to use.
Warm regards,
Jane
Do u have to place cones in oven? Or just let them dry flat?
Hi Diane,
No, you don’t have to place them in the oven necessarily. If you leave them on a flat surface they will dry out and open up on their own. Placing them in the oven spends up that process. The heat from the oven also will kill any bugs or bacteria from the pine cones. We think this is really important if you’re planning to use the pine cones in a centerpiece or table arrangement. It’s likely less necessary for a wreath or other crafts.
We hope this helps!
Jane
Is it ok to wash them up and then put them right in the oven? I mean, let them drip dry real good first, then pop them in the oven? Kill bugs and dry at the same time! Save some time!
Hi Megan,
Yes, definitely you can! You may just want to rotate the pine cones as they’re baking as sometime they won’t up on the side that they’re resting on.
Hope that helps!
Jane
I have just moved from NY to NC I have collected a ton of pine cones with my two year old granddaughter I was so happy to find out how to clean them. Now I will be DIY for Hanukkah and Christmas, including crafting with my Luna. So exited thank you for your post.
How can you make them safe so they don’t cut you?
@Connie, I’m wondering the same thing. I collected over 200 and worked on them for 3 days and we cannot use them because those little prickly things tear up your hands.
Hi Louise and Connie, ours aren’t so prickly but even so we wear gloves if we’re trying to work quickly with them. I can’t think of another way to make them easier to handle unfortunately. -Jane
My husband and I
gathered a big galvanized wash tub full of pine cones. I have a bad back so I will do the cleaning over a few days. I am so excited that I found how to DIY with pine cones WITH tutorials. Thank you. The tutorials answered all my questions.
Thank you so much for your message. Take your time and enjoy, happy pine cone crafting!
what if you do not have parchment paper?
Then you can use an unlined cookie sheet (old one is preferrable so it doesn’t get ruined with any sap). -Jane
You can use tin foil instead of parchment.
Yes, absolutely!
I have a bunch Of pine cones that I picked a few years ago. They have been sitting in the garage, and I want to use them now. Do you think they still need cleaned and washed and oven et cetera? I just want to paint them and possibly mount them as flowers on a board.
Hi Derris. Personally I would check them to see if they still have dirt on them that needs to be washed off. If they look otherwise clean (and you’re not skittish about little spiders that may have found a home in the box) then I wouldn’t bother with cleaning. Especially if you’re planning to paint them. Hope that helps! -Jane
I’m trying to clean the pinecone I picked up this week at our lake. I have wash them with warm water and vinegar for about 20 minutes then padded them dry with paper towel. I then placed then inthe oven at 200 degrees for an hour and they haven’t opened. What am I doing wrong?
Hi there. That approach should work- the only thing I can think of is that they’re still wet on the inside and might need more time, especially if they were soaked to begin with. They can take a couple days to open on their own.
Jane