Hand Painted Jewelry Box Idea

Hello crafty friends! If you’ve visited us here before, you already know that we loooove to craft! And we appreciate crafts that are easy and straight to the point. So this latest DIY hand painted jewelry box idea (in just four simple steps), checks off all the right boxes!
A Simple 4 Step Farmhouse Paint Finish
When I recently crafted this mason jar wall sconce, I was impressed at the effect I achieved using a set of DecoArt Designer Finishes (use our code JV22H1 for 20% off your order). I managed to quickly transform a brand new wooden pallet into a rustic and perfectly aged-looking piece of wood with just a little paint!
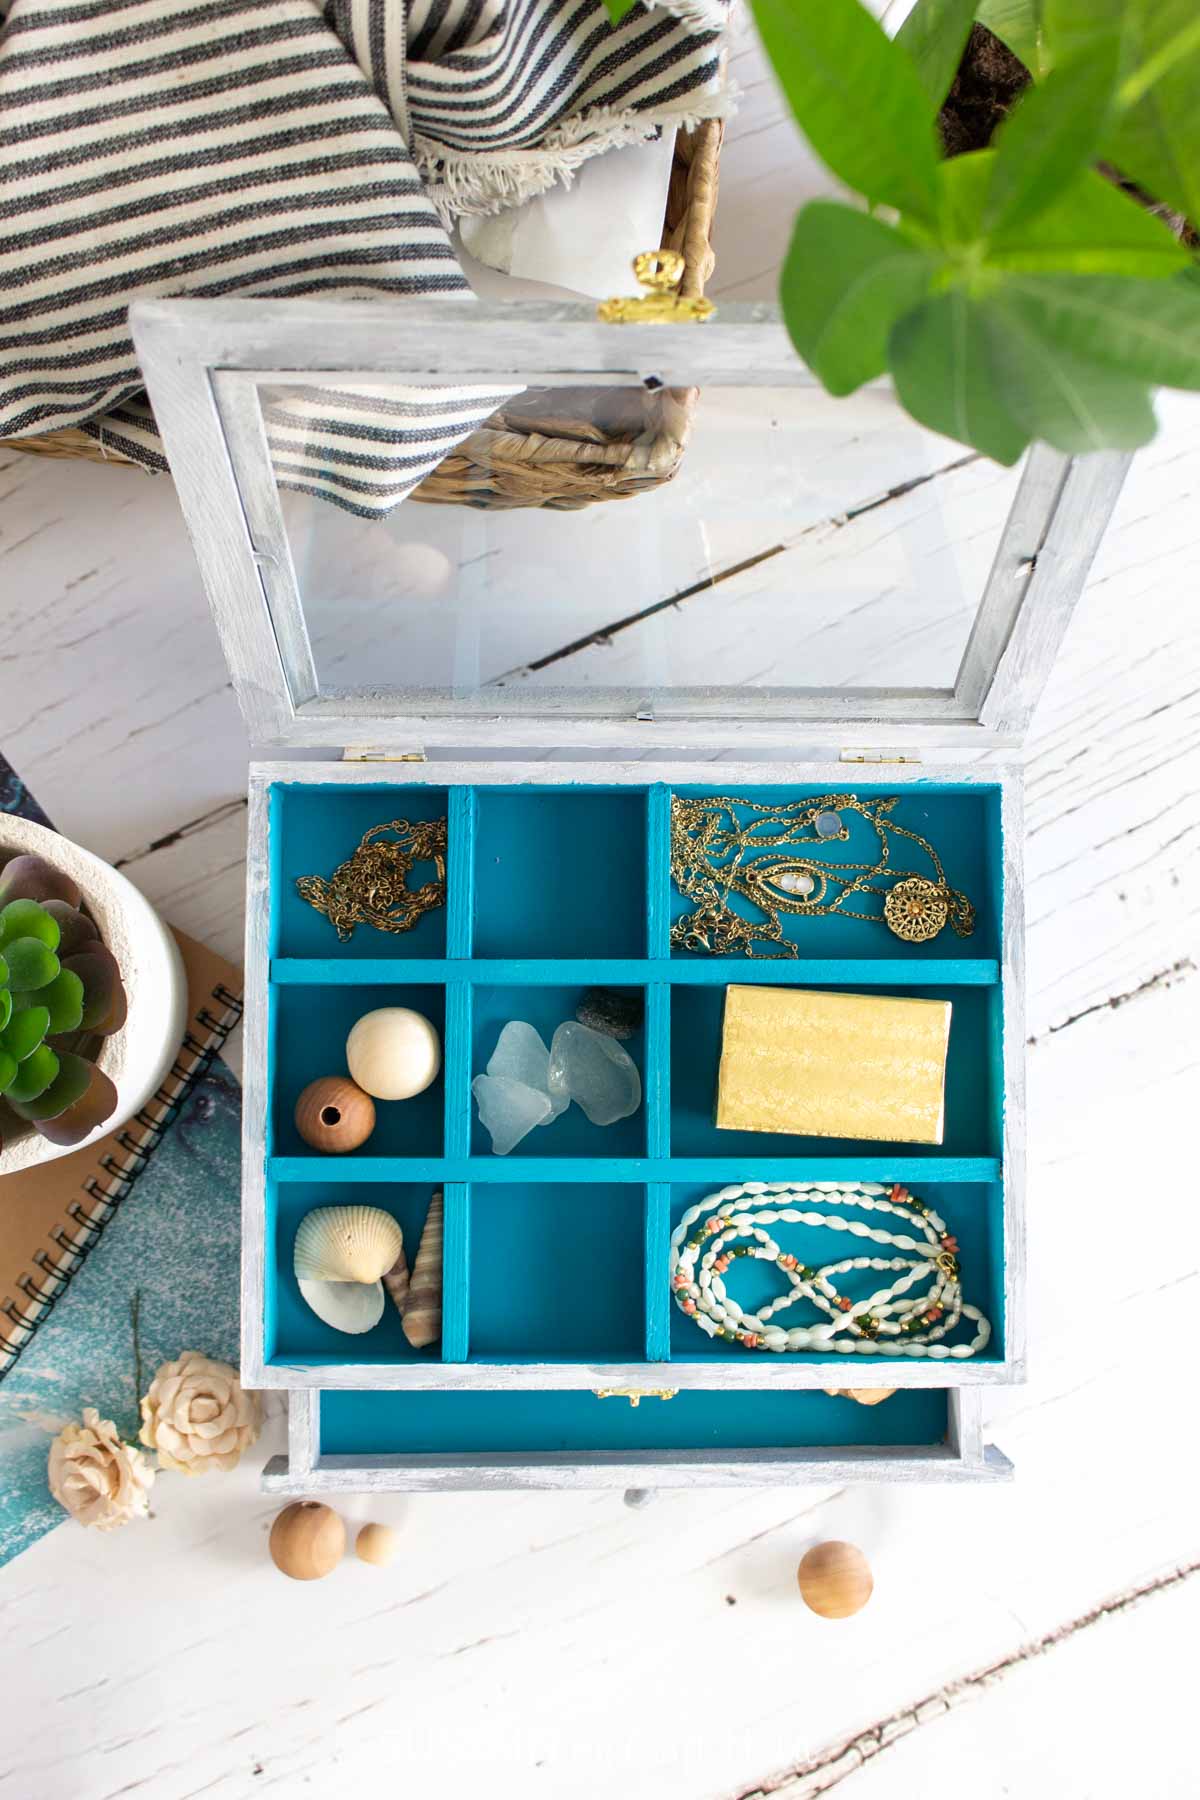
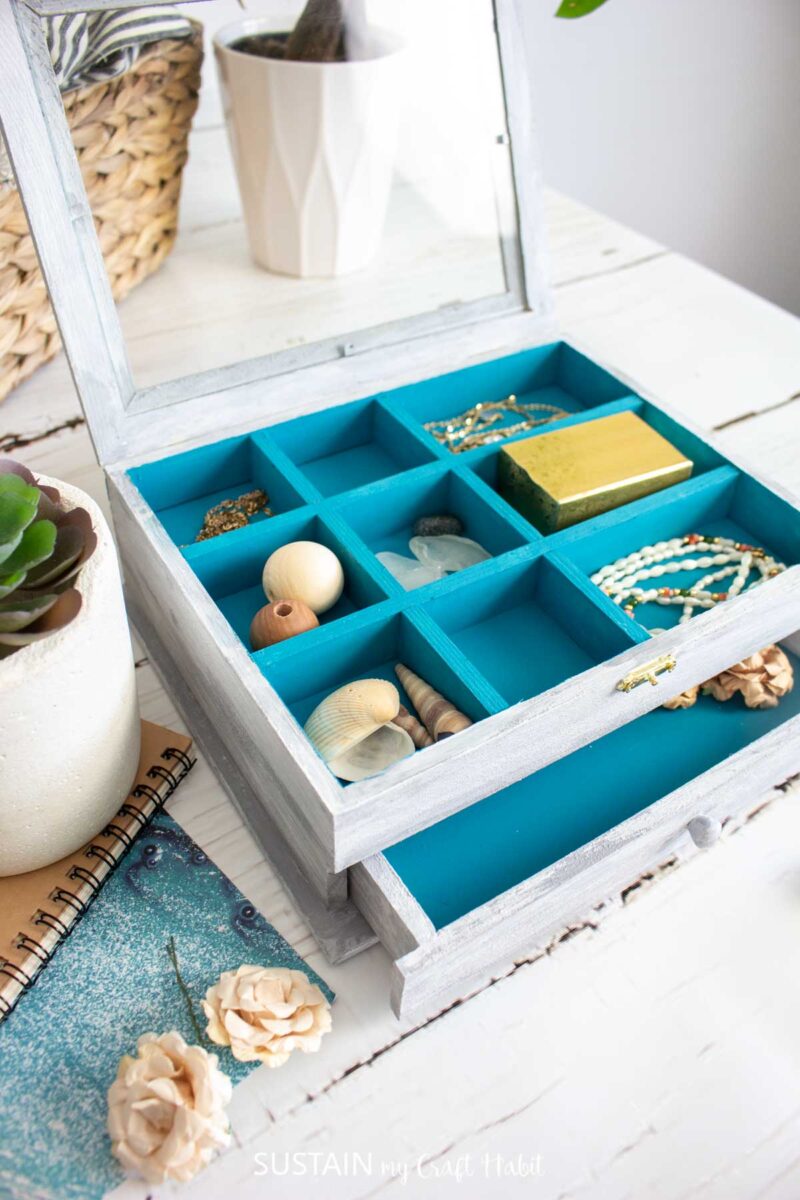
And since I loved the salt wash effect so much, I decided to also use it for painting a wooden trinket box I picked up at the craft store. Adding a pop of unexpected color to the inside of the wooden box compliments the farmhouse finish on the outside.
Want to receive a ton of inspiration and money saving ideas for decorating, gift-giving and crafting? Join HERE (it’s free)!
Materials Needed
Disclosure: This post contains affiliate links for your shopping convenience. Should you choose to purchase through them, we will make a small commission at no extra cost to you. You can read our full disclosure here.
- Wooden trinket box
- DecoArt Designer Finishes Salt Wash Farmhouse
- Americana Acrylics in Desert Turquoise
- Paintbrush, 1” flat and fine tip for touch ups
- Painter’s tape, ½” to 1” wide
- Sandpaper if needed

Hand Painted Jewelry Box Idea
Remove the clear glass from the trinket box and put aside for time being.
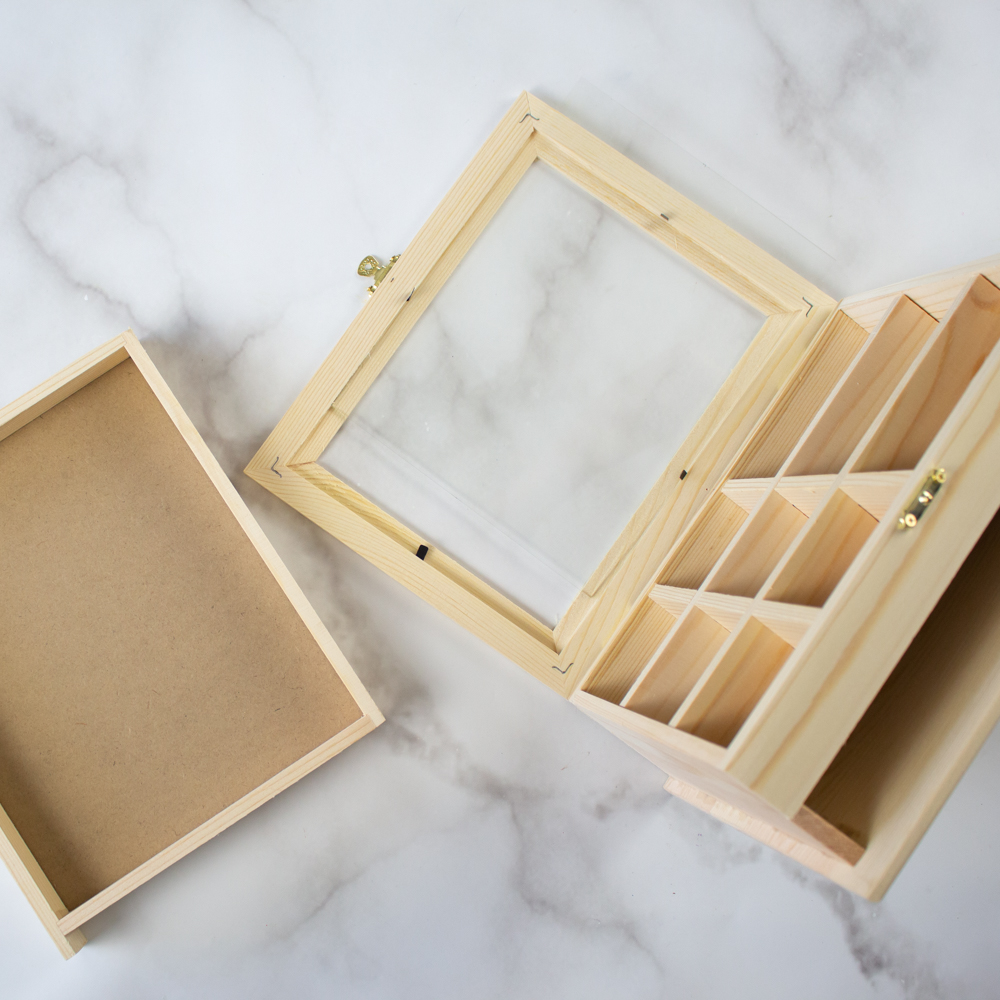
Sand any rough edges on the wooden box.
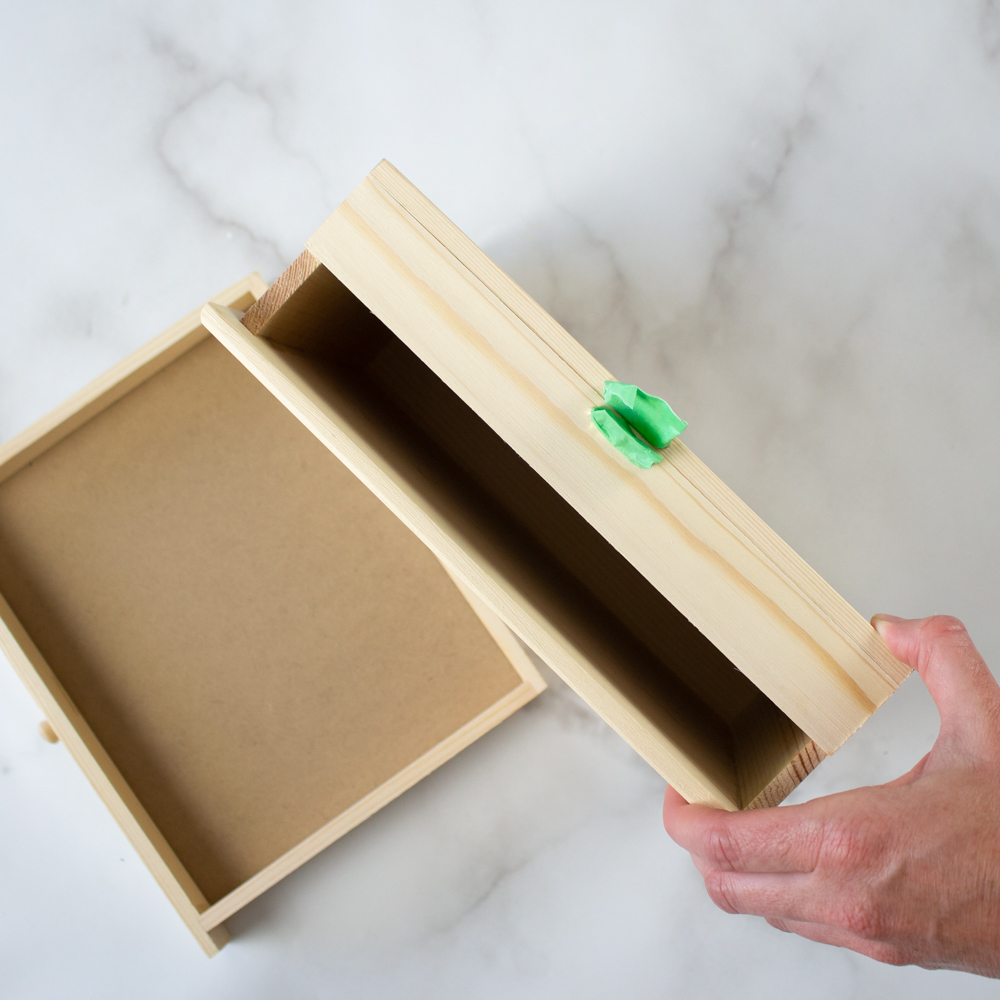
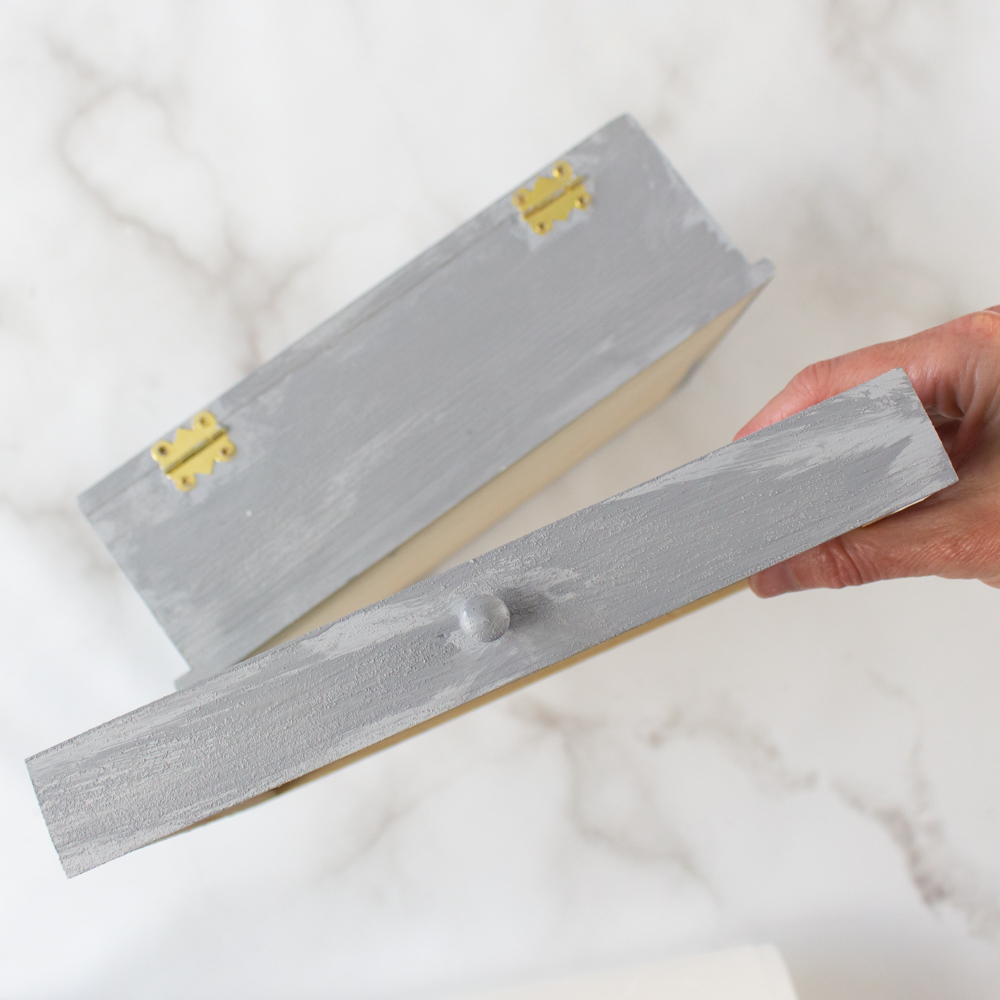
Use painter’s tape to cover the latch on the box to keep it from getting painted.
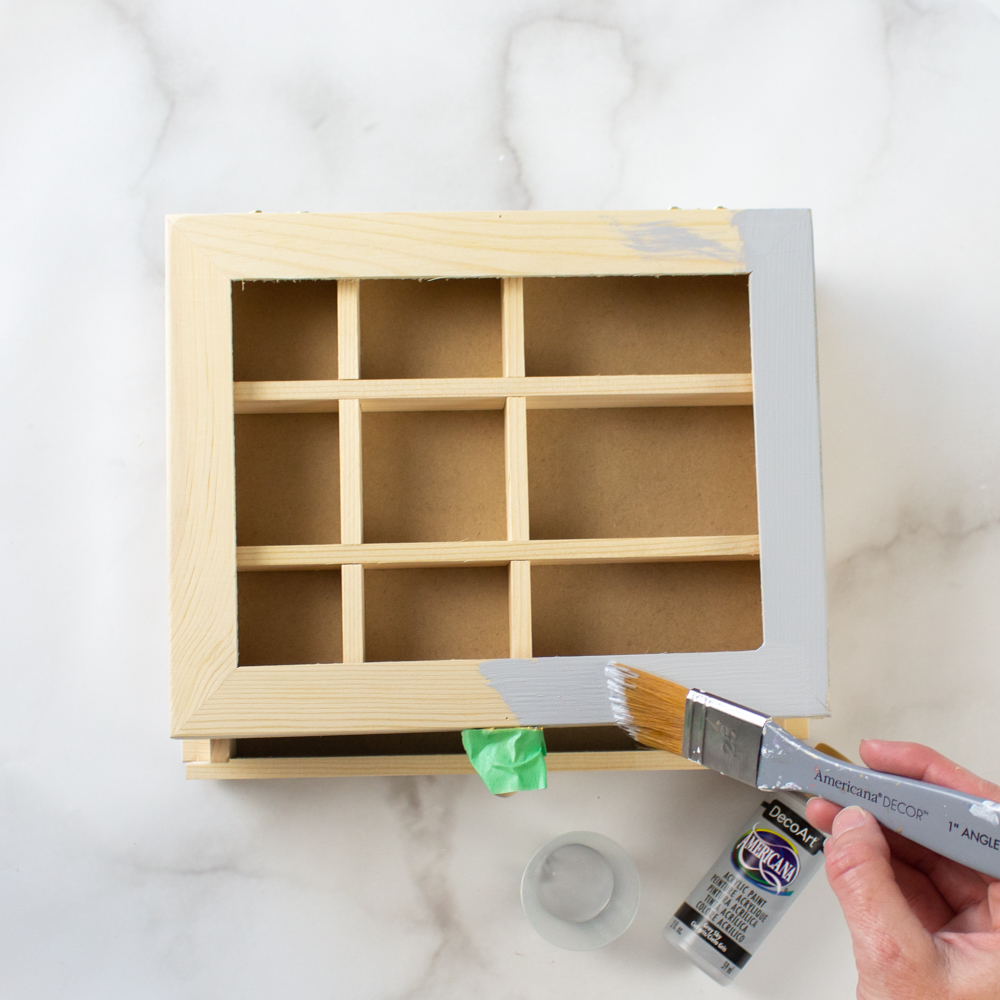
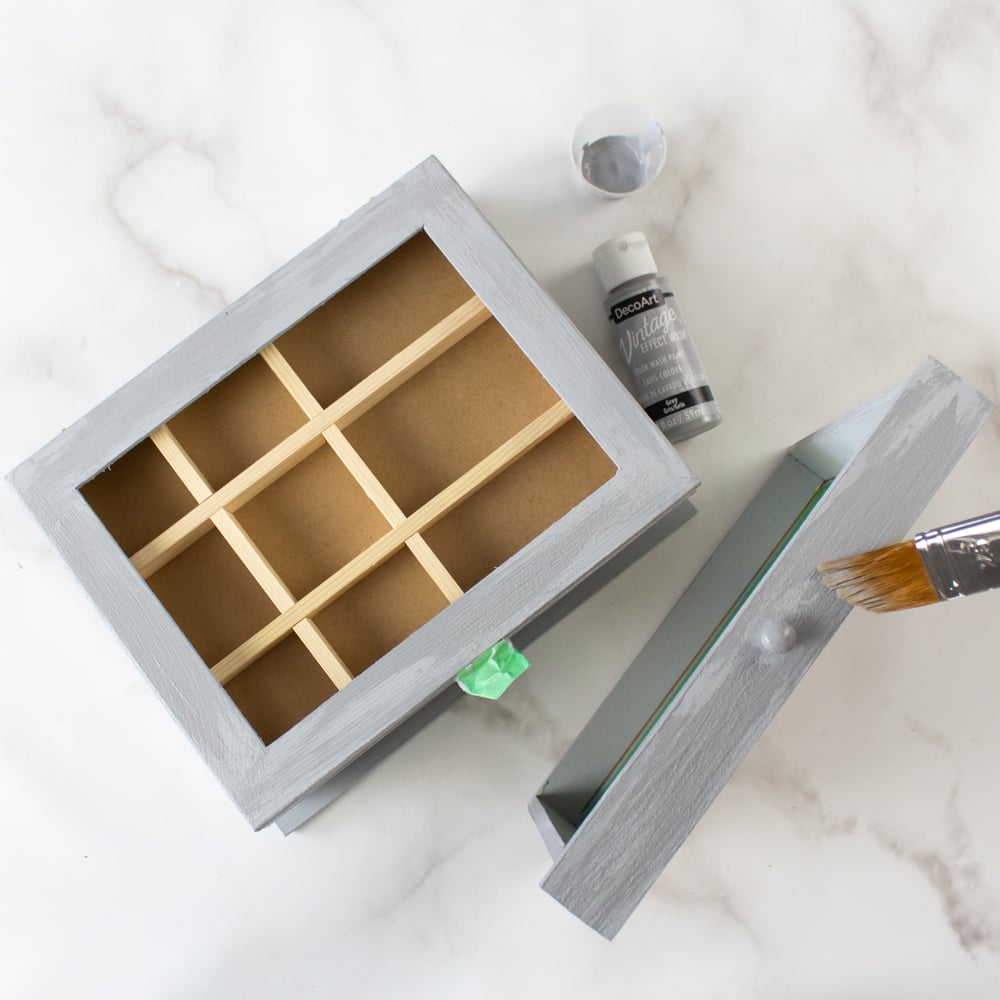
For the basecoat, paint the surface of the wooden trinket box in Grey Sky and let it dry.
Mix 1:1 Grey Sky and Texture Sand Medium. Brush onto the surface of the jewelry box, leaving parts of the baseboat showing. Leave the paint to dry fully.
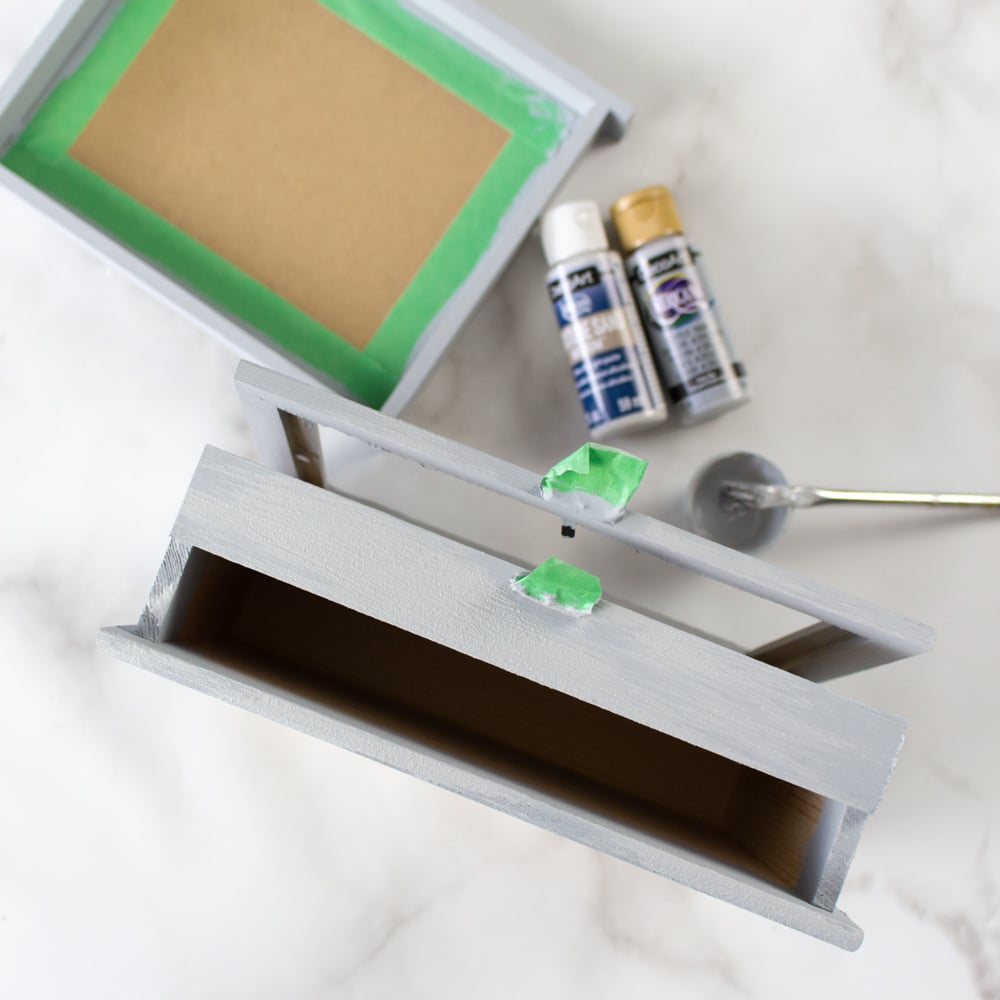
Load the brush with Vintage Effect Grey and lightly brush in random areas. Leave the paint to dry fully.
Load the brush with Vintage Effect White and lightly brush in random areas. Leave the paint to dry fully.
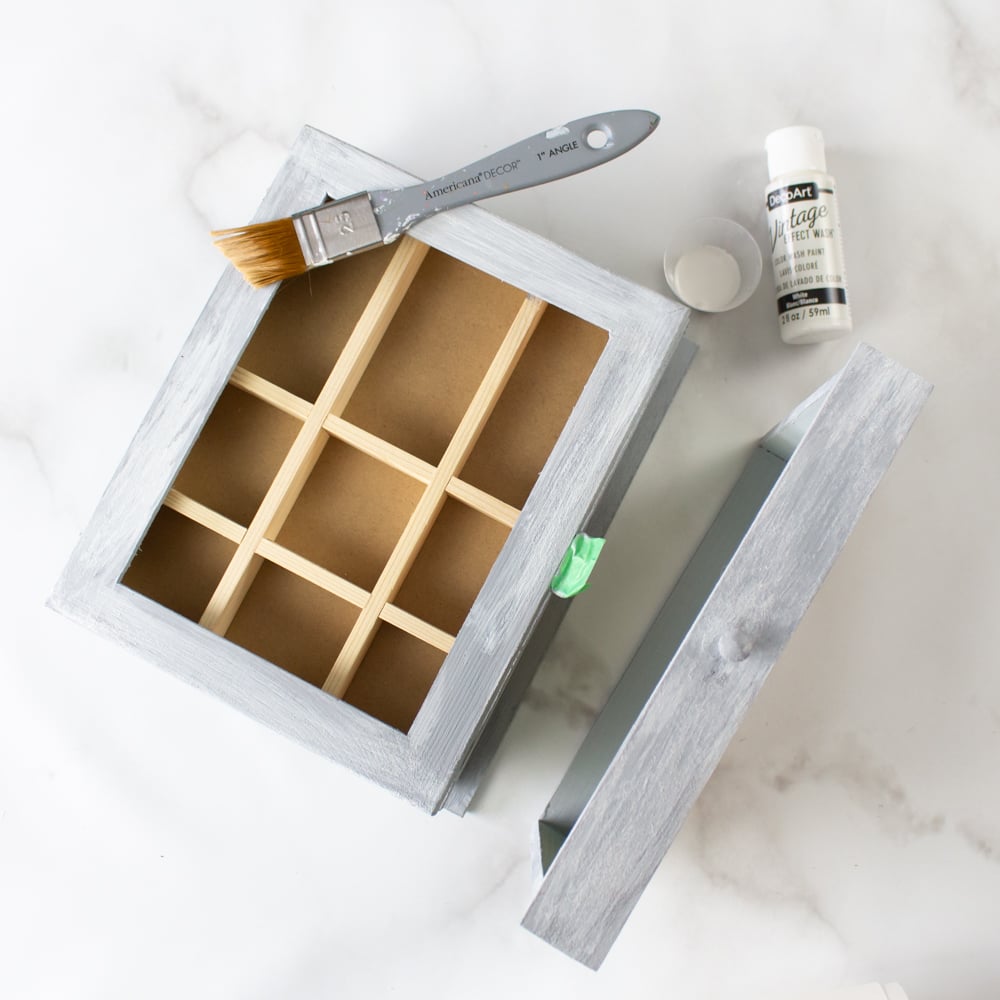
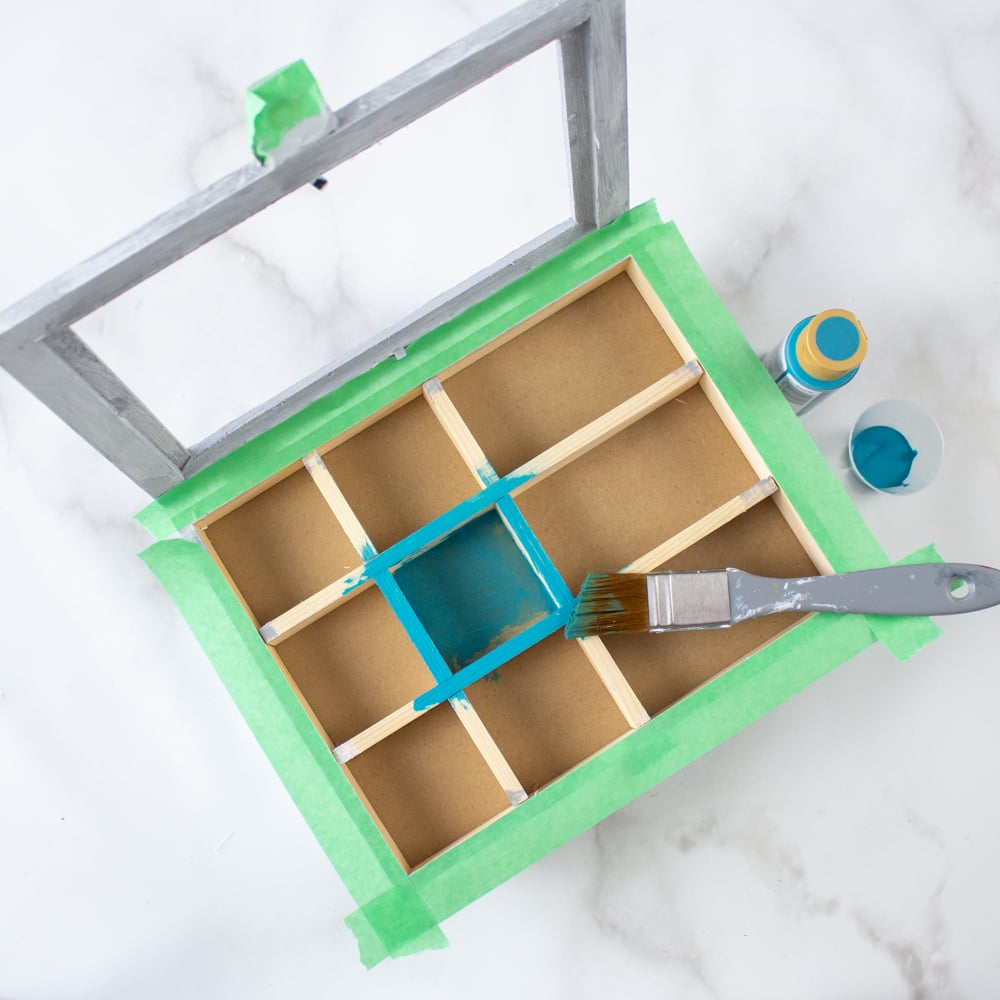
Lift the lid and apply strips of painter’s tape over the opening edges of the wooden box.
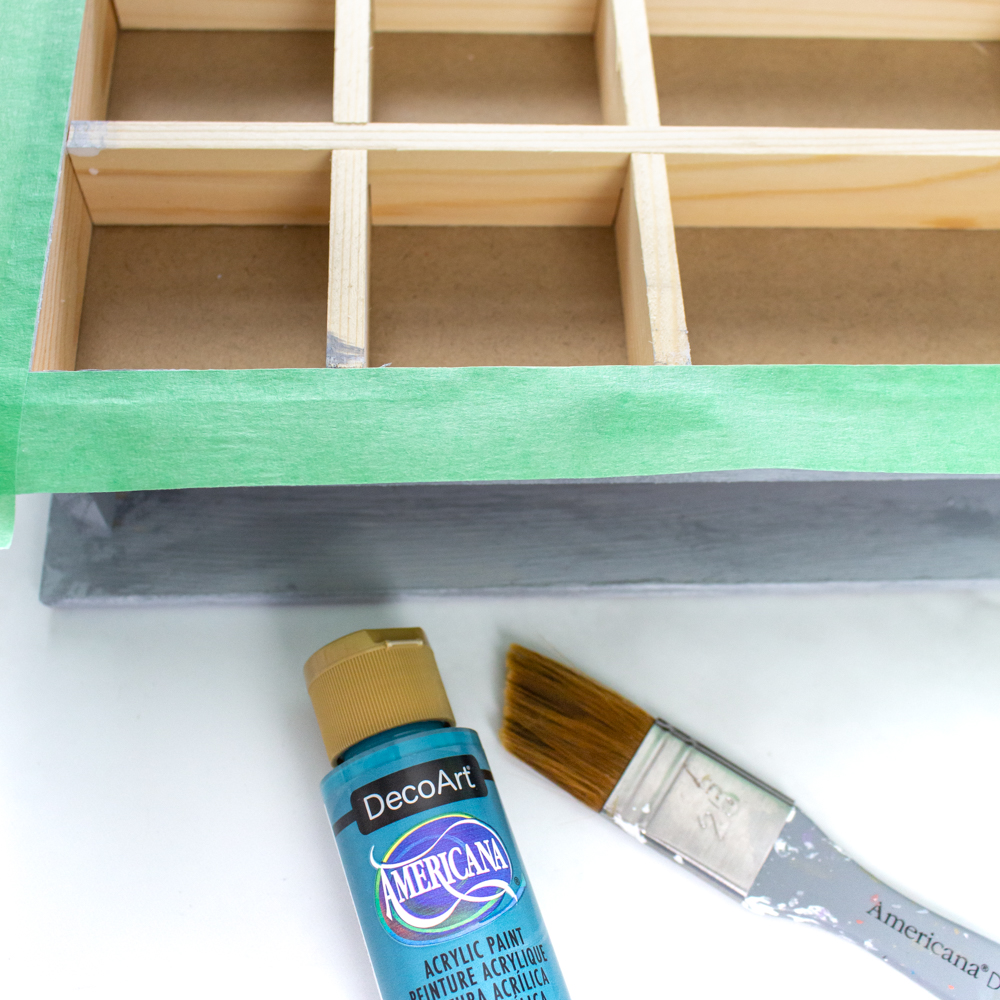
For a pop of color, I chose this beautiful turquoise but you can of couse use any color that you love! Apply the solid paint color to the inside of the compartments of the jewelry box and leave the paint to dry fully.
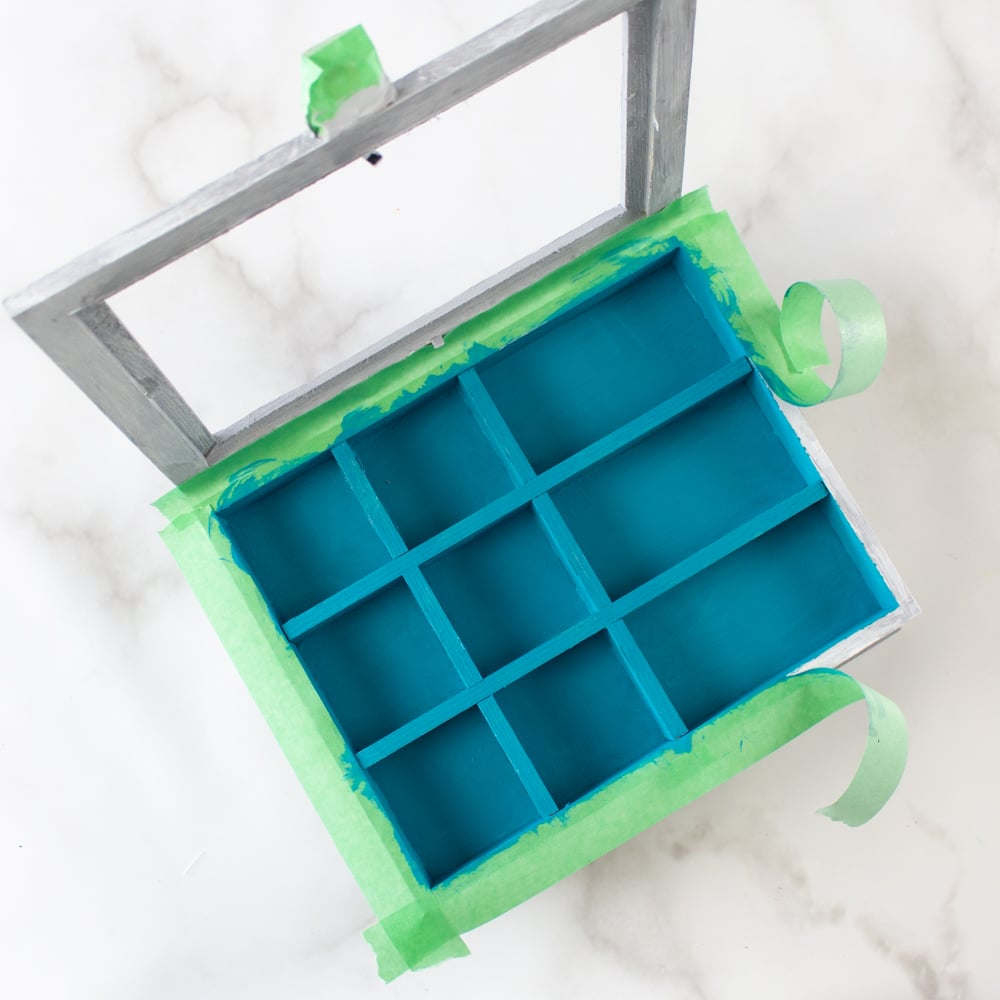
Remove the painter’s tape and replace the glass to finish.

This project originally appeared in DecoArt’s project gallery. Thank you so much for stopping by. We’d love for you to stay in the know on our latest crafts, special offers and freebies by joining our mailing list.
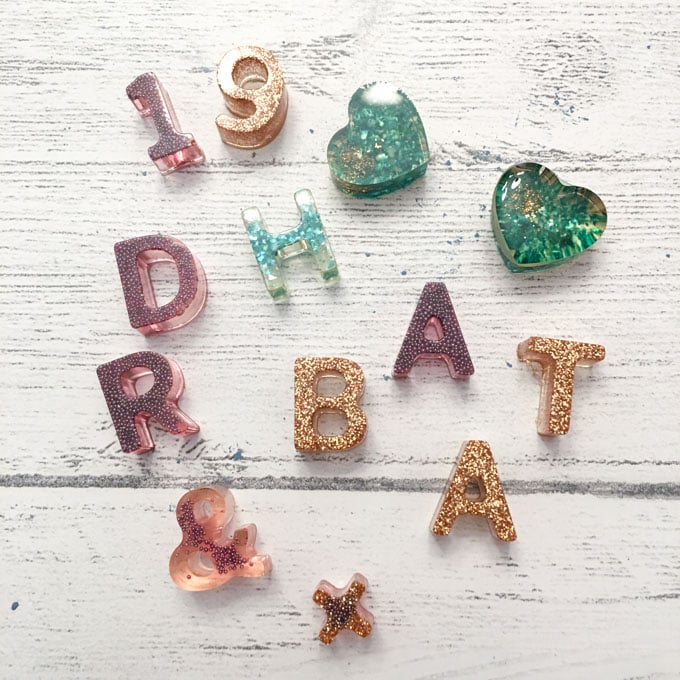
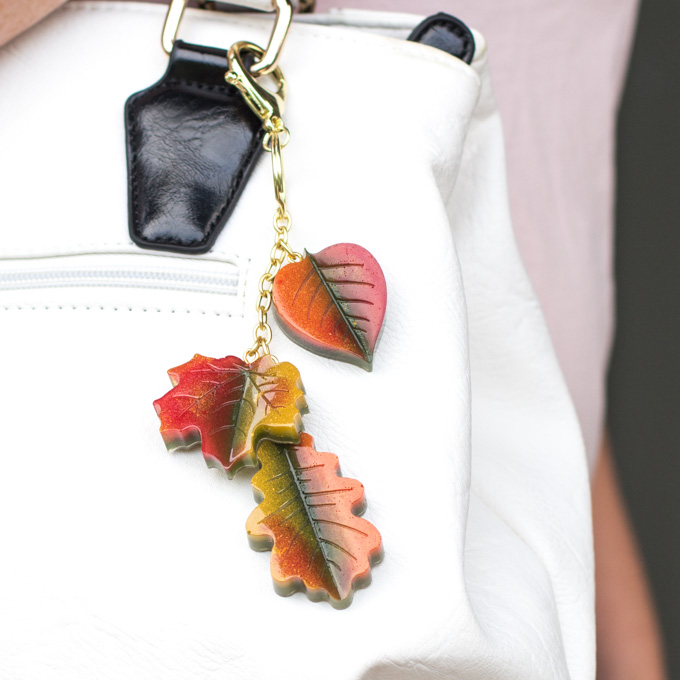
DIY Jewelry Ideas
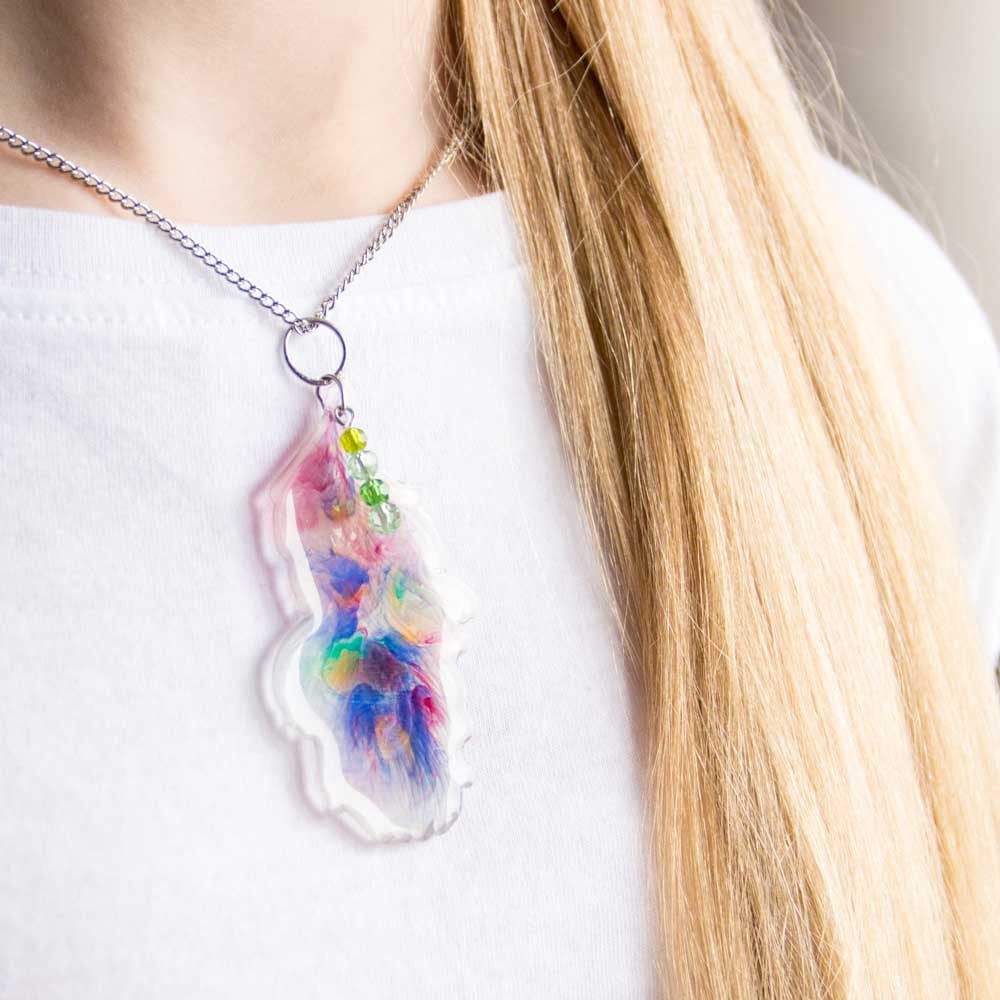
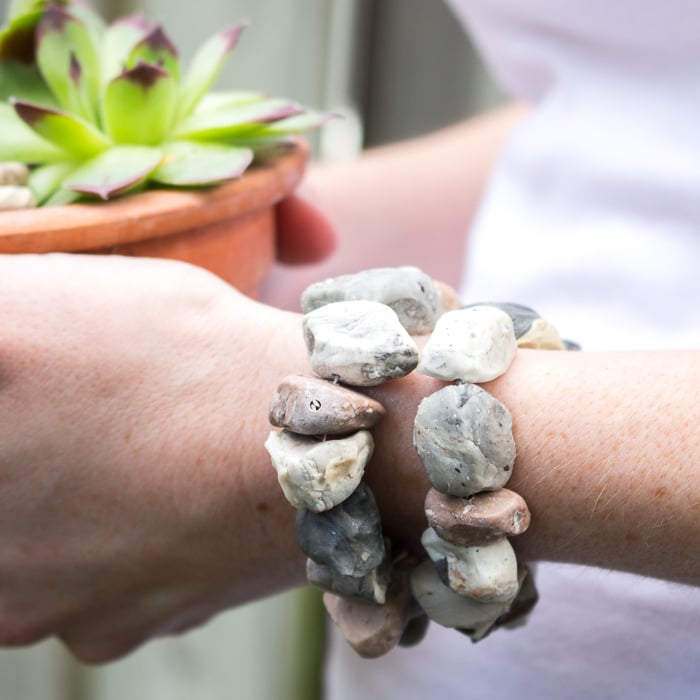
We hope you enjoyed our wooden box painting idea! Before you go, check out these craft ideas for making jewelry at home, like these feather pendants or this faux stone bracelet. Additionally, these monogrammed charms and DIY purse charms would fit perfectly inside the newly painted jewelry box!

Resin Feather Pendant 
Faux Stone Bracelet 
Monogrammed Charms Purse Charms
Like it? Pin it for later!

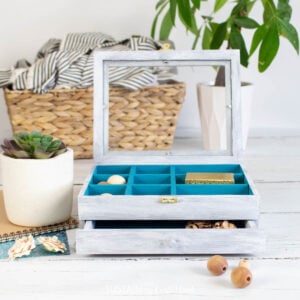
Beautiful Hand Painted Jewelry Box Idea
Materials
- Wooden trinket box
- DecoArt Designer Finishes in Salt Wash Farmhouse
- Americana Acrylics in Desert Turquoise
- 1" flat Paintbrush and fine tip for touch ups
- Painter’s tape ½” to 1” wide
- Sandpaper if needed
Instructions
- Remove the clear glass from the trinket box and put aside for time being.
- Sand any rough edges on the wooden box.
- Use painter’s tape to cover the latch on the box to keep it from getting painted.
- For the basecoat, paint the surface of the wooden trinket box in Grey Sky and let it dry.
- Mix 1:1 Grey Sky and Texture Sand Medium. Brush onto the surface leaving parts of the baseboat showing. Leave the paint to dry fully.
- Load the brush with Vintage Effect Grey and lightly brush in random areas. Leave the paint to dry fully.
- Load the brush with Vintage Effect White and lightly brush in random areas. Leave the paint to dry fully.
- Lift the lid and apply strips of painter’s tape over the opening edges of the box.
- Apply a solid coat of Desert Turquoise to the inside of the trinket box and drawer for a pop of color. Leave the paint to dry fully.
- Remove the painter’s tape and replace the glass to finish.