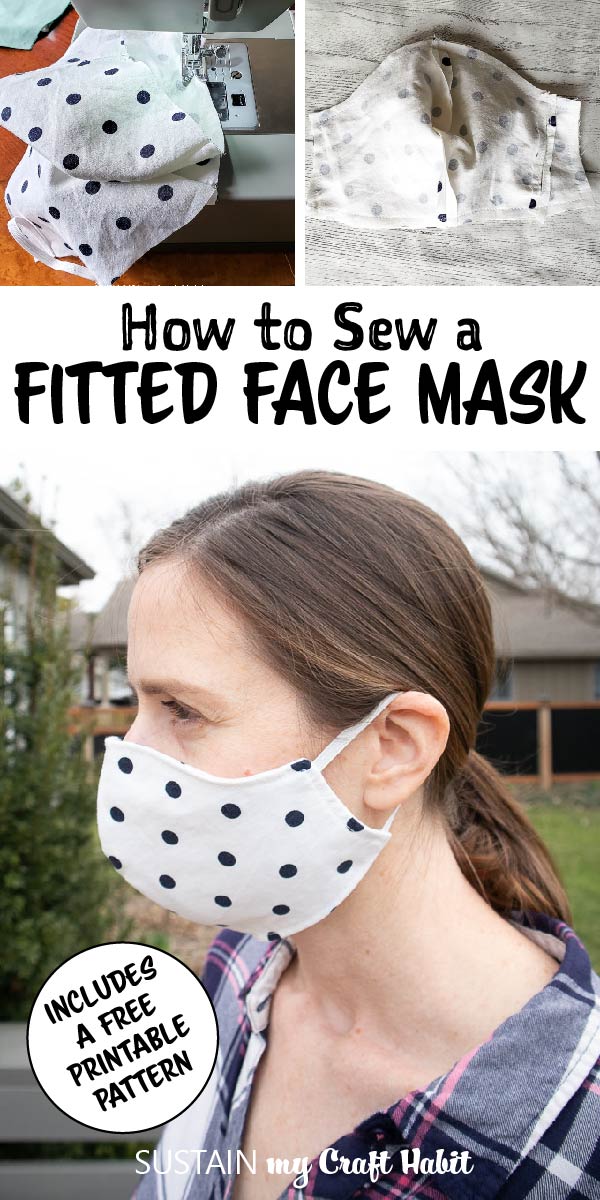
How to Make a Fitted Face Mask with FREE Pattern

Hi friends! Although there is a world of other things I would rather be sewing, it was important for me to help in this fight against COVID-19. We’ll show you how to make a fitted face mask that you can use or make for others in need.

Which Fabrics To Use for General Use Face Masks?
Although these particular home-sewn masks are intended for general use (not approved for medical use), choosing the right fabric is very important. It is best to use a tightly woven fabric with a plain weave, one that DOESN’T have any stretch. This is different from a knitted material, such as t-shirts; which are stretchy by nature. A tightly woven fabric (in a medium weight) is less permeable and also will ensure the mask won’t loose it’s shape after wear.
UPDATE: The WHO (World Health Organization) recommends using 3 layers of fabric for non-medical fabric face masks: outer layer to be water resistant; inner layer to be water absorbent and the middle layer to be a non-woven filter. Refer to the WHO’s video for how to wear a mask for more details.
I’ve been using a mix of leftover tightly woven fabrics from my past sewing projects, such as this upcycled cardboard storage box and these homemade lavender sachets, but even fabric from fitted bed sheets work well for these face masks…BUT keep in mind if the fabric feels thin, then it is best to add additional layers of fabric (and/or a non woven filter) for added protection.
Are there Other Options for Elastics?
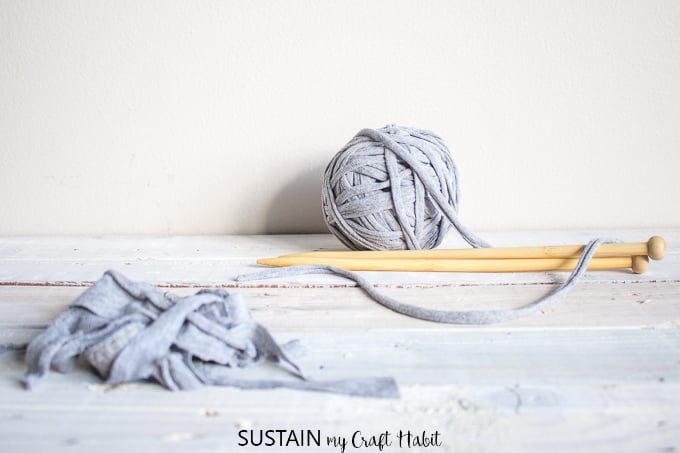
As for the elastic, I’ve been using a flat elastic but other types such as hair elastics, bungee cords or stretchy elastic headbands will do the trick if in a pinch. I even discovered some more flat elastic inside a polka-dot fitted bed sheet I’ve been upcycling. Of course comfort is key so you want to choose something that won’t hurt the ears. Another option is to make t-shirt yarn and use that in place of flat elastics which are hard to come by.
Inserting a Filter in your Fitted Face Mask
This fitted face mask pattern also has an option to add an opening for inserting a filter. Filters are made from non woven materials which are the least permeable material. If using materials you have at home, you can also use a coffee filter and insert it inside the opening to work as your third layer. But be sure to remove the filter before laundering your fabric mask.
Adding a Nose Wire
Nose wires are great as they help the mask to fit snugly around the nose giving them a more comfortable fit. To add a nose wire to your fitted face mask with filter pocket, head to this post here.
Materials Needed to Sew a Fitted Face Mask
Disclosure: This post contains affiliate links for your shopping convenience. Should you choose to purchase through them, we will make a small commission at no extra cost to you. You can read our full disclosure policy here.
- Fitted Face Mask Pattern with filter opening (adult size) / Fitted Face Mask Pattern without Filter opening (adult size)
- Flat, tightly woven fabric, 100% cotton (see above)
- Flat elastic, ¼” (see above)
- Sewing Machine
- Fabric Scissors
- Pins
How to Make a Fitted Face Mask
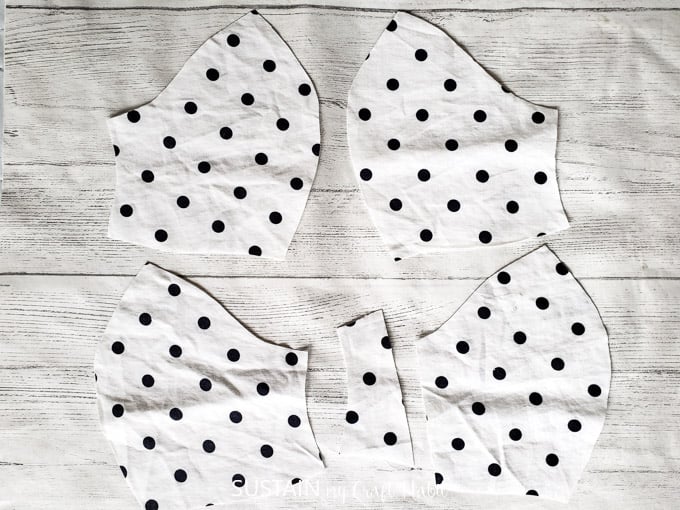
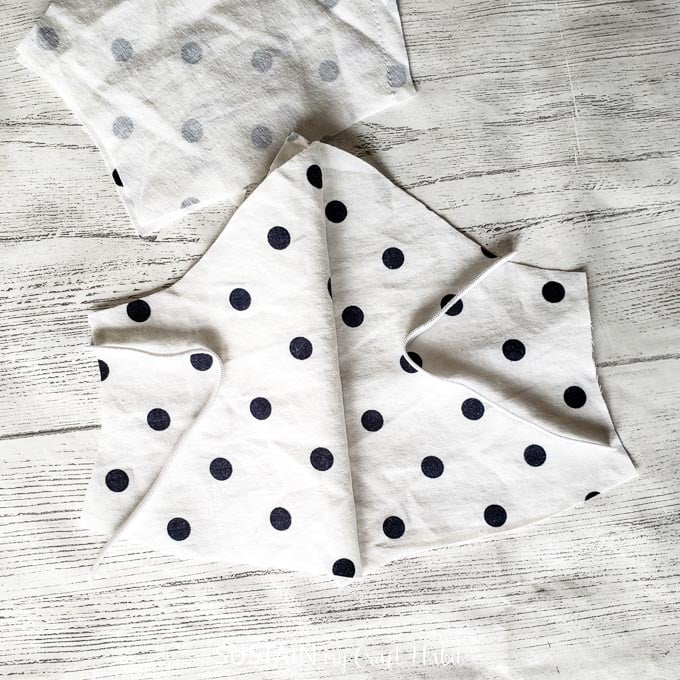
Print off one of the two mask patterns: Fitted Face Mask Pattern (with filter opening) or Fitted Face Mask Pattern (no filter opening). Cut around each pattern piece and place it on the fabric. Pin in place remembering to align the grainline arrow on the pattern pieces with the grainline of the fabric. Cut around the solid lines.
** To adjust the face mask WITHOUT filter opening pattern according to the WHO’s recommended 3 layer fabric mask, cut three pieces of each pattern instead of two and work the following sewing steps in the same way (but with an additional layer).
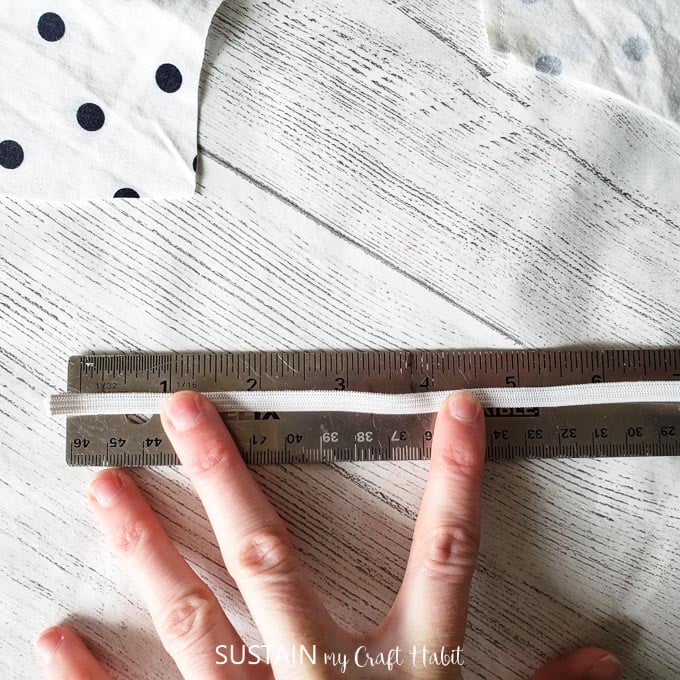
Cut two pieces of elastic 5” long.
For the Mask WITH filter opening:
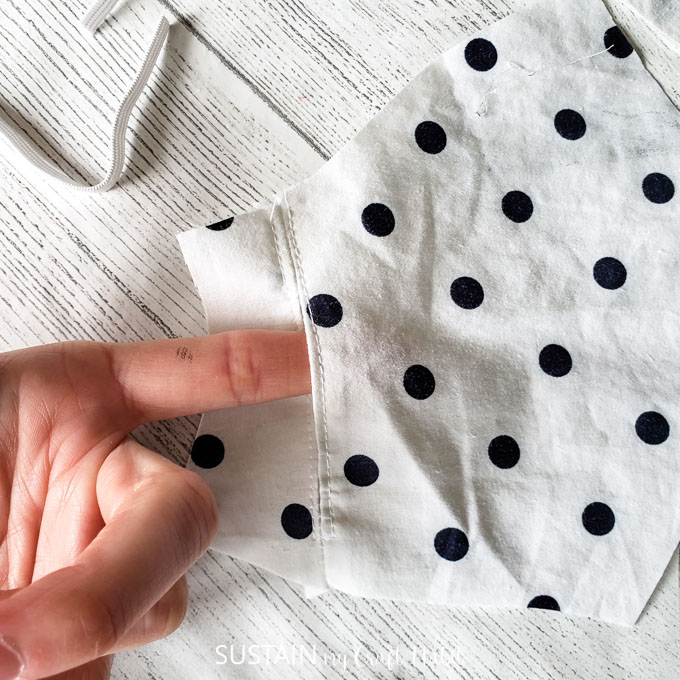
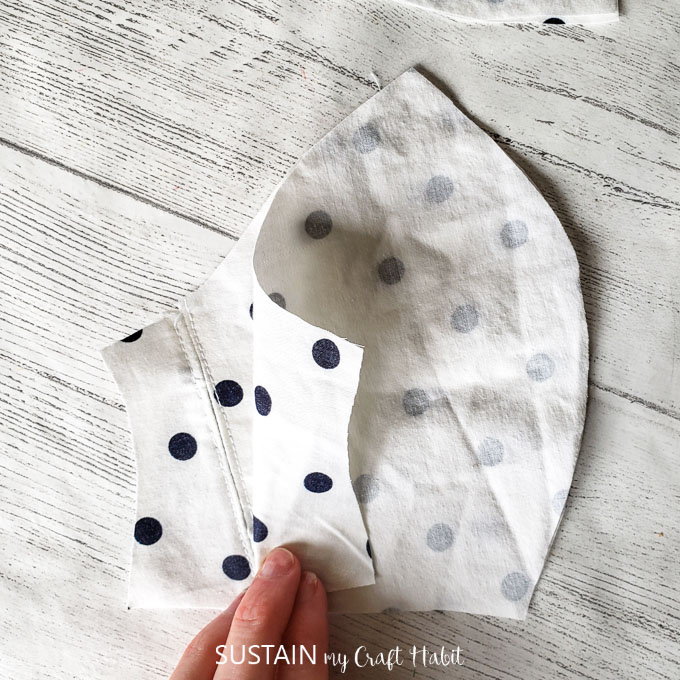
Sew the small side panel to the inner facing piece as shown, aligning the small dots.
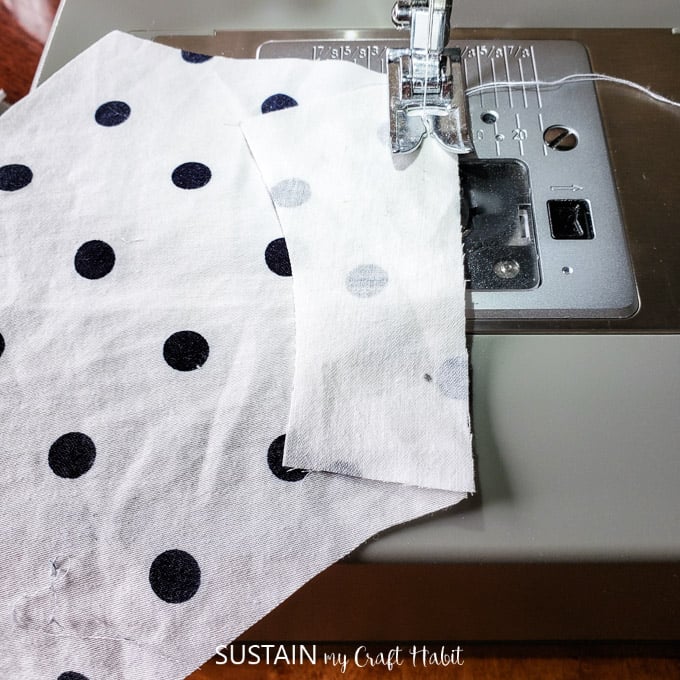
Sew the panels together leaving a gap unstitched between the two dots.
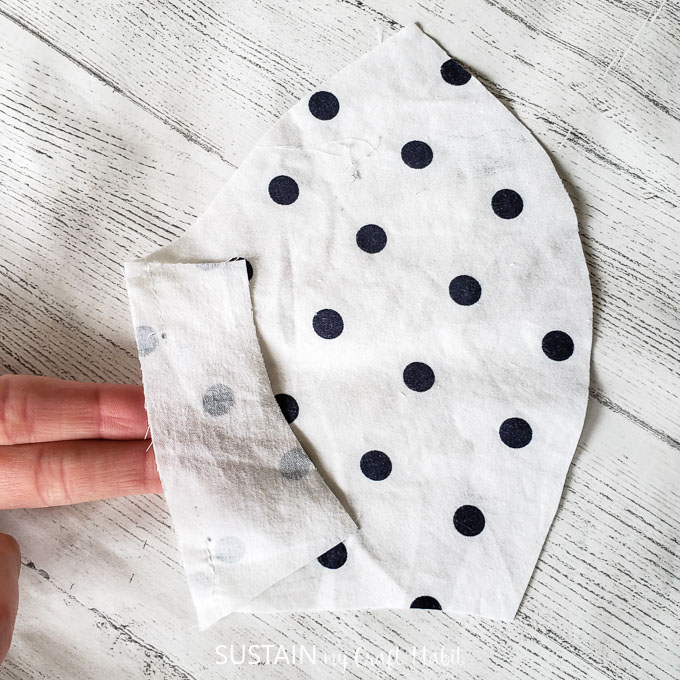
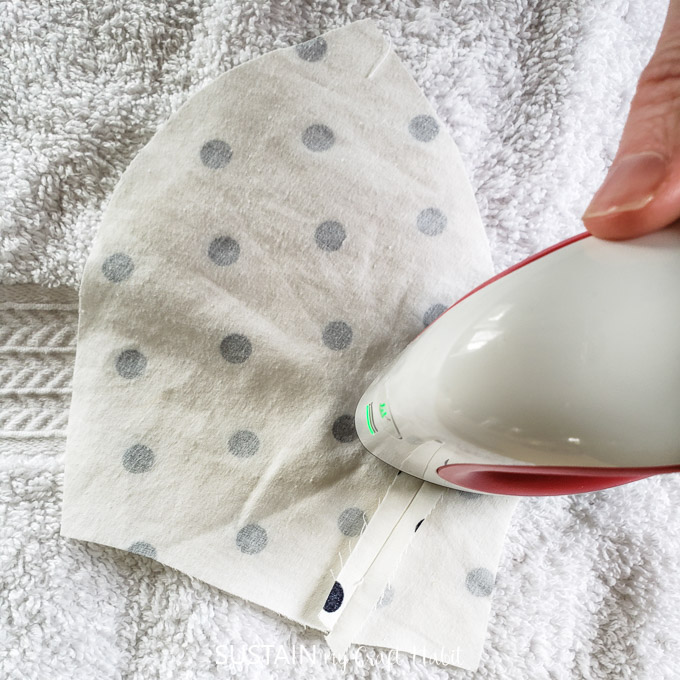
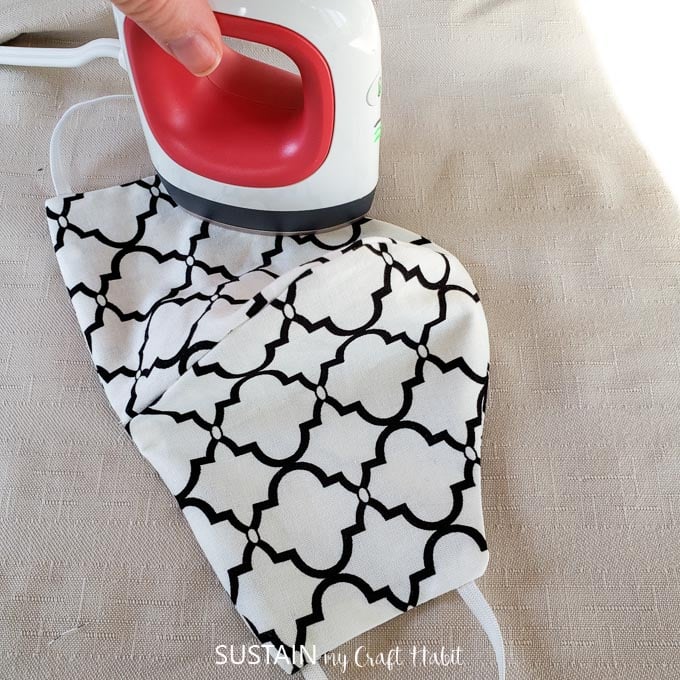
Press the seam open with an iron and edge stitch the filter opening to hold seam allowance in place.
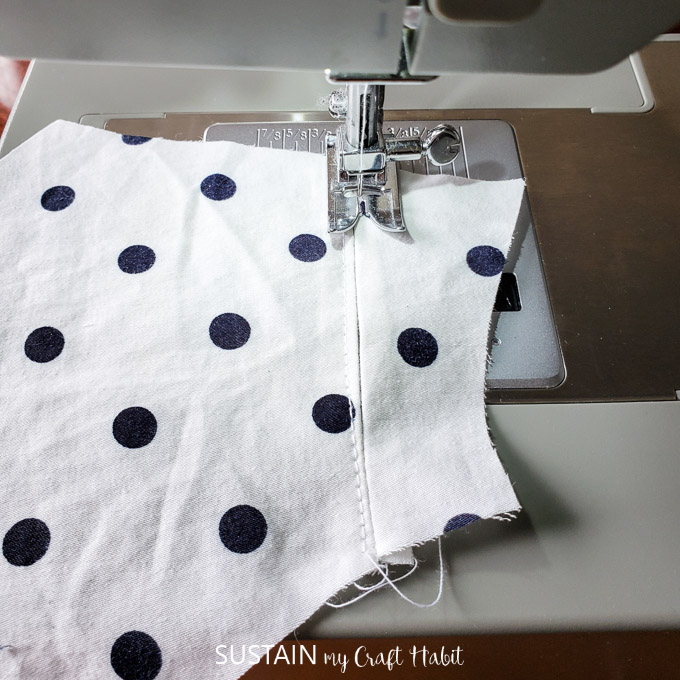
Next, align the inner facing pieces and outer mask pieces with RIGHT sides together and sew along the curve with a ¼” seam allowance.
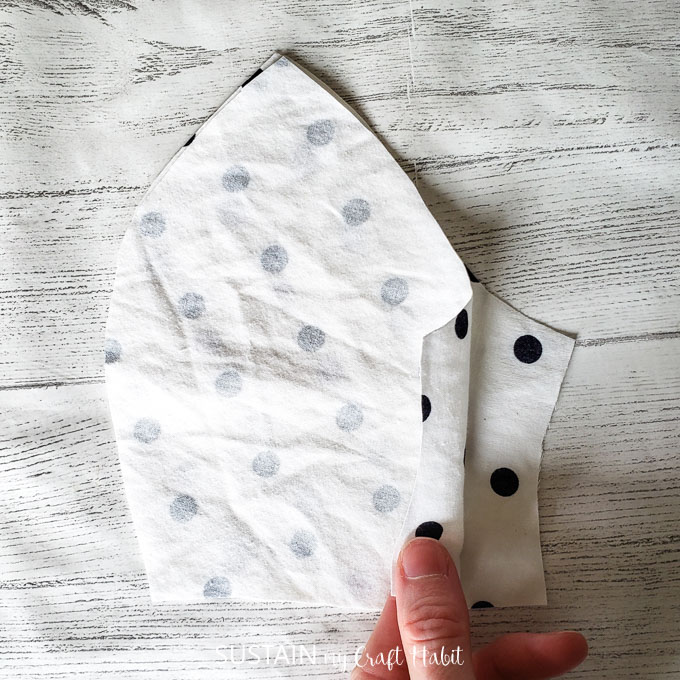
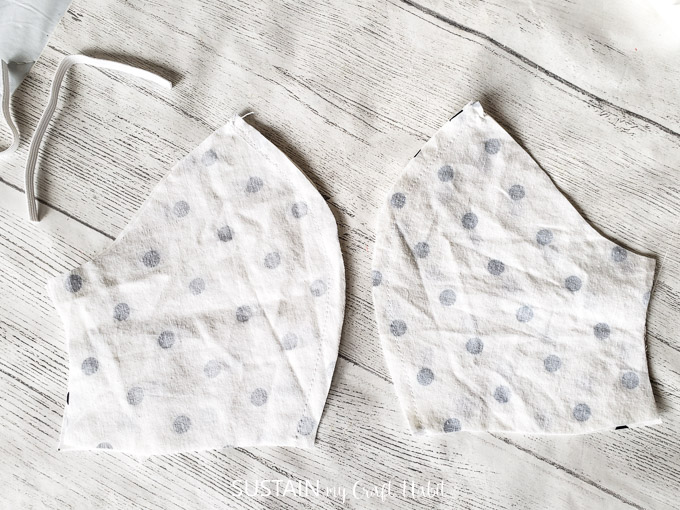
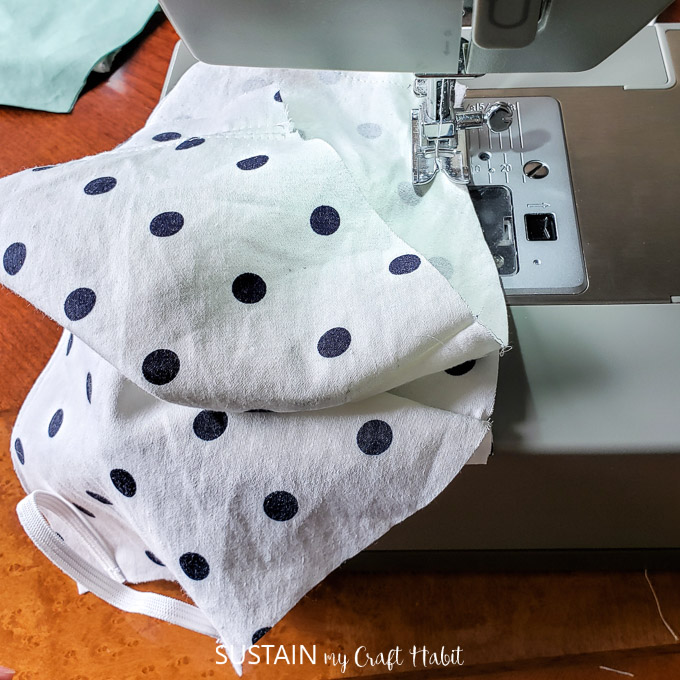
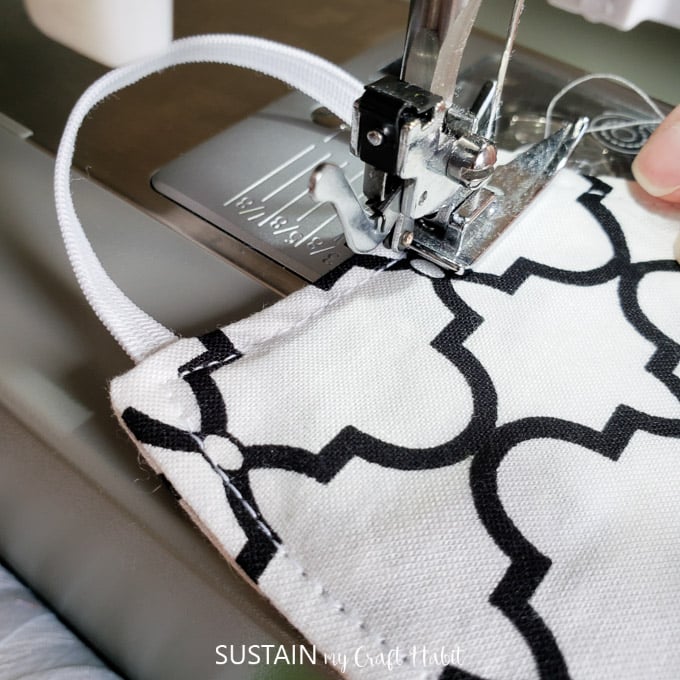
Sew the ends of the elastics to the sides (on the RIGHT side of the fabric) forming loops as shown.
Align the two layers (inner facing with filter opening and outer fask pieces) with RIGHT sides together and stitch all around the perimeter with a ¼” seam allowance.
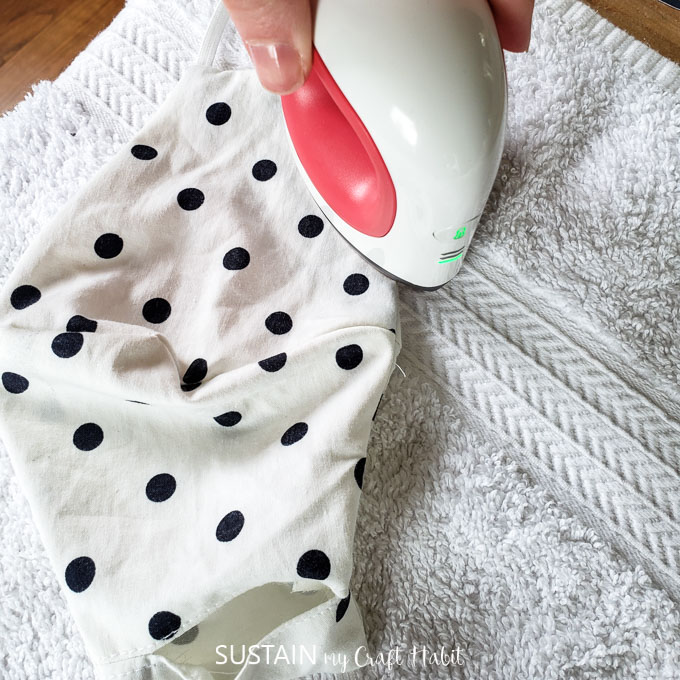
Turn the mask inside out through the filter opening and press seams flat with an iron.
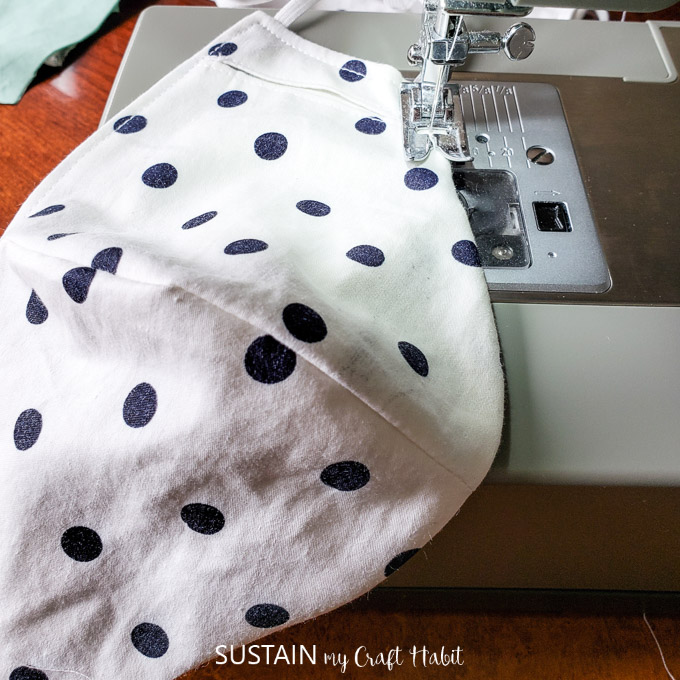
Edgestitch around the perimeter.
Insert your non woven filter material into the opening for added protection.
For the Mask WITHOUT filter opening:
Align the inner facing pieces and outer mask pieces with RIGHT sides together and sew along the curve with a ¼” seam allowance.
Sew the ends of the elastics to the sides (on the RIGHT side of the fabric) forming loops as shown.
Align the two layers (inner facing with filter opening and outer fask pieces) with RIGHT sides and stitch all around the perimeter with a ¼” seam allowance leaving a 3” gap.
Turn the mask inside out through the 3” gap and press seams flat with an iron.
Edgestitch around the perimeter and stitch the opening closed to finish.
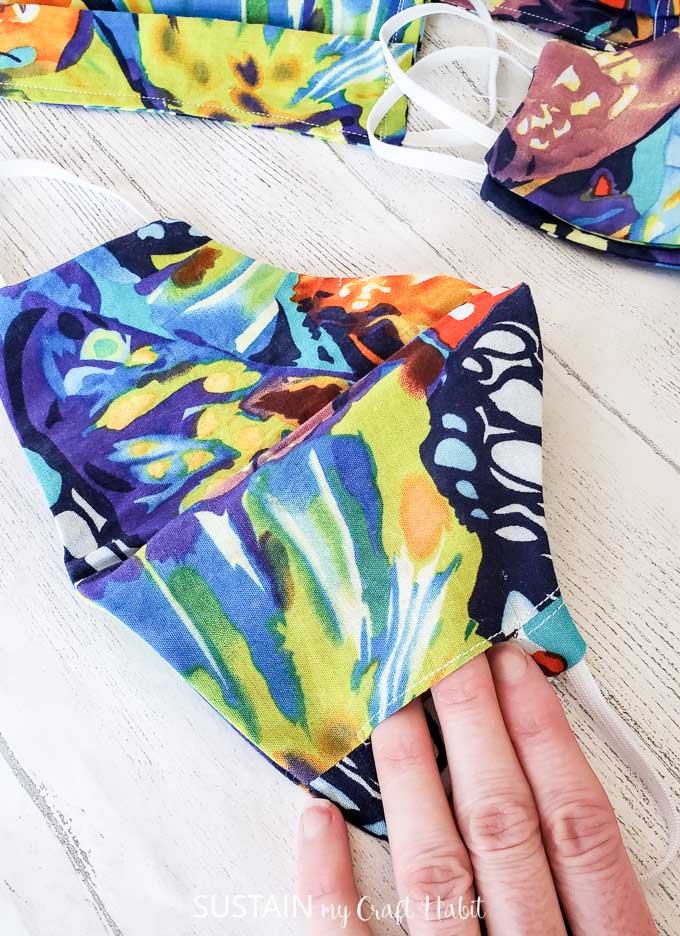
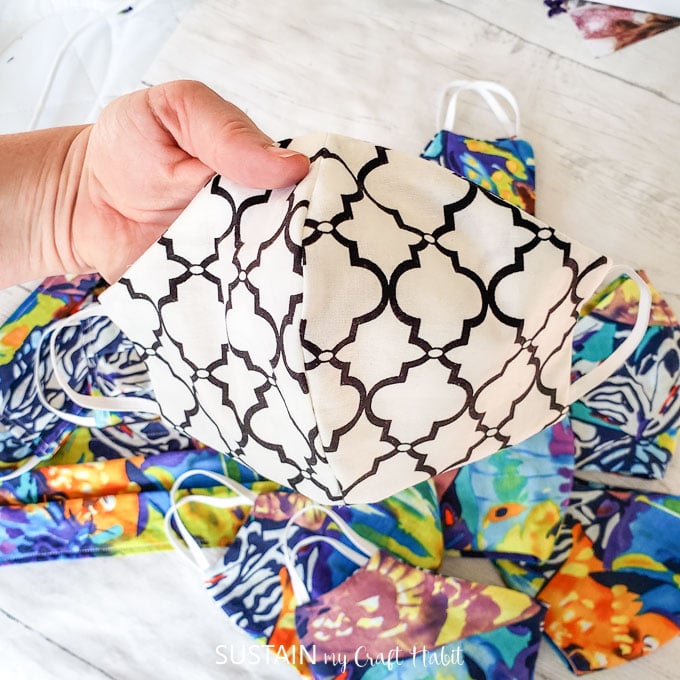
Once done, the mask is ready for wearing.
We’ve also created a printable pattern for a simple pleated face mask along with the step by step instructions on how to make them.
Washing Your Fabric Face Masks
Do not wear a mask that is damaged or dirty. To clean your fabric face mask, REMOVE the inner filter layer and place it in the washing machine as you do for regular laundering.
Additional Notes for Using a Fabric Mask
Disclosure: This post contains affiliate links for your shopping convenience. Should you choose to purchase through them, we will make a small commission at no extra cost to you. You can read our full disclosure policy here.
Like it? Pin it for later!

How to Make a Fitted Face Mask with FREE Pattern
Materials
- Fitted Mask Pattern with or without filter opening
- Flat tightly woven fabric 100% cotton or 100% polyester
- ¼” Flat elastic
- Sewing Machine
- Fabric Scissors
Instructions
- Cut out the pattern pieces on fabric.
- Cut two pieces of elastic 5” long.
- For Mask WITH filter opening, Sew the small side panel to the inner facing piece aligning the small dots.
- Sew the panels together leaving a gap unstitched between the two dots.
- Press the seam open with an iron and edge stitch the filter opening to hold seam allowance in place.
- Next, align the inner facing pieces and outer mask pieces with RIGHT sides together and sew along the curve with a ¼” seam allowance.
- Sew the ends of the elastics to the sides (on the RIGHT side of the fabric) forming loops.
- Align the two layers (inner facing with filter opening and outer fask pieces) with RIGHT sides together and stitch all around the perimeter with a ¼” seam allowance.
- Turn the mask inside out through the filter opening and press seams flat with an iron.
- Edgestitch around the perimeter.
- For Mask WITHOUT filter opening, align the inner facing pieces and outer mask pieces with RIGHT sides together and sew along the curve with a ¼” seam allowance.
- Sew the ends of the elastics to the sides (on the RIGHT side of the fabric) forming loops.
- Align the two layers (inner facing with filter opening and outer fask pieces) with RIGHT sides and stitch all around the perimeter with a ¼” seam allowance leaving a 3” gap.
- Turn the mask inside out through the 3” gap and press seams flat with an iron.
- Edgestitch around the perimeter and stitch the opening closed to finish.

Wow, this makes me feel like maybe I CAN do this!! Great tutorial. They look comfy too!
Yesss, you CAN definitely do this, Jennifer! And thank you for your comment.
Great tutorial! Thanks for sharing!
Our pleasure Jes. Thank you so much!
Jane
Nowhere do I see how many inches to cut the fabric. I see 5” for elastic bu not for the template.
Good morning Donna! The downloadable and printable template has all the dimension. Just click on the link in the first bullet of the MATERIALS section – it depends on whether you are planning to put in a filter or not. Let us know if you still have any questions.
Jane
Thank you, this is really helpful and very kind of you. Well done!
I’m a little confused about exactly wear to sew the elastic. Mine just aren’t coming out looking nice. Do you sew the elastic all the way to the top and bottom or do UTI leave a quarter inch up from the top and bottom.
Sew the elastic at the black triangles on the pattern.
There are triangles on both sides of the template piece. What are the inner triangles for, the ones close together on the curve? What this the “right” side of the fabric, like, the pattern side? Thanks!
Hi Amber, The triangles closest together along the center front curve are only guides to tell you those two pieces get sewn together along the curve, they are also called “notches”. And yes, the right side of the fabric is the patterned side.
Love this, have made quite a few for family members. A friend would like me to make one for her kids, age 9 & 10. Do you have a pattern for kids?
We’re so happy you’ve found the tutorial helpful! We don’t have a pattern for the fitted mask, but do for the simple pleated version here: https://sustainmycrafthabit.com/diy-kids-face-mask-with-free-pattern/ . That’s a great idea though, to add one for the fitted pattern as well. -Jane
Hi I’d really like if you could do video for the fitted filtered mask. I find videos easier to follow. Will be making the pleated mask but would like to make the fitted filter one.
Hey I’ve been making these they’re super easy once you get into it, comfy and I am making some for friends 🙂
Nice pattern. Just a FYI: I think it would have been a bit clearer had you used different fabric for the liner than the main mask. Got it figured out but that would have made it faster. Thanks for the pattern. It worked up really nice.
Take care and be safe.
Many thanks to you for your feedback. I think you’re right about that, it would have been clearer for sure.
How do I know if my pattern printed correctly? There is no scale square as on other patterns I’ve used. You don’t give any measurements.
Sorry about that, I added the msmts for reference to this sketch. Hope this helps.
Was wondering about the tiny iron you are using. Where can I buy one?
Hi Dottie. I’m sorry we missed your question earlier. It’s the Cricut EasyPress Mini – it’s so versatile and easy to use for quick pressing needs. This is our affiliate referral link for it: http://shrsl.com/2snd9
Warm regards,
Jane
Thank you! Have used repeatedly, as I sew for our local medical office to hand out. Great pattern, easy to use.
Hi Lee,
Oh, we’re so happy you’ve found the pattern helpful. And thank you for your generosity in making the masks for those in your community.
Have a great day!
Jane
Maybe I’m just a little dense, but when I sew the elastic loops on the right side of the fabric at the notches of the outer fabric piece, and then close up with just a 3″ opening on one side and turn it right side out, the loops on one side are INSIDE…….I’m doing something wrong, I know.
Hi there, when you’re sewing the two sides together along the outer edge, they have to be RIGHT sides together with the elastic loops stitched and sandwiched in between (on both sides). That way, when you turn the mask right side out, the elastic loops will be on the outside. That is the only thing I can think of that could be wrong. If you wish to send me an email with a photo, I could help you further. Thanks, Sonja…smchinfo@gmail.com