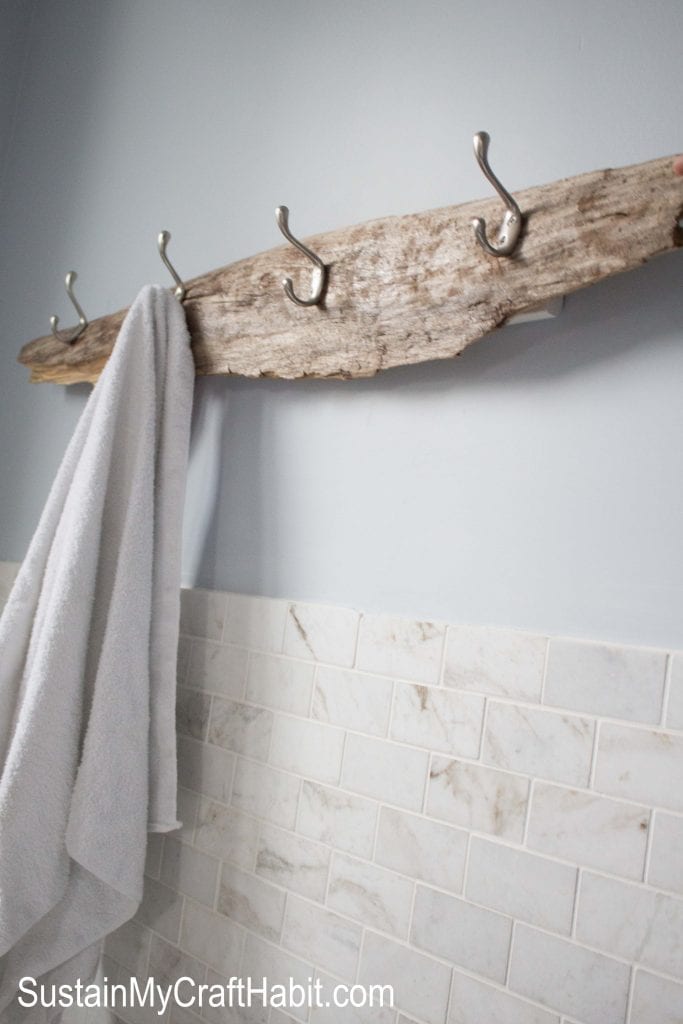
A Beachcomber’s Rustic Towel Rack
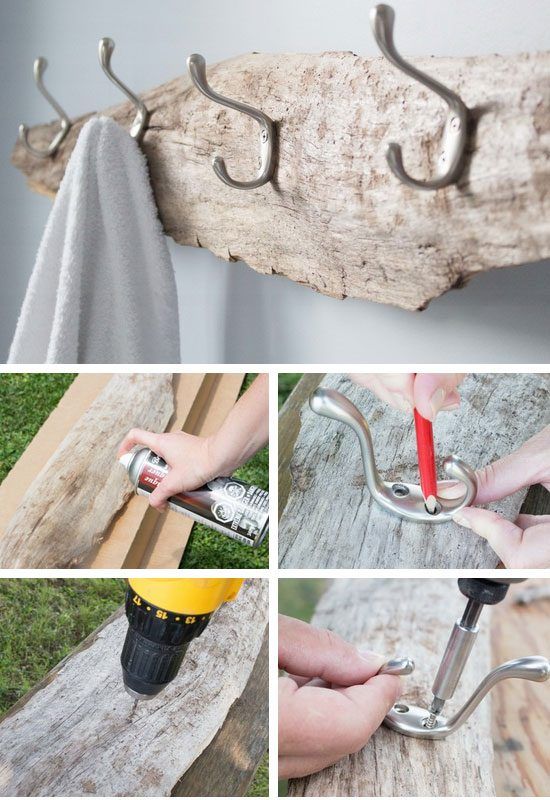
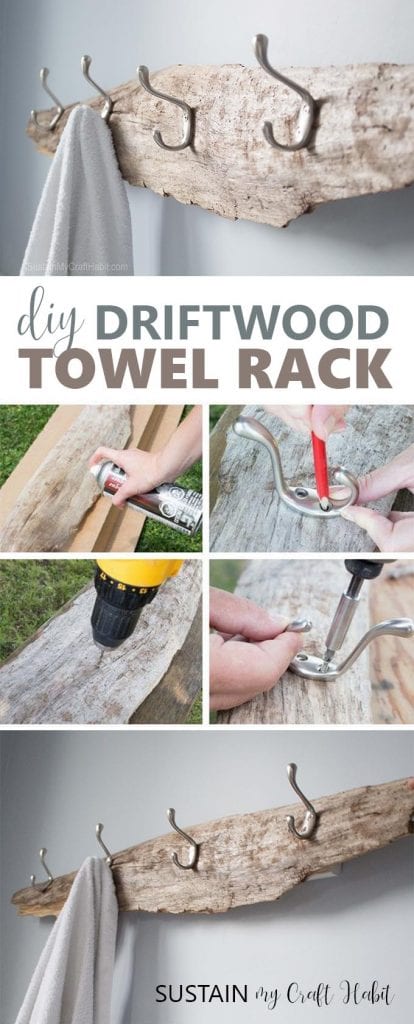
What to do when you find a large, beautiful piece of white washed driftwood? Transform it into useful DIY rustic coat rack or towel hooks for your home or cottage.

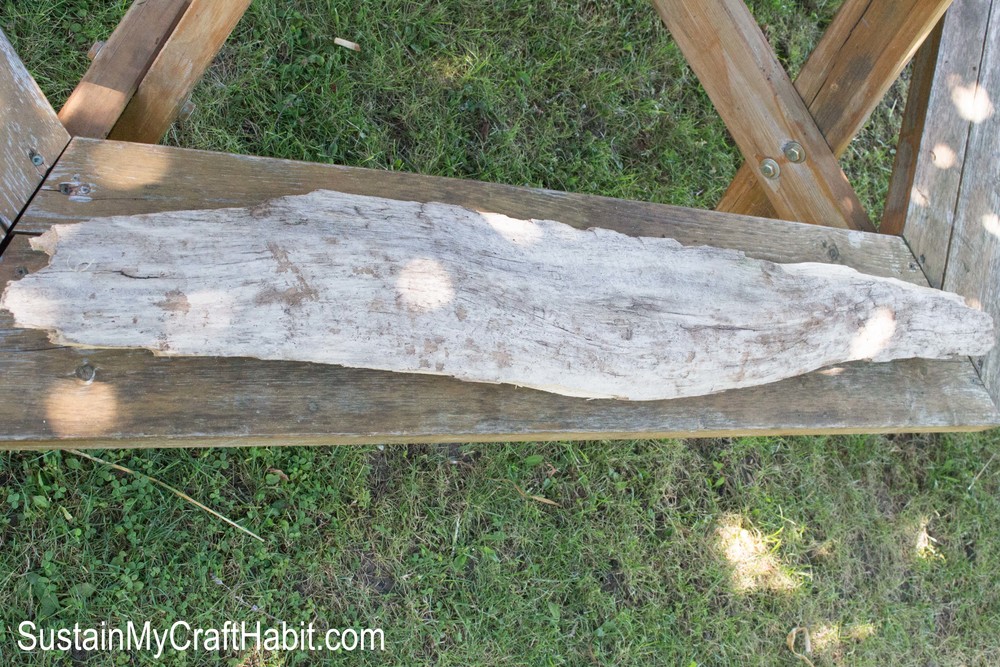
During one of our afternoons at the beach with the kids, we discovered a large uniquely shaped piece of driftwood. We put it aside figuring we would eventually find a good use for it. And then recently, the perfect use came to mind. We decided to turn it into a contemporary wall mount towel rack for our parents’ cottage bathroom.
A Coastal DIY Towel Rack
I should add here that our parents are pretty traditional so this idea didn’t go over that well at first (I recall some comment from my dad about it belonging in a barn). However, they changed their tune once they saw the finished product! It is quite rustic, very beachy with a modern twist. While we made it for their bathroom it would look great as a pool towel rack, rustic coat rack or even as a unique DIY hat rack idea.
And if you’re a driftwood hoarder like we are, you might find another project in this collection of over 20 driftwood crafts to make!
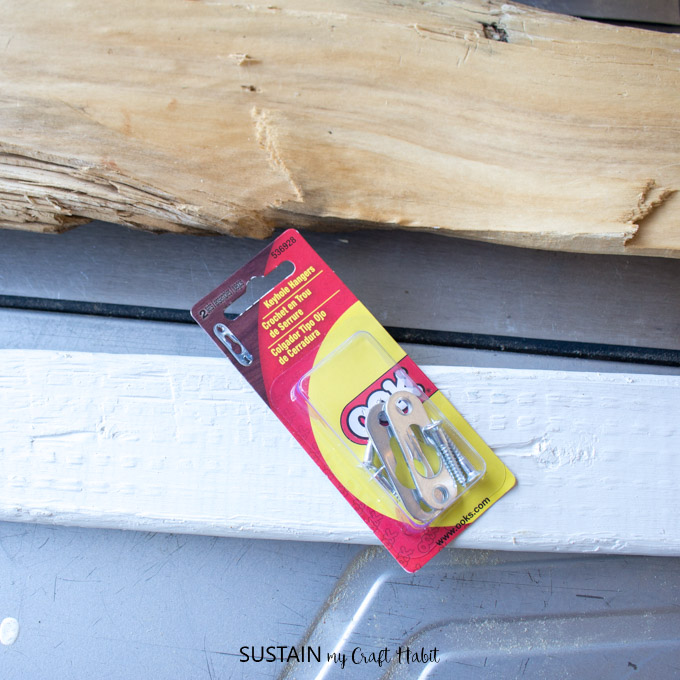
Materials Needed for this Coastal Towel Rack Idea:
Disclosures: This post continues affiliate links for your shopping convenience. You can find our full disclosure policy here.
-
- Large piece of driftwood with a flat-“ish” underside
- Long 1”x2” piece of wood for fastening to backside
- Drill
- Screws: 1¼” long to secure the 1″x2″ wood to the driftwood (we used 2)
- Spray Lacquer – matte finish
- Keyhole hangers (x2)
- Wood glue
- 4 x 3½” Brushed Nickel Coat Hooks with compatible screws
How to Make a Rustic Towel Rack:
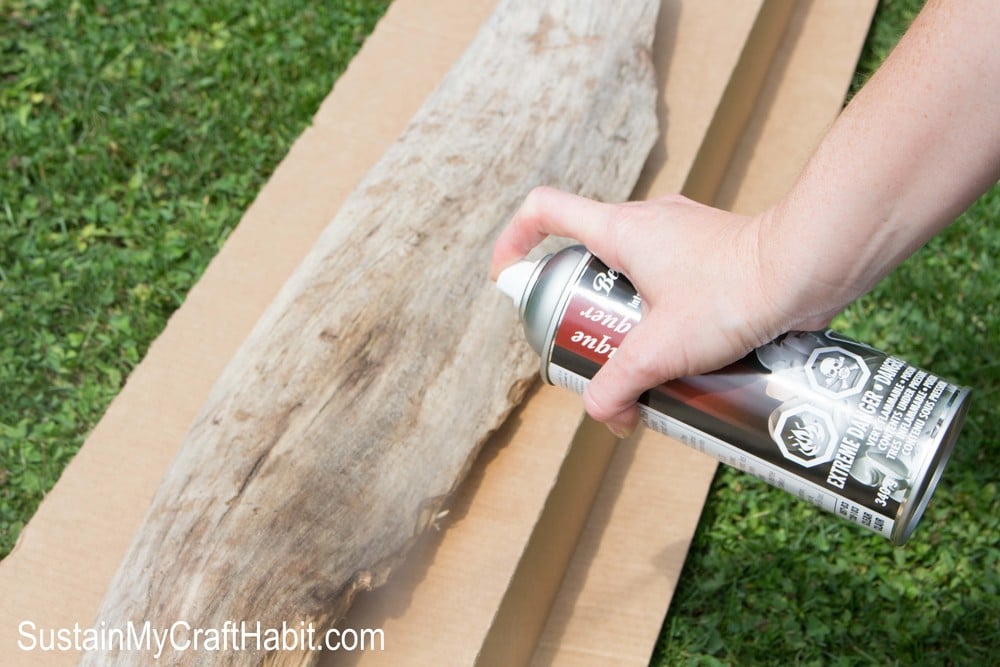
Step 1: Prepare the driftwood
To start, we cleaned the driftwood in water with a brush to remove all dirt and sand. We then placed it in the sun to dry for several days.
The next step was to spray lacquer on all sides of the driftwood. We chose a matte finish but a glossy would have worked out well too.
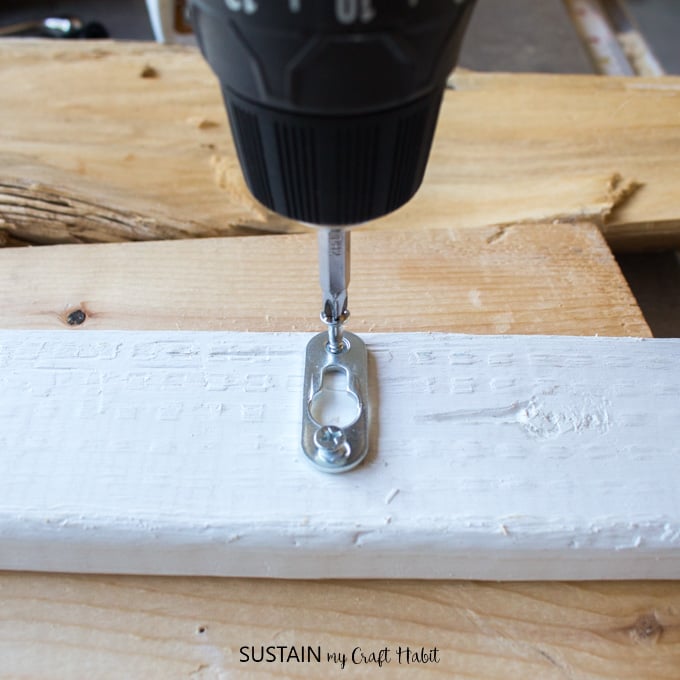
Step 2: Add the wall mounting hardware
Since the underside of the driftwood was uneven and rough we decided to fasten a 1”x2” piece of wood to the backside. This piece of wood would lay flush against the wall and hold the wall mounting hardware.

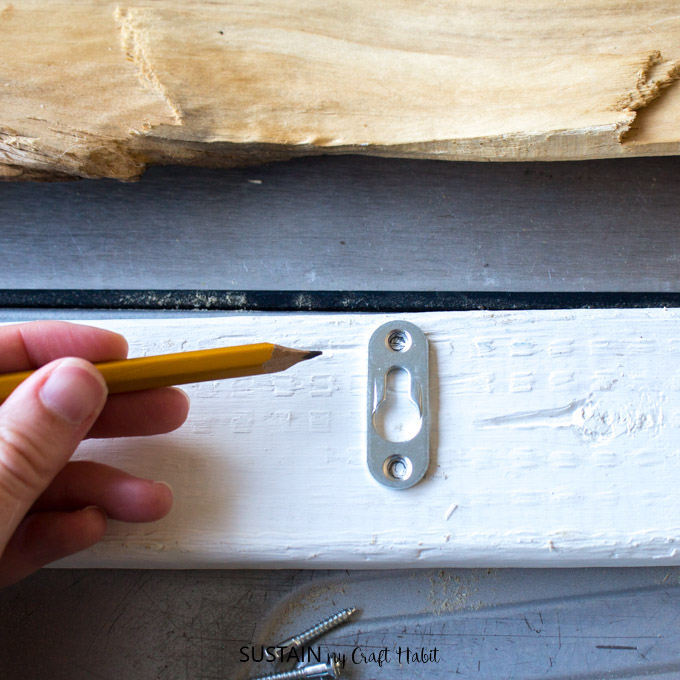
We painted the 1″x2″ wood white and let it dry completely before attaching the keyhole hangers to mount on the wall.
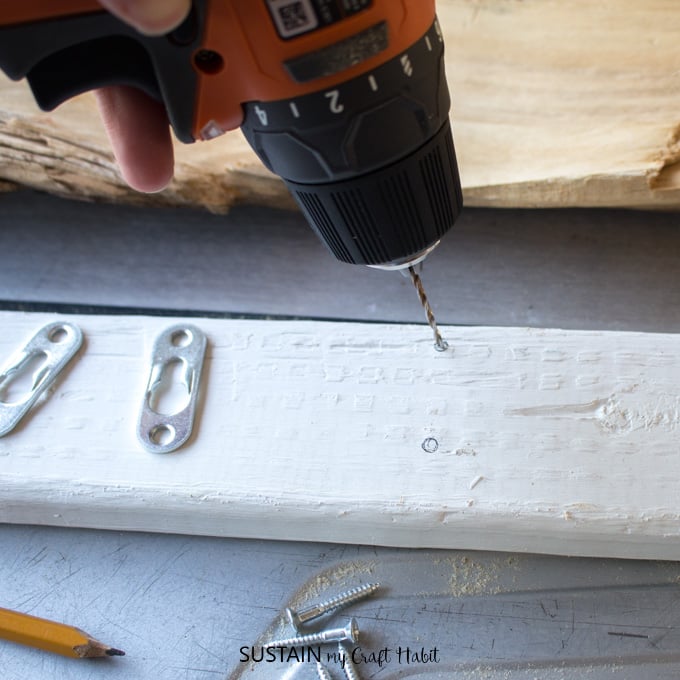
We marked the drilling spots for the keyhole hangers towards the top edge of the wood, about 4″ from each end. Next, we used the markings to drill small pilot holes into the 1″x2″ wood piece.
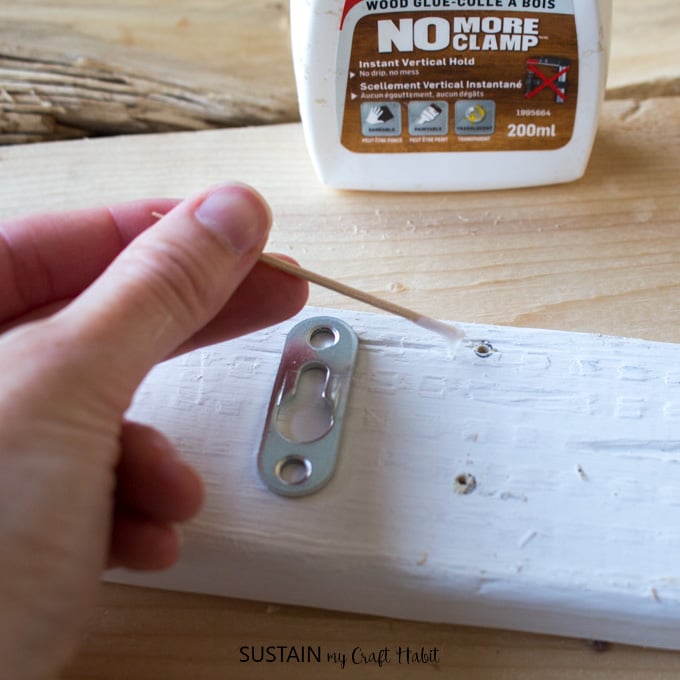
Prior to affixing the keyhole hangers, we put a bit of wood glue into the pilot holes.
The 1″x2″ backing piece is now ready to be mounted to the driftwood.
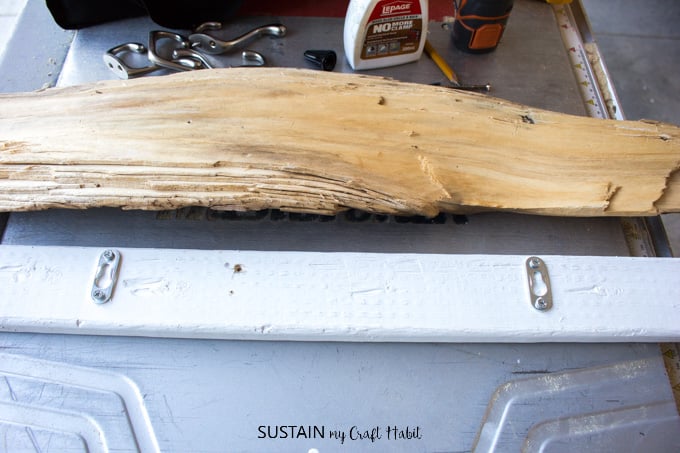
Step 3: Mount the backing to the driftwood
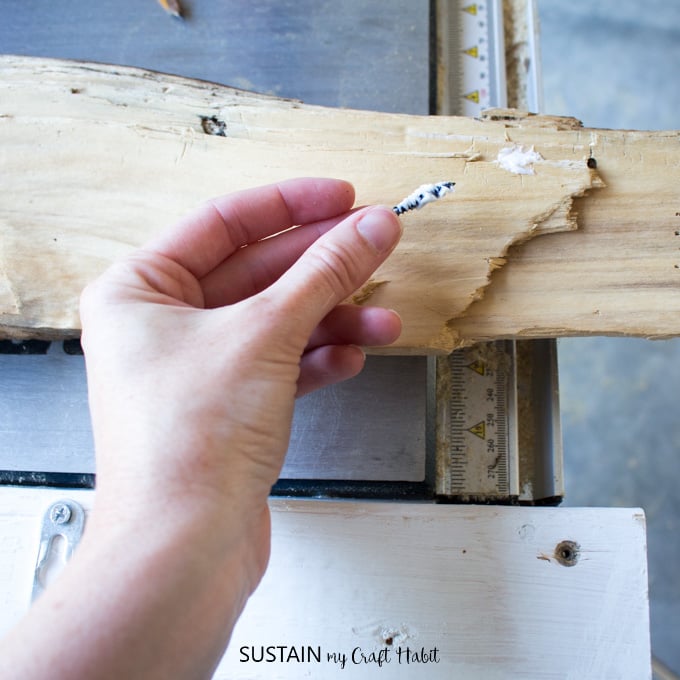
Again, drill a pilot hole, this time all the way through the wood backing into the backside of the driftwood piece. Be careful not to drill completely through to the front side of the driftwood. Before screwing the pieces together add a generous amount of wood glue into the pilot holes for extra adhesion.
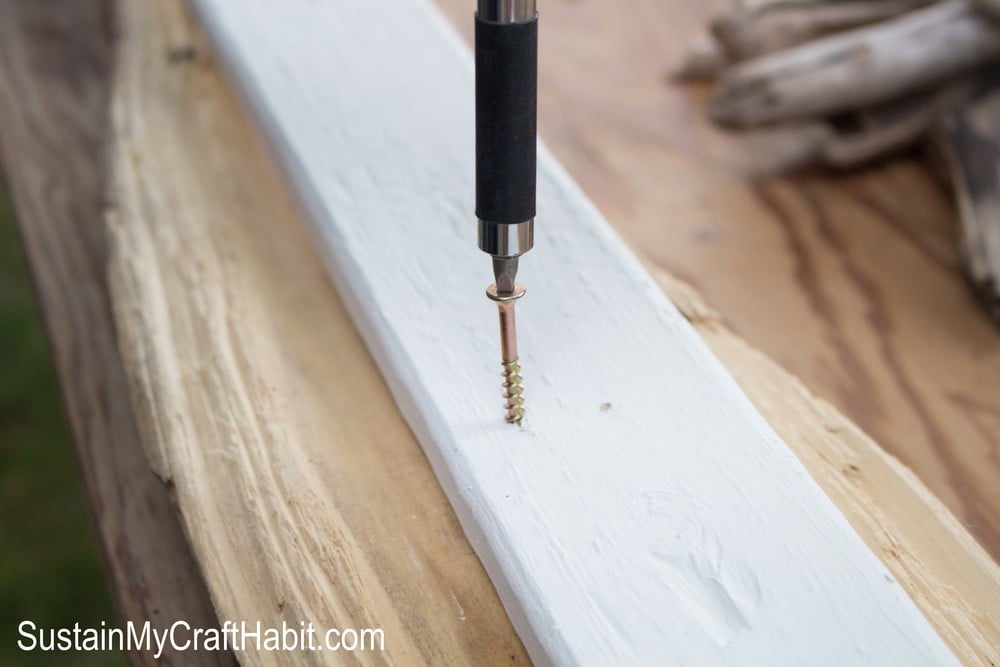
Secure the backing to the driftwood with three screws: one on each end and one in the middle.
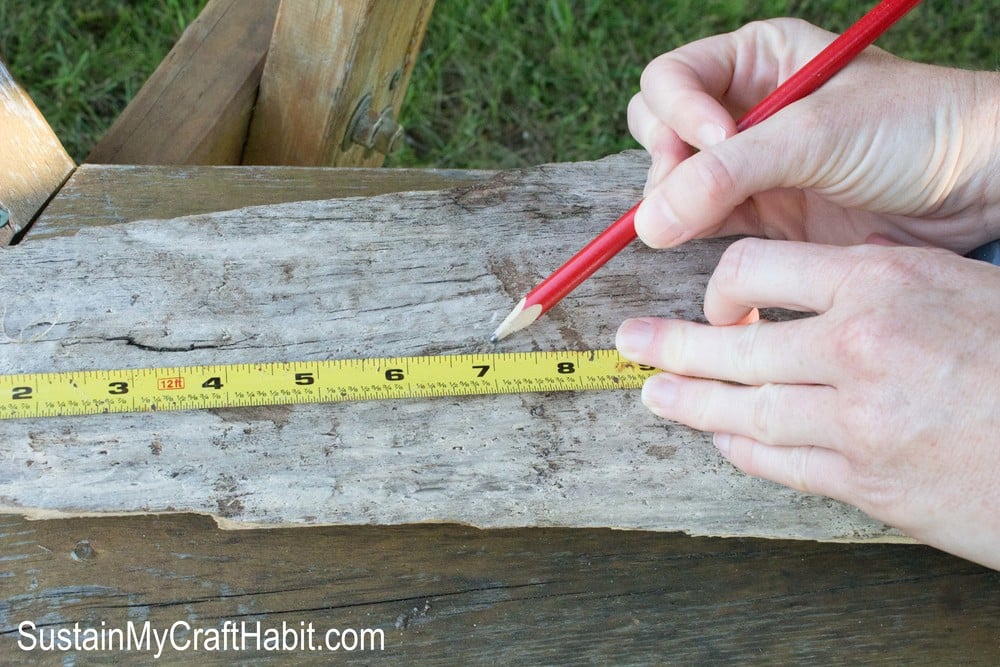
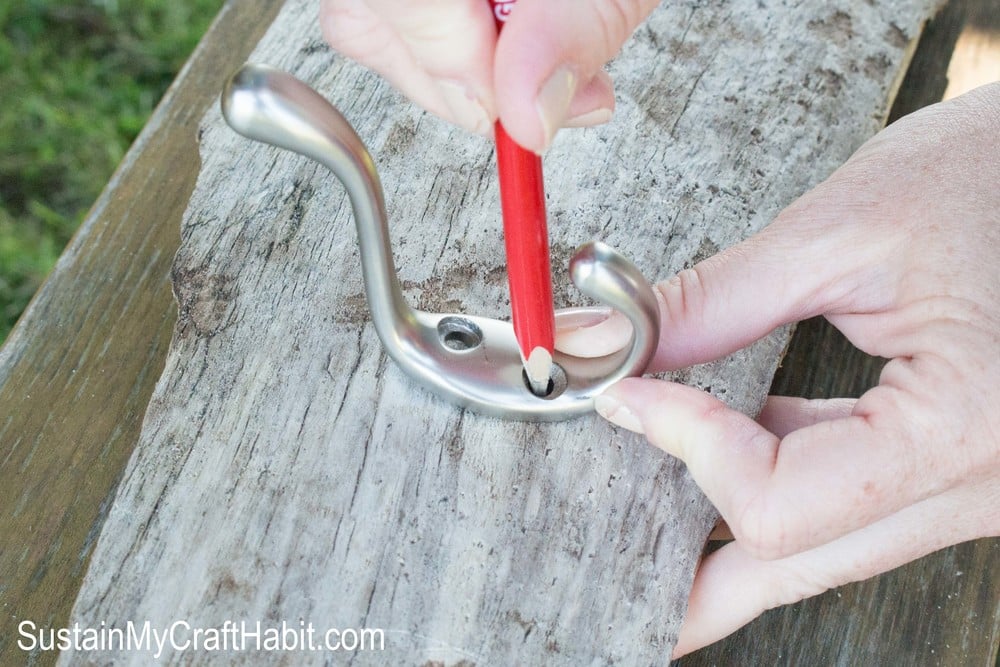
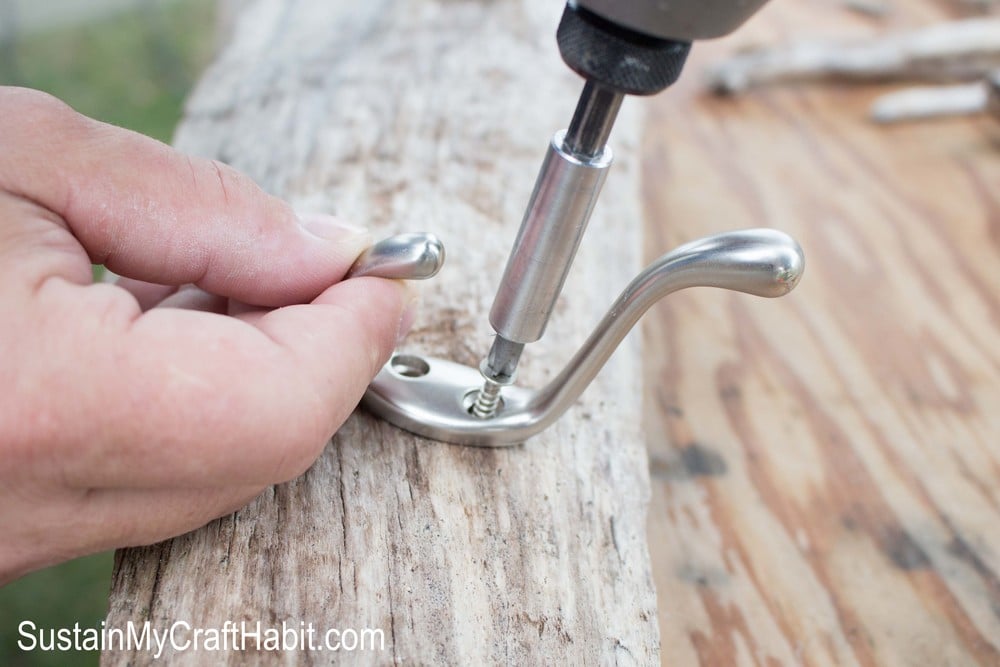
Step 4: Add the towel hooks
Now for the fun part…on the right side of the driftwood, we determined the positioning for the hooks so they would all be evenly spaced apart. We pre-marked the drill holes with a pencil and then drilled all the holes. The final step was to add the brass towel/coat hooks. Using compatible screws and a screwdriver we securely attached each of the hooks.

It was a simple and inexpensive project (we only paid for the coat hooks and keyhole hangers) and we’re left with a unique piece of functional art! We were thinking to use it in our cottage’s beach themed bathroom as a DIY towel rack. However, we’ve decided to save it for the entryway for a rustic coat rack idea.
We hope you’ve found this DIY towel rack tutorial helpful. If you’re looking for a farmhouse style towel rack check out this DIY towel rack made from wood pallets. And if you enjoy making things with driftwood, you make also like our painted driftwood wall art, DIY driftwood mirror or how to make a driftwood wreath tutorials as well.


I love this! What a great use of drift wood and how lucky to find such a large piece that you could use this way. Thanks for sharing on Snickerdoodle Sunday!
We definitely got lucky with this find and knew we had to grab it as soon as we saw it! Thank you so much for stopping by.
Love this!! Thanks so much for stopping by!!
Hugs,
Debbie
Thank you Debbie! Your flower gardens look spectacular (http://www.debbie-dabble.blogspot.ca/2015/08/august-back-yard-cottage-garden-update.html).
I love this so much!
Thank you Deborah and we’re so happy you stopped by!
Looks fantastic!! Good idea about adding the 1 X 2 to the back. I’m so glad you linked up at Snickerdoodle Sunday!
Sarah (Sadie Seasongoods)
Thank you Sarah and we so appreciate having this featured at Snickerdoodle Sunday! Have a wonderful week.
Very simple and cute. Good to be co-hosting the #homemattersparty with you. Can’t believe the month is half over.
Thank you Amanda. We can’t believe how fast this month is going either!
Gorgeous! I love using things that I find as projects. I wish I was closer to the beach because I love the look of the beachy home decor. It turned out really nice.
Thank you Michelle! We love all your upcycling project including the recent coffee station makeover (http://michellejdesigns.com/coffee-station-makeover/).
We are enjoying our time co-hosting the #HomeMattersParty with you!
What a beautiful towel rack! Want to make me one. Thank you for being a wonderful cohost on #HomeMattersParty.
Love it! I really think my husband would love it too. Thanks for sharing. Great to be co-hosting with you at #HomeMattersParty
Thank you Shann Eva! That’s a huge complement for hubbies to like our projects 🙂
Looking forward to co-hosting another week of #HomeMattersParty with you!
This is so cute! I’ve been thinking about making something like this but never considered using driftwood. It looks amazing though! Great to be co-hosting the #HomeMattersParty with you again!
Thank you Sarena! We definitely got lucky to find a big enough piece that washed up after a rainstorm!
We’re very much enjoying our time co-hosting the #HomeMattersParty with you.
Cute! My favorite update for bathroom is changing out the towel racks for hooks. It’s so much easier to get the kids to hang their towels up when all they have to do is drape it on the hook.
I’m having fun co-hosting the #HomeMattersParty with you this month!
So true Alayna! My guys love to yank the towels off of the towel bar but never manage to get them back on. Hooks are much better for them!
Thank you so much for stopping by and being a great co-host for the #HomeMattersParty!
Thank you for sharing with OMHG Wordless Wednesday link party. I absolutely love it!! I have picked you as my favourite feature from last week’s link up, come and grab your button! Have a great day Evija @Fromevijawithlove http://fromevijawithlove.com/linky/wordlesswednesday-link-party-august-3/
Thank you so much Evija! We are so happy to have been featured at the fun OMHG Wordless Wednesday link party! Have a wonderful week.
This is a great idea for a beach place. It really enhances the laid back feel of the ocean! Thanks for joining us on Oh My Heartsie Girl Wordless Wednesday!
Shellie
http://www.thefabjourney.com
Hi Shellie! I’m hoping this piece in my house will remind me of warm days at the beach through the cold of winter! Thank you so much for coming by.
love it!
Thank you Ariel! Love the atomic star decals in your latest post, especially with that amazing green wreath (http://www.pmqfortwo.com/2015/08/entryway-atomic-star-decals/)!
I love this and want to try it! How do I attach the 1×2 to the wall? Thank you!!
I have the same question as Christy. How did you attach the 1 X 2 to wall without visible screws on the driftwood?
Thanks!
So pretty! Do you mind if I include a photo and link to your instructions in a blog post I’m writing about ideas for decorating RV’s with a beach theme?
Can you share the paint color (& brand)?. Looks amazing with the driftwoid.
Hi. I have a question. Do you find the openings on the back are sufficient to hang the driftwood securely?. I have a piece I have been planning to use for the same purpose but had not decided how to hang it. Thanks!
Ty for such a thorough, clear explanation, and the pictures to go along! One of the best I’ve seen I promise you ????! I’m a very visual learner so I love it!
Hi Lily.
Our pleasure! So glad you found it helpful.
Kind regards,
Jane