Upcycled Tin Can Craft Storage with Cricut
In an effort to use items we already have around the house and still satisfy our craft habit, we upcycled a bunch of tin cans for some craft room organization.
Craft Room Organization with Modern Upcycled Tin Can Storage
Over the years, I’ve collected a lot of craft supplies, I mean A LOT. My husband would say I am a bit of a hoarder when it comes to crafting. BUT what does he know!
There’s a real sense of satisfaction with creating something beautiful out of items you have around. And you never know when that item you’ve been holding on to for years will come in handy. Take this scrap fabric wreath and also this no-sew tshirt bag made with an old cotton tee!
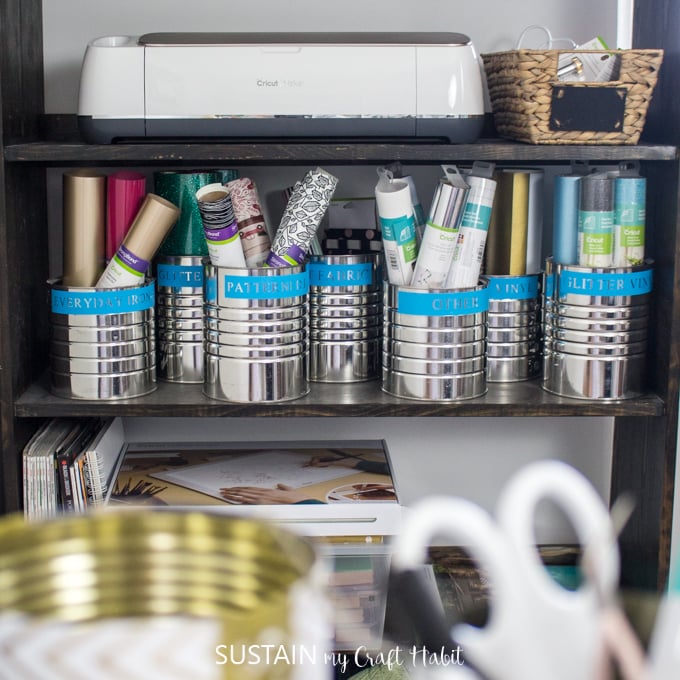
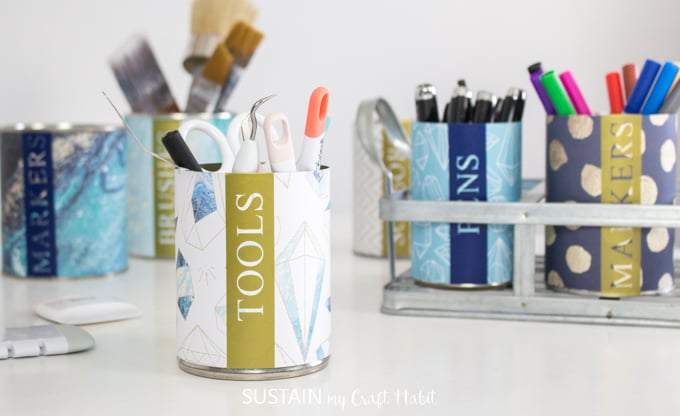
The key to collecting all those craft supplies is organization. Upcycling these tin cans into modern holders is one of many craft room organization ideas on a budget. I also made special labels for my empty coffee tins to hold all the different types of Cricut vinyl and materials. And what’s more, is that I made all this using materials and Cricut supplies I already had at home!
If you’re practicing social distancing (like so many of us), crafting is a great way to keep yourself busy. Look for ways to utilize materials and Cricut tools you already have at home to craft something special. And as an added bonus, Cricut has added loads of free images to Design Space so there is no shortage of inspiration.
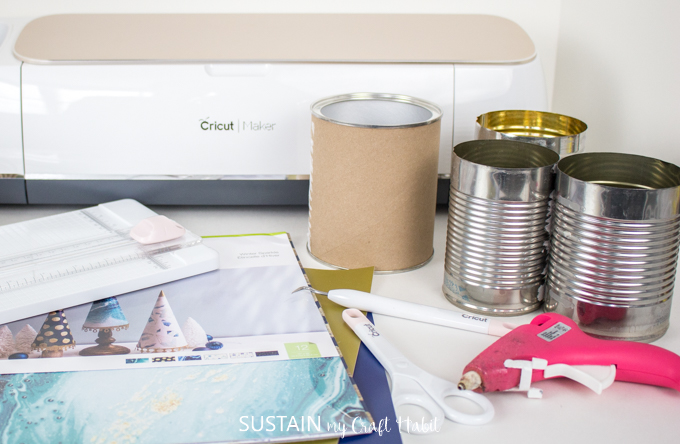
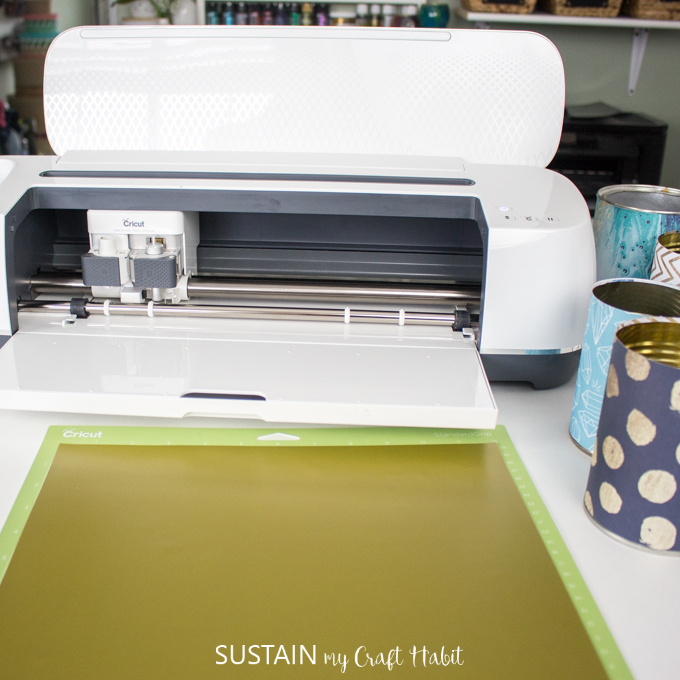
Materials Needed:
- Tin cans in assorted sizes (cleaned and dried)
- Cricut Deluxe Paper, Hostess with the Mostess Winter Sparkle
- Cricut Maker
- Standard grip mat
- Cricut Paper Trimmer
- Cricut Premium Vinyl, Removable in gold and dark royal blue
- Weeder
- Cricut Transfer Tape
- Double sided tape, paper glue or hot glue gun
Instructions for Upcycling Tin Cans:
Prep Work
Thoroughly clean and dry the tin cans before starting. Always take extra care working with tin cans to ensure there are no sharp edges. If any are found, you can sand the edges with a metal sander tool.
Covering the Tin Cans with Paper
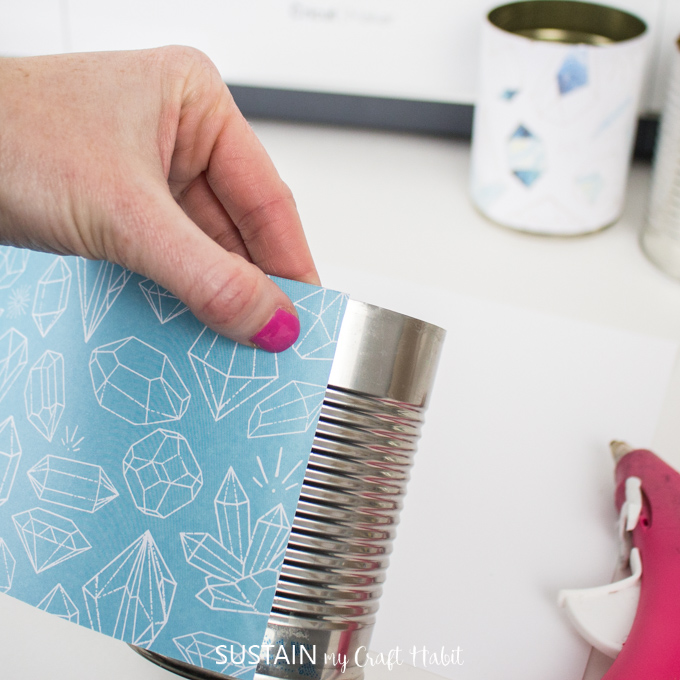
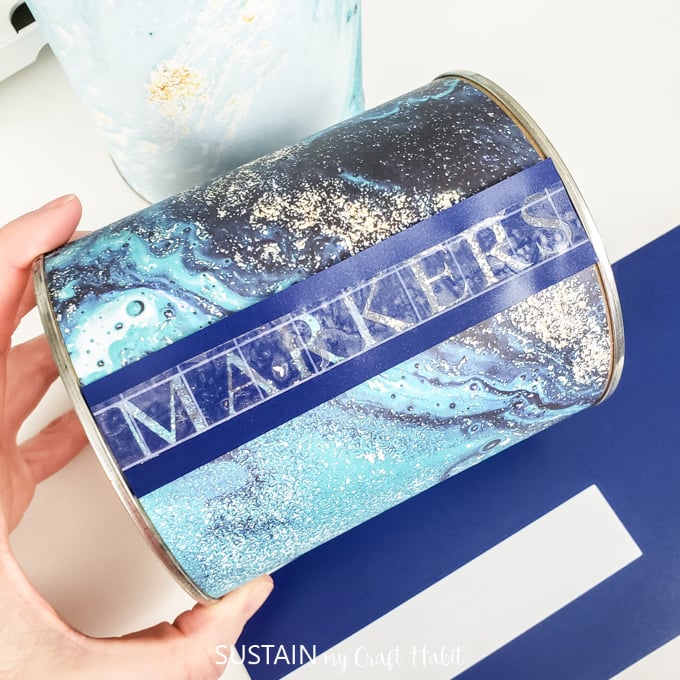
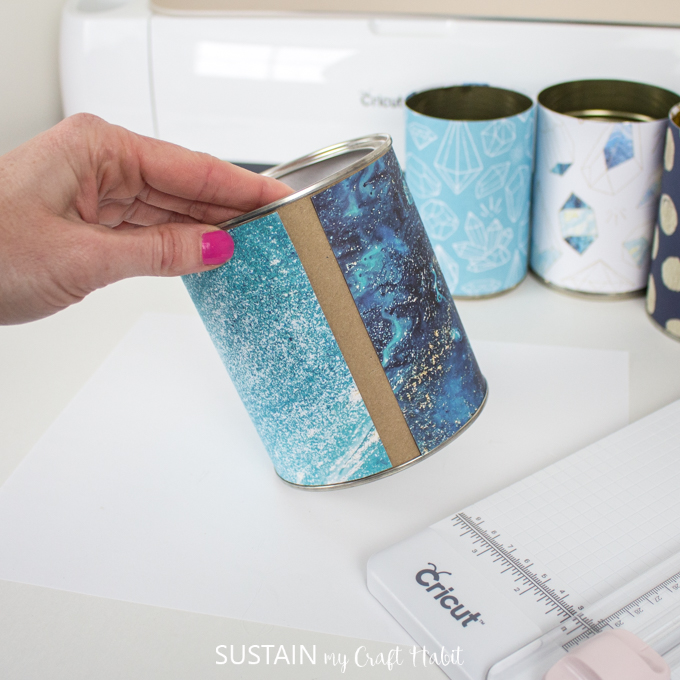
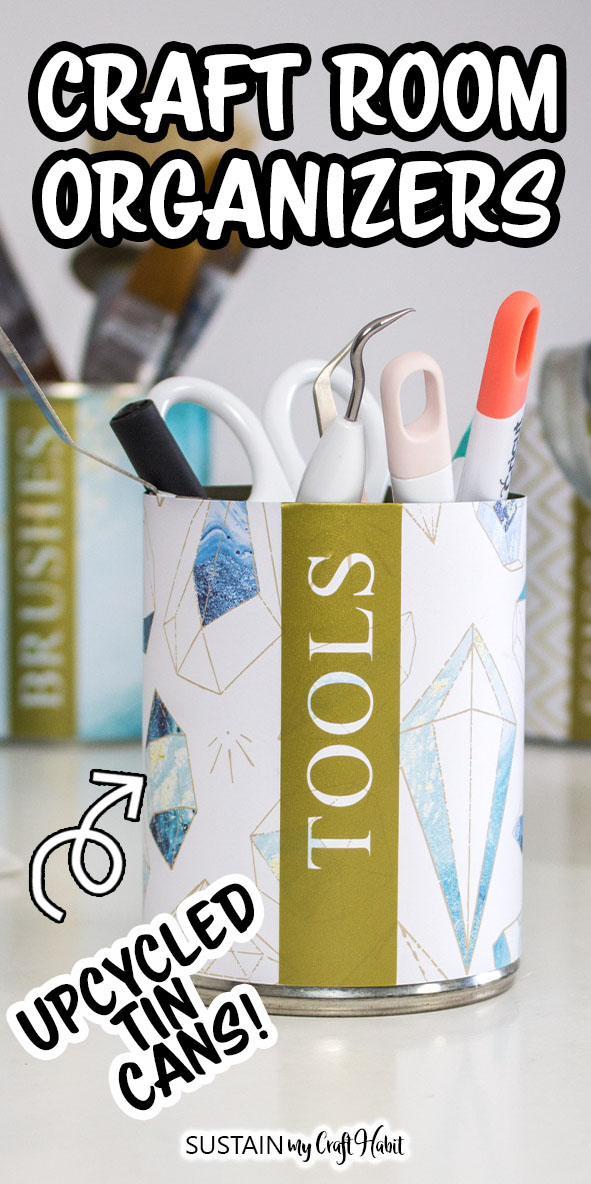
Working with one tin can at a time, select a piece of paper from the Hostess with the Mostess Winter Sparkle pack. We completely fell in love with this collection as soon as we saw it! With the paper being reversible, there are so many pretty options to choose from!
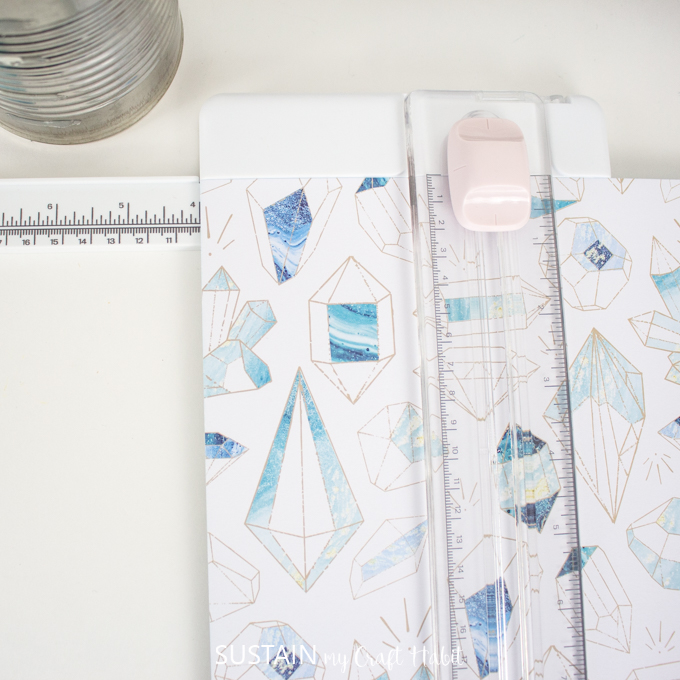
Measure the height of the can.

Using the paper trimmer, cut the paper to size.
Wrap the paper around the tin can and glue in place.
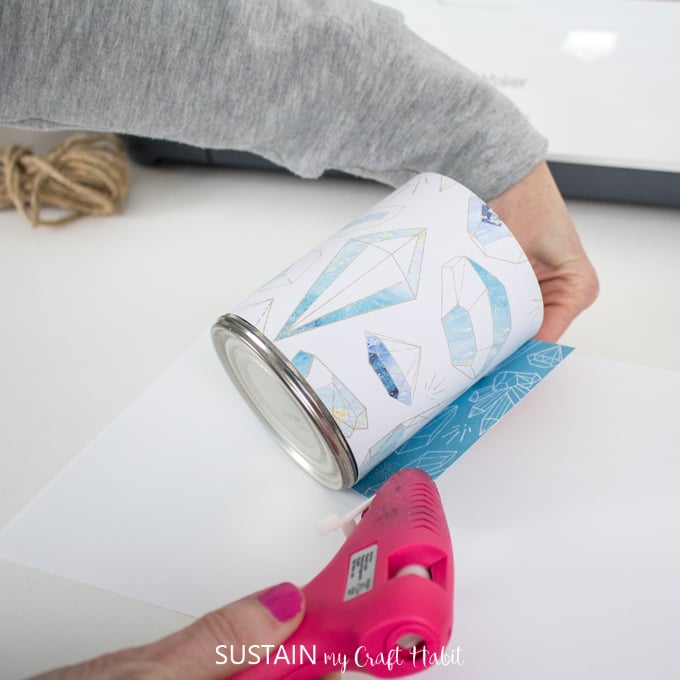
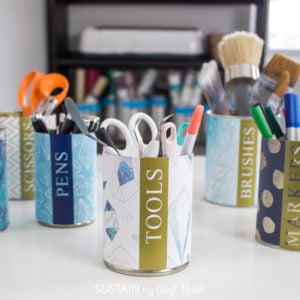
Continue with the rest of the tin cans, mixing up the coordinating paper patterns.
Preparing the Labels
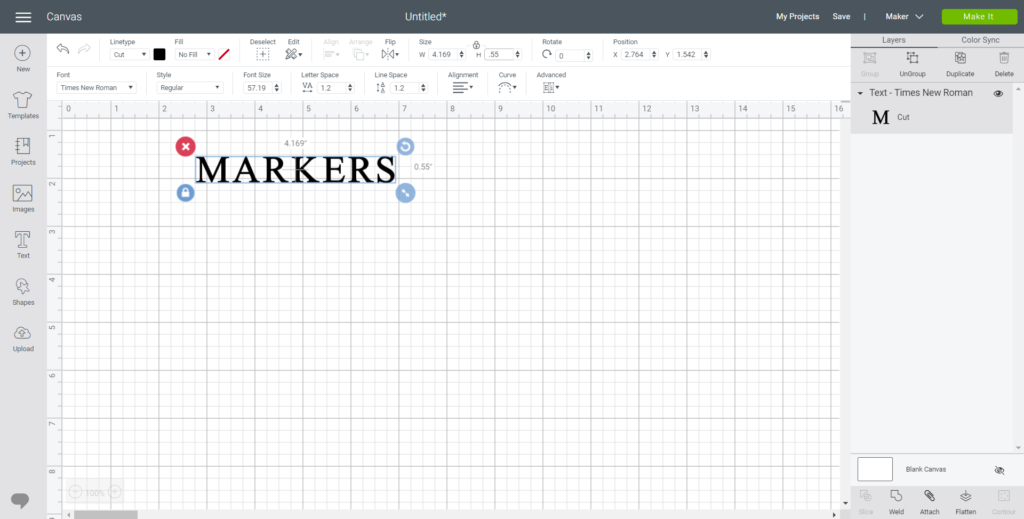
On a new canvas in Cricut’s Design Space, select the Type button on the left hand side.
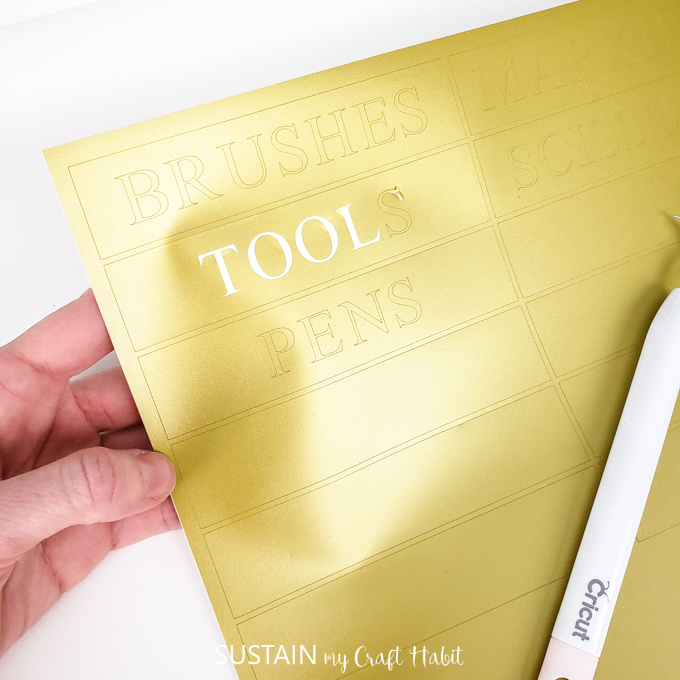
In cap locks, type out the words you plan to use, such as MARKERS, PENS, BRUSHES, SCISSORS AND TOOLS.
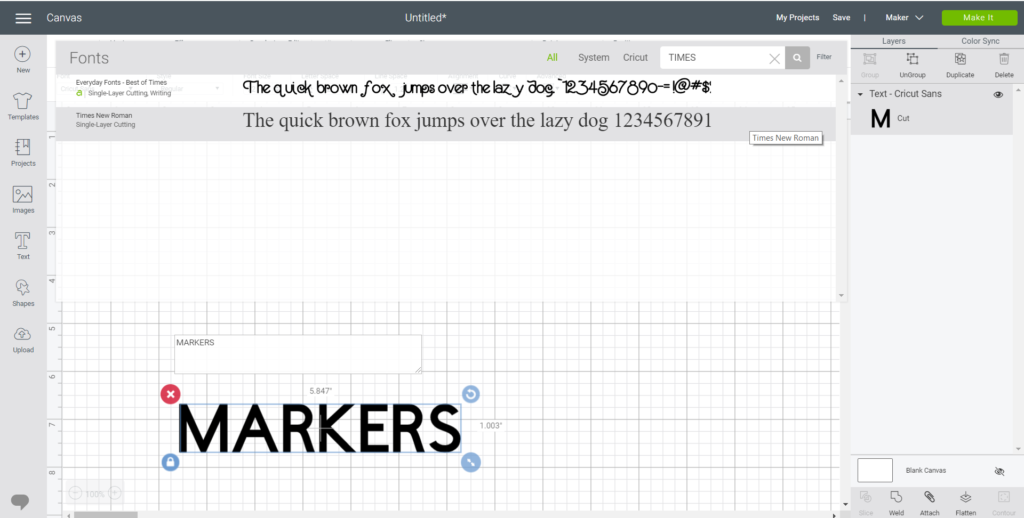
Change the font to Times New Roman and adjust the size to 0.55” high, scaling the length accordingly.
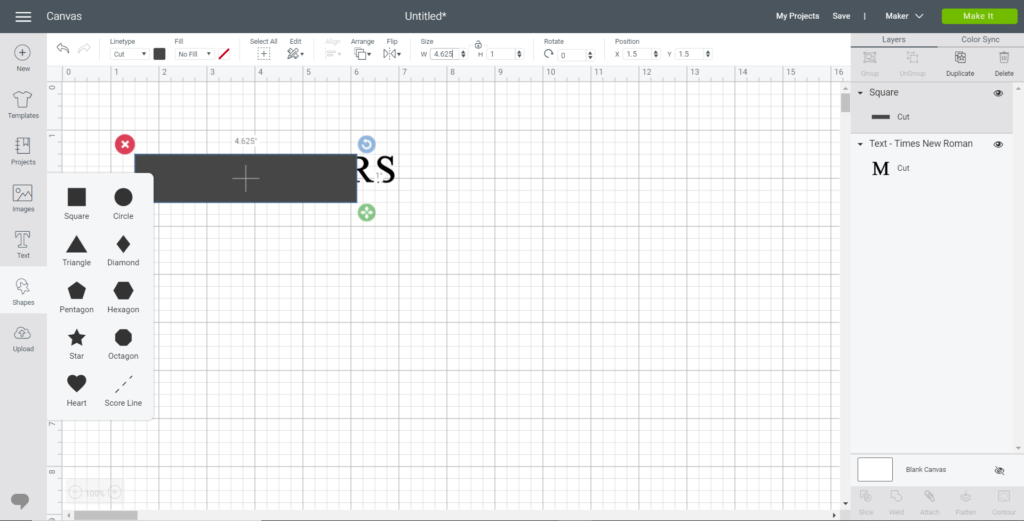
Click on the shape bottom in the toolbar and choose the square shape.
Adjust the size of the rectangle to measure 1” high by 4 5/8” (this is the height of the tallest tin can).
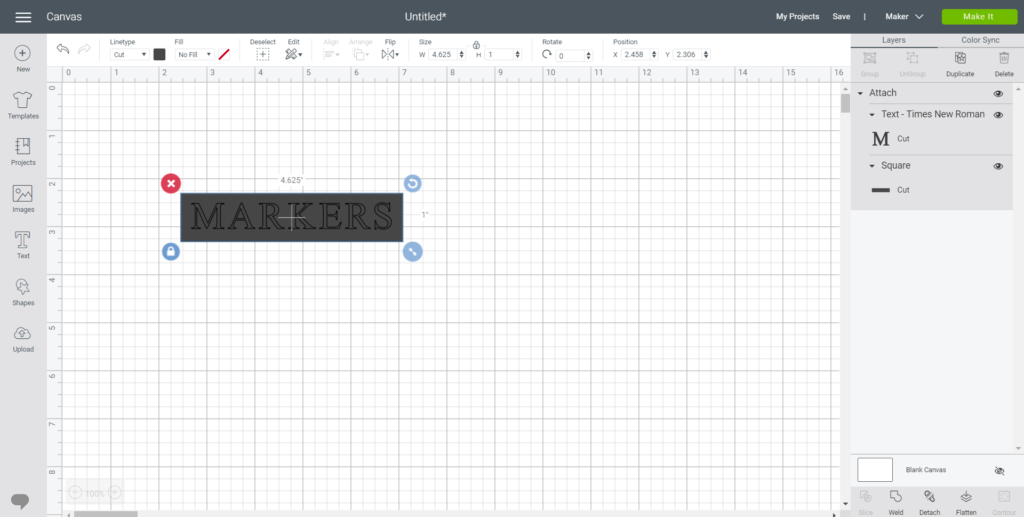
Place the text in the center of the rectangle, moving the rectangle shape behind.
Highlight the text and rectangle, then click the Attach button in the bottom right side.
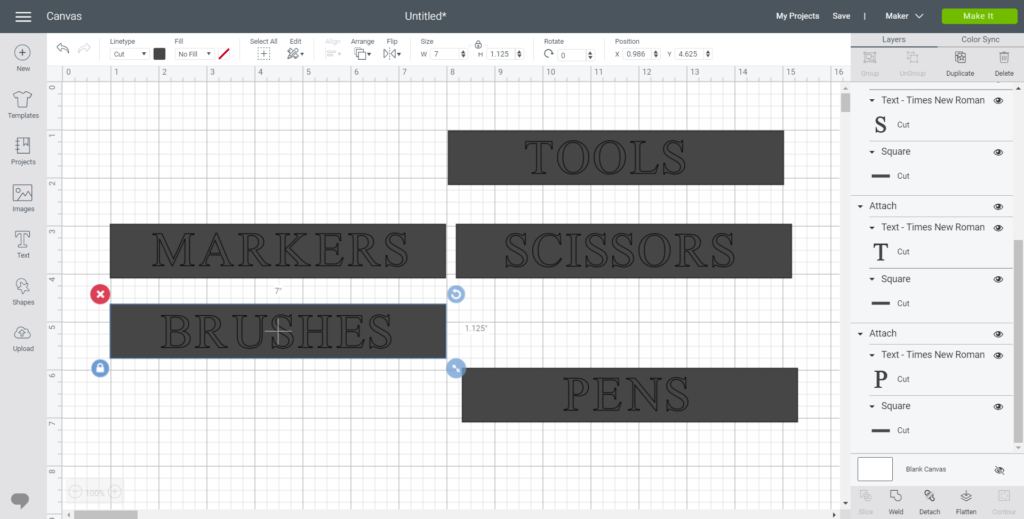
Repeat for the rest of the labels. Make a few blank rectangles as well.
Next, select the Make It button and proceed to cutting.
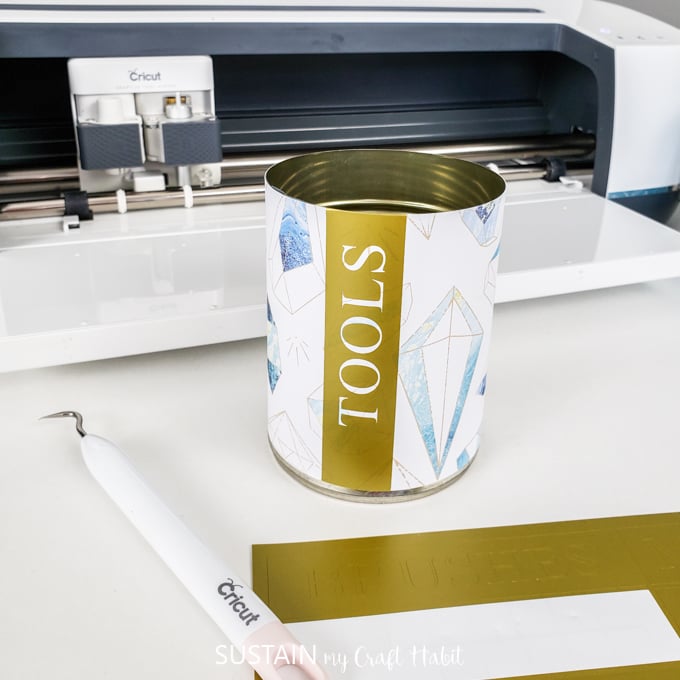
Place a sheet or Premium Vinyl on a standard grip mat.
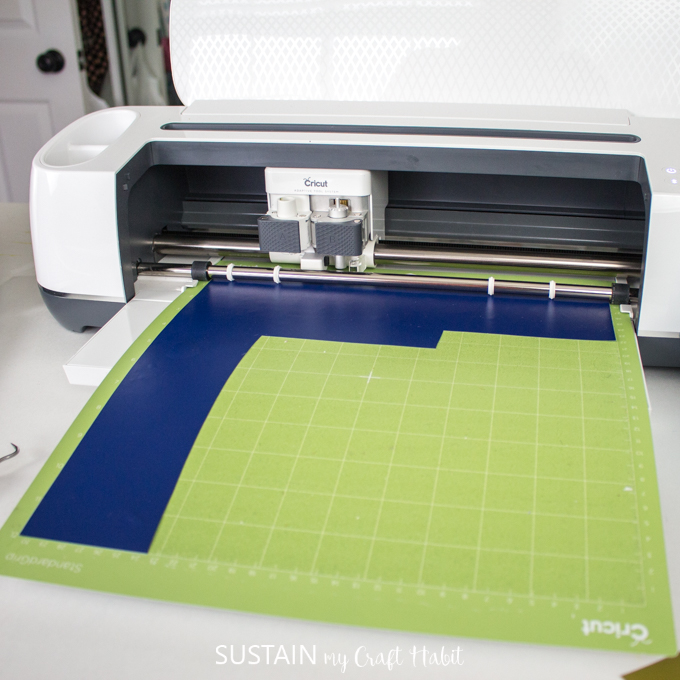
Follow the instructions on the screen to cut out the labels. When done, unload the mat.
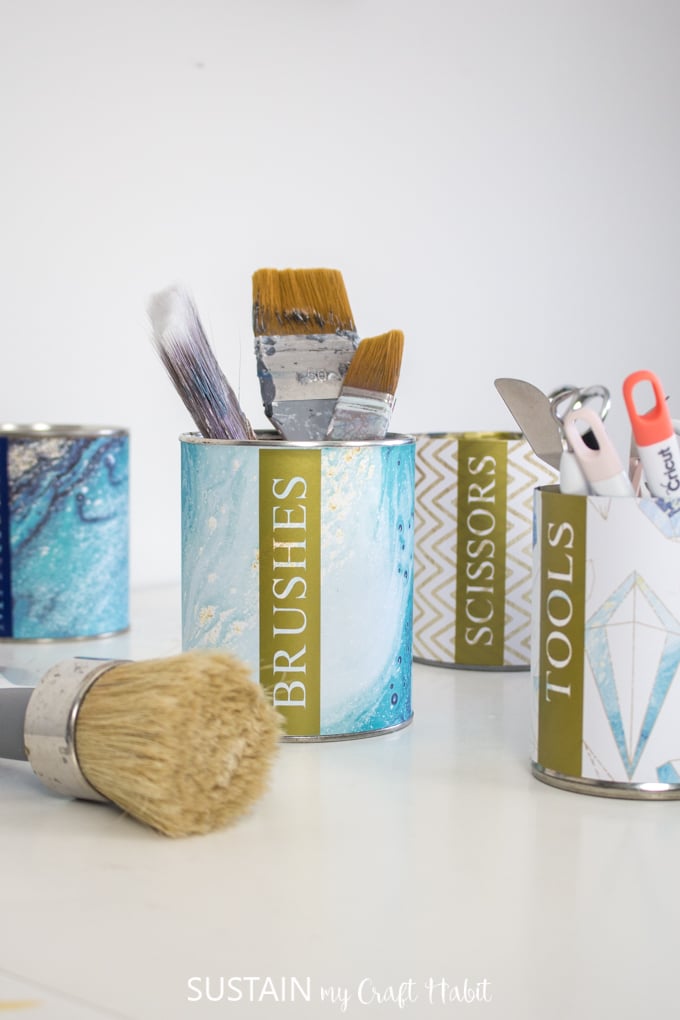
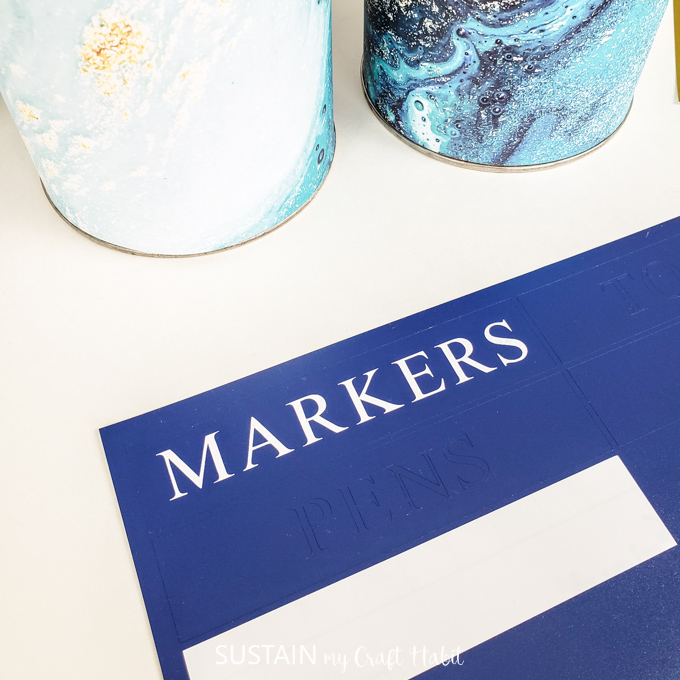
(I used some of the Royal Blue vinyl to make these craft room organization tags for Jane’s craft room. I’m glad I held on to the scrap vinyl for this project!)
Using the weeder, pick out the individual letters.
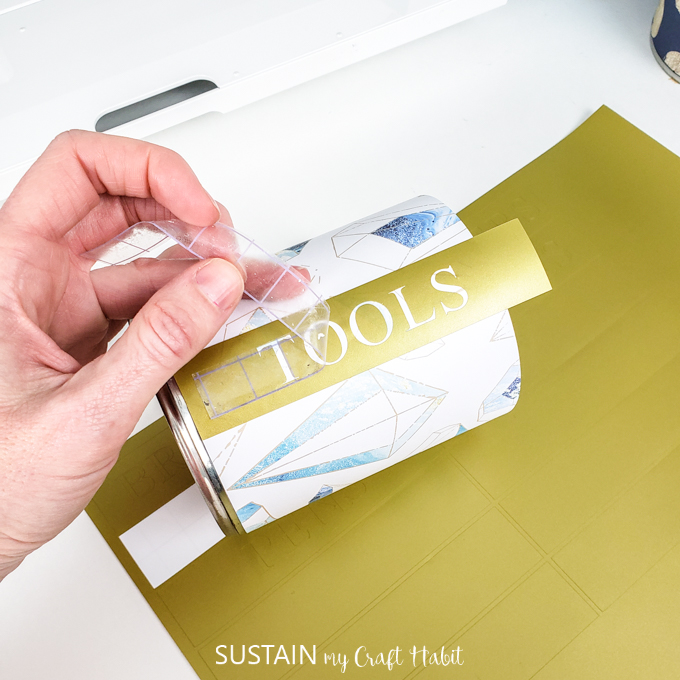
Place a small sheet of transfer tape over the vinyl label.
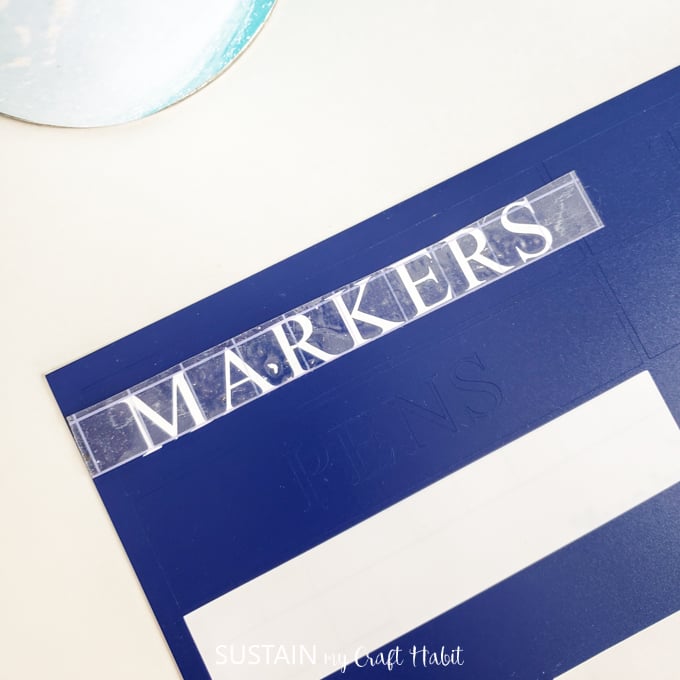
Peel off the premium vinyl backing.
Position the label on to the tin can as shown.
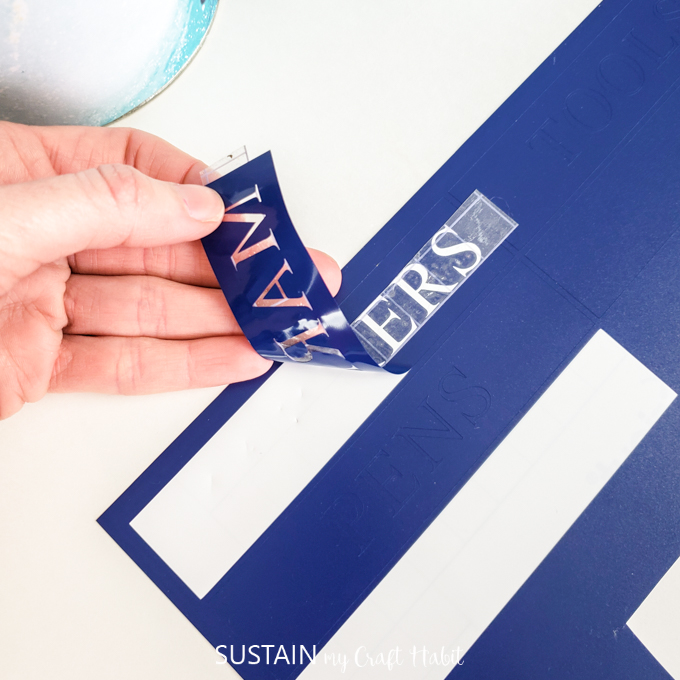
Next, peel away the transfer tape leaving the vinyl label on the can.
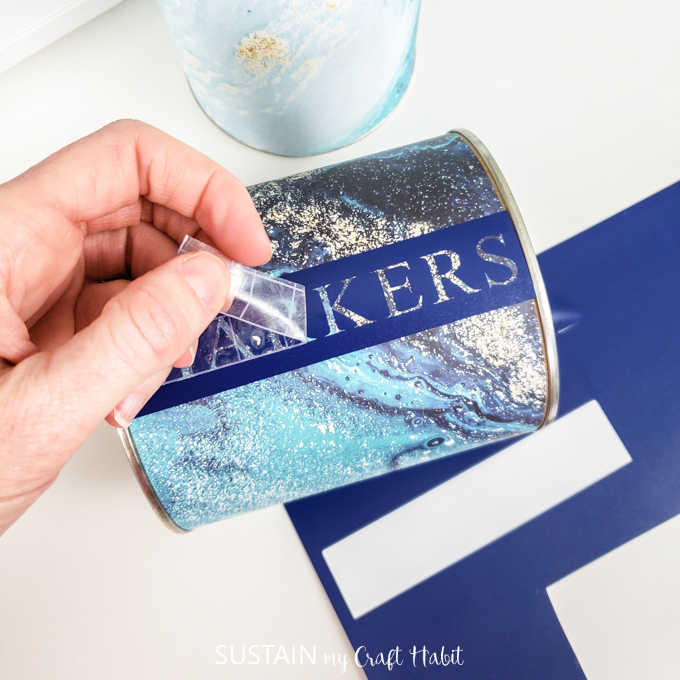
If the label is too long, cut the excess or fold it under.
Finishing
If you have any cans where the paper is not long enough, cover the blank space with the blank rectangles.
Now sort all your craft supplies in style with these handy upcycled tin can holders for some added craft room organization.
If you’re looking for more DIY project ideas, Cricut will be sharing more stay-at-home tutorials on their blog in the next two weeks. You can also check out these 10+ Cricut crafts to improve your home office.
Like it? Pin it for later!
Upcycled Tin Can Craft Storage with Cricut
Materials
- Tin cans in assorted sizes
- Cricut Paper Trimmer
- Cricut Deluxe Paper Hostess with the Mostess Winter Sparkle
- Cricut Maker
- Cricut standard grip mat
- Cricut Premium Vinyl removable in gold and dark royal blue
- Weeder
- Cricut Transfer Tape
- Double sided tape paper glue or hot glue gun
Instructions
- Working with one tin can at a time, select a piece of paper from the Hostess with the Mostess Winter Sparkle pack.
- Measure the height of the can and use the paper trimmer to cut the paper to size.
- Wrap the paper around the tin can and glue in place.
- Continue with the rest of the tin cans, mixing up the coordinating paper patterns.
- To prepare the labels, on a new canvas in Cricut’s Design Space, select the Type button on the left hand side.
- In cap locks, type out the words you plan to use and change the font to Times New Roman. Adjust size accordingly.
- Click on the shape bottom in the toolbar and choose the square shape and adjust the size accordingly.
- Place the text in the center of the rectangle.
- Attach the text and rectangle shape together.
- Move to cutting stage.
- When done, unload the mat and use the weeder to pick out the individual letters.
- Cover the label with transfer tape and then peel off the premium vinyl backing.
- Position the label on to the tin can and peel away the transfer tape leaving the vinyl label on the can.