As the days grow shorter, and leaves begin to fall from the trees, we know that autumn has arrived. It’s a time for apple cider, cozy sweaters, and pumpkin spice everything. But why limit your love for pumpkins to just lattes and pies?
This year, bring some festive charm into your home with beautifully crafted laser-cut wood pumpkin ornaments. Not only will they add a touch of rustic elegance to your fall decor, but they also make for unique and personalized gifts.


Why You Will Love Making Laser Cut Wood Pumpkin Ornaments
For starters, they’re incredibly versatile. You can use different types of wood such as maple, birch, or cherry to achieve different looks and textures. Plus, you can play around with various designs – from simple shapes to intricate patterns – adding your own personal style to each one. And if you want to take it a step further, consider painting or staining the ornaments for a pop of color. The possibilities are endless, and the end result is sure to impress.

What Is Laser Cutting?
Laser cutting is a technology that uses a high-powered laser to cut through materials such as wood, paper, or acrylic with extreme precision. This advanced technique allows for intricate and detailed designs to be created quickly and accurately. And the best part? You don’t need any prior experience in woodworking to create beautiful pieces using this method. With just a little bit of creativity, you can bring your ideas to life and add a personal touch to your home decor.
We have a full review of the xTool M1, a hybrid laser engraver and cutting machine in which we cut these adorable wooden pumpkin ornaments. Along with these other DIY projects:
- kraft paper DIY night light
- laser engraved slate coasters
- upcycled tray home sign – beginner xTool M1 project


Want to receive a ton of inspiration and money saving ideas for decorating, gift-giving and crafting? Join HERE!
Materials Needed
Disclosure: This post contains affiliate links for your shopping convenience. Should you choose to purchase through them, we will make a small commission at no extra cost to you. You can read our full disclosure policy here.
- xTool M1 or other cutting machine
- Pumpkin SVG cut file (you can find this SVG file in our Craft Habit Graphics digital Etsy shop)
- Basswood sheets
- Gold pumpkin tulle (we got ours from the dollar store)
- Paint in brown and blue
- Paintbrushes
- School glue
- Decoupage or Mod Podge
- Wood beads
- Twine or ribbon


How to Make Laser Cut Wood Pumpkin Ornaments
I shared the tutorial for these pumpkin ornaments on a Facebook Live which you can catch here. Or if you prefer the photo tutorial, continue reading below.
Before you begin you’ll need to grab the pumpkin ornaments svg file and use your xTool M1 cutting machine (or other cutting machine) to cut out the shapes out of basswood sheets.
Embellishing Pumpkin Ornaments
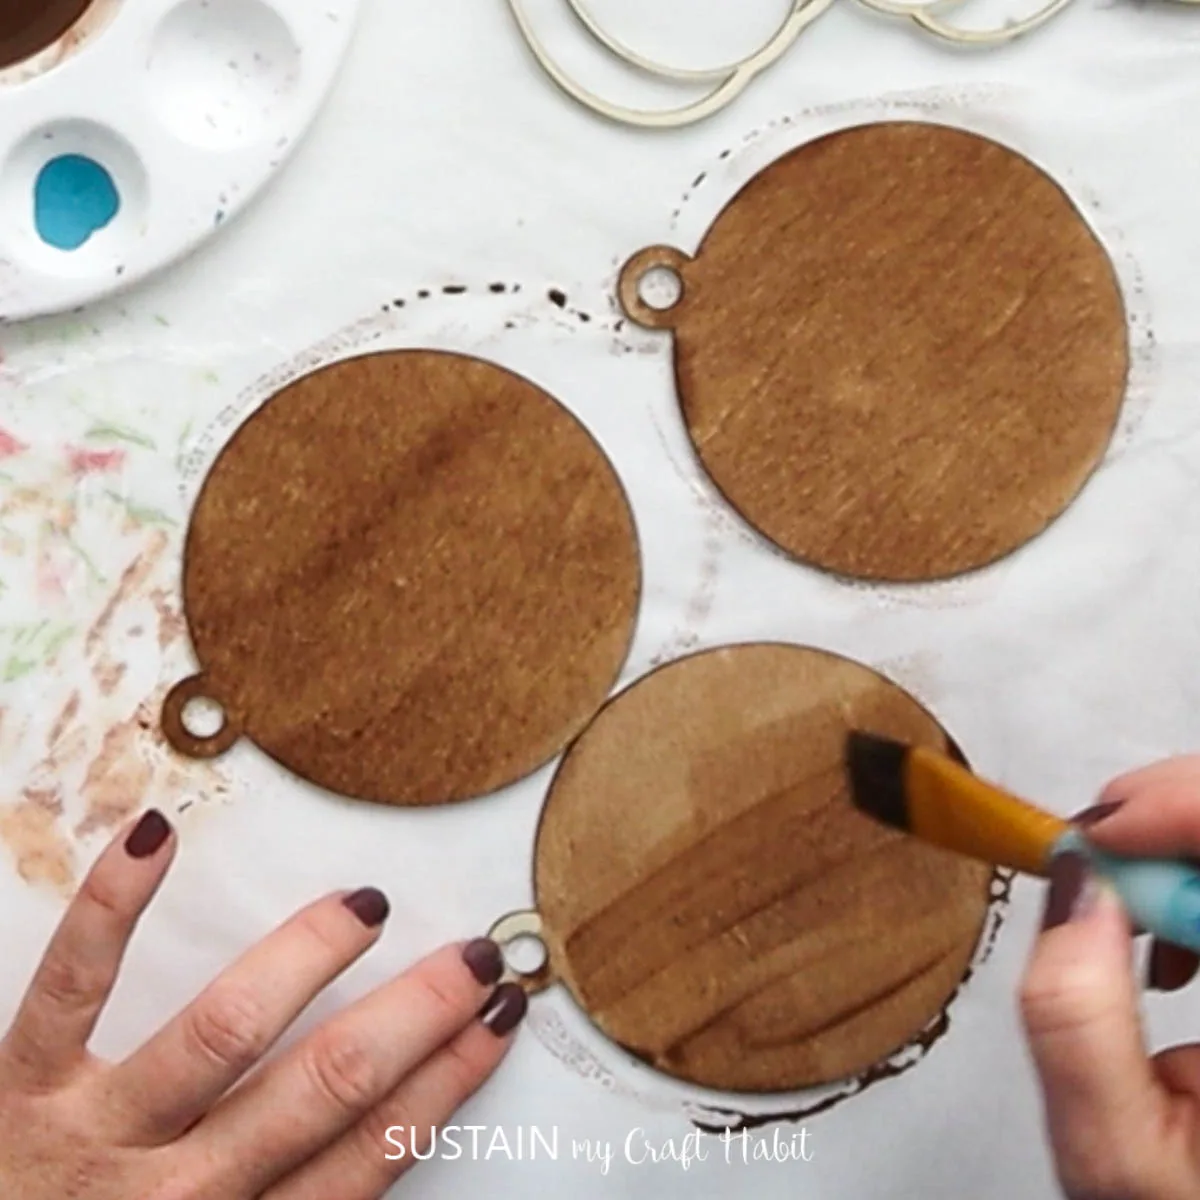
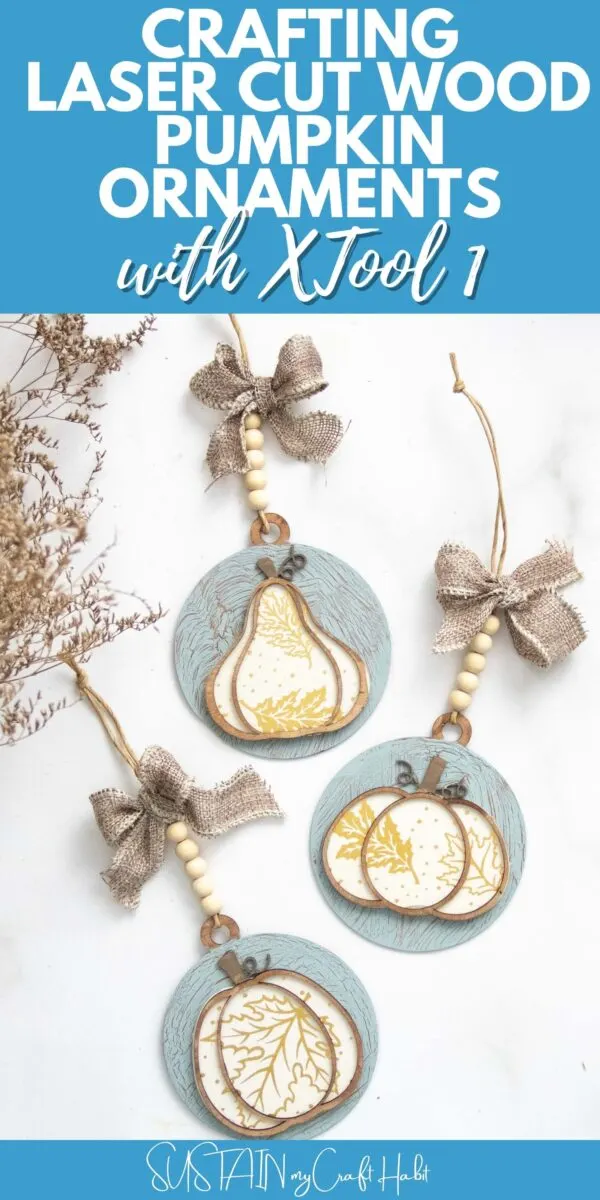
Paint your wood rounds with brown paint. Let dry completely.

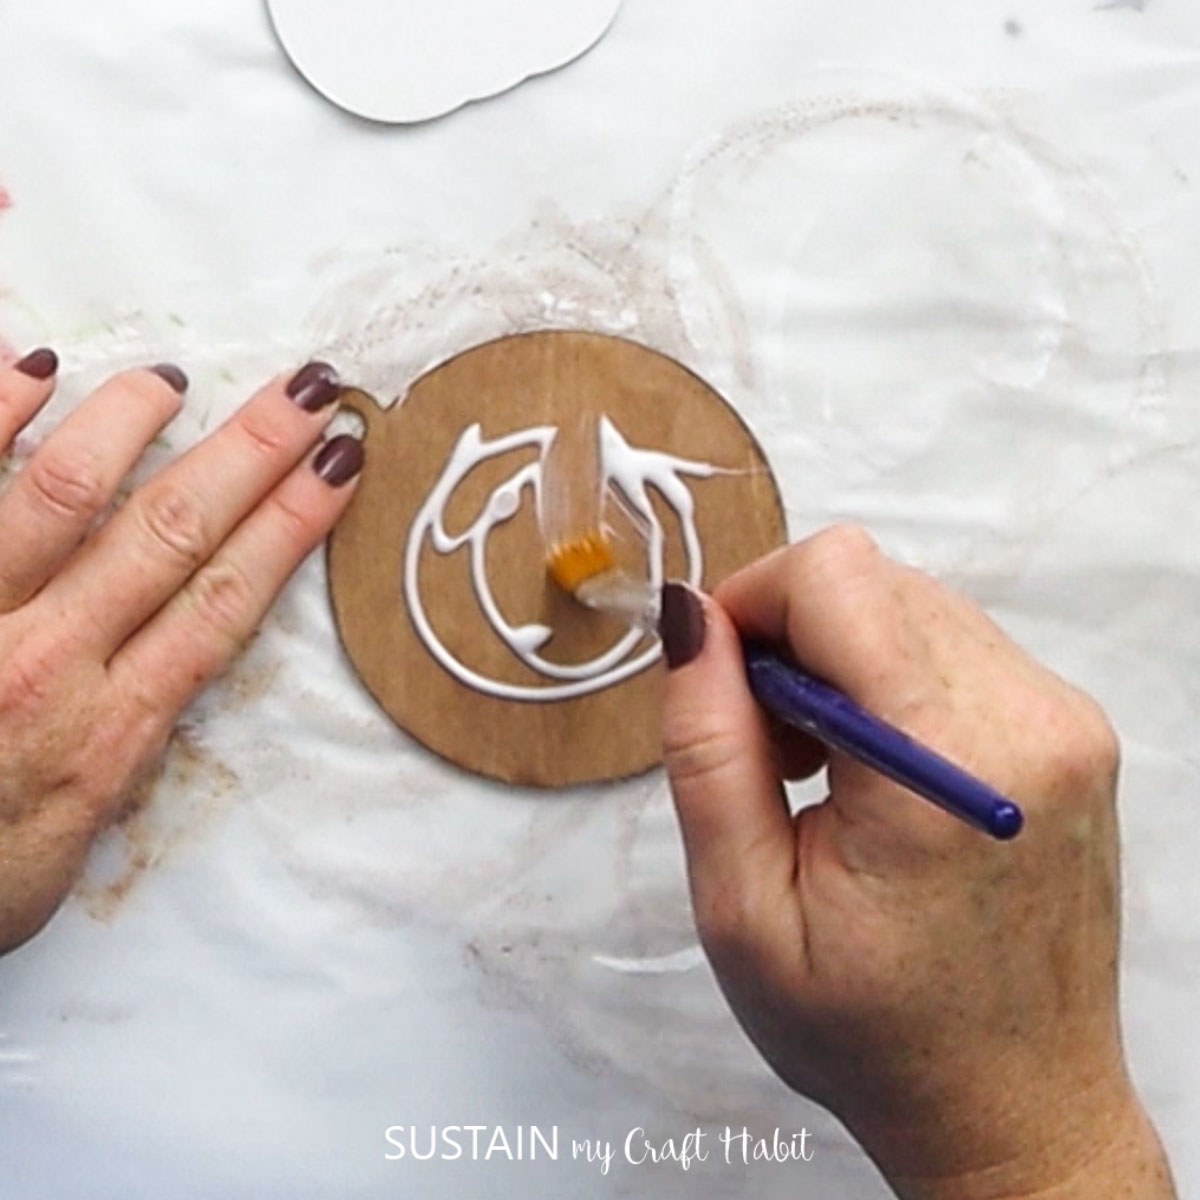
Paint a generous coat of school glue onto the wood rounds. Brush it in one direction for best results. Let dry until TACKY (the glue needs to still be wet for the paint crackle finish to form).

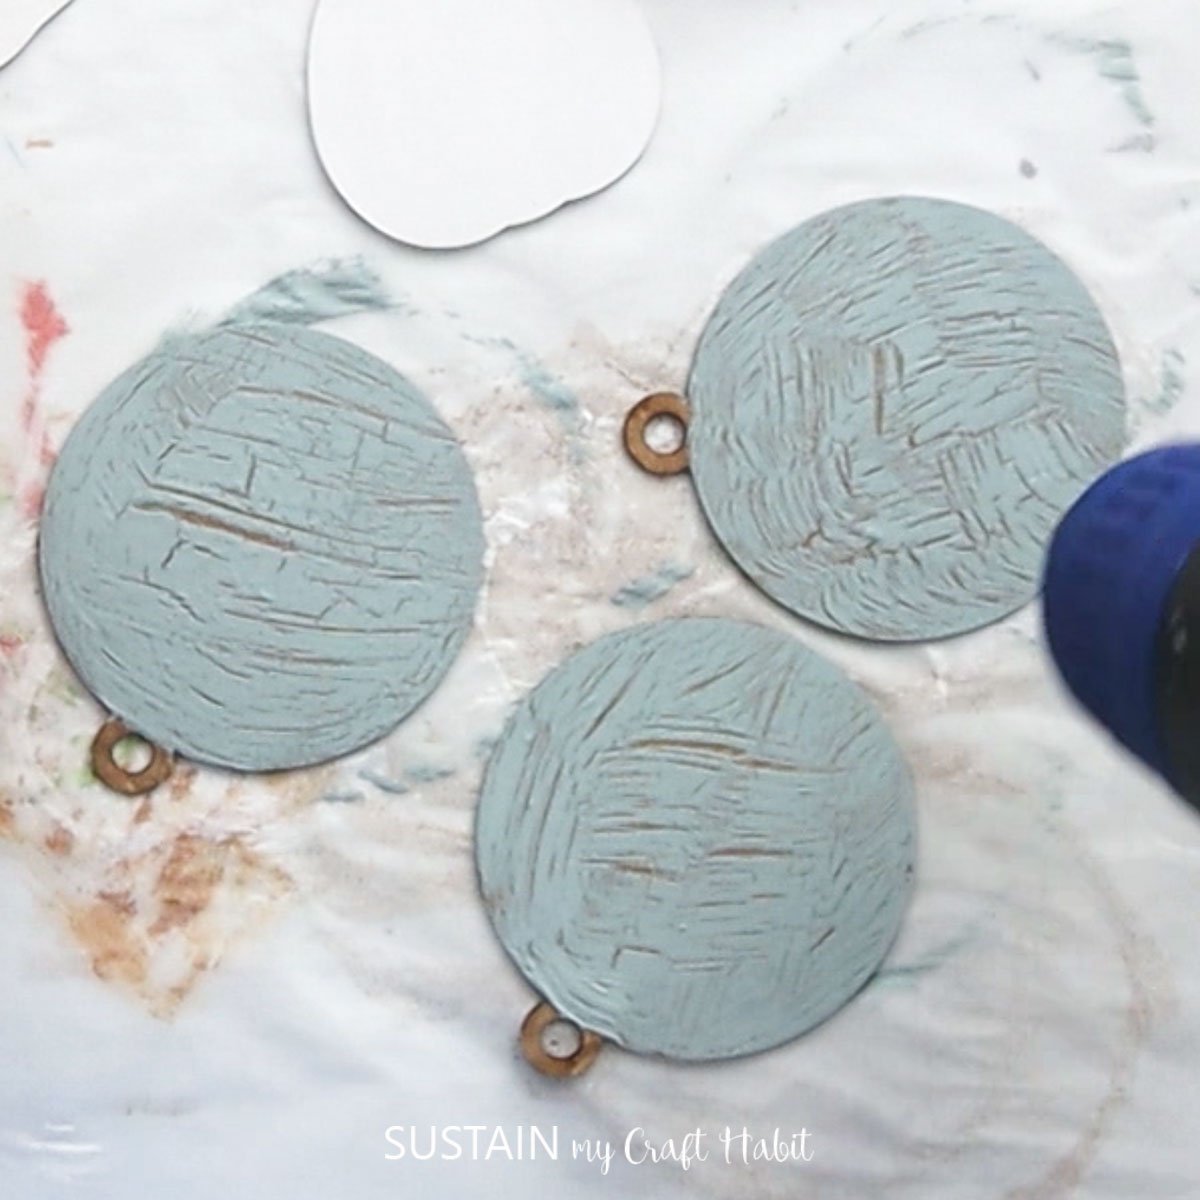
While the glue is still tacky, brush the blue paint over it. As the paint dries, the crackle finish will form.


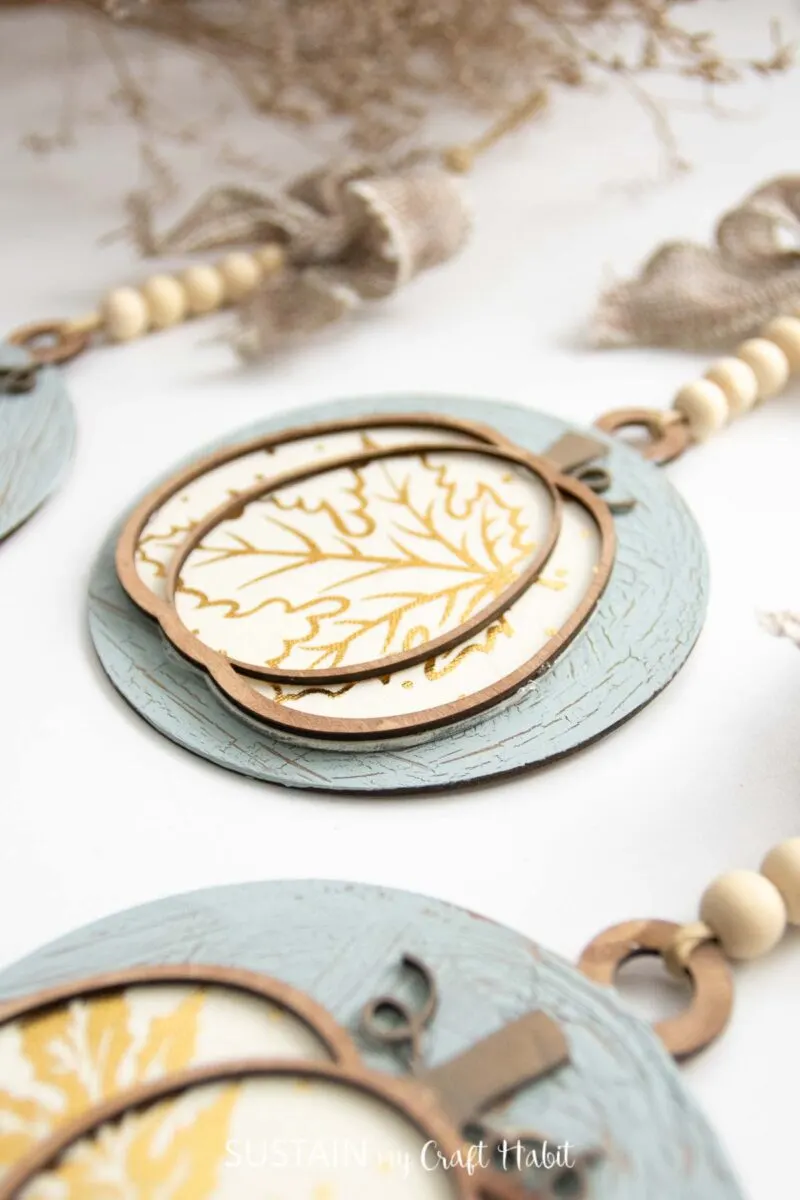
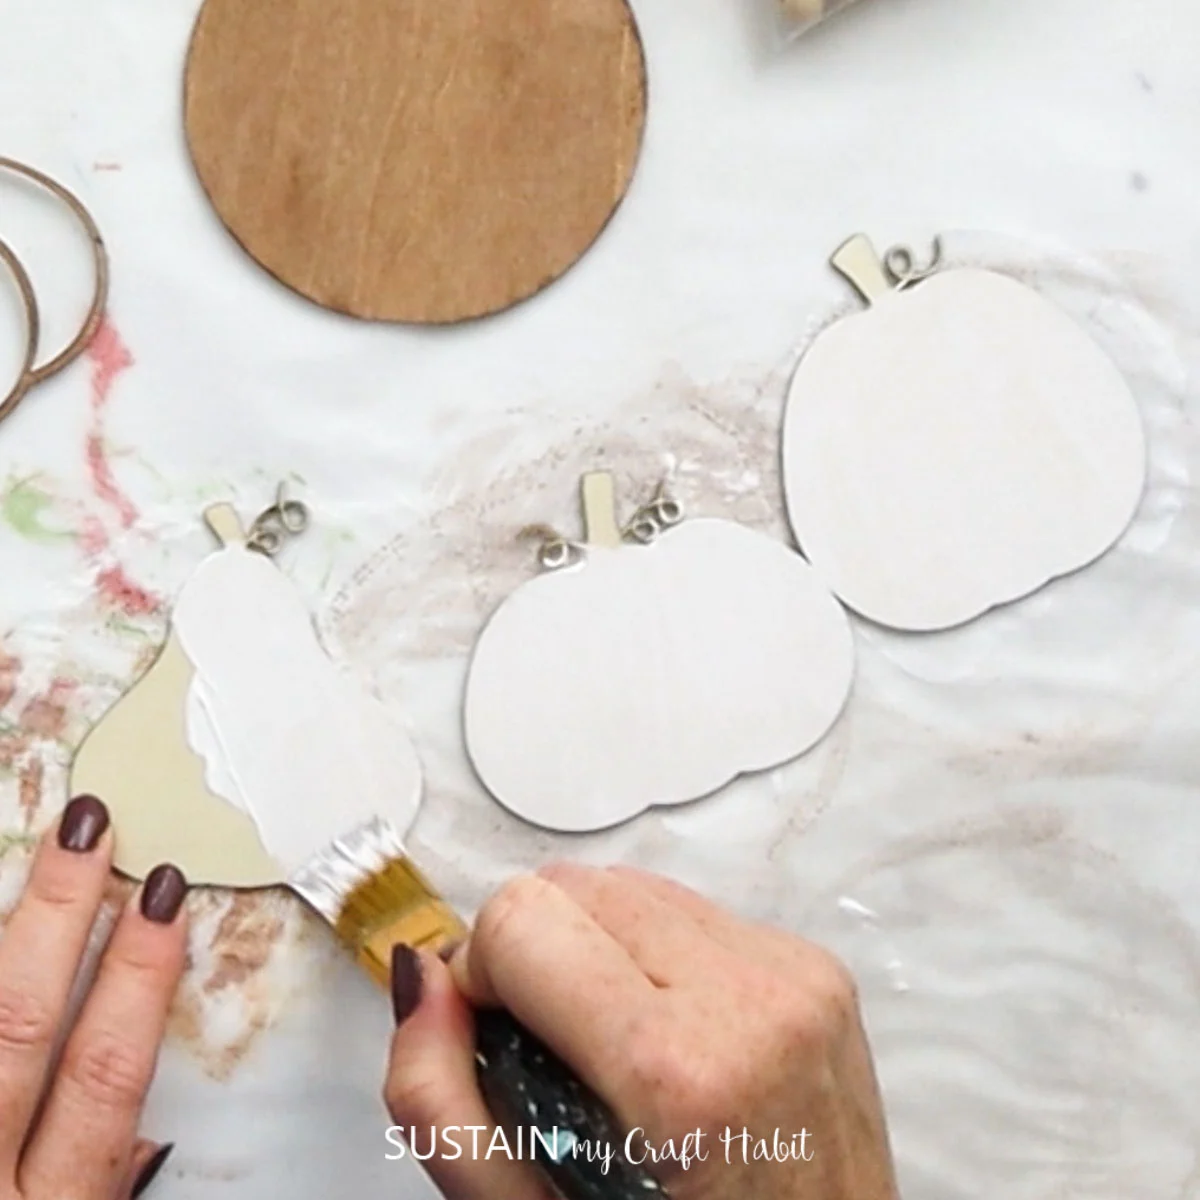
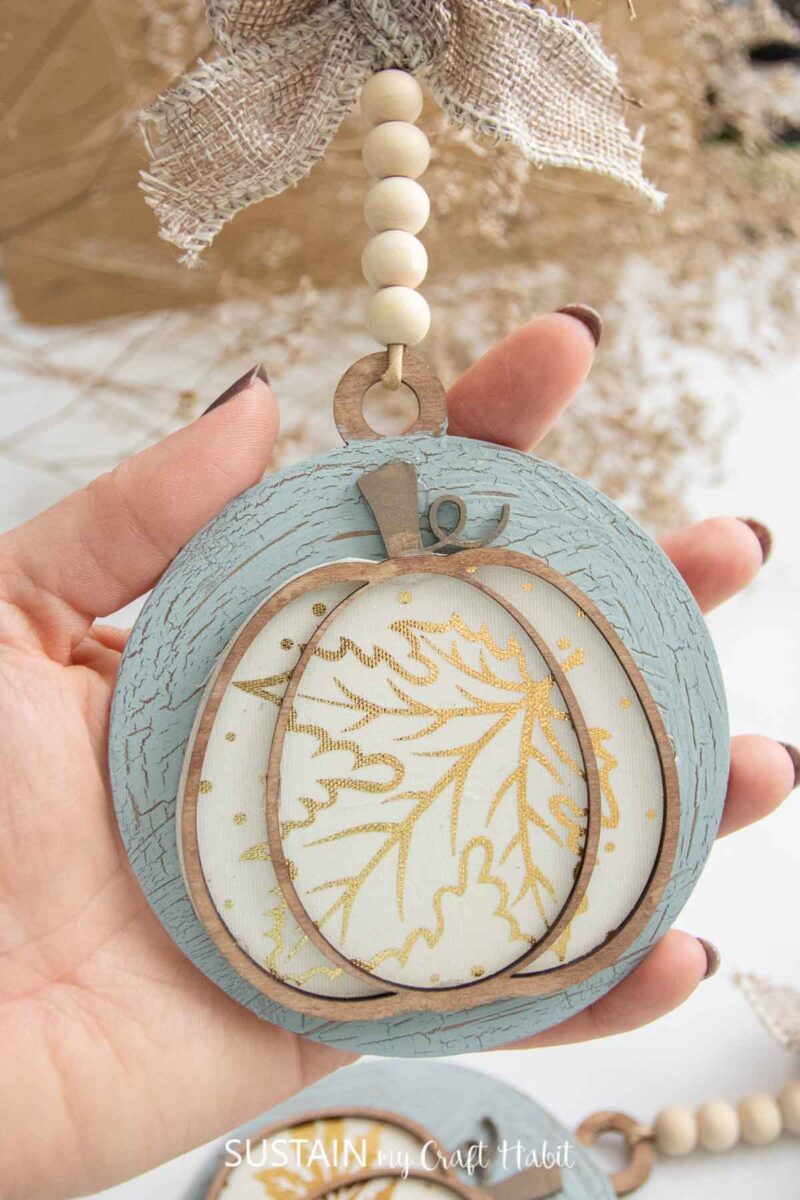
Next, paint the laser cut outs with white paint and the edges with brown paint.


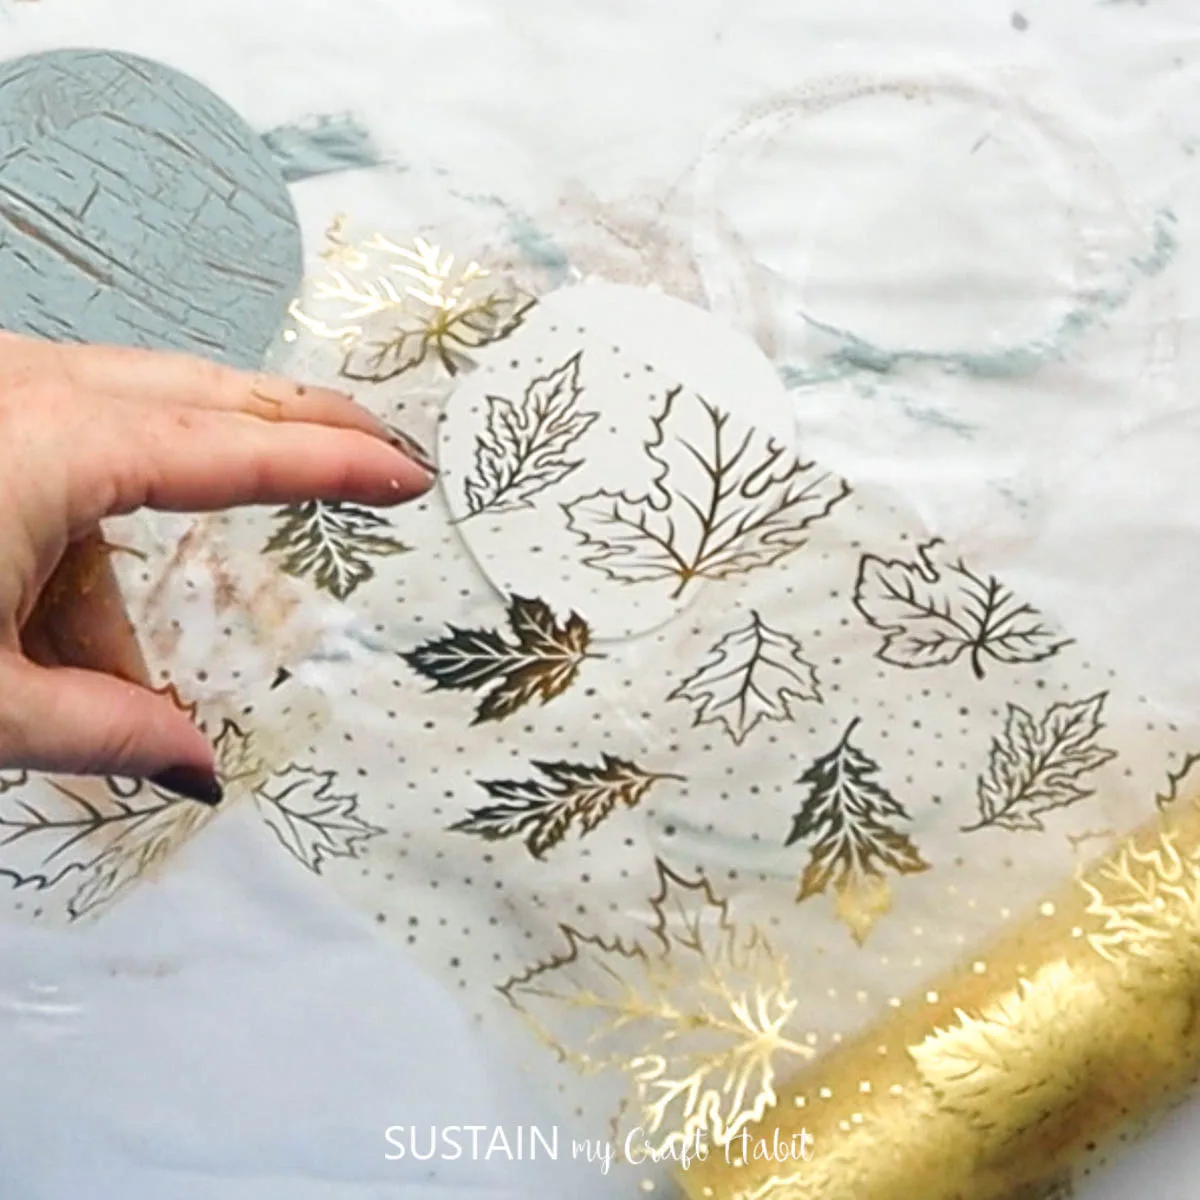
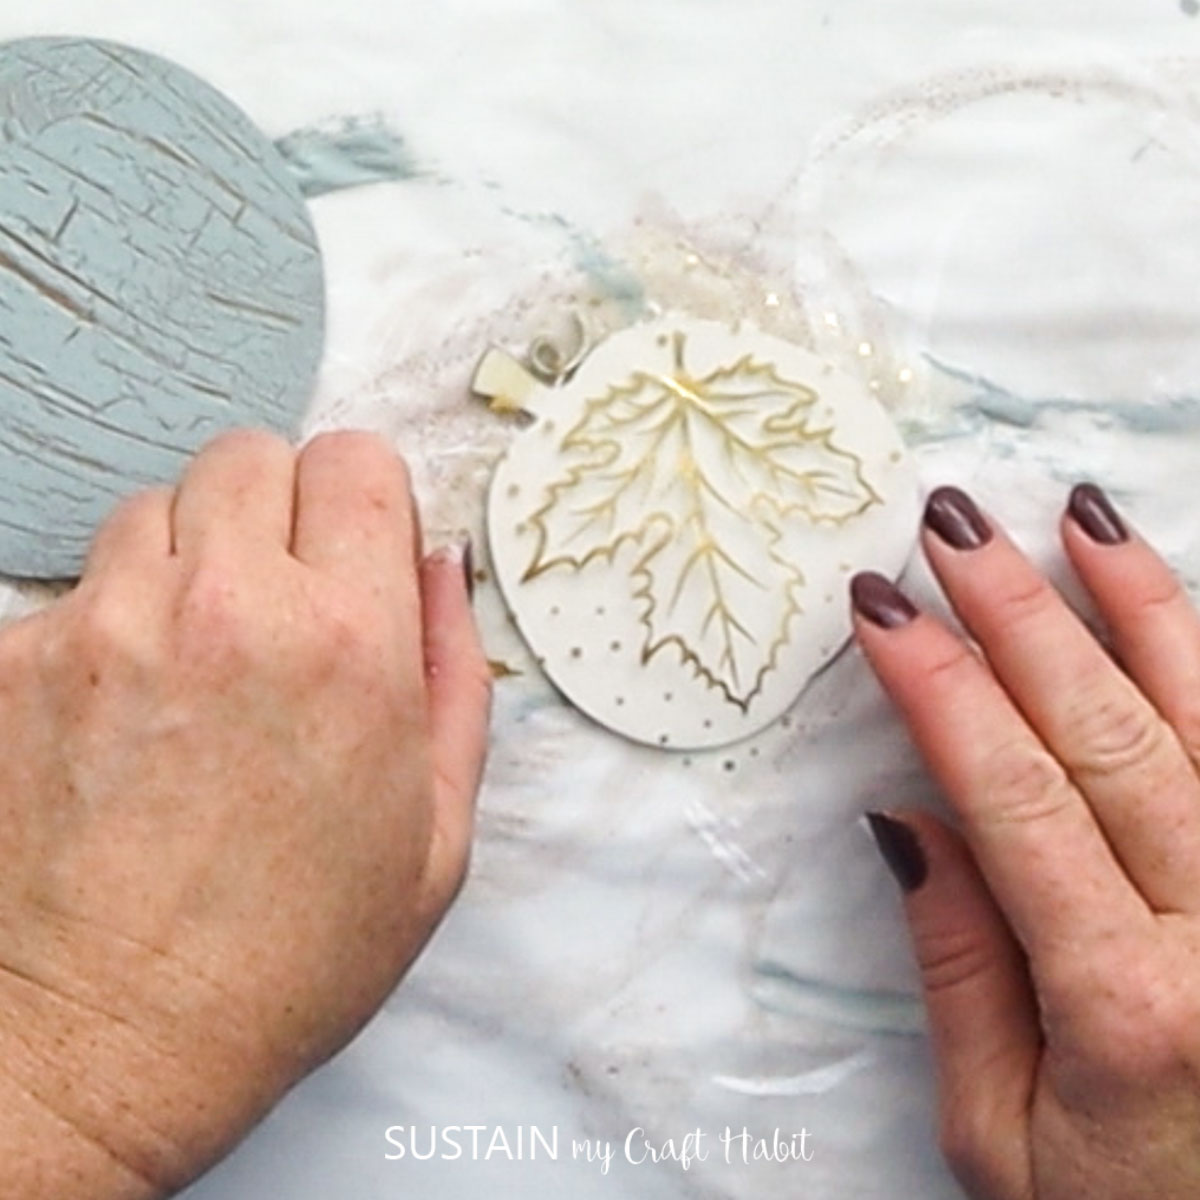
Cut out the gold tulle and use Mod podge to glue it onto the laser cut out. Then, glue the edges over top.


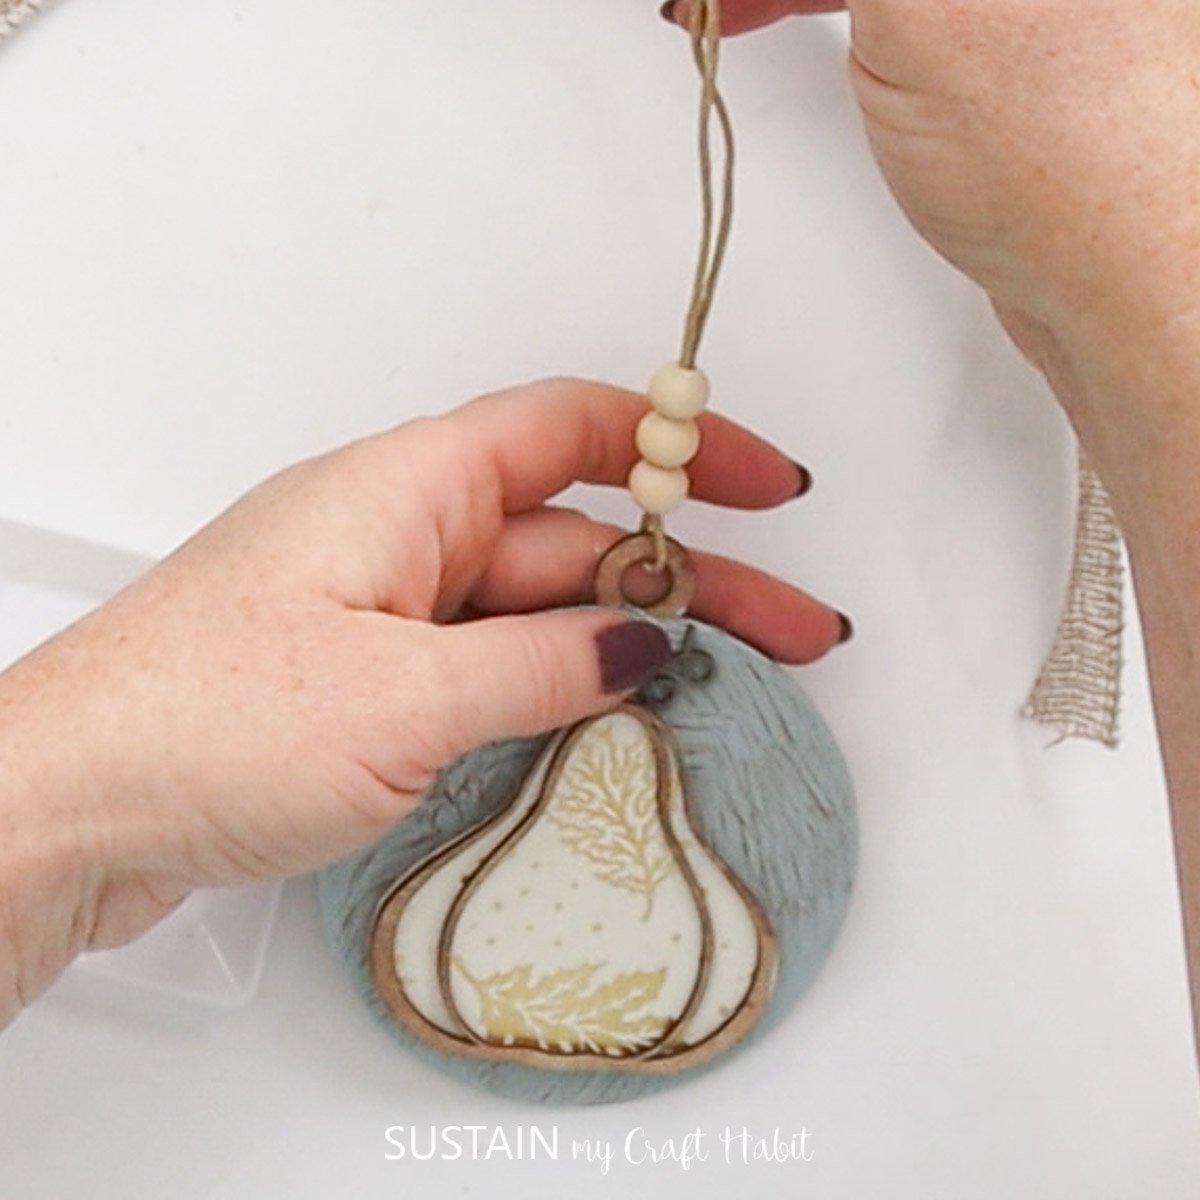
Attach twine to the wood round and string wood beads to form a handle. Attach a ribbon bow onto the beads.
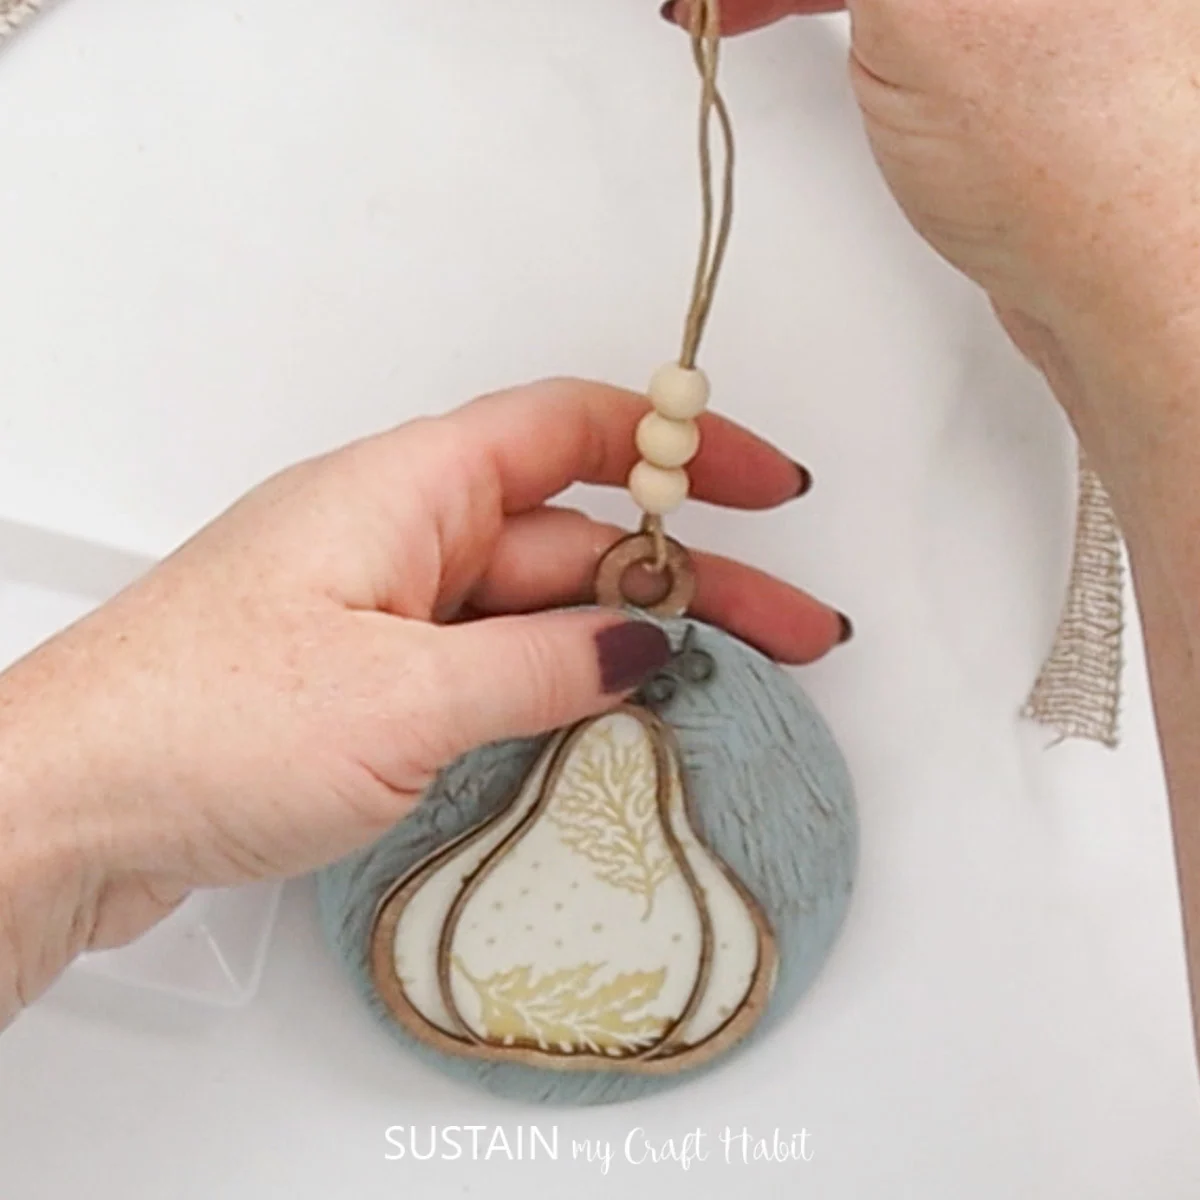


And there you have it, how pretty are these wooden pumpkin ornaments?!

Unique And Personal Decoration
So why not add some handmade charm to your home this fall? By crafting laser-cut wood pumpkin ornaments, you not only get to unleash your creativity but also achieve a unique and personalized decoration that will surely be a conversation starter. And let’s not forget about the joy of giving – these ornaments make for perfect gifts for family and friends, adding a special touch to their homes as well.
More Pumpkin Crafts
- Pumpkin Cutout Craft
- Stacked Pumpkins Cutout Craft
- Fall Door Hanger
- Crafting a Fall Sign
- Upcycled Tin Pumpkin
- Pumpkin Mason Jars


Stay in the know on our latest crafts, special offers and freebies by joining our mailing list.
Like it? Pin it for later!


Crafting Laser Cut Wood Pumpkin Ornaments
Materials
Instructions
- Paint your wood rounds with brown paint. Let dry completely.
- Paint a generous coat of school glue onto the wood rounds. Let dry until TACKY
- While the glue is still tacky, brush the blue paint over it. As the paint dries, the crackle finish will form.
- Next, paint the laser cut outs with white paint and the edges with brown paint.
- Cut out the gold tulle and use Mod podge to glue it onto the laser cut out. Then, glue the edges over top.
- Attach twine to the wood round and string wood beads to form a handle. Attach a ribbon bow onto the beads.