How to Install Vinyl Plank Flooring [Video Tutorial]
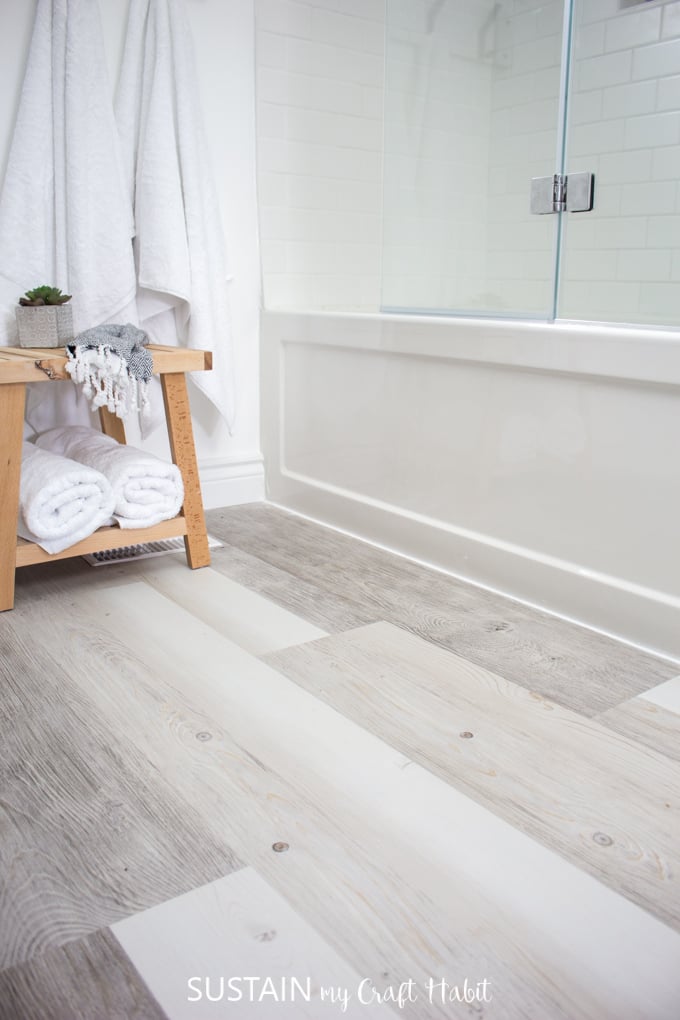
Last week we shared the final reveal for our Graystone Beach cottage beach-themed bathroom remodel that we completed as a part of the One Room Challenge. One of our favourite parts of the room is the new Allure ISOCORE floor and today we’re happy to share this video tutorial on how to install vinyl plank flooring with you!
![Great video tutorial on how to install vinyl plank flooring! Makes installing vinyl plank flooring yourself totally doable. Reviews for Alllure ISOCORE / LifeProof brand luxury vinyl tile from Home Depot [ad]. #diyflooring #allureprojectsuccess #vinylplank #bathroomremodel #grayflooring](https://sustainmycrafthabit.com/wp-content/uploads/2017/05/How-to-install-vinyl-plank-flooring-SustainMyCraftHabit.jpg)
“Disclaimer: This post is sponsored by The Home Depot Canada and Allure ISOCORE. All opinions expressed are our own. You can read our full disclosure policy here.”
UPDATE: Allure ISOCORE is also now called LifeProof Luxury Vinyl flooring.
There were so many reasons why we wanted to install the Allure ISOCORE floor in the bathroom:
- It has the underlayment built right in so we didn’t need to worry too much about preparing the subfloor.
- We could install the vinyl plank flooring over the existing tile which saved SOOO much time and effort.
- It helped to solve the problem we were having of “sweating floors”: the existing ceramic tiles had been installed right onto the cement. In the summer, the warm moist air would hit the cold ceramic tiles resulting in condensation. Since the vinyl planks stay closer to room temperature, the likelihood of condensation is greatly reduced.
- Allure ISOCORE is waterproof, odour, mold and mildew resistant making it perfect for the bathroom.
- The drop and lock joints made installation pretty quick as we had limited time to complete the entire bathroom remodel.
- The vinyl planks have a beautiful texture and interesting pattern – the cool tones in the Brushed White vinyl plank tiles were perfect for our new beach-themed bathroom, yet the warm tones help to tie in the rest of the cottage floor (which is a natural oak).
![Great video tutorial on how to install vinyl plank flooring! Makes installing vinyl plank flooring yourself totally doable. Reviews for Alllure ISOCORE / LifeProof brand luxury vinyl tile from Home Depot [ad]. #diyflooring #allureprojectsuccess #vinylplank #bathroomremodel #grayflooring](https://sustainmycrafthabit.com/wp-content/uploads/2017/05/How-to-install-vinyl-plank-flooring-SustainMyCraftHabit-1321.jpg)
There were a few surprises when we went to installing vinyl plank flooring:
- It is meant to be installed AFTER all the parts of the room are in place, such as the shower, vanity and toilet. This did require extra care in measuring the planks to get them to fit into place.
- Also (at least with the Brushed White style) the beautiful variations in pattern and colours from tile to tile required extra care to line up the designs such that there weren’t any stark transitions from one to the next. In the end, this little step made a huge difference in the floor looking cohesive and professional.
Supplies Needed to Install the Allure ISOCORE / LifeProof Luxury Vinyl Flooring
- Allure ISOCORE Brushed White Luxury Vinyl Tile Flooring from The Home Depot
- vapour barrier or subfloor (if necessary, based on moisture level in the room)
- shims for spacing
- soft mallet
- knee pads (optional for comfort)
- utility knife, hard-edge ruler (a table saw and/or jigsaw are helpful for more complicated cuts)
How to Install Vinyl Plank Flooring
We’re happy to share this video tutorial to help you with installing vinyl plank flooring. We have new DIY video tutorials on our channel each week, so be sure to subscribe! As always, be sure to read all the instructions provided with the product for best results.

We are so pleased with how this vinyl plank flooring from The Home Depot Canada turned out. It’s got so much interest and texture yet looks clean and crisp. It looks great with our new DIY wine cork bath mat! We’ll be sure to provide an update next summer of how it holds up.
Be sure to stop over and check out the entire beach themed bathroom makeover with lots of simple, coastal DIY ideas!
We’ve also just recently installed vinyl plank flooring in another bathroom renovation directly over top of ceramic tiles. For more details you check out our experience with installing that flooring as well.
We hope you’ve found this tutorial on how to install vinyl plank flooring helpful! Leave us your experience below.

![Great video tutorial on how to install vinyl plank flooring! Makes installing vinyl plank flooring yourself totally doable. Reviews for Alllure ISOCORE / LifeProof brand luxury vinyl tile from Home Depot [ad]. #diyflooring #allureprojectsuccess #vinylplank #bathroomremodel #grayflooring](https://sustainmycrafthabit.com/wp-content/uploads/2017/05/How-to-install-vinyl-plank-flooring-SustainMyCraftHabit-591x1024.jpg)
![Great video tutorial on how to install vinyl plank flooring! Makes installing vinyl plank flooring yourself totally doable. Reviews for Alllure ISOCORE / LifeProof brand luxury vinyl tile from Home Depot [ad]. #diyflooring #allureprojectsuccess #vinylplank #bathroomremodel #grayfloor](https://sustainmycrafthabit.com/wp-content/uploads/2017/05/Beach-theme-bathroom-remodel-1347-2.jpg)
