Installing Vinyl Plank Flooring: Lifeproof Waterproof Rigid Core

Are you considering flooring options for your next renovation? Here’s our experience of installing Lifeproof vinyl plank flooring over ceramic tiles for our bathroom renovation.
Lifeproof Flooring Installation over Existing Ceramic Tile
Yes, that’s right, OVER existing ceramic tile. Installing floating vinyl plank floors over our existing tiled floor was definitely the right decision for our bathroom home improvement project.
We couldn’t be happier with the look and quality of our finished new flooring. Starting the bathroom renovation two months ago, we knew we didn’t want to tackle the removal of our current ceramic tiles. Just imagining the demolition with all its mess, dust, noise and back breaking work made me anxious.

Having installed vinyl plank flooring in our family’s beach-themed bathroom several years ago, we were confident this was the best type of flooring for our bathroom. We began looking for the right one to place over top of the tiles and came across these multi-width vinyl planks in a frosted oak finish by Lifeproof.
Why we chose Lifeproof vinyl plank flooring and why it’s a great option:
- 100% waterproof which is ideal for a bathroom where there’s bound to be water spillage.
- Can be installed over existing flooring. This includes ceramic tiles like ours as well as other vinyl, concrete and even wood flooring.
- Easy installation with its tongue and groove interlocking edges so no need to fasten or glue to the floor below, or worry about lining pieces perfectly (such as with other vinyl peel and stick options).
- Vinyl flooring feels comfortable and warm so no more hard, cold ceramic tiles against our feet in the mornings.
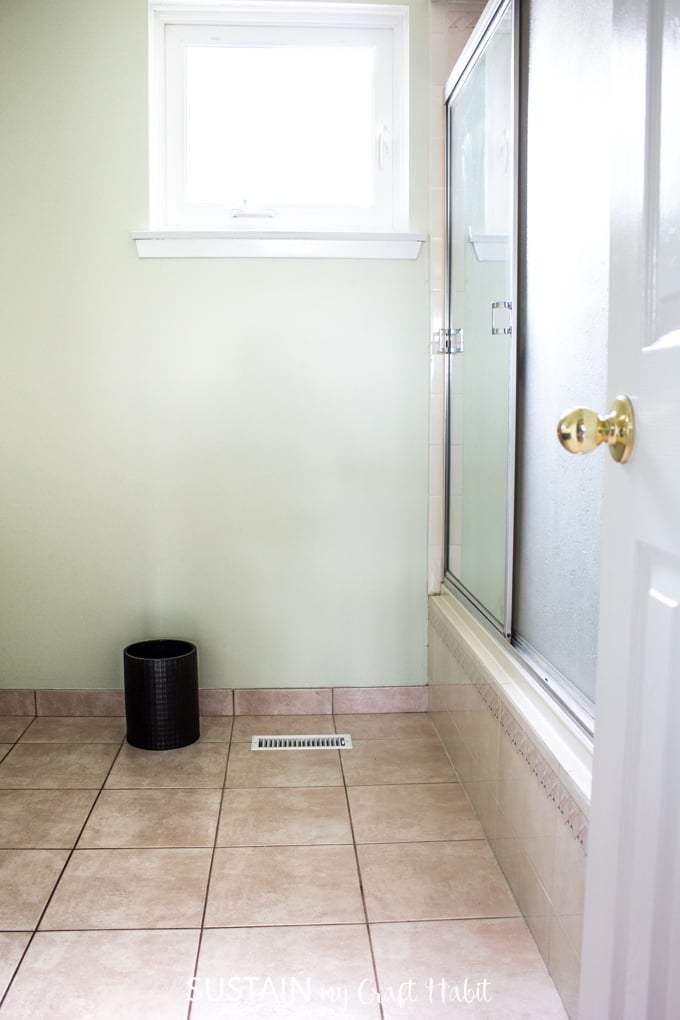
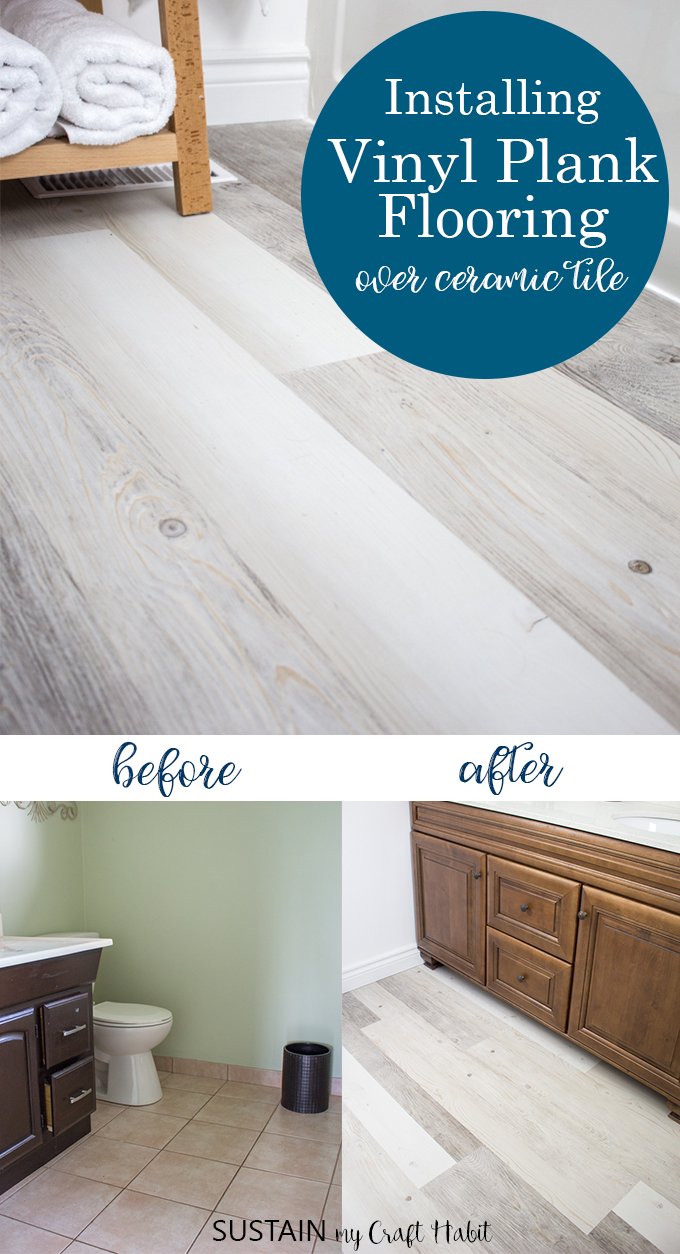
The transformation is pretty impressive, just check out the Before and the After:

The “Before” The “After”

Lifeproof flooring is available exclusively at Home Depot. Thank you to Home Depot Canada for sponsoring this DIY flooring installation.
Materials Needed for Vinyl Plank Flooring Installation:
- Lifeproof Waterproof Rigid Core Vinyl Plank Flooring in Frosted Oak
- Tapping block
- Soft faced hammer
- Metal 90 degree Square Ruler, Pencil
- Measuring Tape
- Utility Knife or alternatively a Miter Saw and Jigsaw
- ¼” spacers
- Paper for creating cutting templates
Our Lifeproof Flooring Installation Experience:
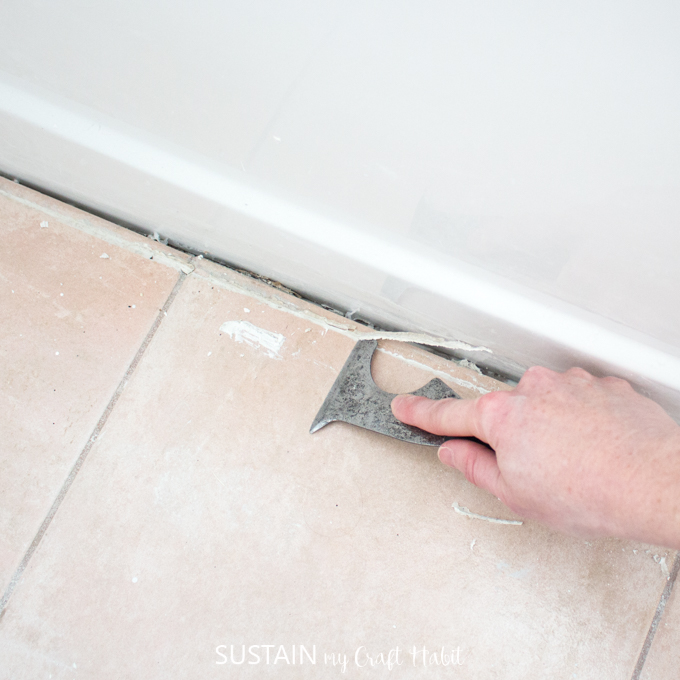
Prior to installation, we cleaned the existing floor, removing all dirt, dust and uneven edges.
TIP: Ensure your floor is completely free of debris before starting to lay the vinyl planks.
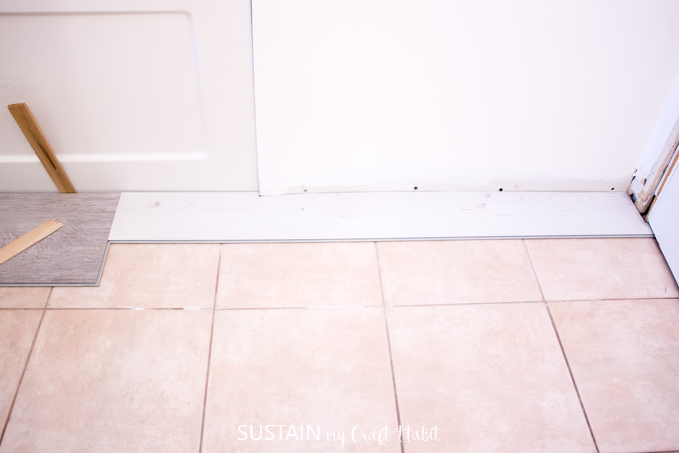
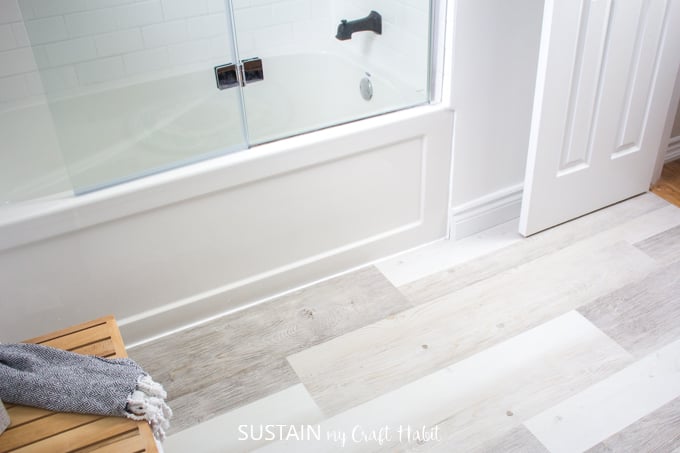
Following the manufacturer’s instructions, we started in the left corner of the bathroom along the bathtub edge with the tongue edge facing the tub.
We opened up several vinyl plank flooring boxes and sorted them by color and size to ensure we got a good mix of color and texture.
With these multi width planks, we took extra time to figure out the pattern and layout we wanted. We started with a loose lay, placing down several pieces on the floor to plan out a few rows at a time.
TIP: Unpackage several boxes of the vinyl planks and plan out your pattern before installing the flooring.
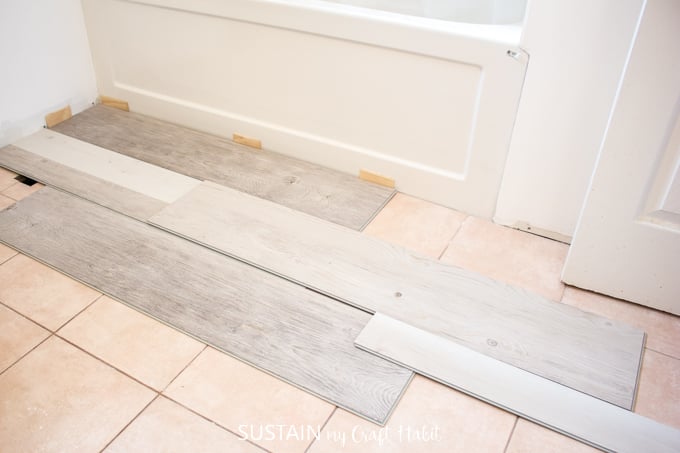
We placed 1/4” spacers around the perimeter of the room and between all vertical objects (tub, toilet, etc) to leave an expansion gap.
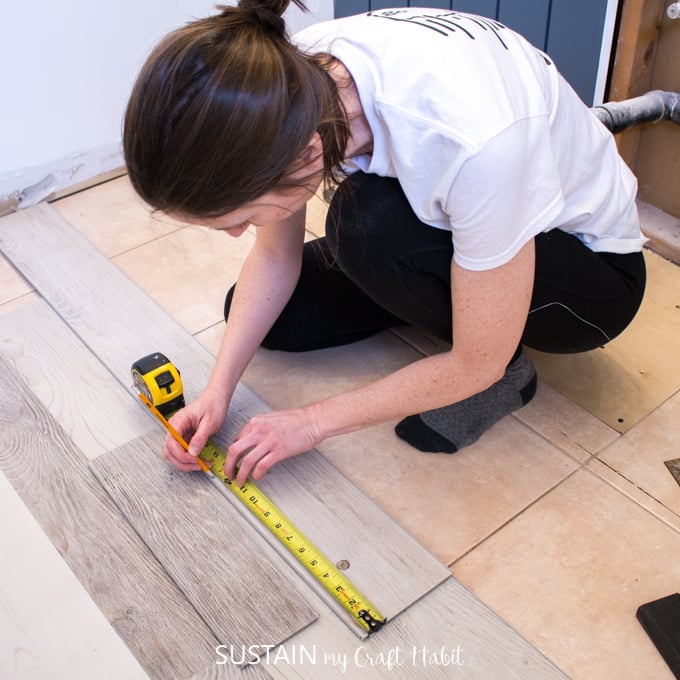
Working from left to right, we soon needed to cut our first plank to fit around the not-so-square tub and wall area. We used several pieces of paper to create a template for cutting.
With the pattern marked out, we found that using a utility knife to cut the planks (as recommended by the manufacturer) was possible although difficult for lengthwise cuts and for smaller more precise cuts. Instead we found using a jigsaw to cut out the excess vinyl worked best for us.
TIP: A jigsaw and mitre saw will be a good friend of yours during installation of the vinyl plank flooring.
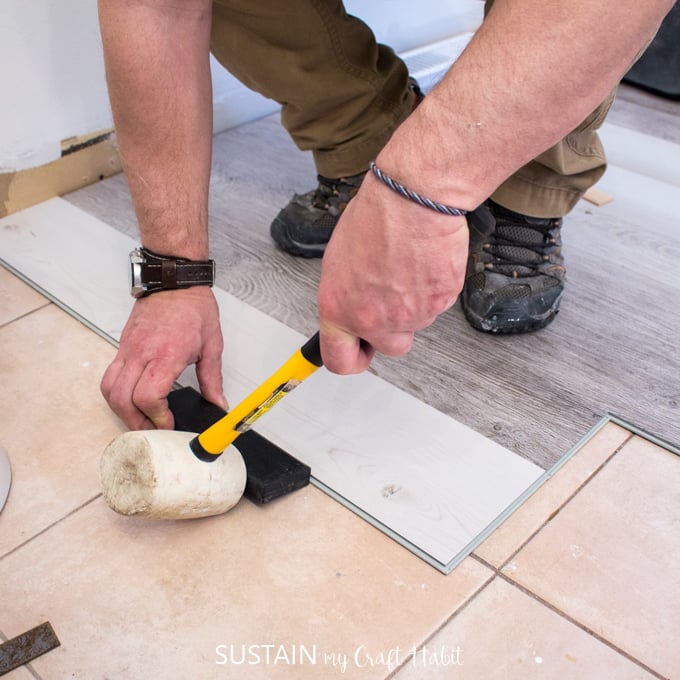
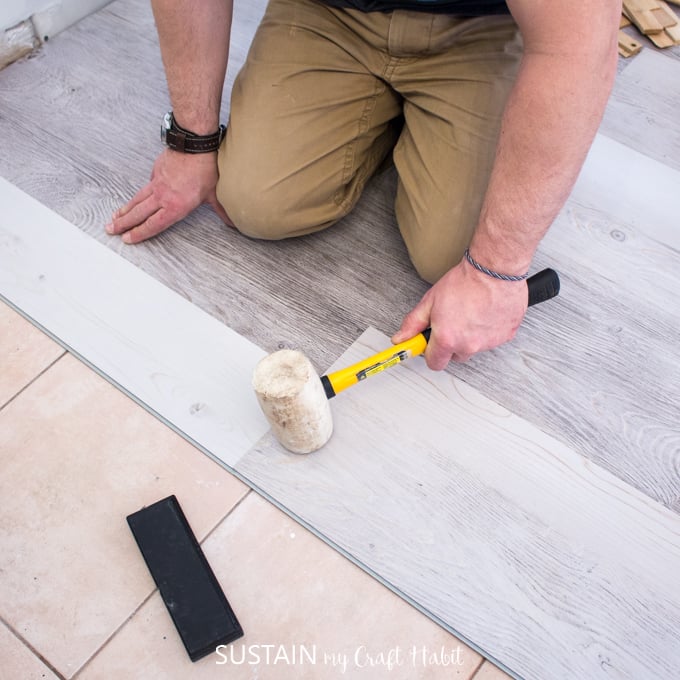
The actual installation of the Lifeproof vinyl flooring was quick when there weren’t too many cuts needed. It was a matter of joining the tongue on one plank with the groove of the other plank and using a tapping block and soft faced hammer to click them together along the long edges. Then we just tapped (with a soft faced hammer) on the short edges to slide the piece in place.
Throughout the installation, we measured and marked the cut lines working one row at a time.
For the area around the toilet, we created another paper template to help with the cuts making sure we left a ¼” space around the edge of the toilet. Afterwards we filled the gaps around the toilet (and bathtub) using a kitchen and bath adhesive caulking.
TIP: Create templates with paper to help with cutting around more complicated areas.

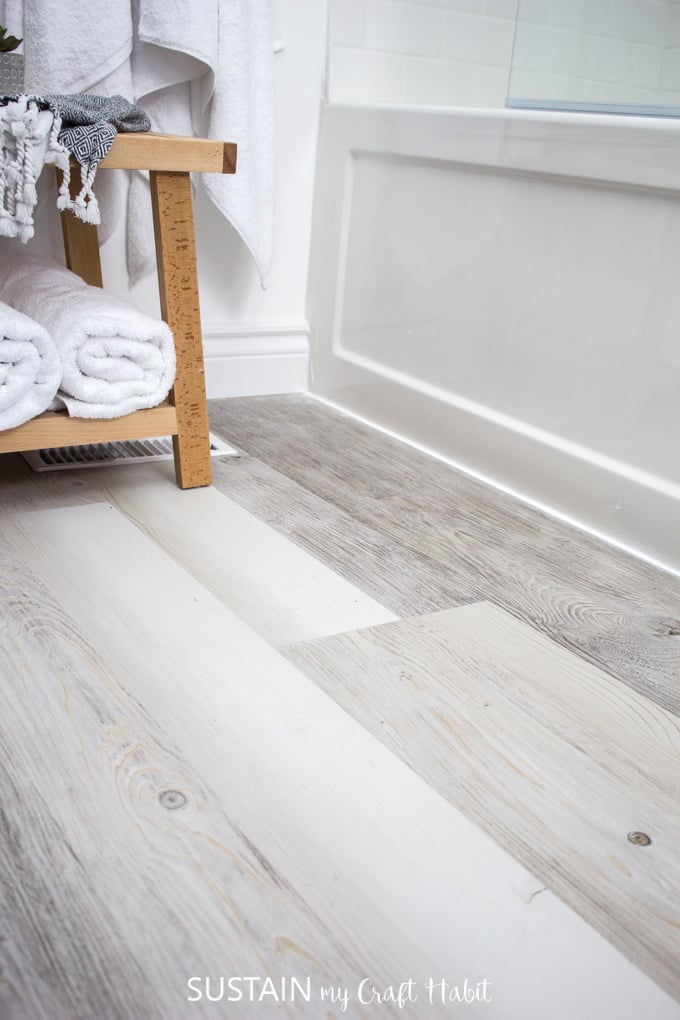
The Beautiful End Result!
It took my husband and I one full working day to install the Lifeproof Rigid Core Luxury Vinyl flooring in our 50 square foot bathroom using a miter saw and jigsaw for all the cuts. Had we used a utility knife for cutting instead, I would expect the installation to take another half to full day.
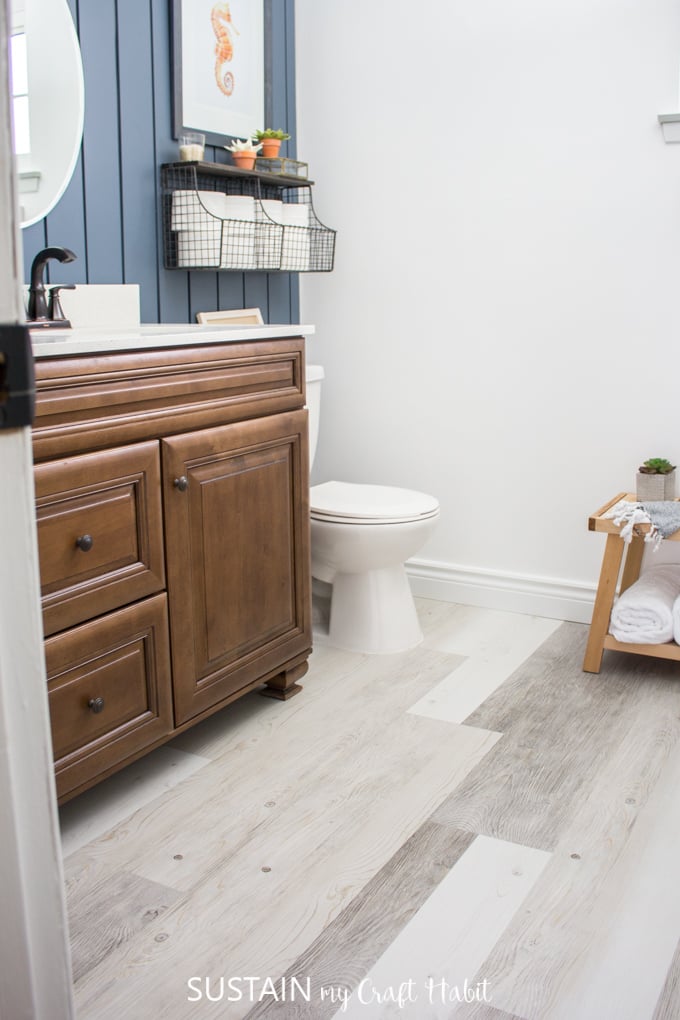
Now that the bathroom is finished, the flooring with its mix of colored planks and natural looking textures is one of my favourite features. This renovation was full of DIY projects: you can check out our final cozy contemporary bathroom makeover reveal here.
Having two successful vinyl plank flooring installations, we plan our next project using this floating floor option to be in our parents’ unfinished basement over top of the concrete. We can’t wait to share that with you soon!
We hope this tutorial will help you should you chose to install vinyl flooring. Or do you have any experience with installing vinyl plank flooring to share?
Like it? Pin it for Later!


Looks beautiful! How did you get the vinyl plank flooring to even out with your hallway/wood flooring? Especially since you put the vinyl plank on top of existing tile? We are thinking of doing a diy!
Thank you, Melissa! The vinyl flooring is a bit higher than the hardwood flooring in the hallway but not at all noticeable. The vinyl is only 3/8″ thick and our wooden floors were a little bit higher than the ceramic bathroom tiles anyways. Also, we placed a wooden transition strip in between the vinyl planks and hardwood which helped to hide the uneven floors. Good luck on your DIY! It took some effort but we still love how it turned out.
Looks great! Did you fill in any of the grout lines between your tiles or just install the vinyl planks right on top of your tiles as-is?
Hi Jill, thanks for your question. We applied the vinyl planks right on top, without filling in the grout lines. Our grout lines were 1/4″ wide so there was no need. Hope that helps!
Hi! The end result is beautiful! I noticed in your before picture you had tile as a baseboard. How did you guys remove them? I am looking to lay flooring over our tile as well, however, our baseboards are tile just like yours were.
Thank you, Jen! We used a pry bar to remove the tile baseboards from the wall. Some of the drywall underneath did tear as a result but we touched up the badly damaged areas with drywall mud and the rest was covered up by the new wider baseboards. Good luck on your reno!
What is the type and name of basboard used?
Hi there, the baseboard is called Alexandria Moulding from Home Depot, it’s 4.75″ high, primed MDF.
Great looking floor! What did you do around the toilet where you left a 1/4″ gap? Would it be ok to caulk around the toilet? I also have a pedestal sink that would need the same 1/4″ gap. Getting ready to do this same installation over tile and around the existing fixtures. Thanks, Cheryl
Thanks, Cheryl! It’s been a year since we installed the floor and are still really loving it! For the gaps around the toilet and bathtub, we filled them with a kitchen and bathroom adhesive caulking (one with a waterproof seal). Good luck on your reno!
The blue shiplap is beautiful. What shade of blue is that?
Thanks, Jessica! The color is called Twilight Blue from Canadian Tire Premier Active line of paints. We have a post on installing the shiplap also – https://sustainmycrafthabit.com/installing-shiplap/ but I don’t think we mentioned the brand of paint:)
Great choice on the vinyl planks, I really love the color. They really look very elegant
Thank you, we are very happy with them!
Your floor looks beautiful! I’m trying to install lifeproof vinyl planks in our bathroom too, but my contractor says that they wont last 6 months because it’s a wet area, and that they’ll swell up or come apart. Have you had any such issues as of yet? Thank you!
Hi Farah, our floors are holding up really well! It’s the only bathroom in our house with a shower so it gets a lot of use. These Lifeproof Vinyl Plank floors are actually perfect for bathrooms since they are 100% waterproof. Not sure why the contractor said otherwise but perhaps he meant laminate floors?
Hi! I love it! Where can I get this same flooring? Do you have a link that you can share?
Do you mind sharing what flooring that is? I love that color.
Hi Jennifer. Thank you for stopping by! It is Lifeproof Frosted Oak Multi-Width 47.6-inch Luxury Vinyl Plank Flooring. Please let us know if you have any additional questions.
Jane
I already watched some videos in YouTube and also read some blogs about it but this only that gives me the complete details. Thanks for sharing.
Hello! Your flooring looks beautiful, but I’m wondering if it has an “echoey” sound? We are thinking of doing a large Lr/Dr area.
Looks amazing! My vanity is flush with the floor and I’m stumped as to how to lay the vinyl planks at that spot. Any thoughts?
You forgot to mention removing molding before installing…
Also, what is a wooden transition strip look like? I’m going to use Vinyl planks
for my art studio flooring but will likely need a wood transition strip to go from
the planks back to ceramic tile flooring…let me know…thanks
And your video is really good!
Do you have a picture of what it looks like around the toilet. I thought you had to remove the toilet for installation
I’m going to try this. I love the color you used. Can I get the name of the color you used?
Hi Bernie. This one’s called Frosted Oak.
I want to place this on top of a secure tile floor, but the tile itself is wavy! Would this flooring be a good option?
I had a “professional” come in to put lvp in bathroom and it looks like utter garbage compared to yours and they charged me $1200. Pretty upset about it.
Looks awesome. Considering it myself. What did you put against the tub and flooring to cover up the 1/4 inch gap? Looks like caulk from here, but can’t quite tell.