Easily Upcycling a Photo Frame with Mod Podge: #12MonthsofDIY
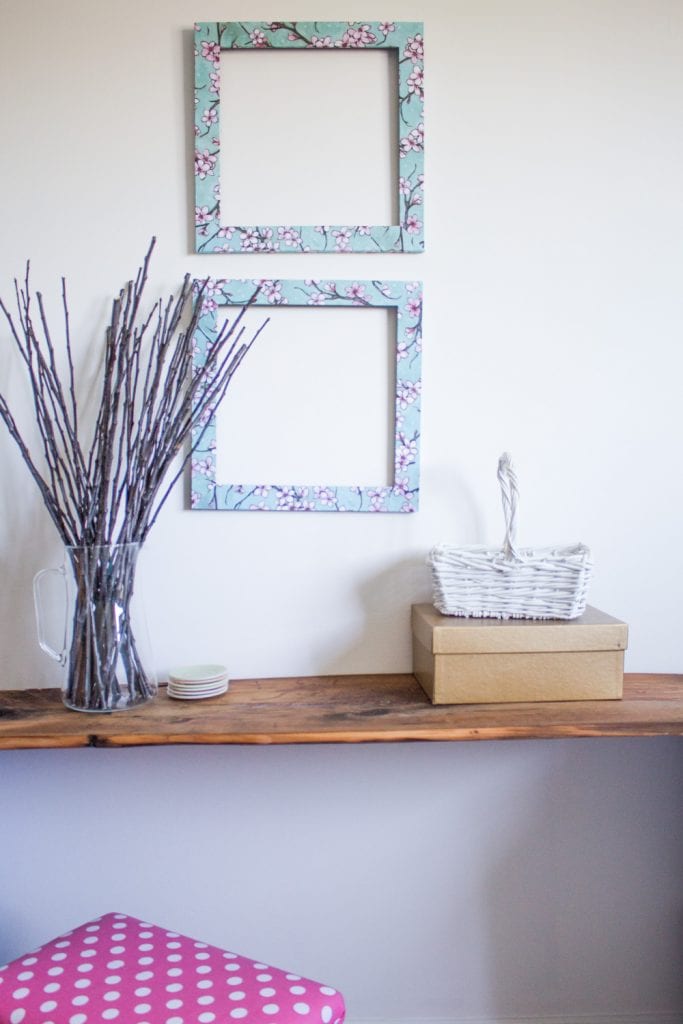
I’ve had a couple of old photo frames in my basement that have been just waiting for a good upcycling! The frames themselves were not the best quality to begin with and the prints inside were pretty uninspiring. Thinking back now, I’m really not sure why I bought the photo frames in the first place?! But I was determined not to put them to waste and I’m glad that I didn’t because now, after a little TLC, they are a pretty fab-looking DIY home decor item (if I do say so myself)!
When we heard about the opportunity to work with the arts and crafts staple Mod Podge by Plaid Crafts for May’s #12MonthsofDIY challenge, we really had no idea what we were going to make. Mod Podge has so many uses and applications (see how to decoupage on plastic bottles even!) that the opportunities seemed endless.
If you haven’t heard of #12MonthsofDIY, it’s a creative challenge in which each of 12 Canadian bloggers (including us) use the same material each month to create an inspiring DIY home decor or craft project. Last month we had fun upcycling an old men’s leather coat purchased at Value Village for less than $25 into an edgy new DIY handbag and in March we upcycled a yardsale-found farmhouse dresser into a beachy dresser for the cottage.
If you haven’t used Mod Podge before it really is a crafter’s dream! It has three very practical uses:
- Can be used as a glue;
- Can be used as a sealer; and
- Can be used as a finish.
It works well with paper, fabrics, and other porous materials. It dries clear and because it’s water based, it’s non-toxic, making it great for kids’ crafts. Mod Podge comes in a variety of different formulas (from matte finish to glitter). Yeah, that’s right….glitter finish!
How to Upcycle Your Photo Frames with Mod Podge:
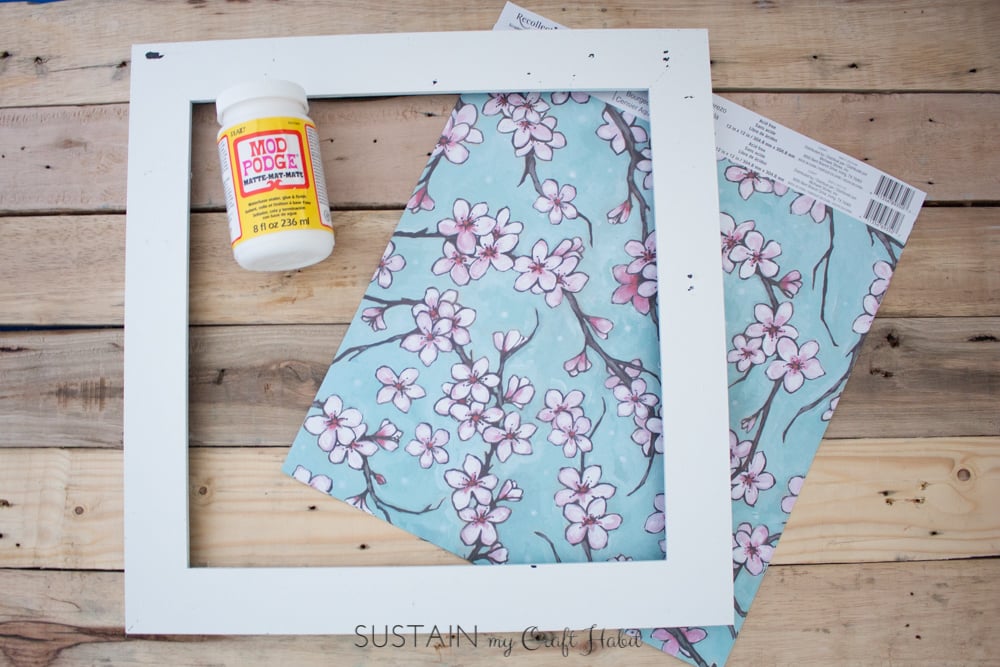
- 12”x12” sheet of scrapbook paper with a print of your choice (this set on Amazon (Amazon affiliate link) also has some great designs)
- Photos frames (with flat surfaces)
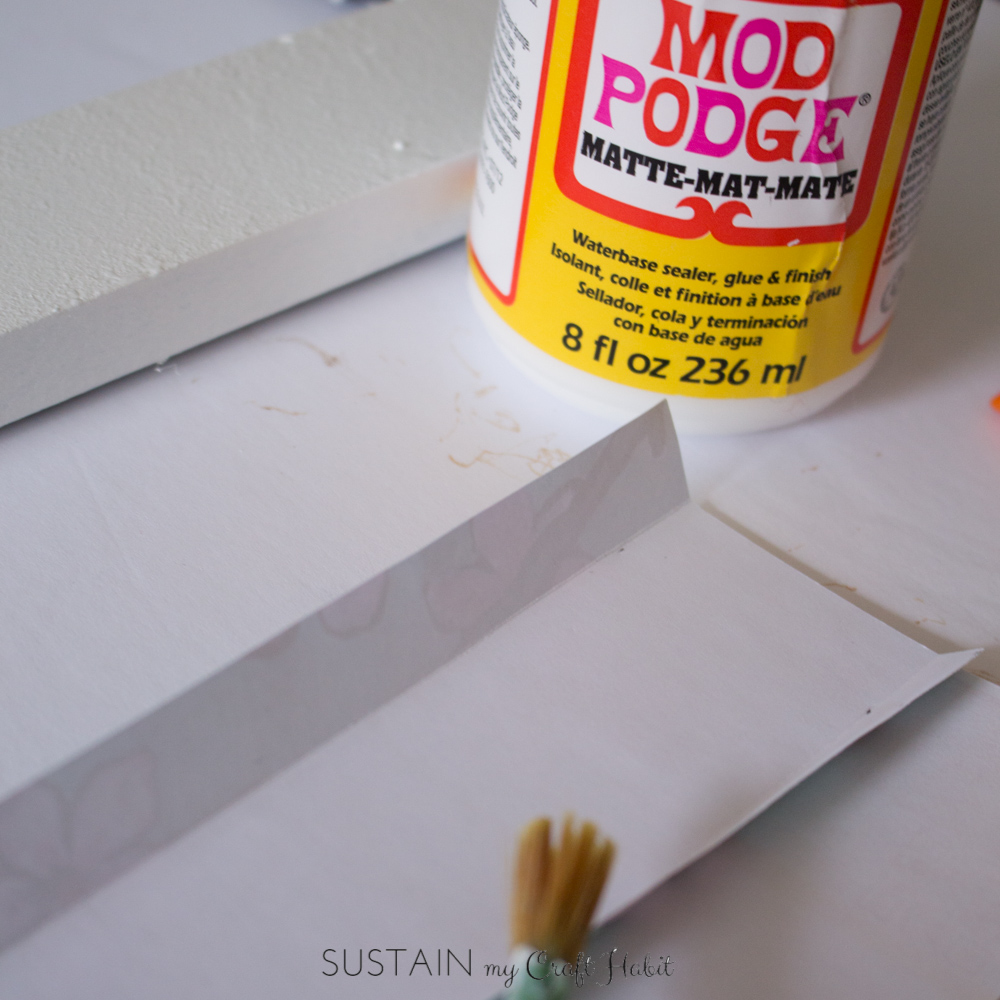
- Mod Podge (Amazon affiliate link) – matte or glossy finish
- Paint Brush / Foam Brush
- Scissors / Ruler / Pencil or paper cutter with crease tool
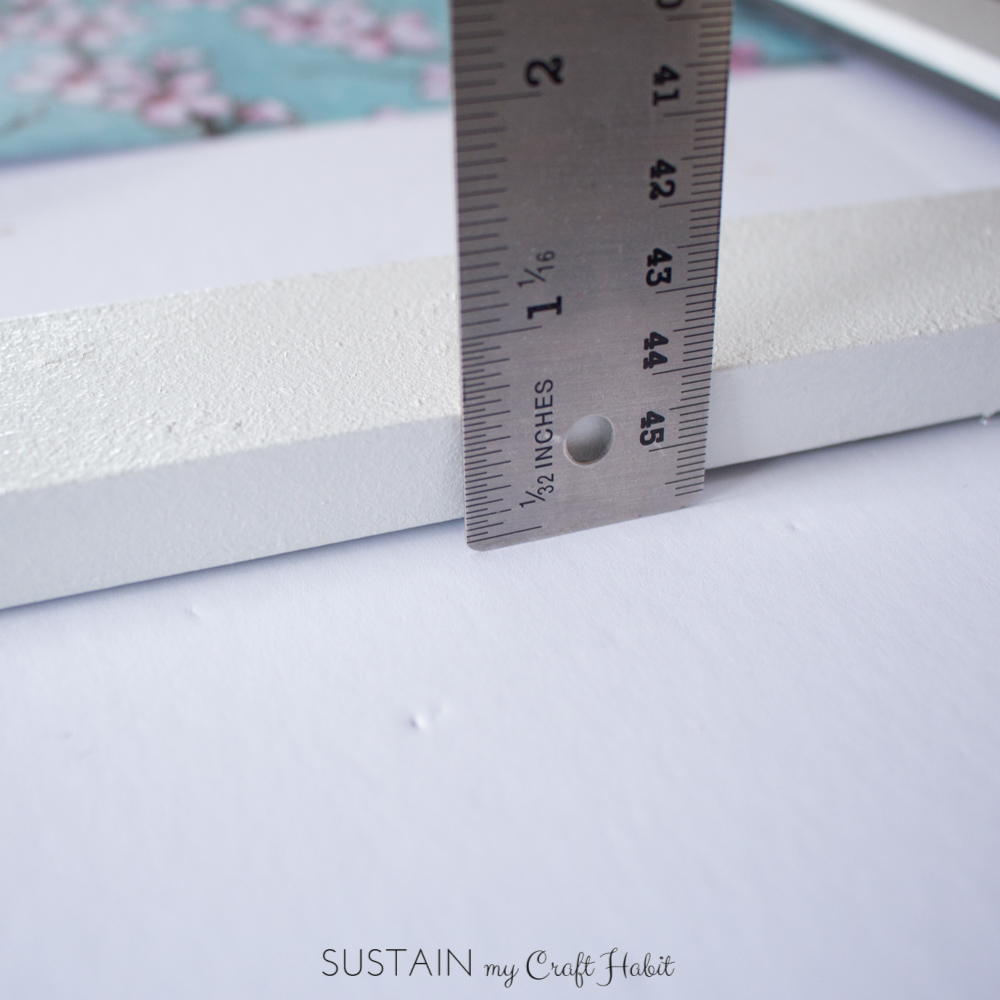
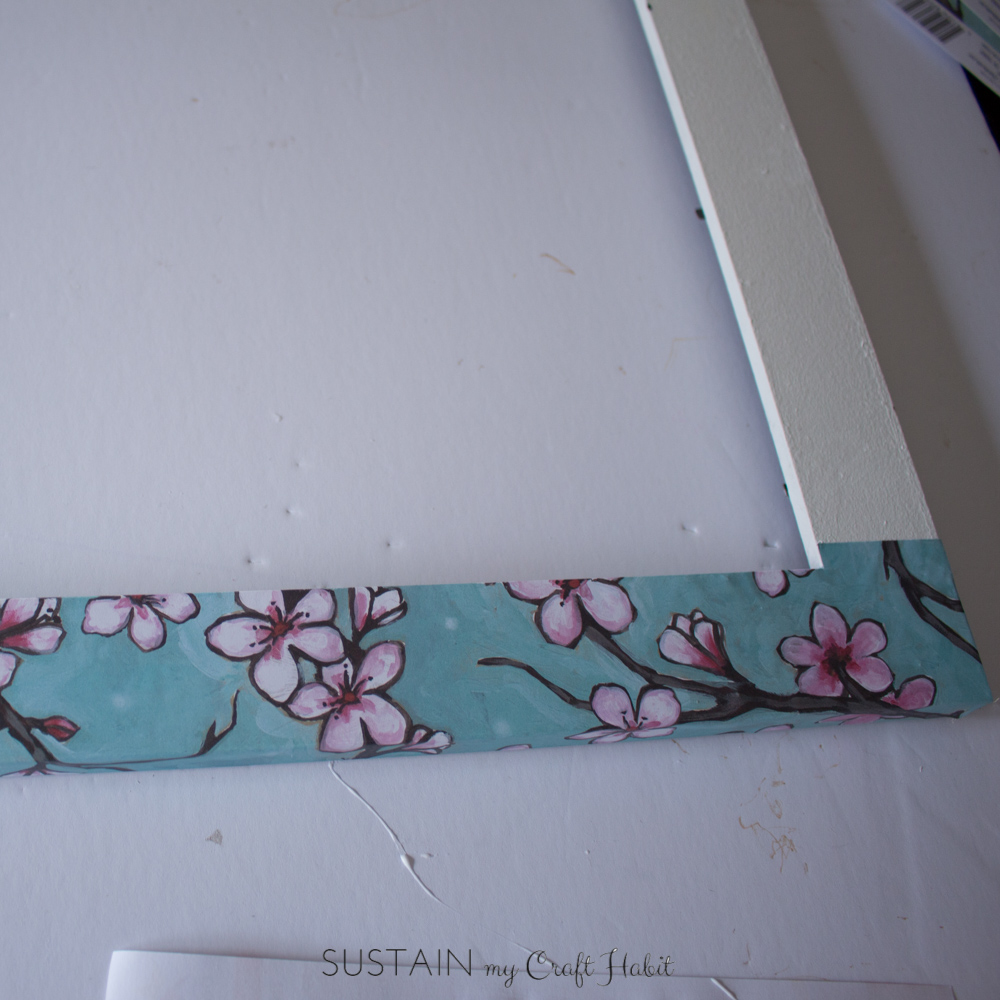
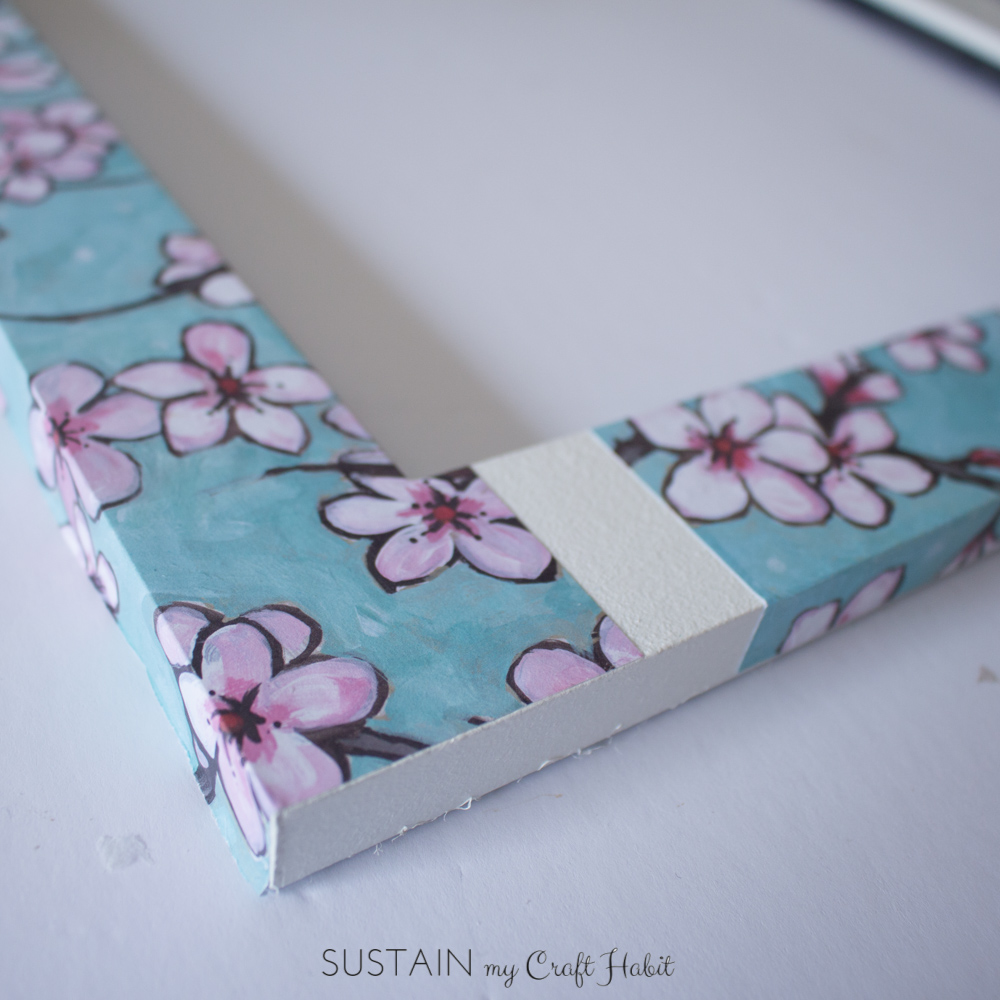
1. Measure the photo frame and cut the paper accordingly to cover the frame. There are so many beautiful printed papers to chose from at craft stores such as Michaels. I loved this apple blossoming printed paper as soon as I saw it – perfect for spring!
Tip: Cut your paper pieces to the correct size and crease all folded edges before mounting with the Mod Podge.
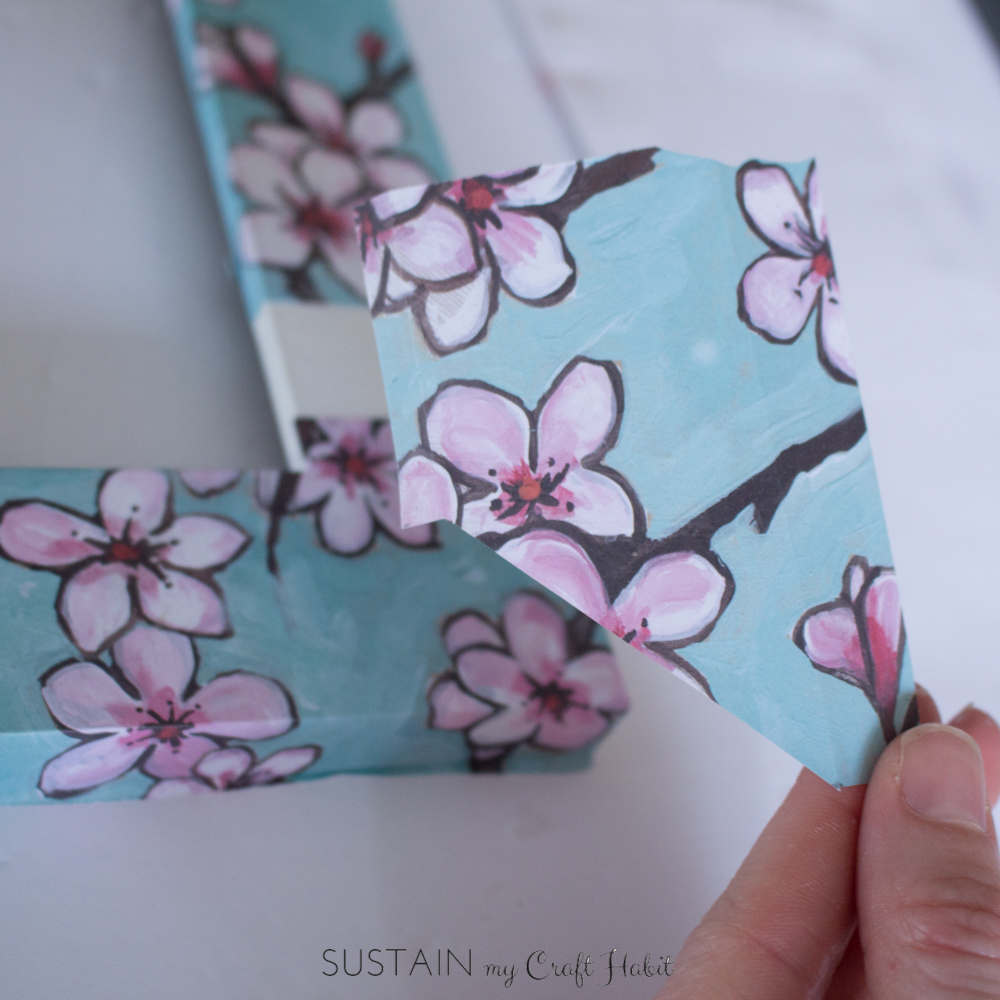
2. Dip your paintbrush in a bit of water. Pat dry. Dip paintbrush into the Mod Podge and then on to the back side of the paper, applying a medium, even coat. Add a layer of Mod Podge to the picture frame as well. It’s better to have too much Mod Podge than not enough.
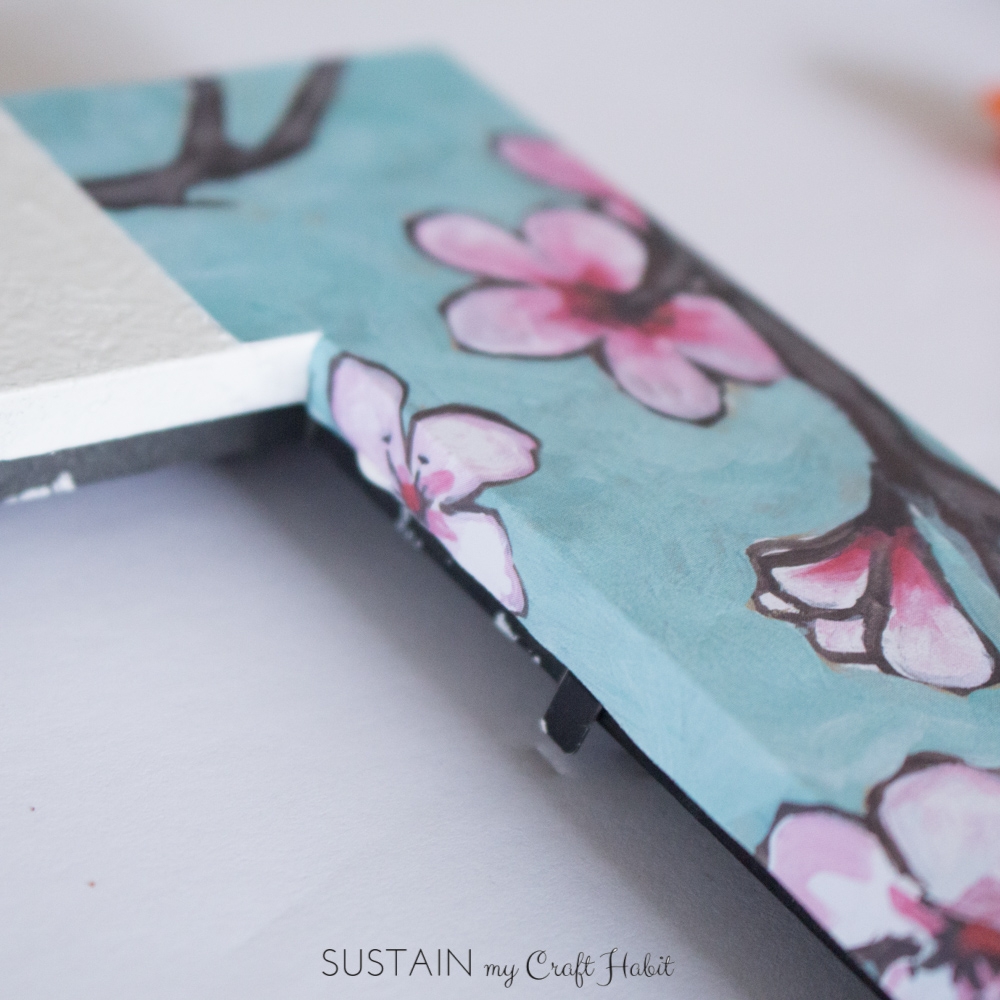
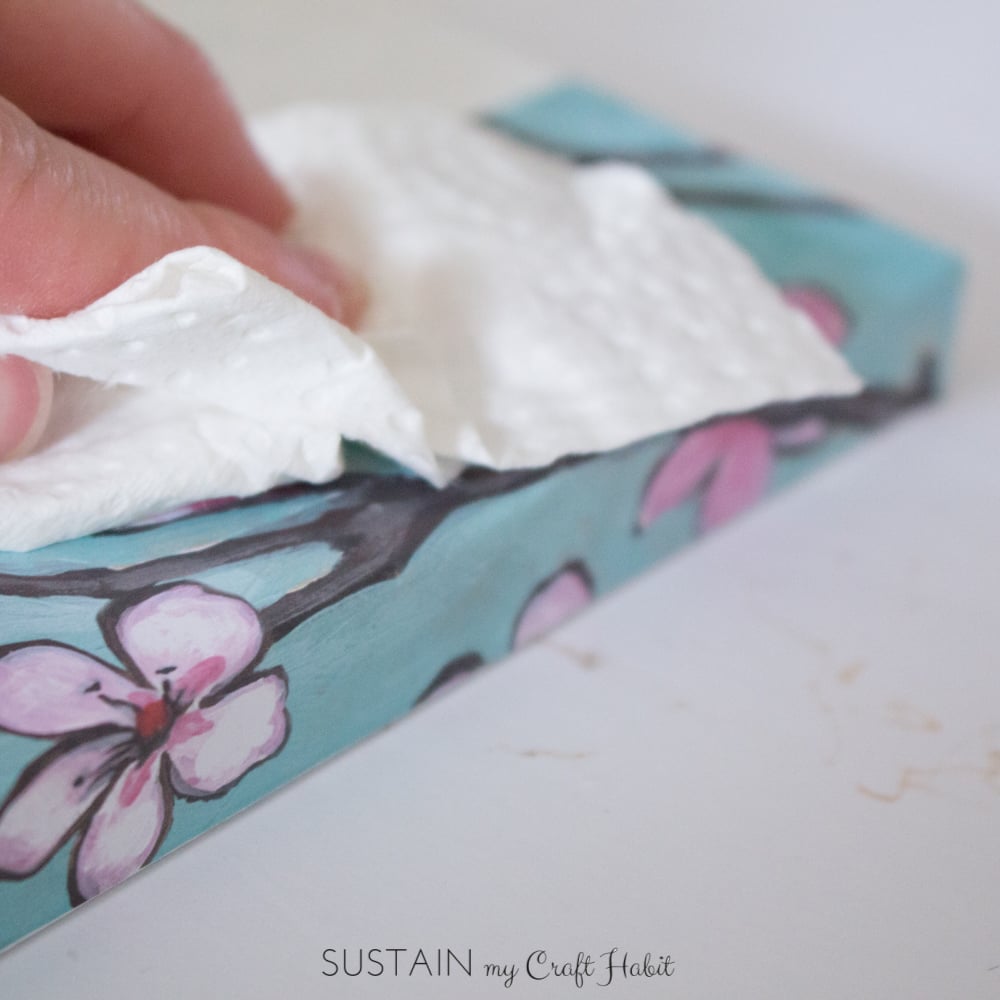
3. Work quickly. Carefully apply the paper onto the photo frame. Press and smooth out to get rid of all of the air bubbles. It’s best to use a roller to press down on the paper and push out any excess glue. Since I didn’t have a roller, I just used a paper towel and carefully pressed out the excess. Doing this step will minimize any bubbles from forming under the paper as the Mod Podge dries. Wipe away any excess Mod Podge and allow 15-20 minutes to dry. This is key…be patient (unlike me the first time I tried it) and wait out the full 15 minutes.
4. Once dry, add another coat of Mod Podge to the outer surface of the paper-covered photo frame using a foam brush to avoid brush strokes showing when the picture frame dries. The Mod Podge will look opaque going on but will dry clear. Add one more coat once dry. Put the picture frame aside and let it dry.
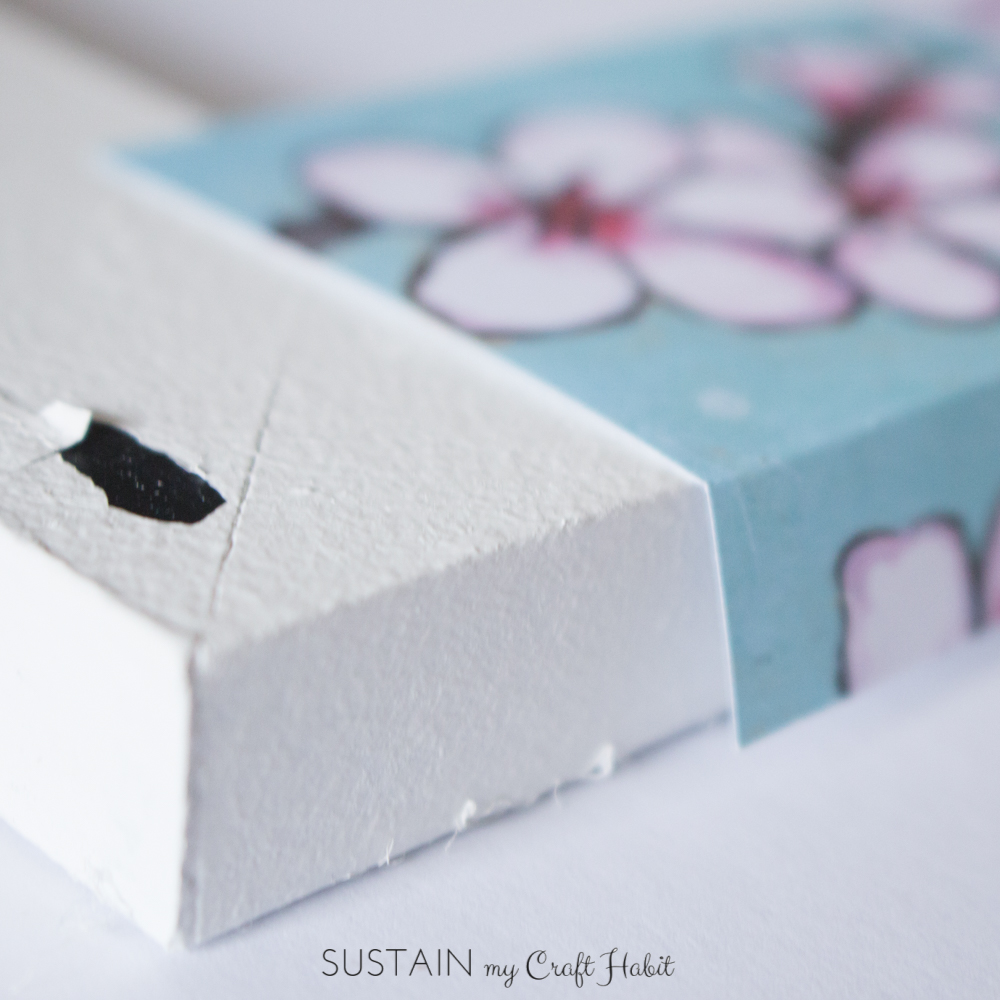
5. The trickiest parts were making sure all the edges of the photo frames were covered by the paper and lining up the pattern since the sheet of scrapbook paper was not as big as the picture frame.
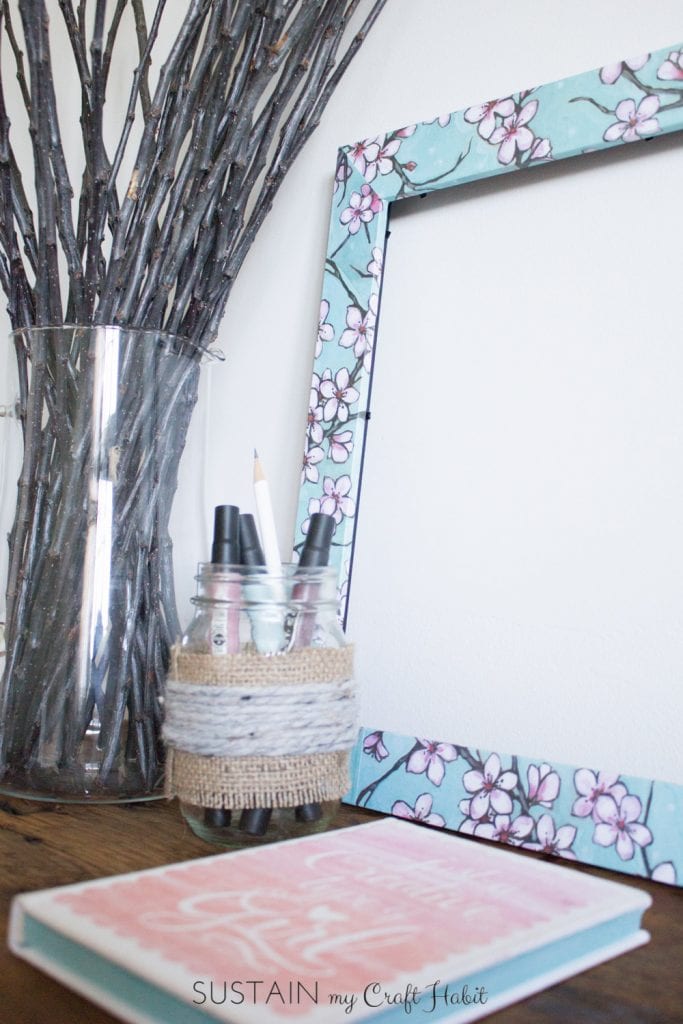
To finish you easy DIY home decor creation, add a favourite photo, a fun printable or just leave pictureless. Hang and enjoy your new upcycled photo frame!

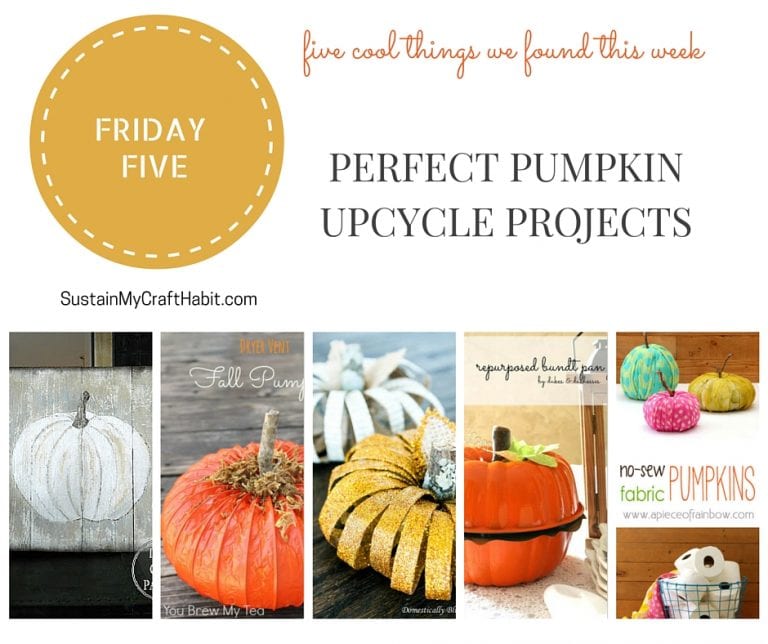
Don’t forget to check out the amazing and creative DIY arts and crafts ideas by our other Canadian blogging friends!

From the top left, they are:
How To Use Mod Podge – A Beginner’s Story from Vin’yet Etc.
Painted Florals on Glassware from PMQ for Two
Geometric Pineapple Art from Life Is A Party
DIY “Home” Wood Sign from Love Create Celebrate
DIY Filing Cabinet Makeover Using Vintage Book Pages from Woman in Real Life
Handy DIY Two Month Receipt Organizer from Time with Thea
Decoupage Foot Stool from Fresh Crush
Make Lace Decoupaged Garden Containers from The DIY Mommy
Paper Flower Lamp Shade from Brooklyn Berry Designs
Easily Upcycled Photo Frames from Sustain My Craft Habit
Kate Spade-Inspired Mug from Mommyzoid
Window Map Art from New House New Home
Have you used Mod Podge? What sort of arts and crafts projects have you used it for?
Also, this post contains affiliate links which means if you buy any products through these links – at no additional cost to you – we make a small commission. “

what ya gonna put in the frames?!
The cherry blossoms are a seasonal favourite. Well done 🙂
No idea! We’re open to suggestions:)
Simply elegant! Such a great idea to give new life to some old photo frames!
I LOVE this idea! There are so many decor possibilities. Plus your instructions made it so simple and inexpensive to do! Thank you!
Great little makeover, and such pretty paper. Great project.
Great now I can hear all of my "didn’t make the cut" frames calling me from the basement! 😉 Seriously though, what a great project, some new eye candy for your walls and upcycled too!
Your frames are so lovely! I have a number of old frames in the basement too. Hmm…so many projects, so little time. 😉
Such a great idea, and what pretty paper you chose! Love!