Free Wooden DIY Planter Box Plans
As we’ve been cooped up at the cottage during this Christmas break we were treated with an unseasonably warm day! It was the perfect time to test out our new AXIS Cordless Reciprocating and Jigsaw to make a project that’s been on our list for a while: a wooden DIY planter box.

Wooden DIY Planter Box
You know we love our woodworking projects here at Sustain My Craft Habit! While driftwood crafts are some of our favourites to make, we appreciate pulling out the power tools every now and then to get creative with. So when WORX Tools reached out to partner on a new project using the versatile AXIS Cordless Reciprocating and Jigsaw, we jumped at the chance to give it a whirl!
NOTE: Use the coupon code AXISCRAFT to receive 10% off plus free shipping!
Last year we built a DIY outdoor shower enclosure for the cottage using cedar fence boards and had a few left over. Since they’re pressure-treated, they’re perfect to use for outdoor projects. Scroll on down for the full how-to tutorial including free DIY planter box plans. We’re looking forward to using our new DIY planter with the changing seasons.

Using the AXIS Cordless Reciprocating and Jigsaw
There are a lot of around-the-home projects you can do with a good jigsaw. A jigsaw is ideal for cutting curved shapes in wood up to about ¾” thick. We use a jigsaw to make our driftwood mirrors and driftwood wreaths for example. The Reciprocating Saw variation is ideal for cutting through branches or PVC piping.
Here are some of our thoughts on using the AXIS for the first time:
Pros:
- Great price for the value;
- Convenience of two tools in one;
- Comes with a battery and charger as well as four different blades;
- Easily transforms from the jigsaw to the reciprocating saw and back;
- Has a safety latch such that you can’t accidentally start the saw and cut yourself;
- Compact size makes it easy to hold for our smaller hands;
- The reciprocating saw was powerful enough to cut through and take down a relatively large, wet branch (about 5 inches wide);
- Includes a light to make it easier to see where you are cutting if in a darker space.
Cons:
- Although compact it is a bit heavy for us to use with one hand;
- As there is not a guide with the jigsaw, you need to have a very steady hand to cut a straight line;
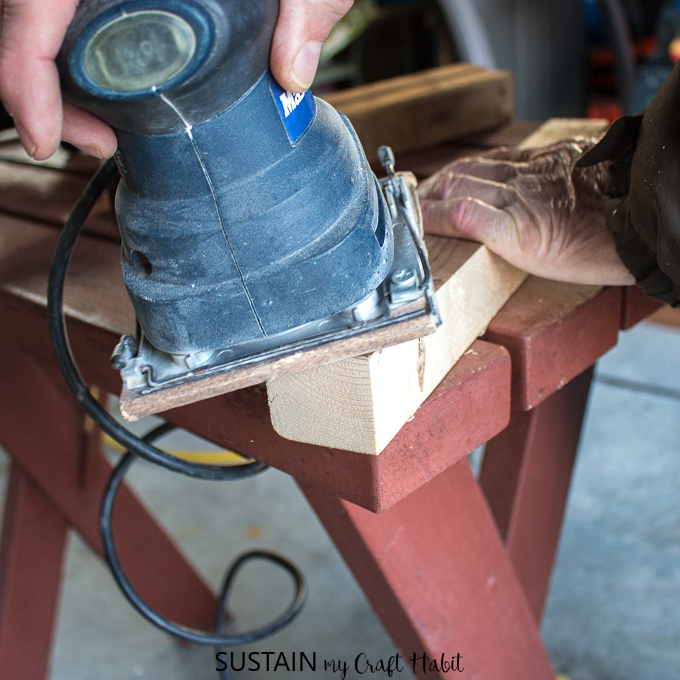
- The edges cut using the jigsaw blade are quite rough so the wood needed to be sanded down for a smoother finish.
Supplies Needed for this DIY Planter Box:
Disclosure: This post is sponsored by Worx. All opinions are our own. Also this post contains affiliate links – should you choose to purchase through these links we make a small commission at no cost to you. Read our full disclosure statement here.
- WORX AXIS Cordless Multi Purpose Saw
- X3 8′ cedar fence boards
- X1 5′ 2×2 post
- 1″ staples and staple gun
- Air compressor
- Measuring tape
- Palm sander
- Pencil
- Angle ruler
- Screwdriver with x4 2″ long screws
How to Build a Planter Box:
Note: This free DIY planter box plan makes a finished wooden planter measuring 16.25” wide x 17.5” long x 18.5”high.
PREPARING THE PLANTER BOX MATERIALS:
For the planter box sides:
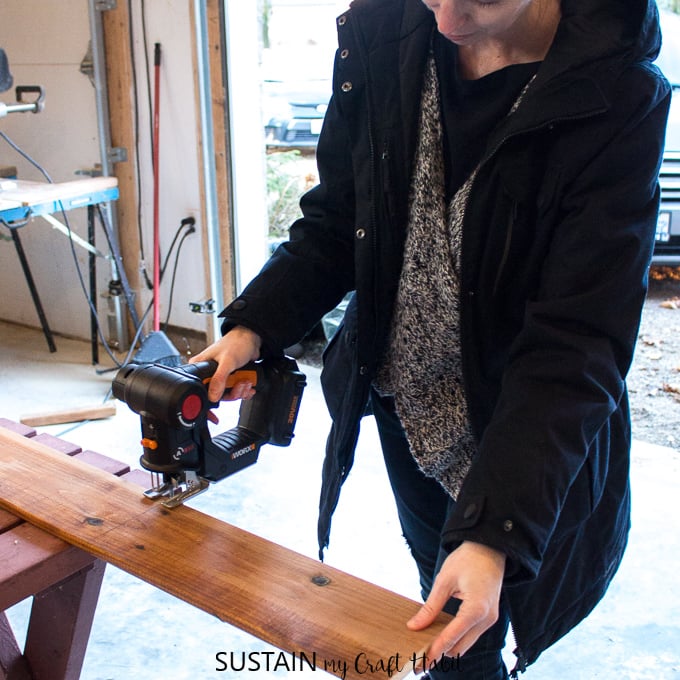
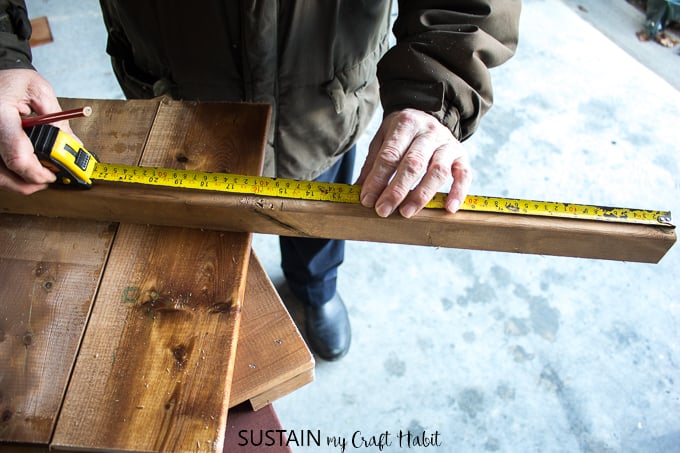
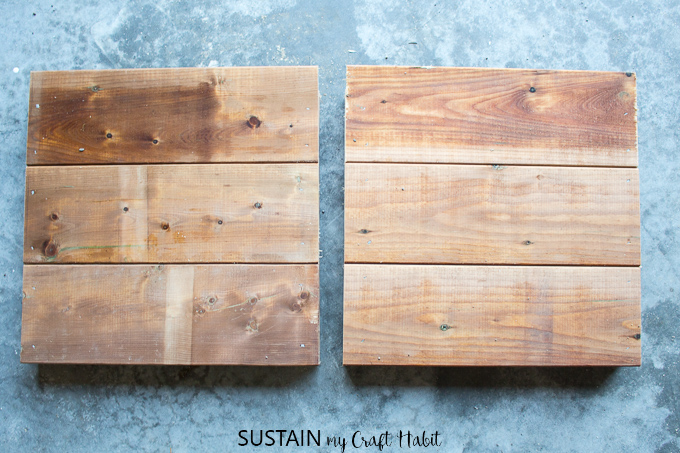
- Using the jigsaw wood blade, measure and cut the fence board into 12 pieces, each measuring 16.25” long.
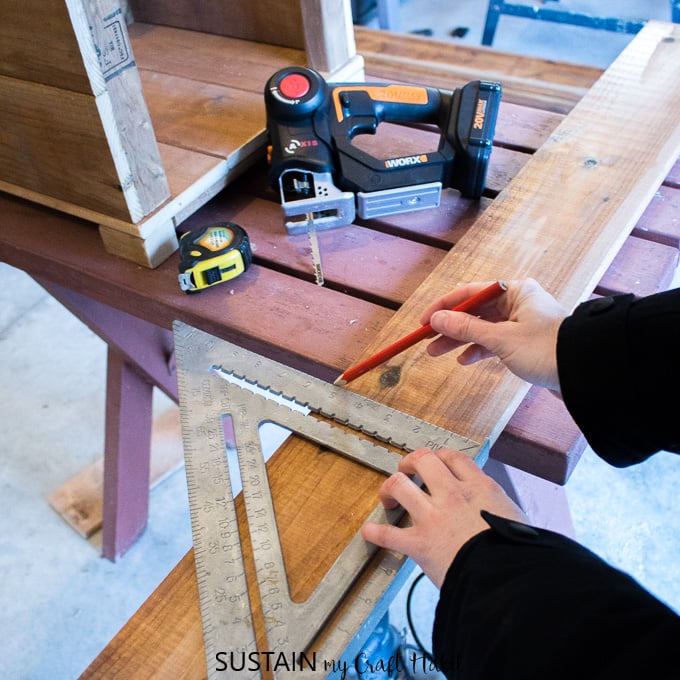
- Measure and mark the 2×2 post into 4 pieces, each measuring 15” long.
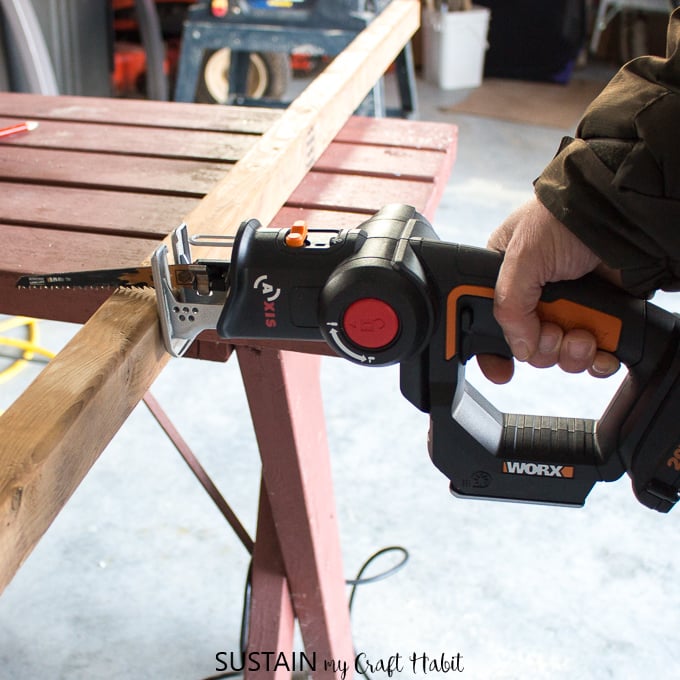
- Using the reciprocating saw, cut along the marked lines.
For the planter box base:
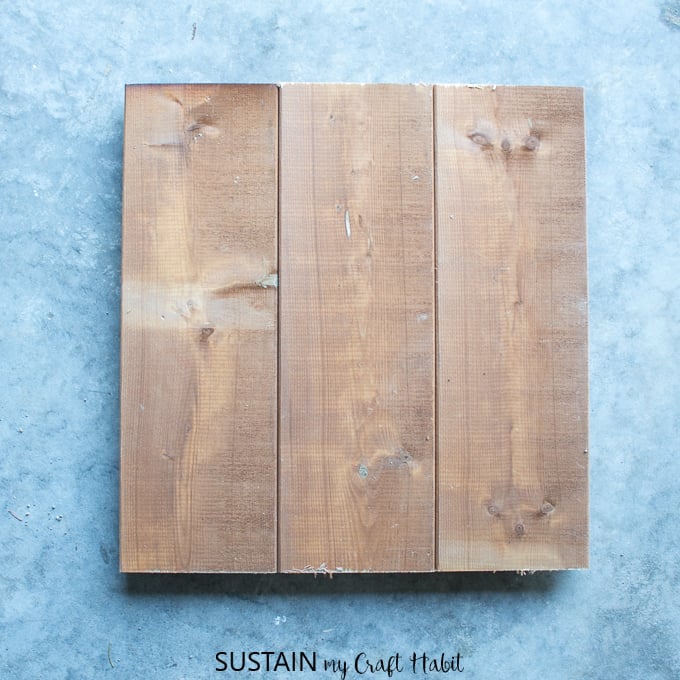
- Using the jigsaw wood blade, measure and cut the fence board into 3 pieces, each measuring 16.75” long.
- Using the jigsaw wood blade, measure and cut the fence board into 3 pieces, each measuring 12” long. In our case, we used existing scrap wood that were also cut in half lengthwise.
For the planter box legs:
- Using the reciprocating wood saw, measure and cut 2×2 posts into 4 pieces, each measuring 1.5″wide. Or alternatively, you can also use same sized scrap wood for the planter box legs.
Using a palm sander, sand all rough edges until smooth.
ASSEMBLING THE PLANTER BOX:
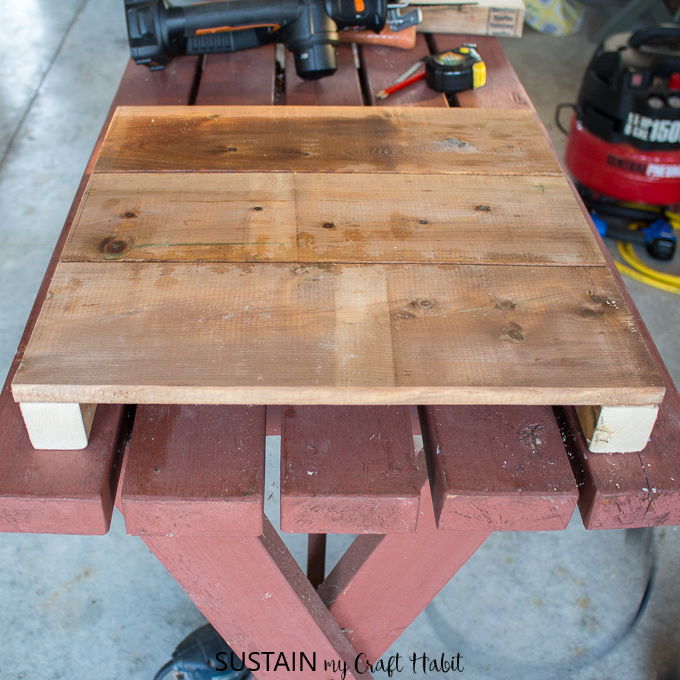
For the planter box base:
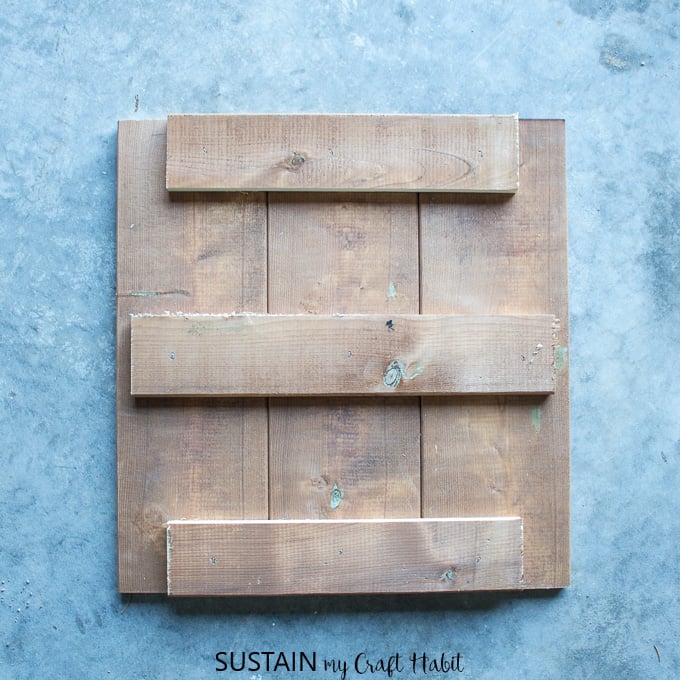
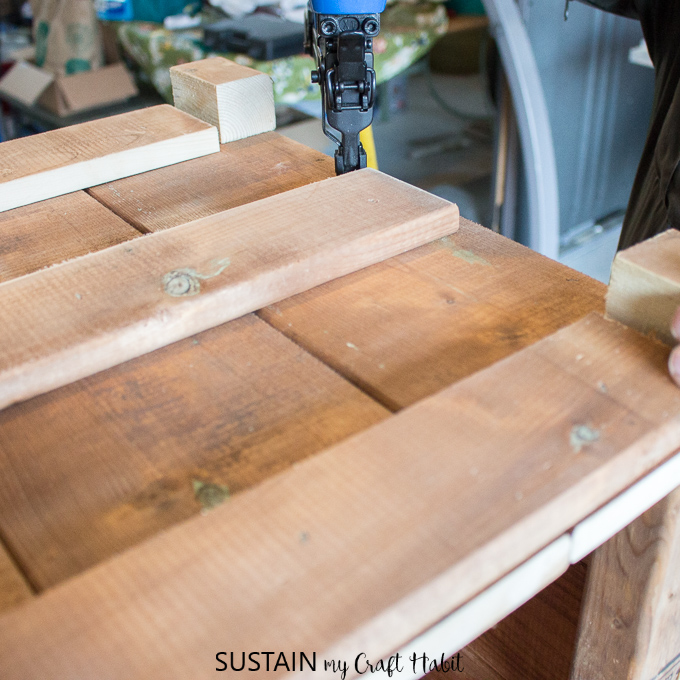
Align the 3 pieces of 16.75″ long fence boards on a flat surface. Overlap the 12″ long fence boards with the other boards as shown (in the opposite direction). Using a staple gun, staple the overlapping boards together.
Place the planter box legs at all 4 corners and staple in place from the top side. You can also wait to add the planter legs at the very end. For our next one, we would attach the legs at the end.
Put the base piece aside for time being.
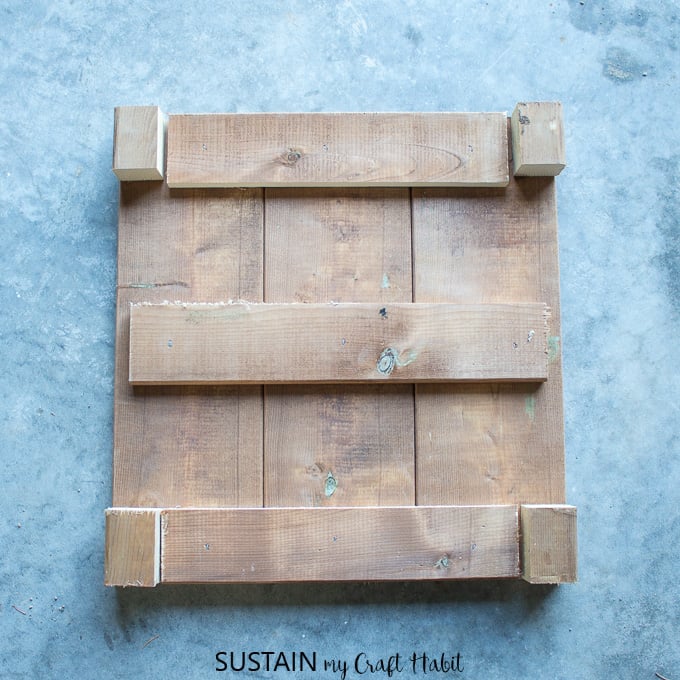
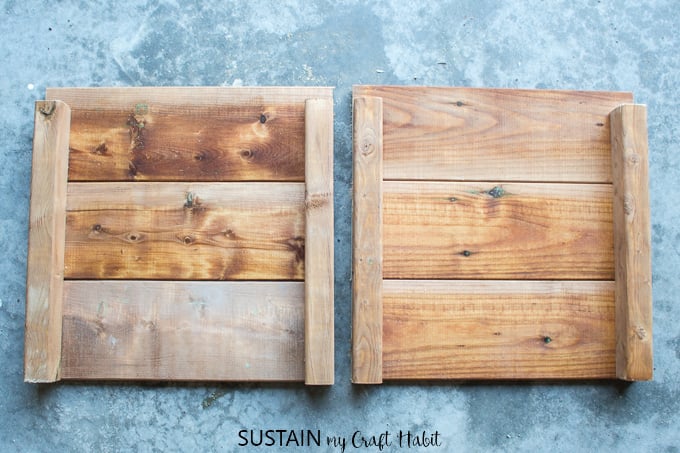
For the planter box sides A (and B):
Align the 3 pieces of 16.25″ long fence boards on a flat surface.
Position the 15″ long 2×2 posts underneath the fence boards as shown.
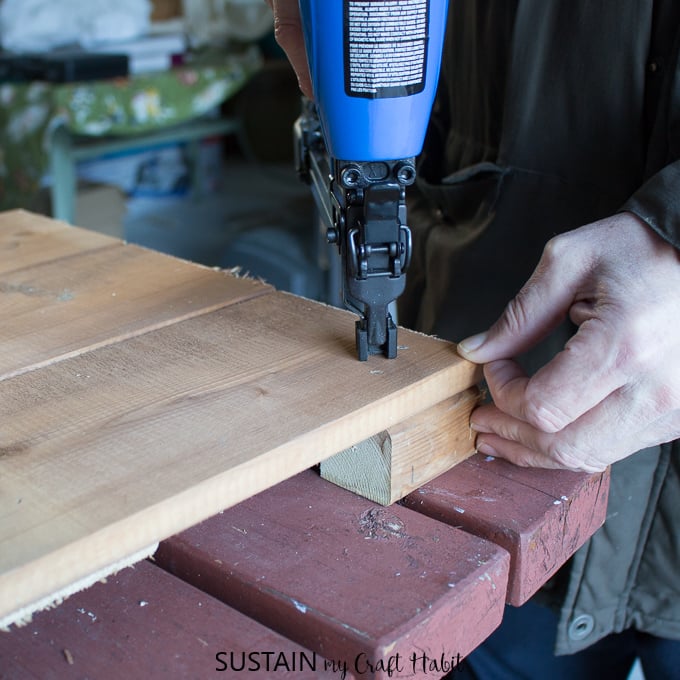
Using a staple gun, staple the fence boards to the 2×2 posts.
Repeat one more time (for side B). Put sides A and B aside for the time being.
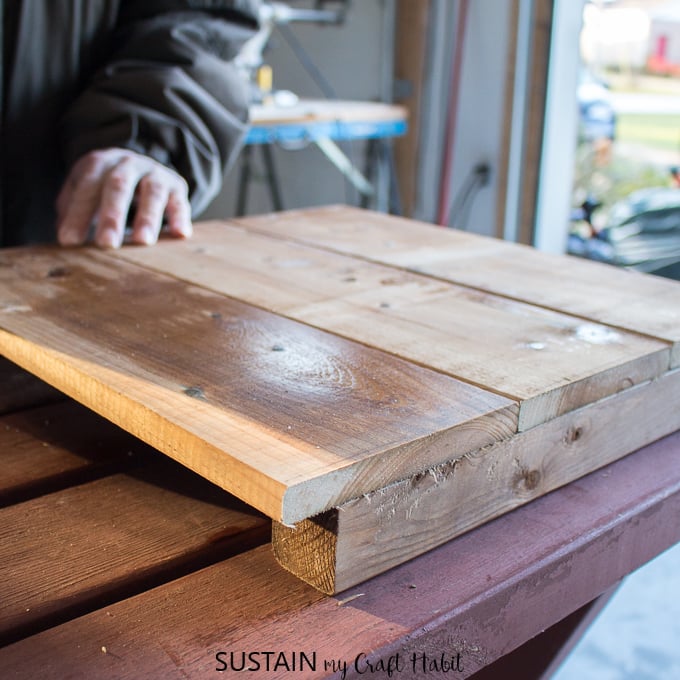
Joining the planter box base and all 4 sides:
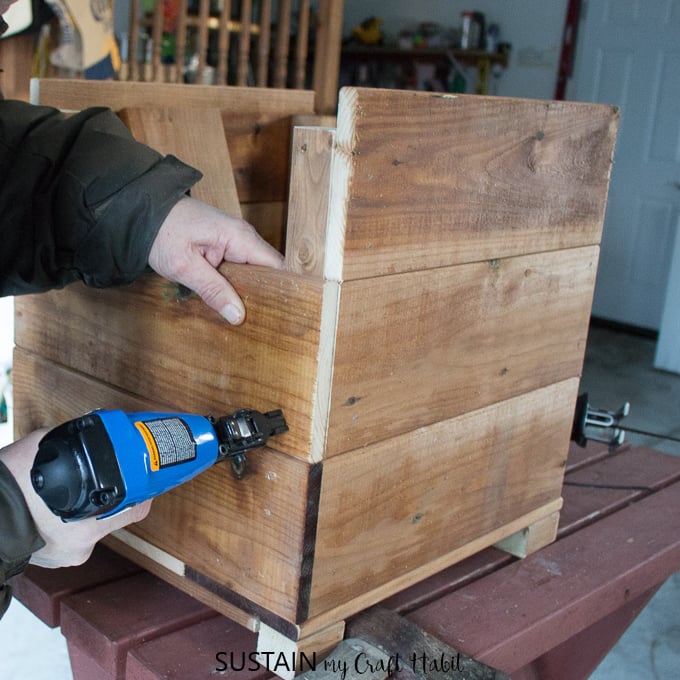
Attach the base to sides A and B using a staple gun along the base edges.
To reinforce the base piece, drill one 2″ screw at each of the 4 corners, next to the attached planter box legs.

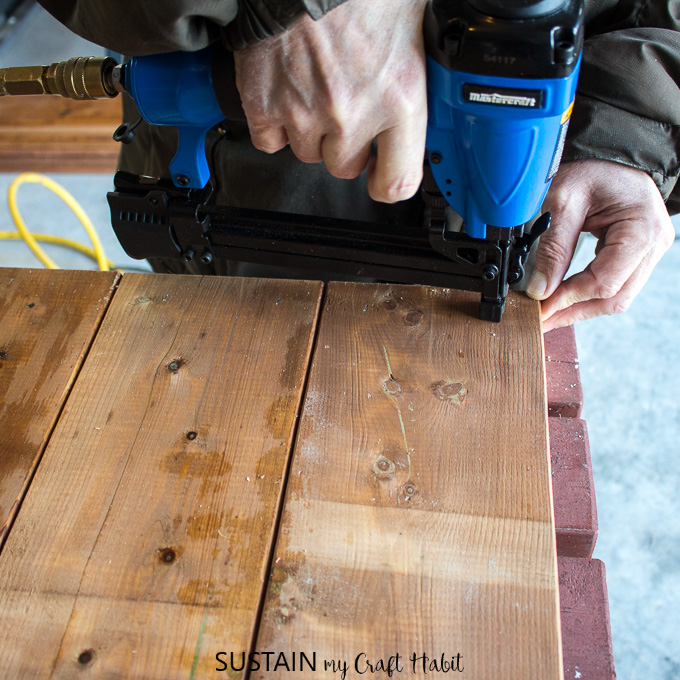
Turn planter box right side up to attach sides C and D. Using a staple gun, attach one fence board at a time until all four sides are completed.
In total, this project took about four hours, perfect for a weekend afternoon! We brushed on a Total Wood Preservative (TWP) in a cedar finish and we love how it looks with the natural finish. Down the road we might stain it a different colour, or even give it a white-wash finish for a fun ship-lap effect.
Using Your New Wooden Planter Box

Although we used a pressure treated wood which is moisture resistant we wouldn’t suggest placing soil directly inside. Rather, line it with a thick plastic bag (with a few holes on the bottom for drainage) prior to pouring the soil inside. Alternatively, you can place an already potted plant inside. We created our arrangement inside a large plastic pot which we can change out with the coming seasons. And we had a lot of fun using the WORX jigsaw for trimming some over grown branches to use in our greenery arrangement!
Thank you so much to WORX for partnering with us on this DIY project. Be sure to visit worx.com and use code AXISCRAFT for a 10% discount and free shipping on your own AXIS Cordless Reciprocating and Jigsaw.
If you’re interested in additional ways to use those power tools, check out these 70 easy DIY projects for your home.
Like it? Pin it for later!


I don’t have a DIY bone in me but I love to grow things. My husband loves DIY so I’m definitely going to have him build this lovely planter box for me. Thank you for your detailed tutorial
Thank you for your sweet comment Michelle! Growing things is DIYing in our opinion, so you have at least the green thumb bone :D. Let us know if he has any questions! -Jane