

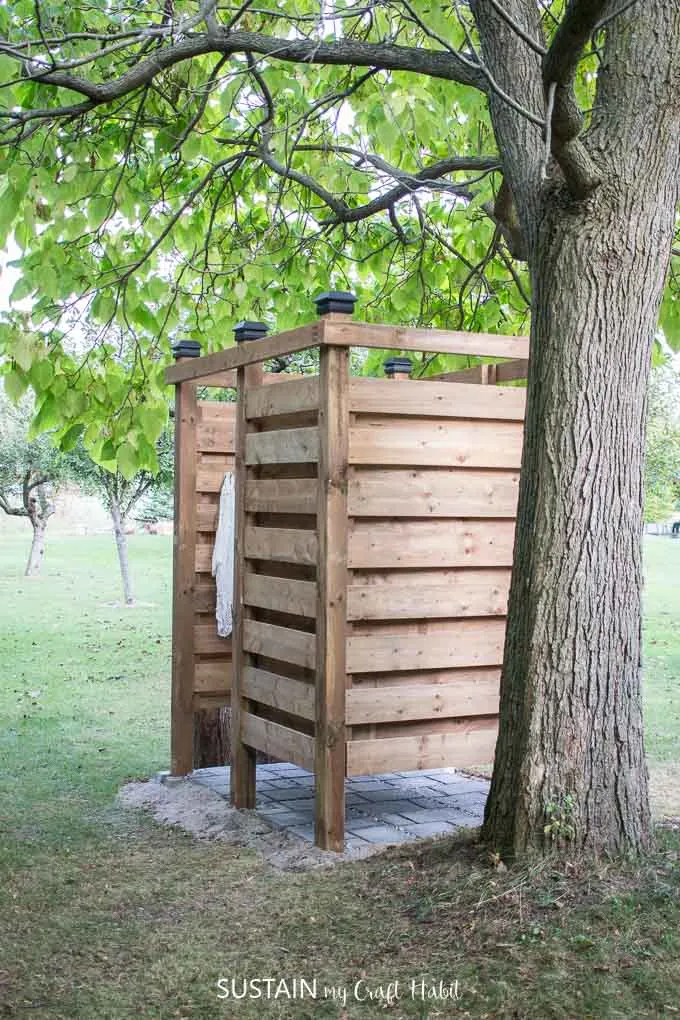
Have you considered adding your own outdoor shower to the exterior of your home? It’s a great way to keep mess and moisture out of your home, cottage or beach house during the warmer months. We’re so excited to share with you our DIY outdoor shower enclosure plans and step-by-step instructions!

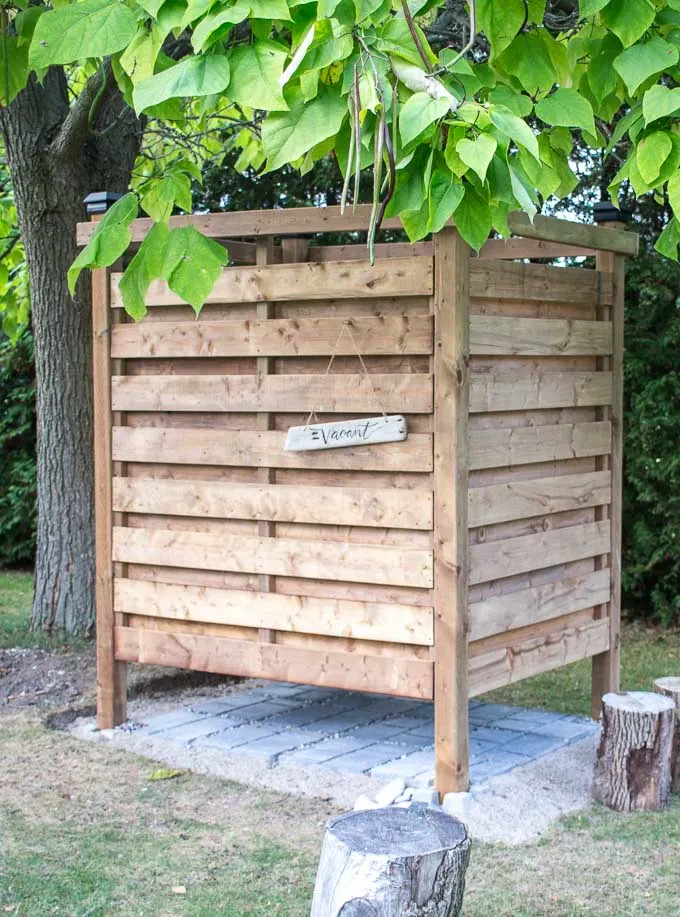
Update (2023): It’s been 5 years since we made this open-air shower for our Graystone Beach cottage. It’s holding up perfectly and we’ve even built two other using the same DIY outdoor shower enclosure plans for family and friends. Read on for the full project plans and tutorial.

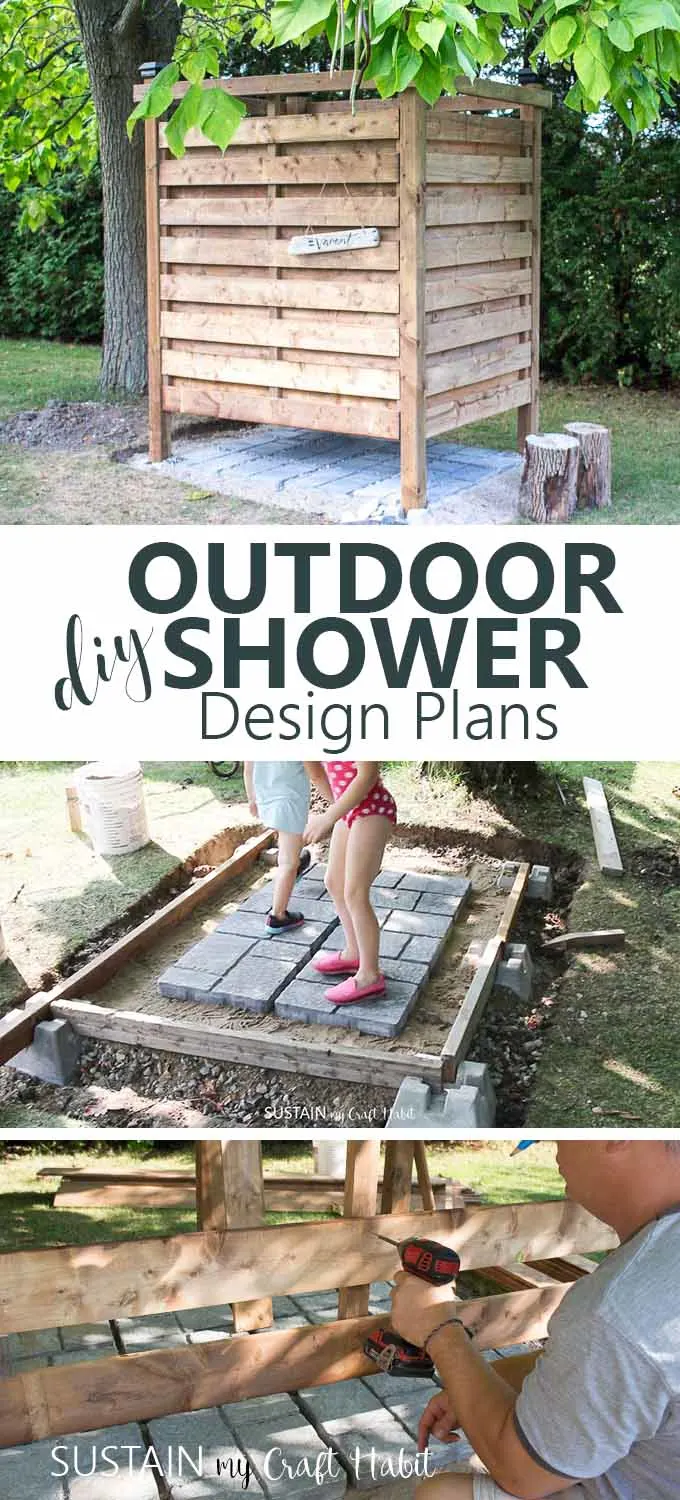
DIY Outdoor Shower Enclosure
Disclosure: We were so happy to partner with The Home Depot Canada, sponsors of this project. All opinions expressed are our own. This post contains affiliate links. Please find our full disclosure statement here.
A sandy beach is a wonderful thing, until the sand clogs up the pipes of your septic system!
We’re so fortunate to have a cottage by the beach to spend our summer days at. The kids love it and end up coated in sand by the time we’re done.
Since the cottage is on a septic system, we’re careful to try and rinse off all the sand before using the indoor shower. However, as they’re getting older (there’s 5 of them altogether!) we’ve been brainstorming the idea of an outdoor shower stall. Not only will this minimize the amount of sand we are bringing into our cottage’s septic system, but also the amount of water it needs to filter. Moreover, it would help to reduce the amount of sand we need to clean off the floors and out of the bathtub/shower indoors.

So, when The Home Depot Canada put out a challenge for summer DIY ideas, the outdoor shower came quickly to mind.
While it seemed like a pretty straightforward project at the start, it took a bit more time and effort than we anticipated. However, over a couple of weekends and with the help of our hubbies and parents, we built a beautiful freestanding outdoor shower enclosure which the entire family will enjoy for years to come.
We’re happy to share our process for making the outdoor shower with you.
Materials Needed for this DIY Project
Please note that the measurements listed are approximate and may adjust according to the project. We also have a printable project plan – subscribe to our email community to access yours!
- Inverted Marking Paint
- Gravel
- Sand
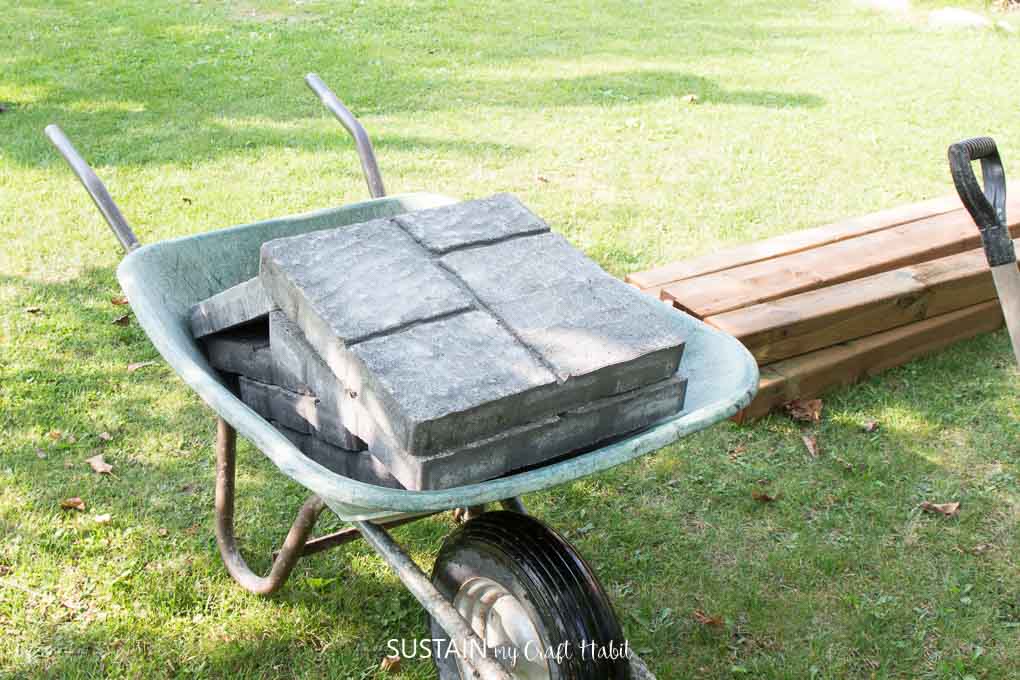
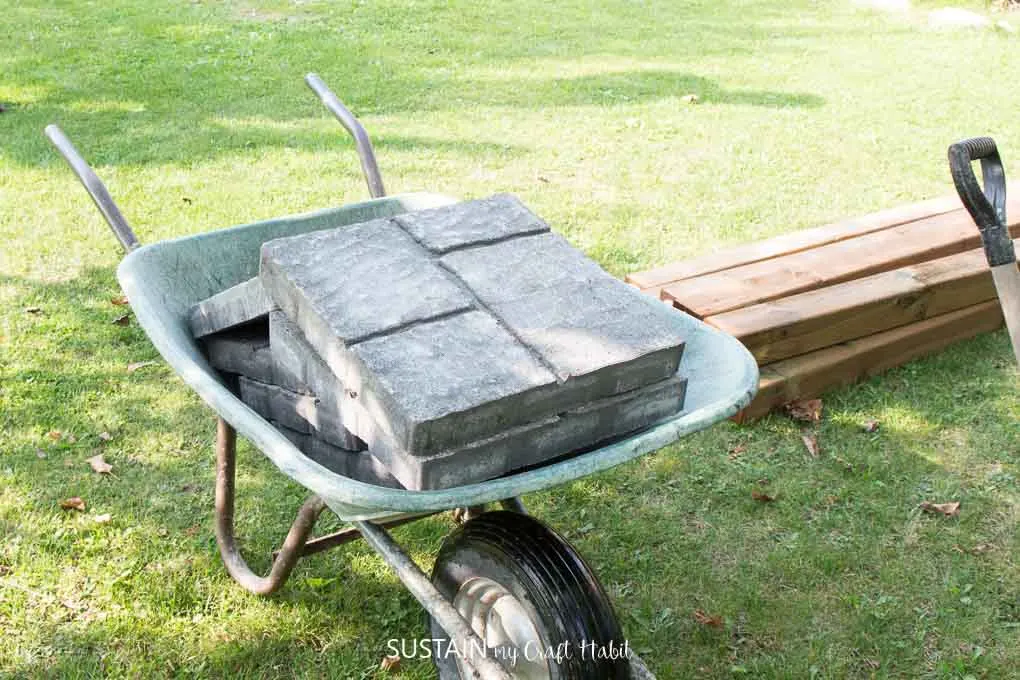
- 12 – Oldcastle Quadral Patio Stones
- 5- Concrete Deck Footing Blocks (a simple solution rather than pouring concrete)
- 5 – 4”x4”x8’ Pressure Treated Wood, cut to 7′
- 8 – 2″x4″x8′ Pressure Treated Wood
- 1″x6″x8′ Treated Wood Fence Boards
- 15 – 60″ long
- 30 – 44″ long
- 15 – 29″ long
- 5- Veranda 4″x4″ Post Caps
- Personal protective equipment (safety glasses, gloves, appropriate shoes)
- 2 1/2″ Cedar deck screws
- Drill, table saw, mitre saw, level, ladder
NEW: DIY Outdoor Shower Enclosure Video Tutorial!
We’ve finally had a chance to post the video tutorial on our YouTube channel. Please give it a thumbs up and be sure to subscribe for more nature-inspired DIY, craft and home decor ideas.

How To Build a DIY Outdoor Shower Enclosure
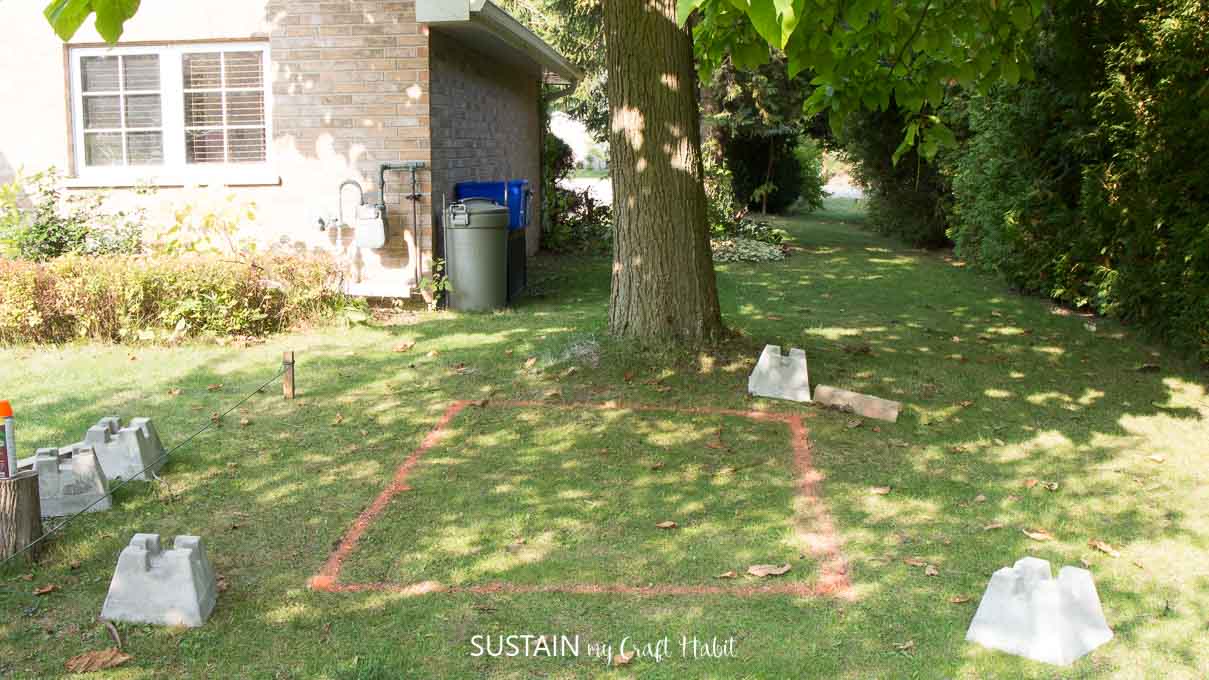
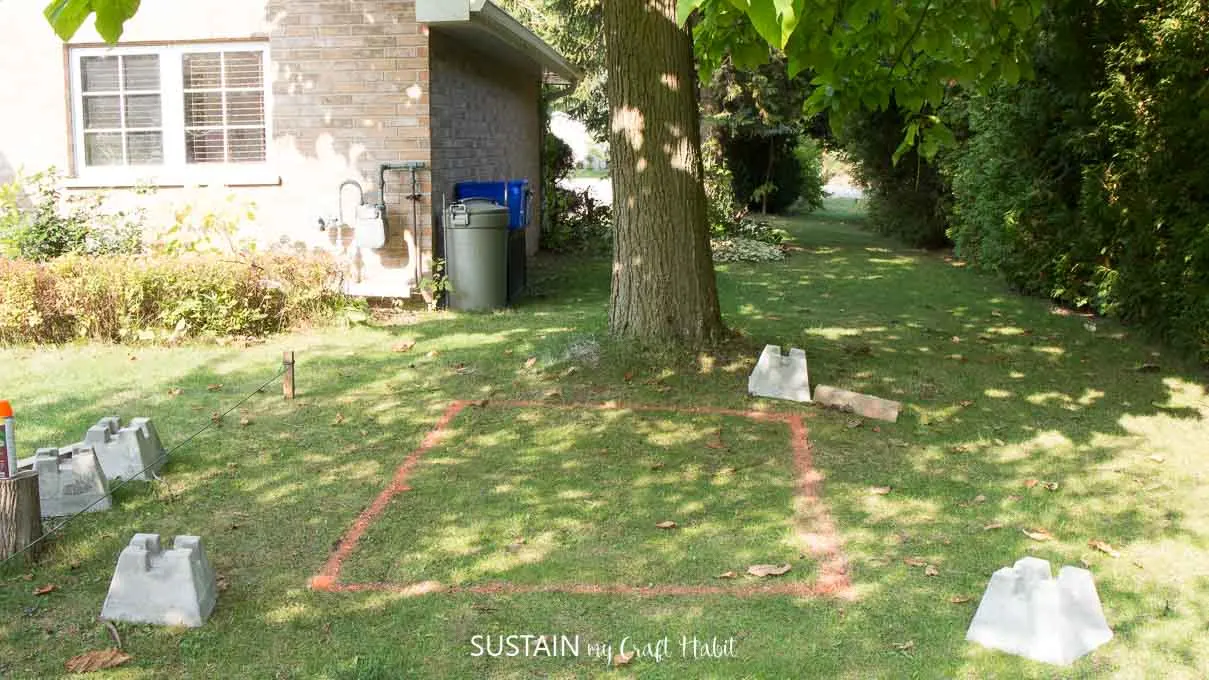
Step 1: Choosing the location
It took a bit of time to decide where we’d build our outdoor shower project. We wanted it to be out of the way yet have easy access to the cottage and our water source (the garden hose). Also, we wanted to ensure that there was a bit of an elevation so that the water would flow out of the shower rather than pooling inside.
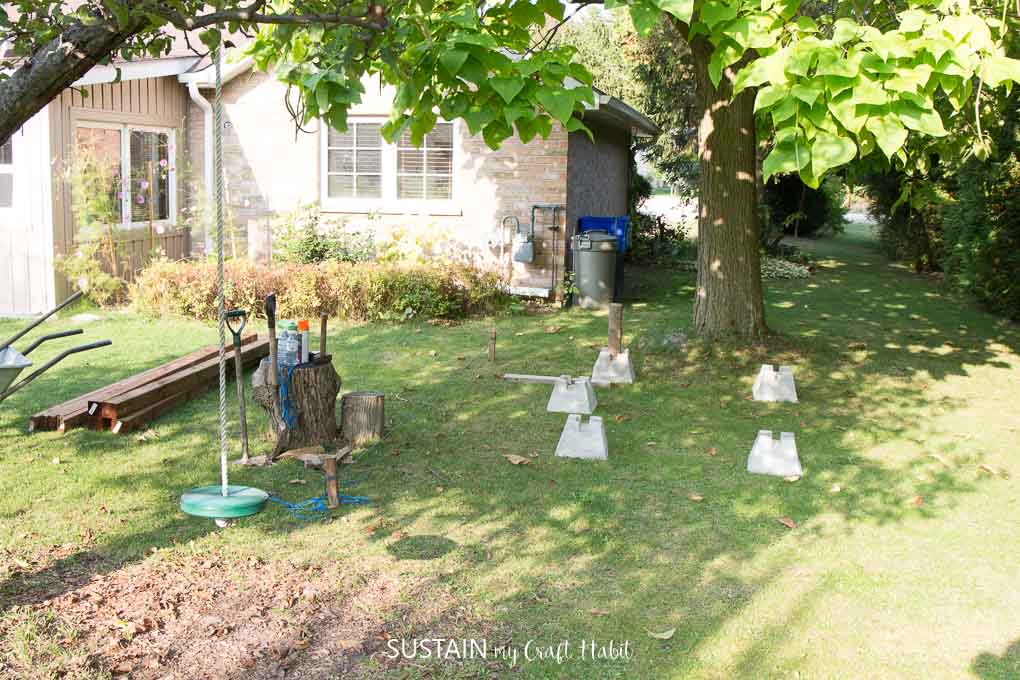

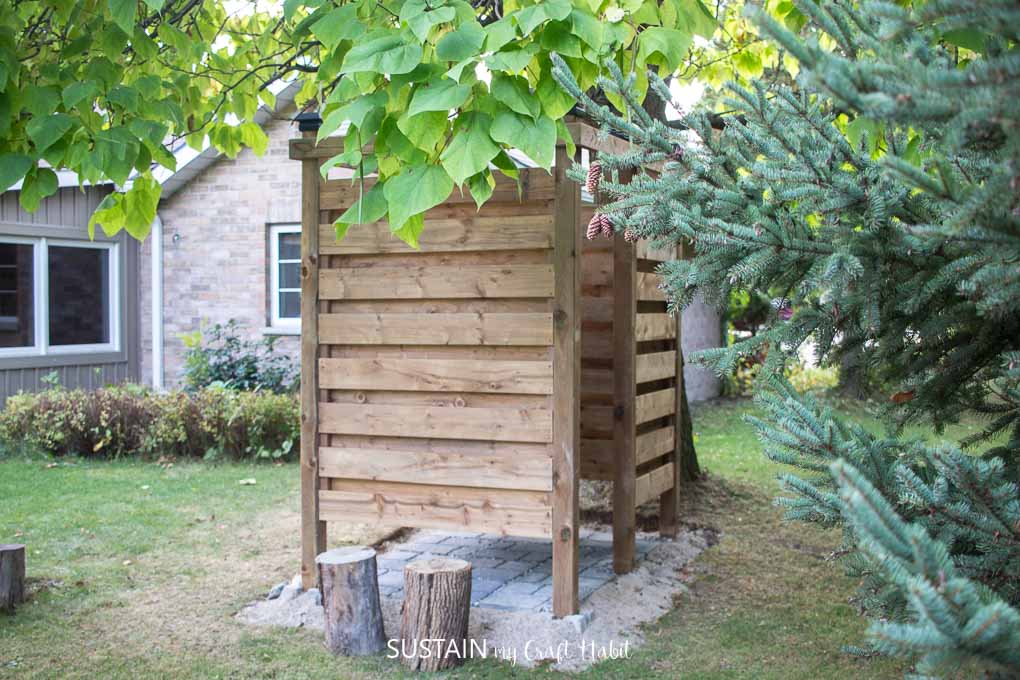
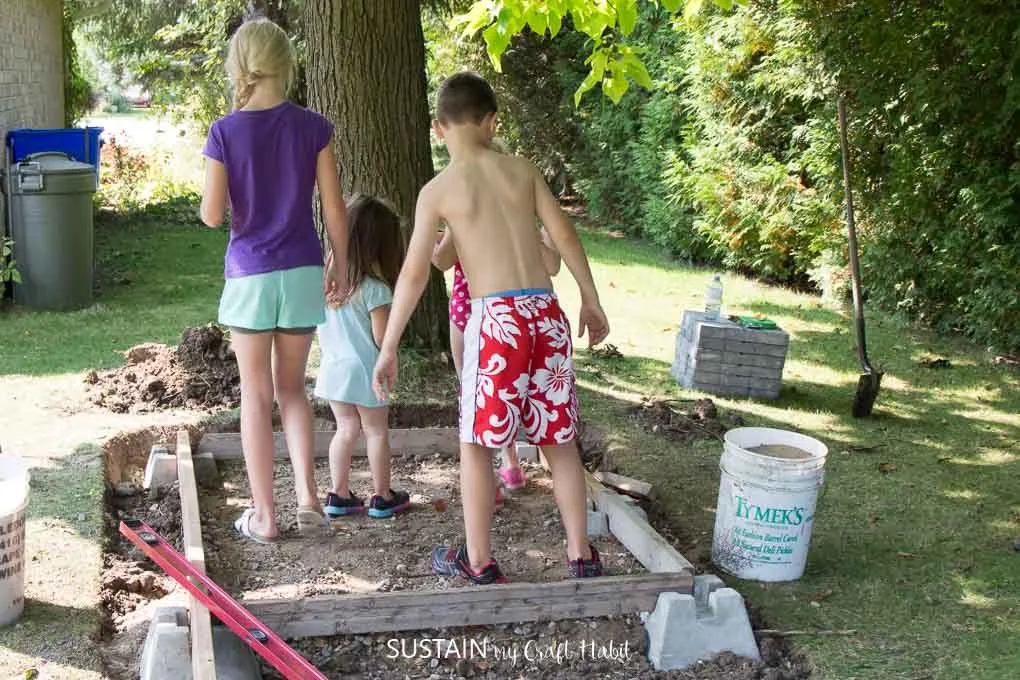
We decided on this private area behind the cottage, under a large tree. The opening to the shower would face towards the hedges for a little privacy (on the right side of the photo). We measured our area (4’x6′) and marked the ground as a guide for where to dig.
Step 2: Preparing the Foundation
Then we started digging. Have I mentioned that this was one of the hottest weekends of the summer? Thank goodness we were working in the shade is all I have to say!


After a little while I called in the big guns!
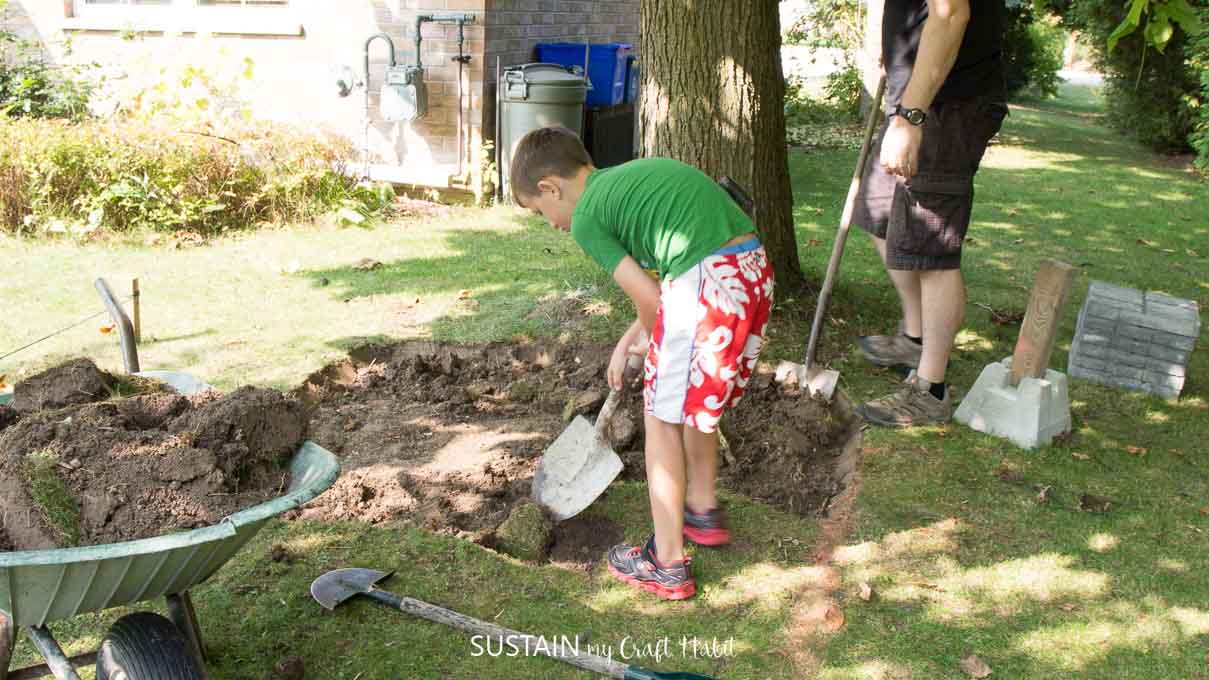
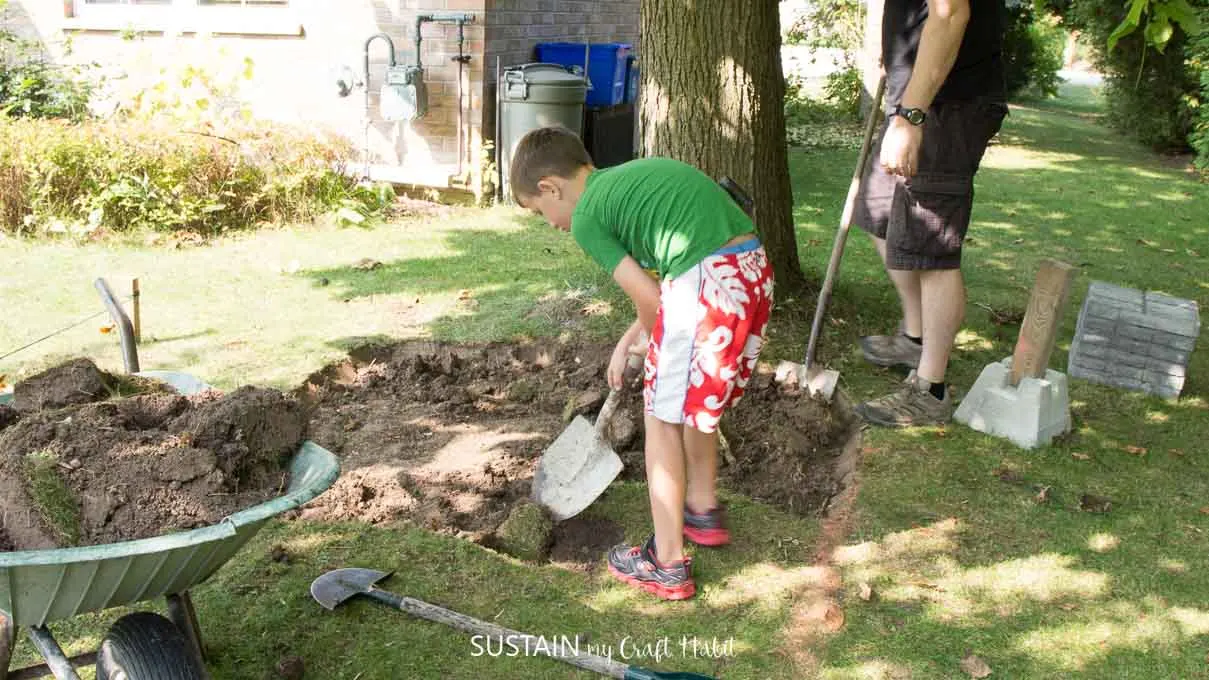
Digging out the foundation took longer than we anticipated because there was quite a steep incline, and lots of roots to get through. After many hours of digging in the heat we finally got to a point where the four deck blocks were level.
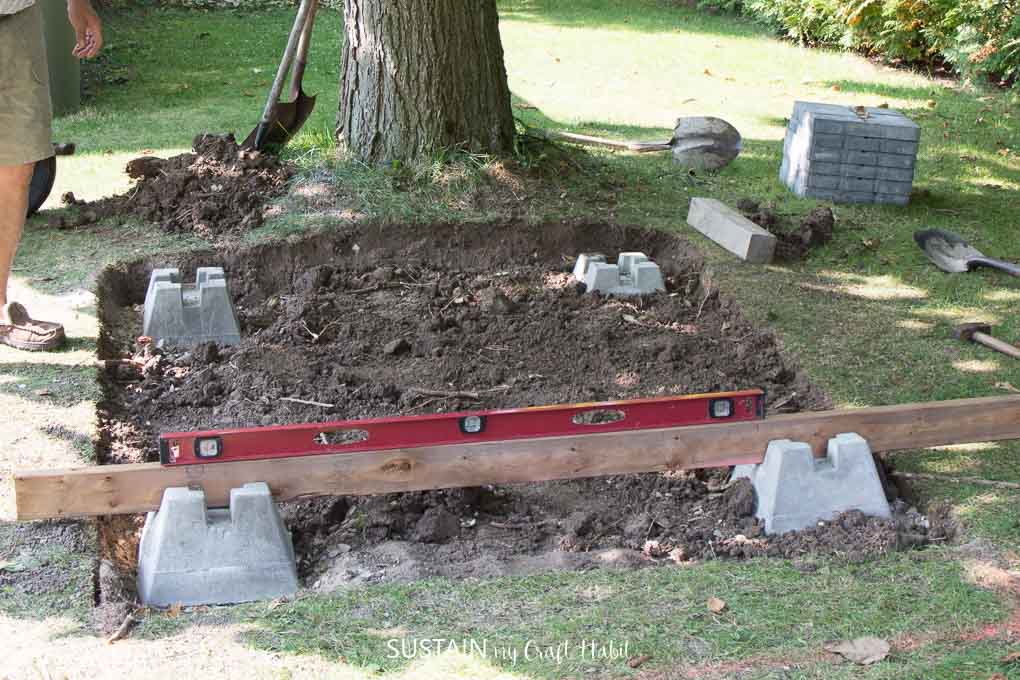
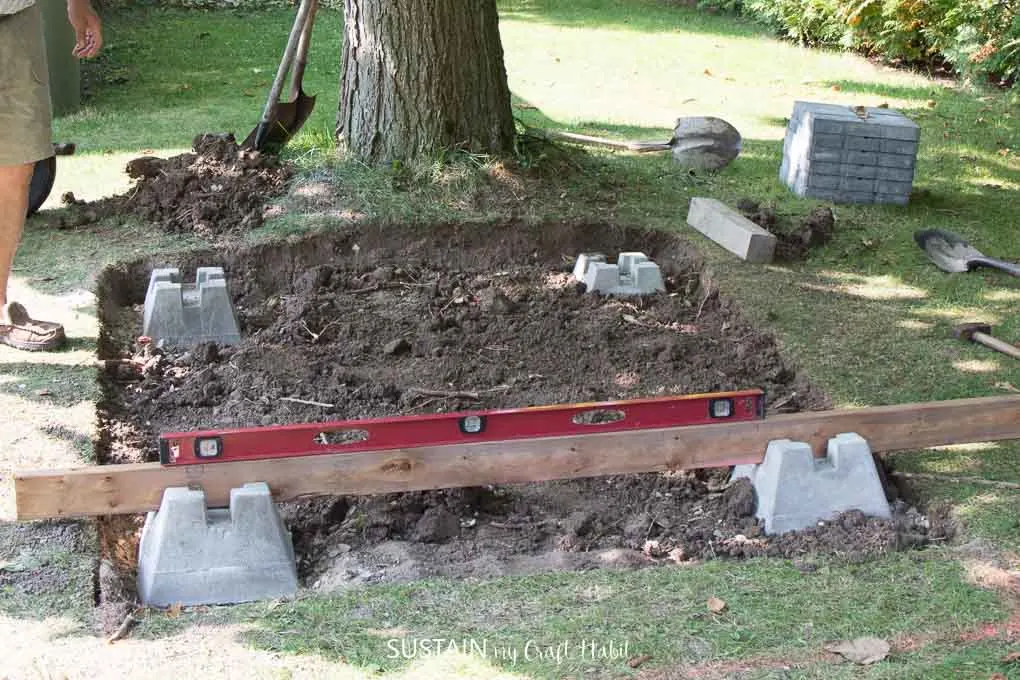
We filled the pit in with gravel to level out the surface and then called in the reinforcements to stamp it all down.

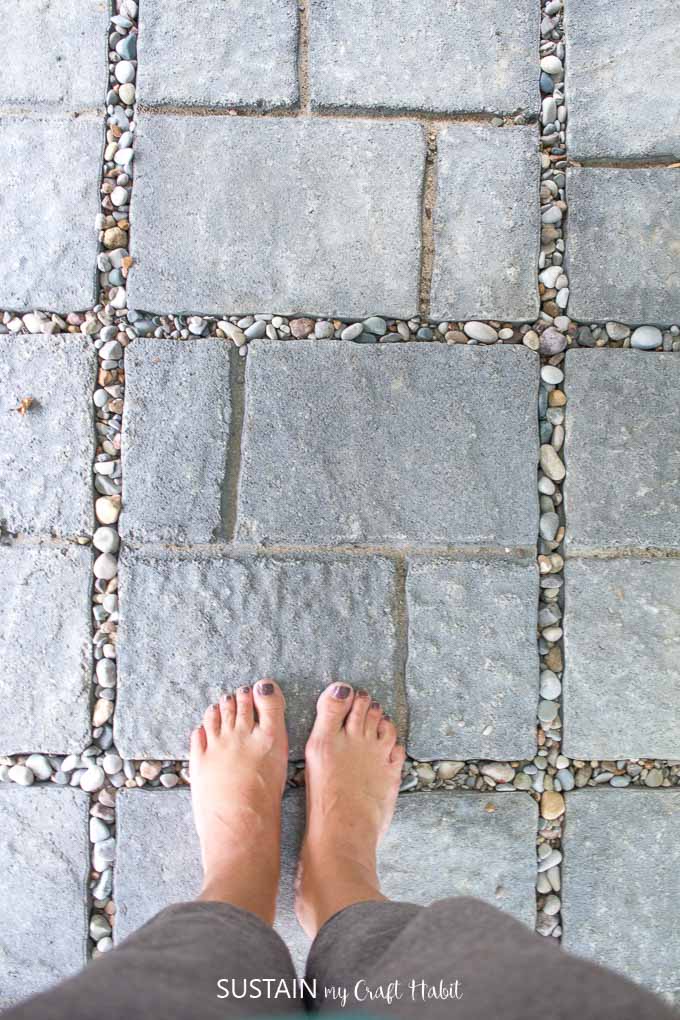
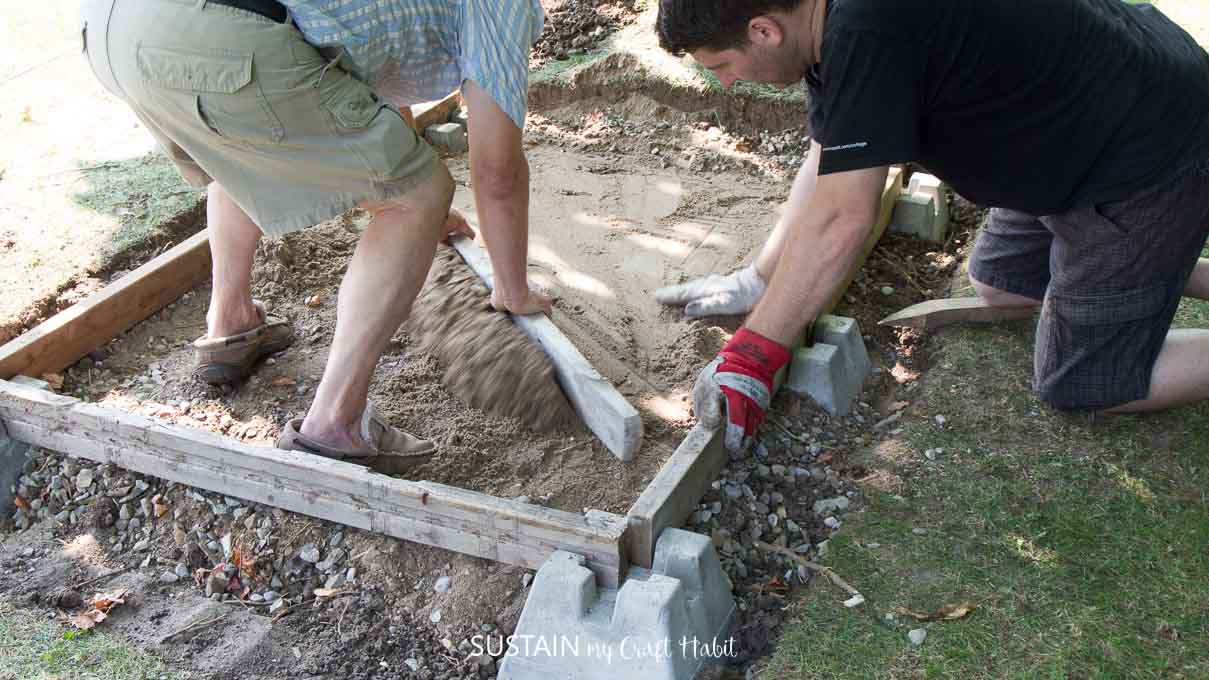
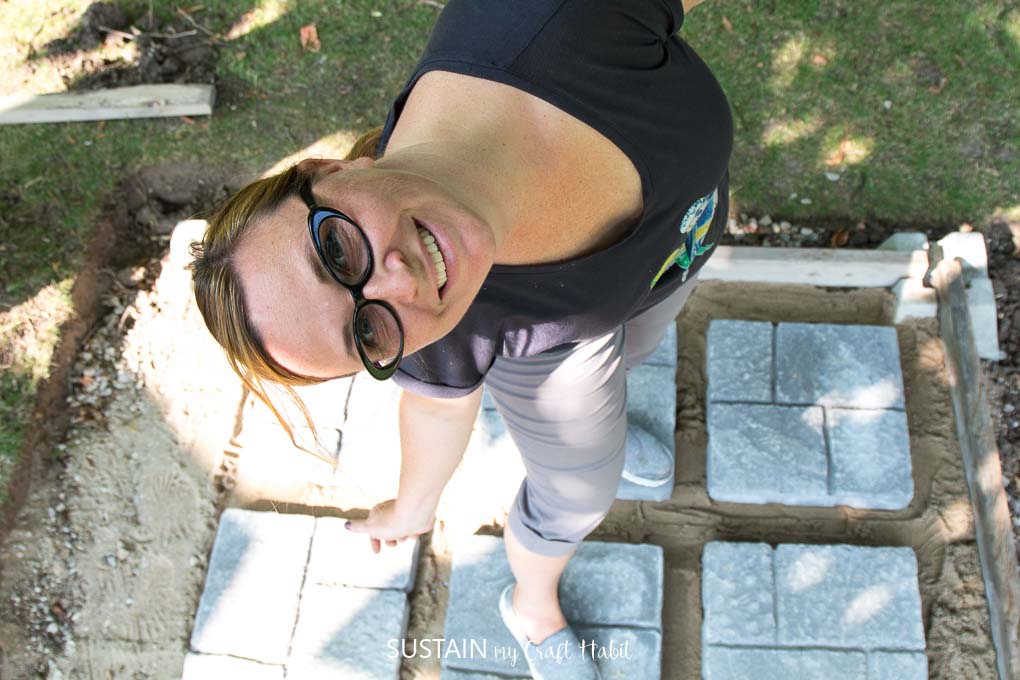
We poured sand over the gravel and leveled it out before laying down some of the stone pavers for the shower floor.

And here I am relieved that we’re done for the day! (Did I mention it was hot out there?)

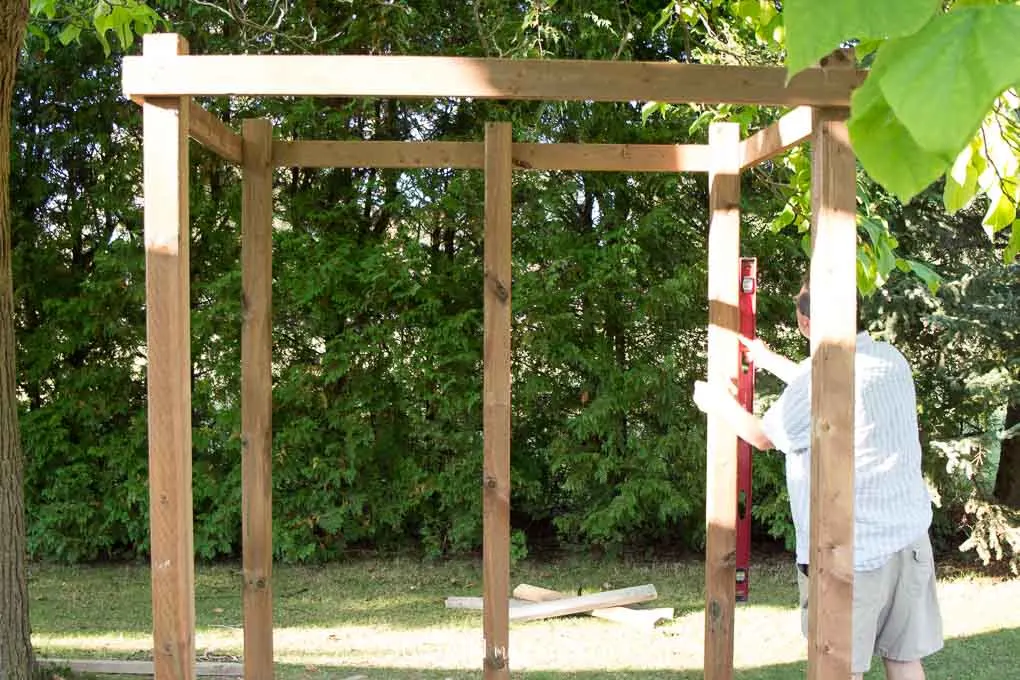
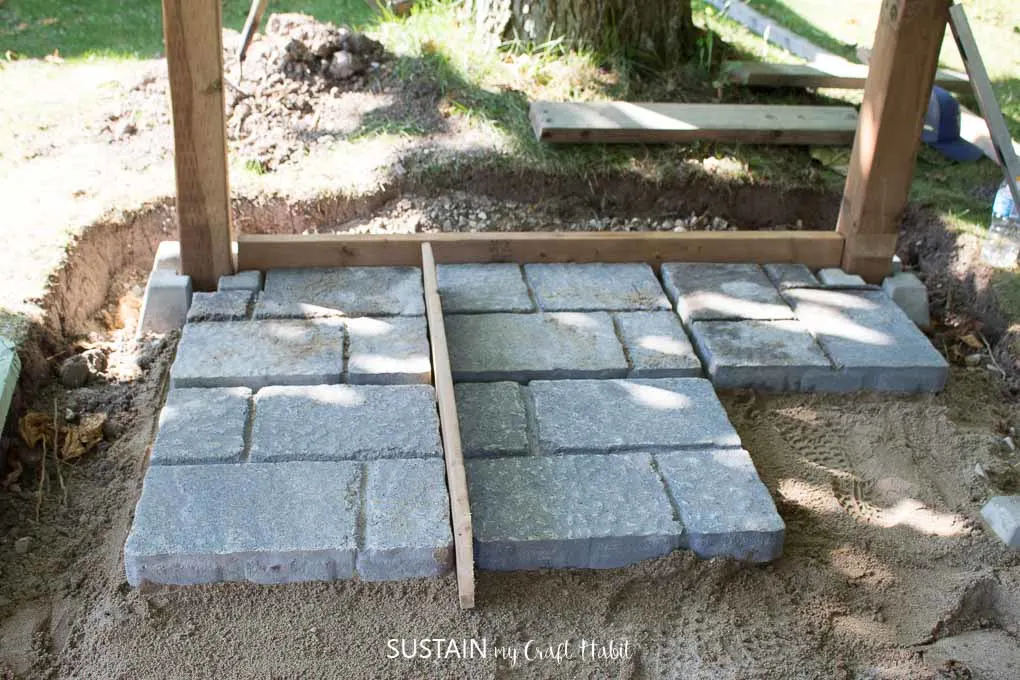
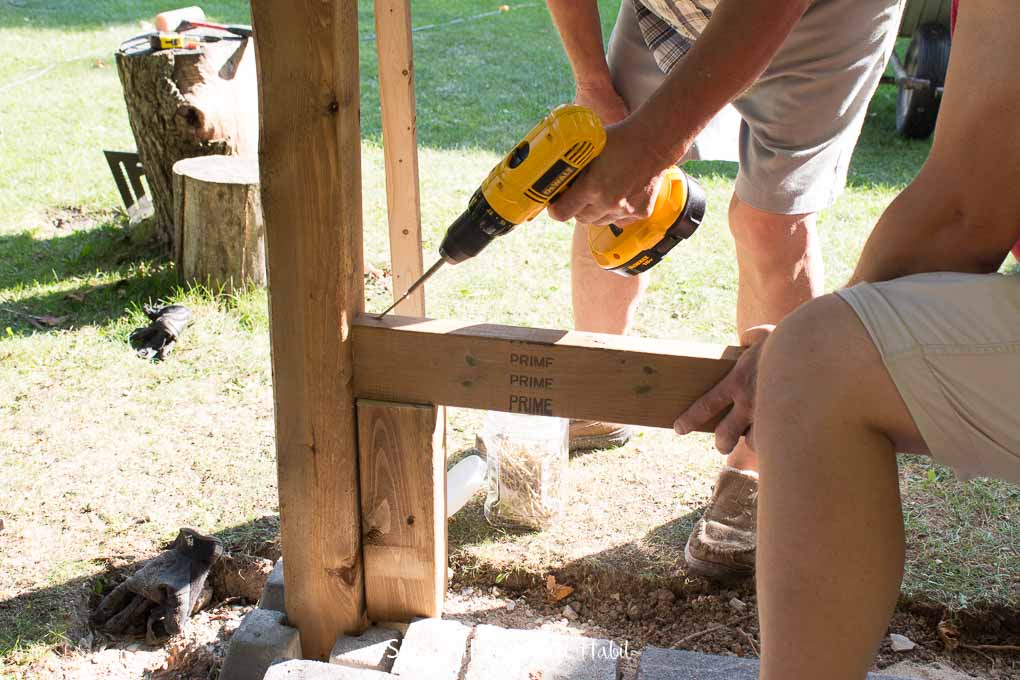
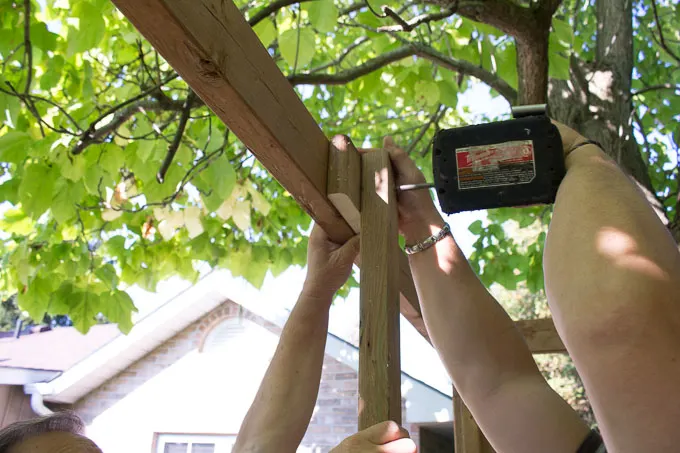
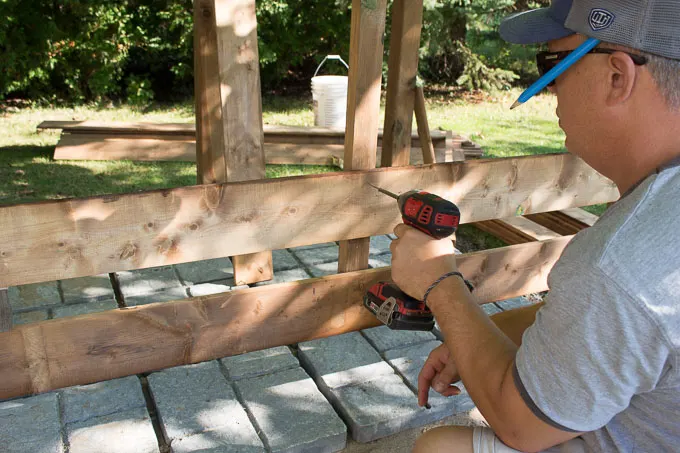
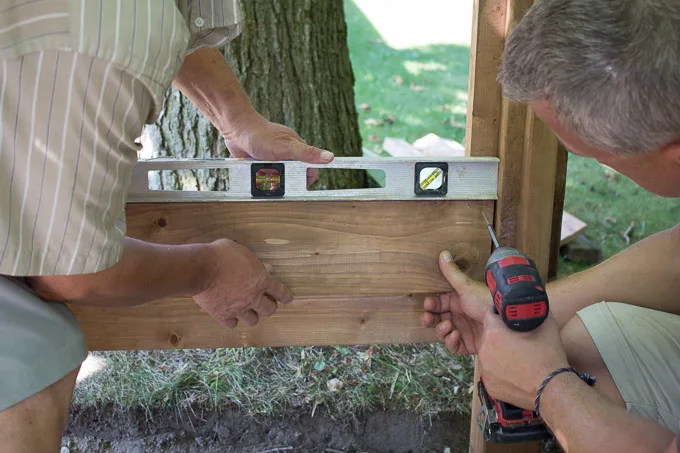
Step 3: Installing the 4″x4″ Posts
To provide stability to the posts for the shower, we braced around the top of the shower with 2×4’s, 3″ down from the top of the posts.
We started by measuring the distance between the outer edges of the post base on one side, cutting the 2×4 to size, screwing the two posts and 2×4 together on the ground before lifting it all into place.
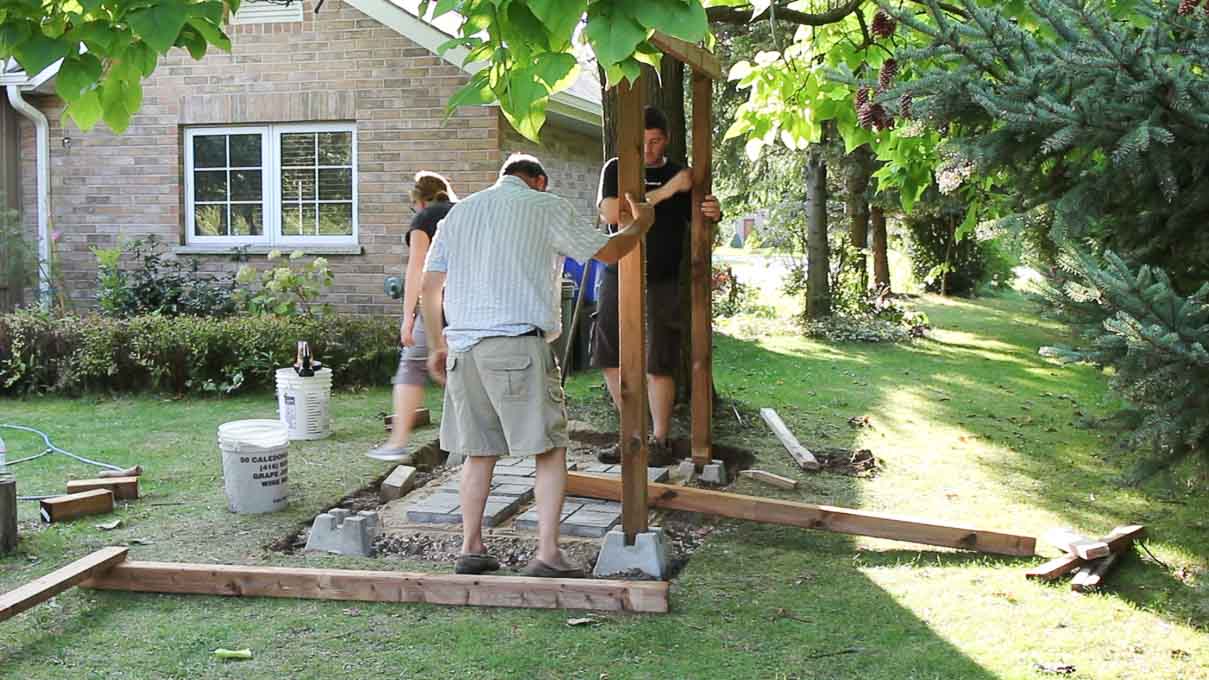

We cleared all dirt out of the deck blocks before putting the posts in.
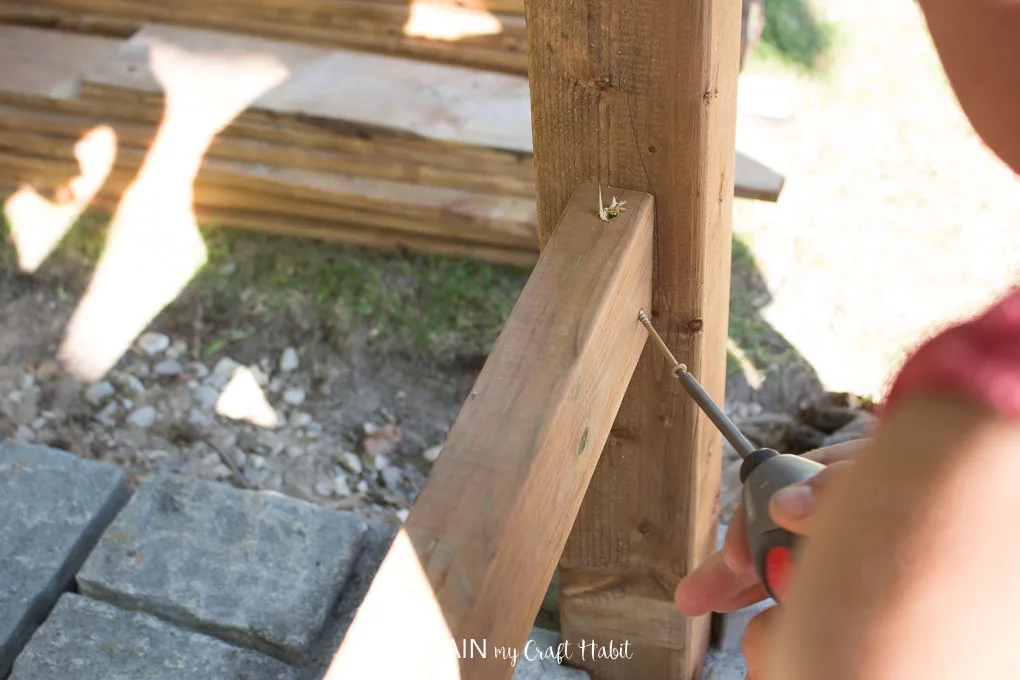
We raised the second side of the shower and held them in place while hubby affixed the ends to tie all the piece together.
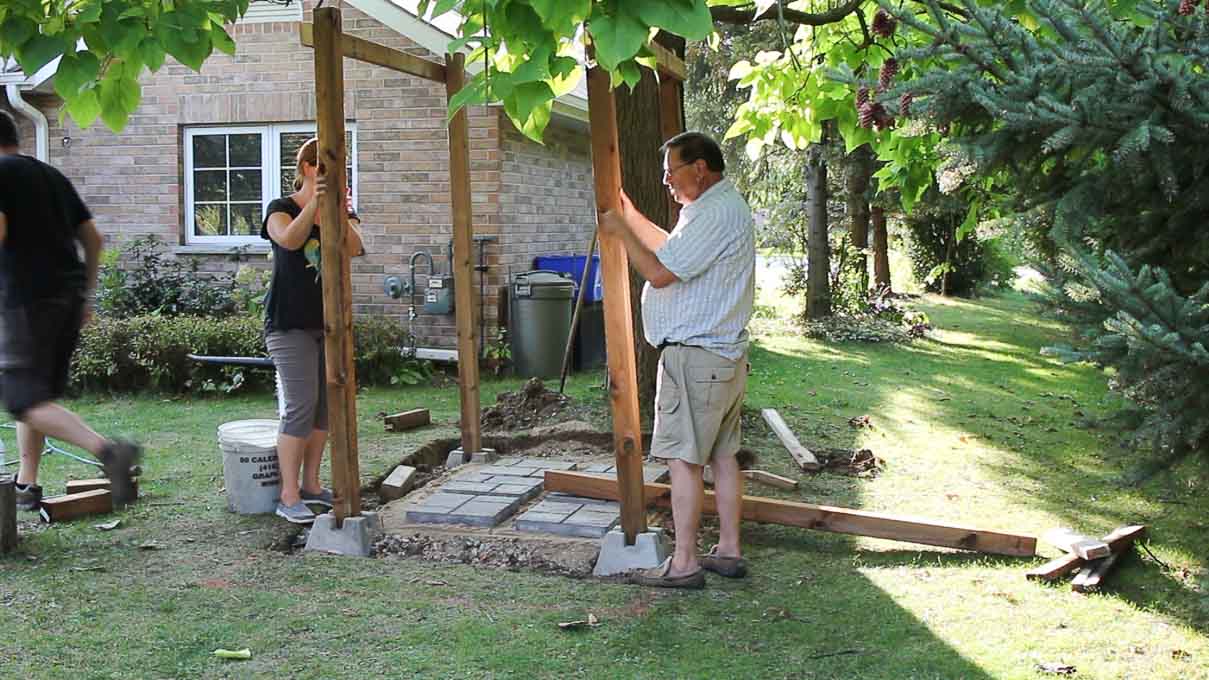
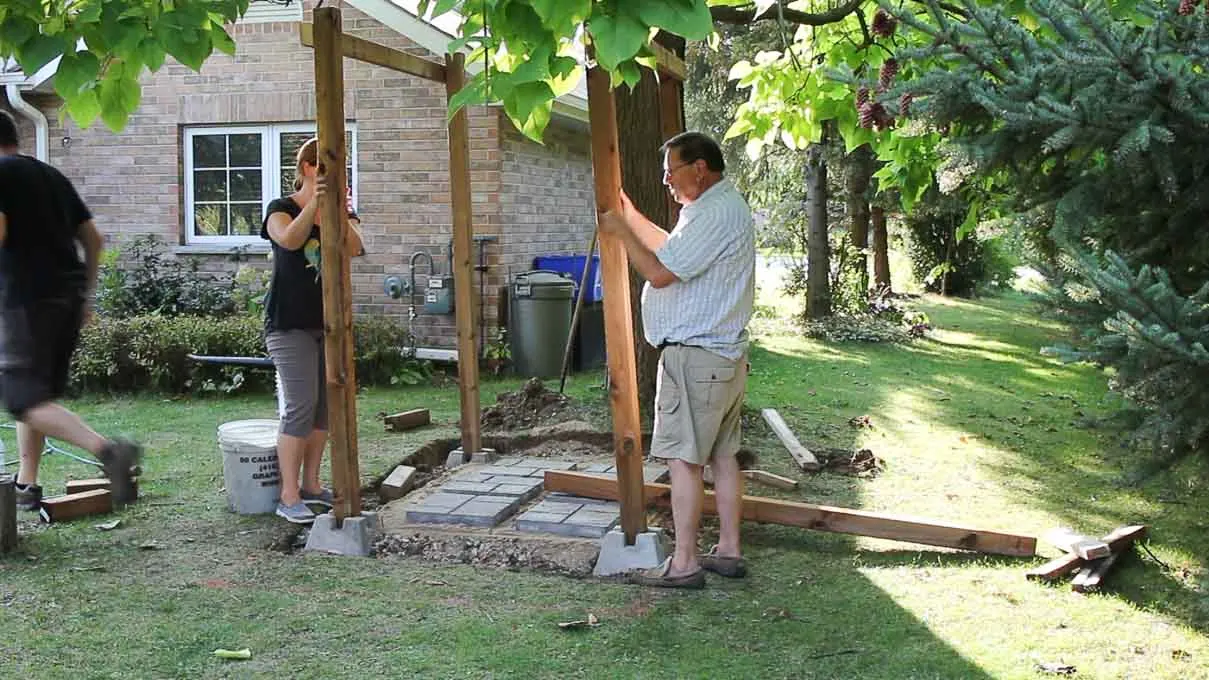
Finally we screwed the fifth post in place, leaving a 27″ wide opening for the enclosure entrance.
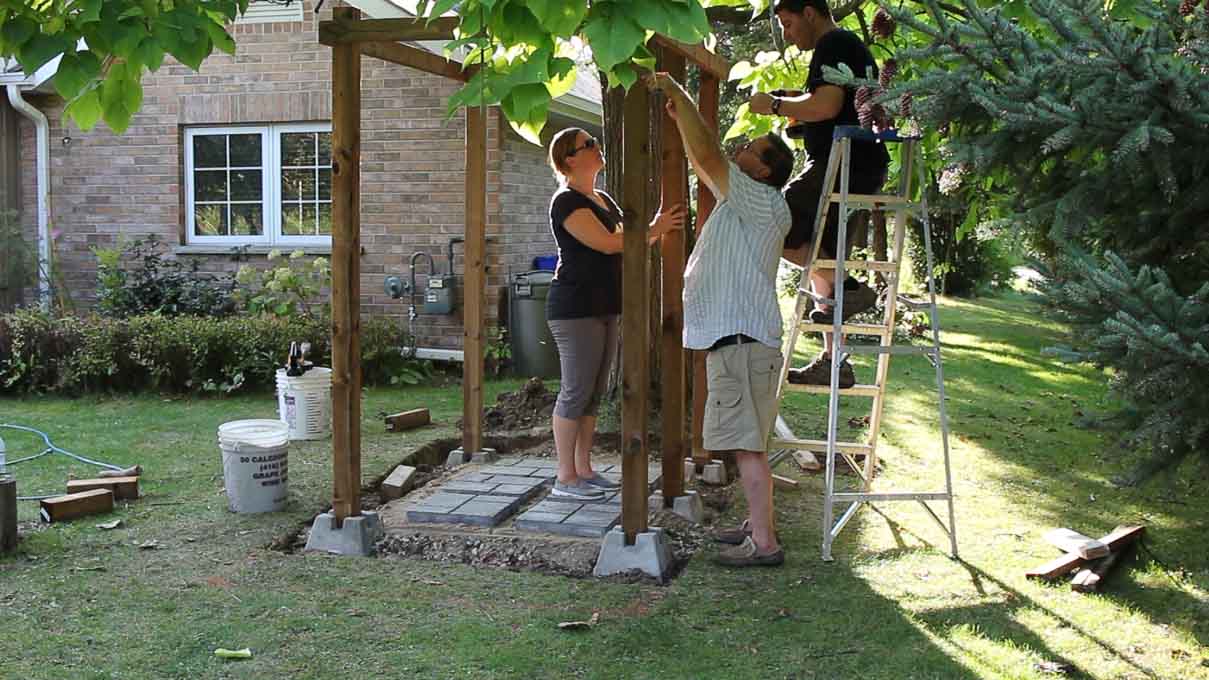


Once the posts were all in place we ensured that they were all vertical.

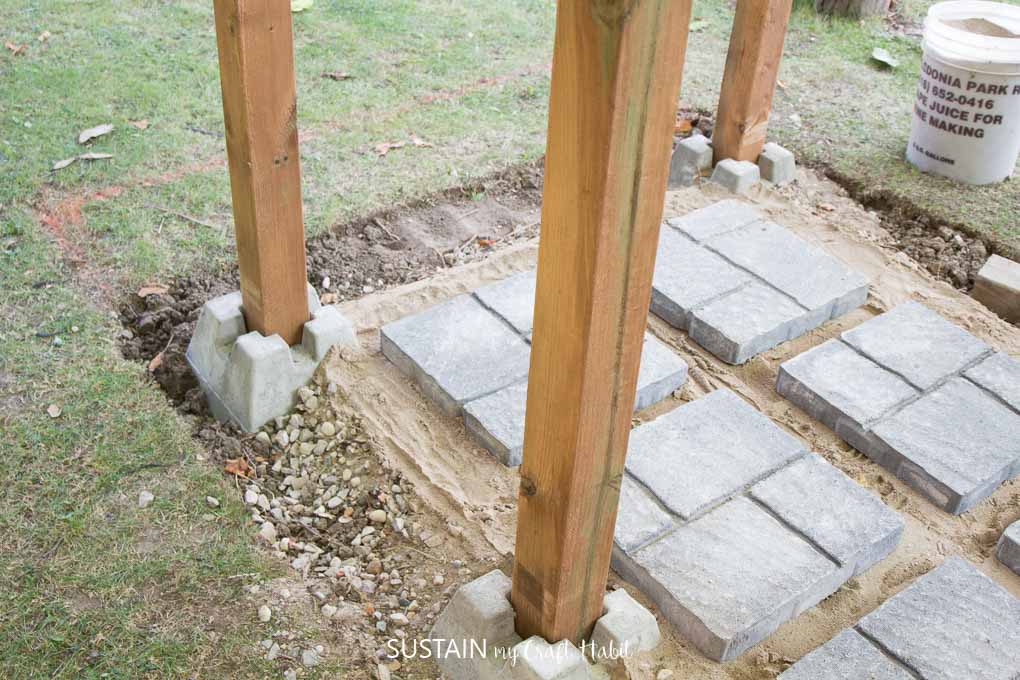
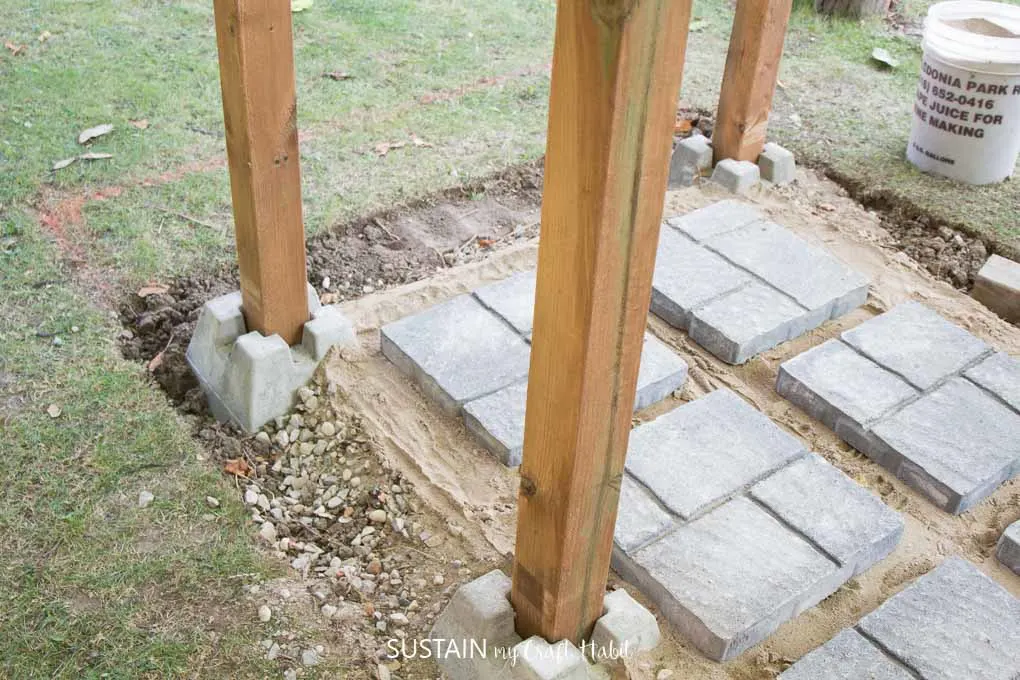
Step 4: Installing the Patio Stones
Once the posts were all in place, we decided that we wanted the patio stones to cover the entire bottom of the shower. This required carefully measuring out the corners of the stones and cutting them to slide around the deck blocks.
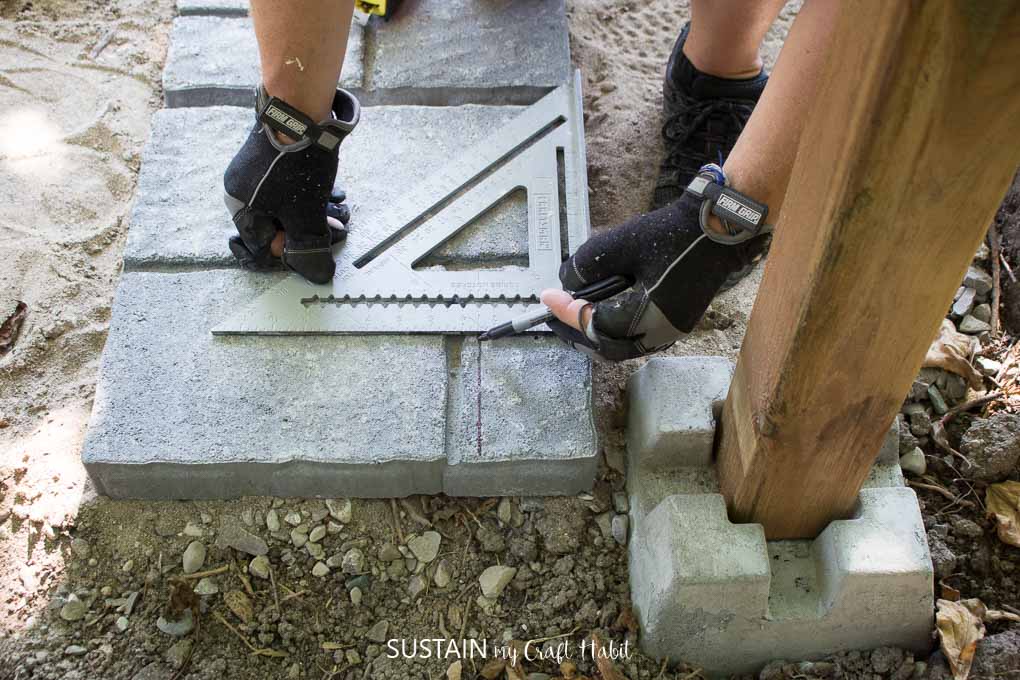

We cut the blocks one by one and made sure they were all leveled…

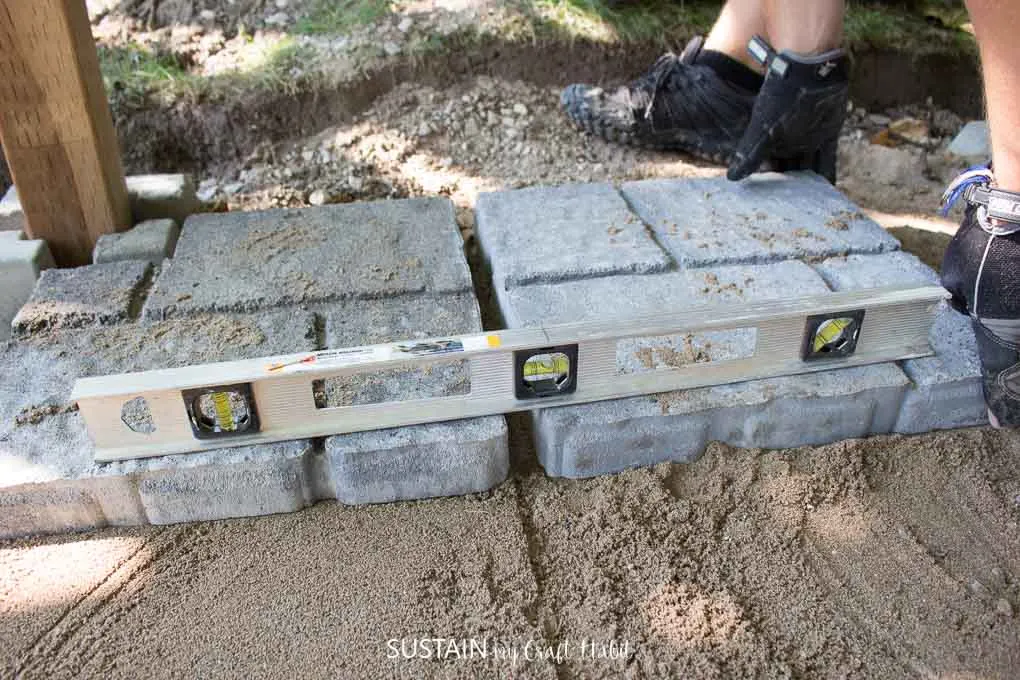
…and evenly spaced.

This again took longer than we anticipated but was well worth it. Cutting the pavers around the deck blocks will ensure they stay in place over time.
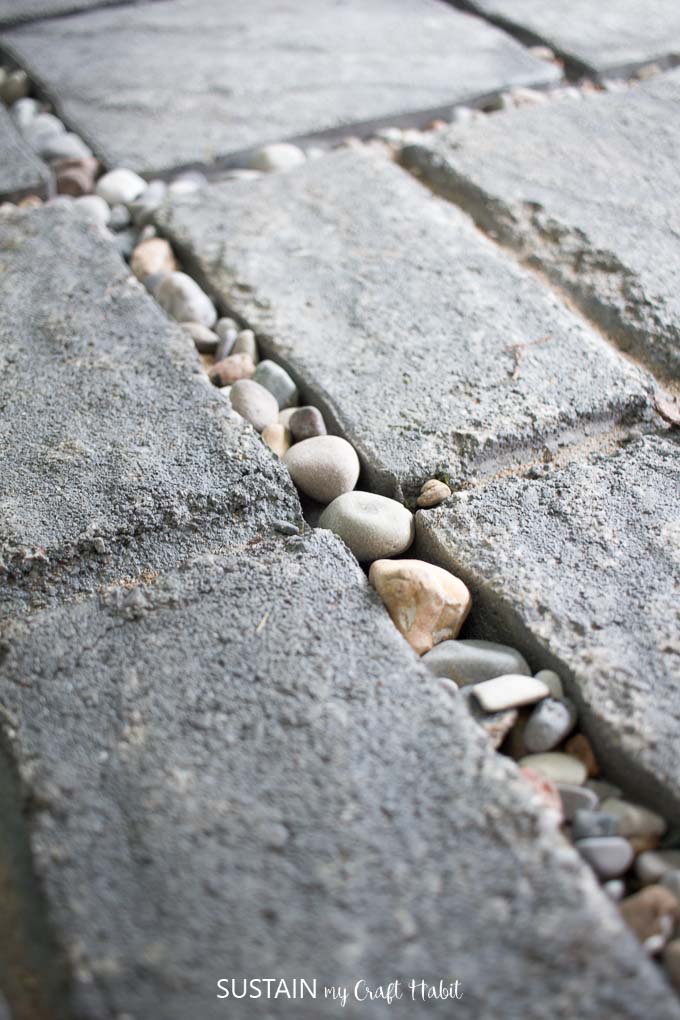
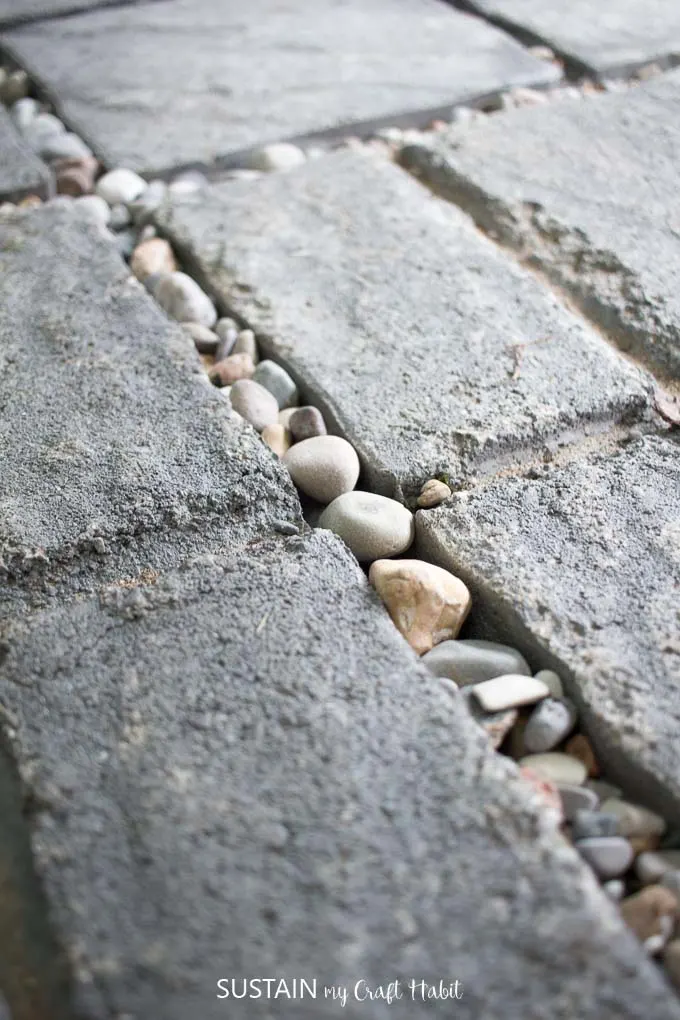
After we finished the entire outdoor shower enclosure we brought a pail of pebbles up from the beach and filled in the gaps between the paving stones.
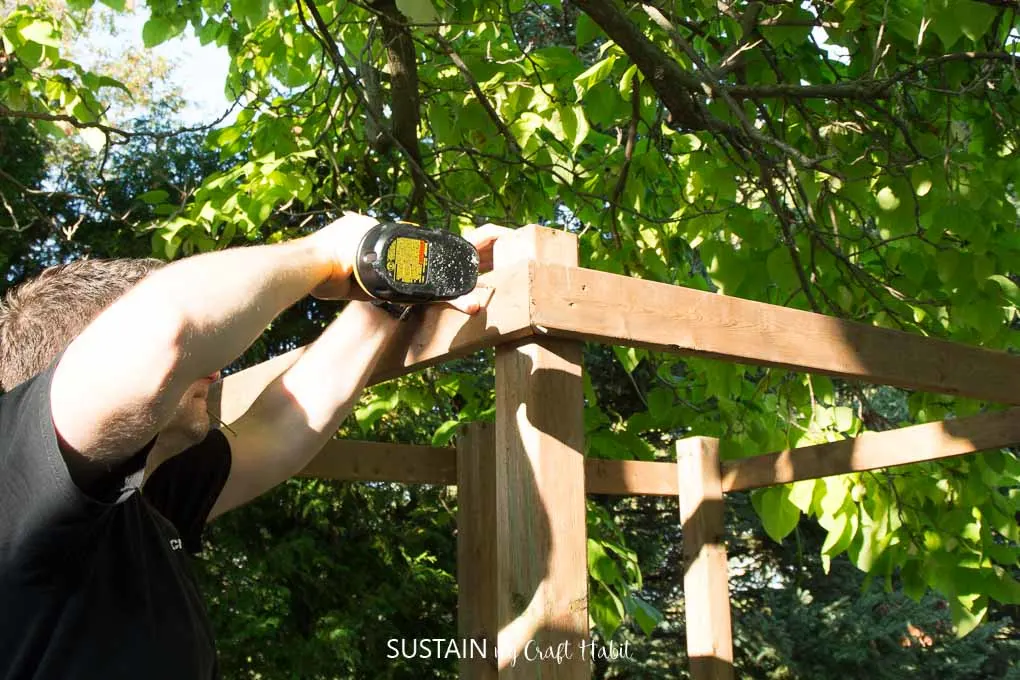
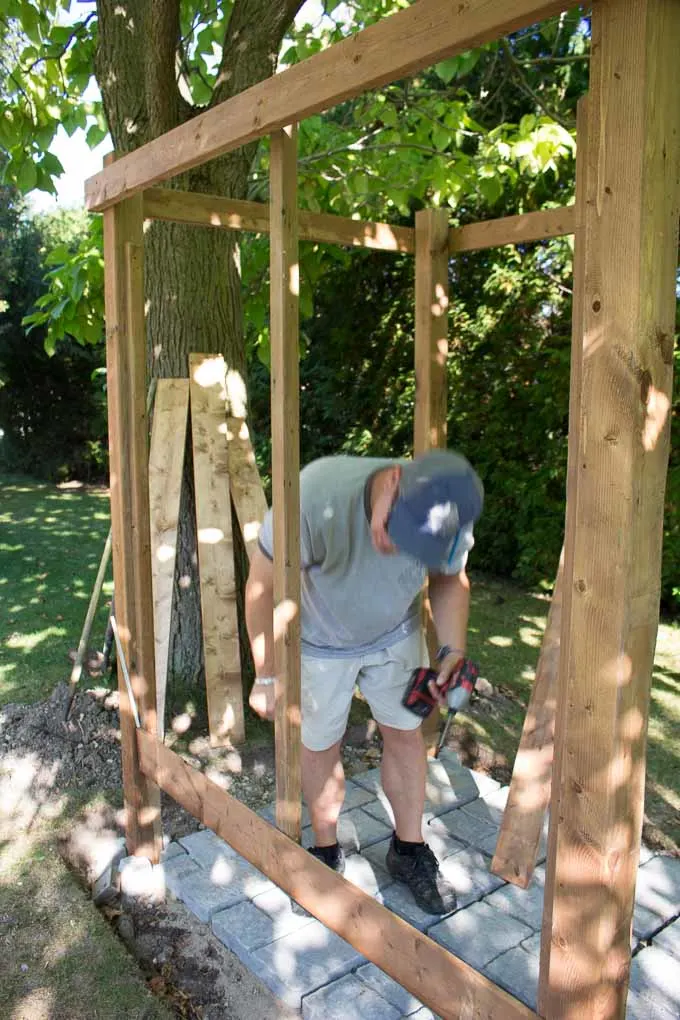
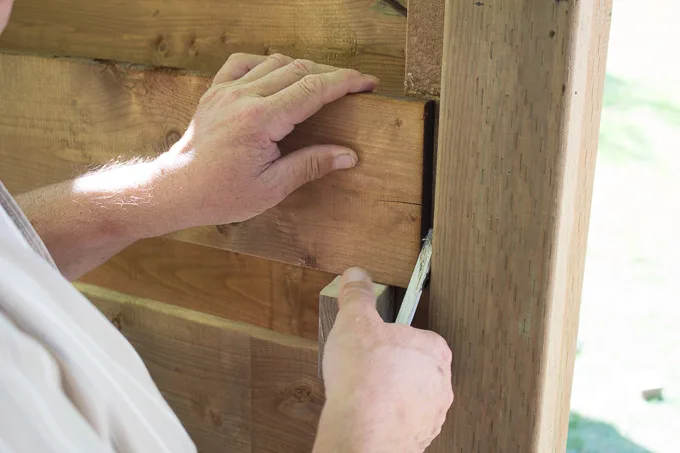
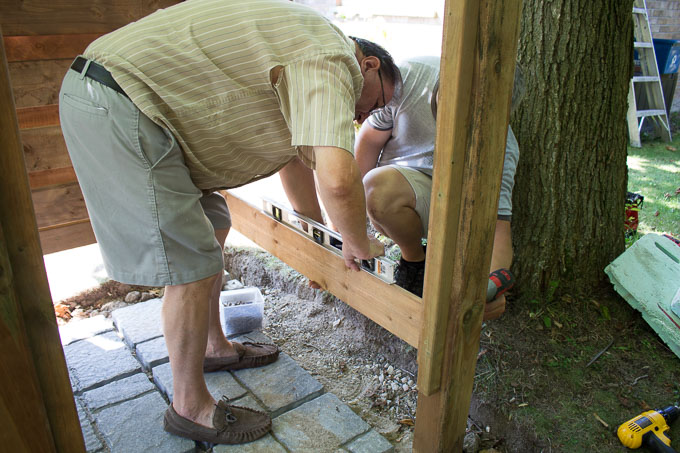
Step 5: Framing the Shower Enclosure
It was almost time for the fun part, building up the shower walls!
We started by bracing our shower frame with 2×4’s installed 12″ from the ground around all sides except for the door opening.


Next, we cut 2×4’s in half and mounted them to the inside centers of the 4×4’s. We also screwed in a 2×2 along the center of the longest wall, to keep the fence boards from buckling.

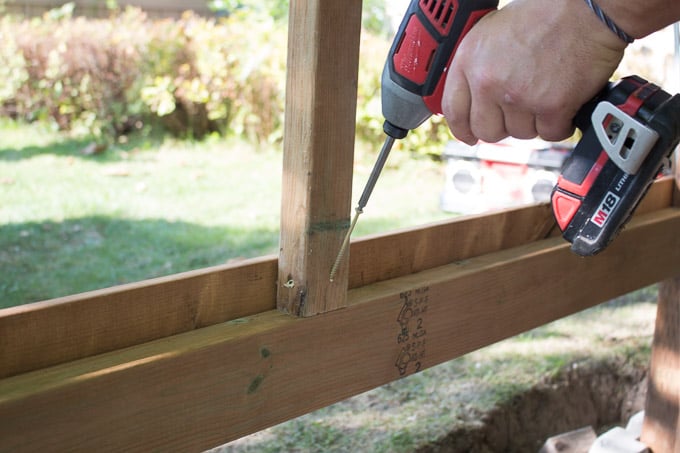

We did need to add a spacer at the top to line up with the upper 2×4.

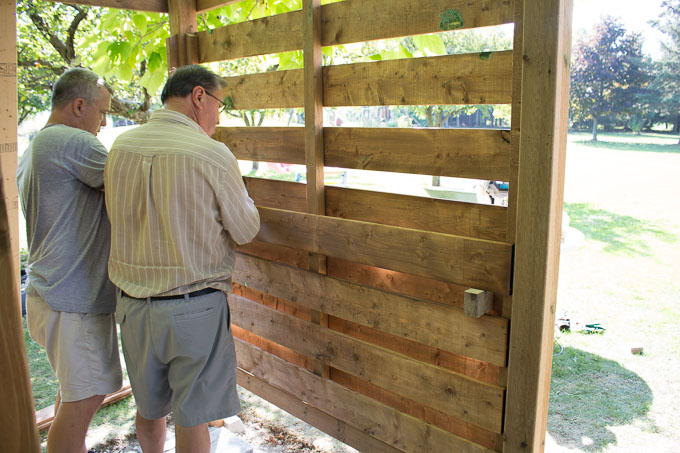
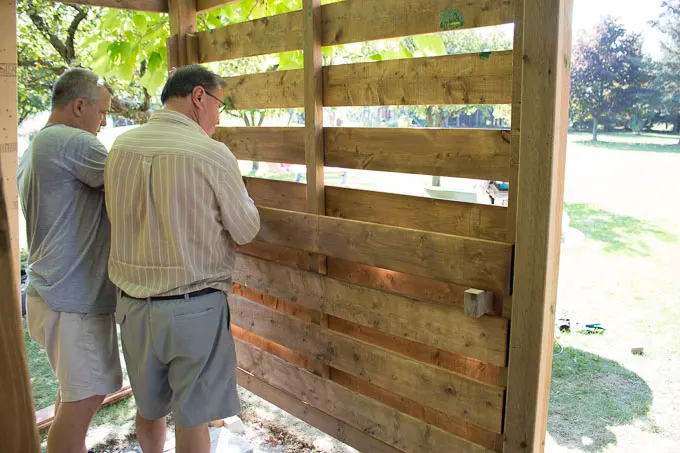
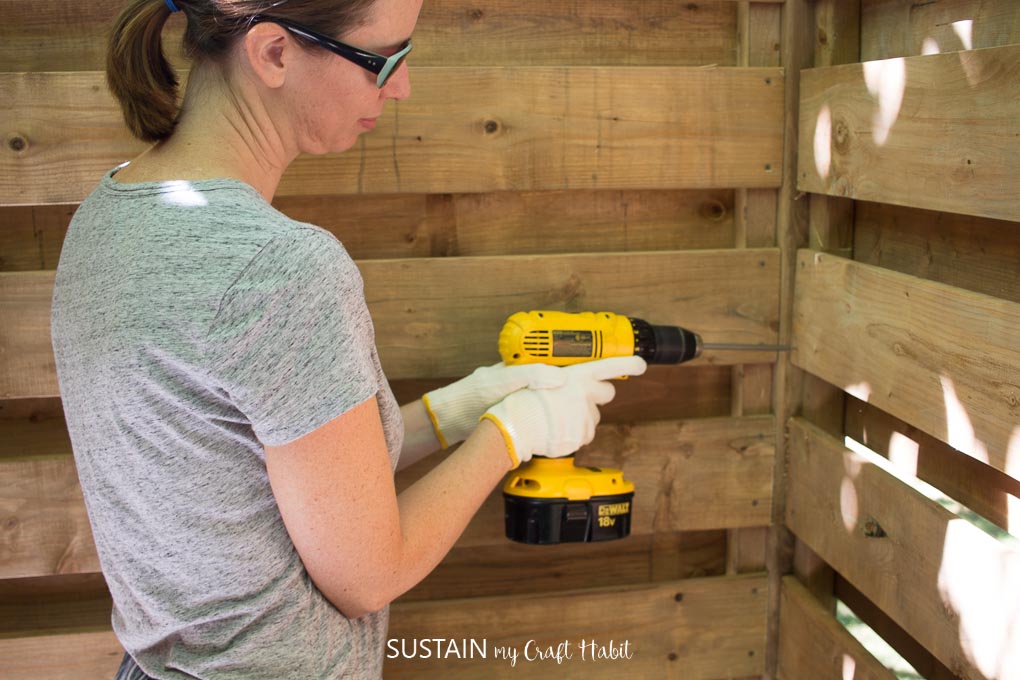
Step 6: Building the Walls
Finally! Time to add the fence board walls.
Our aim was to alternate the boards on the inner and outer sides of the brackets we had installed. We wanted there to be privacy yet allow for air flow.
We cut all the fence boards to size for each wall. Ensure when cutting the pieces that we left a 1/4″ space for expansion.

We cut spacers which were 2 1/2″ high and used them throughout the building process. To start, we screwed the first fence board on the outer side of the bottom 2×4 frame, lining up the fence boards with the bottom edge of the 2×4.

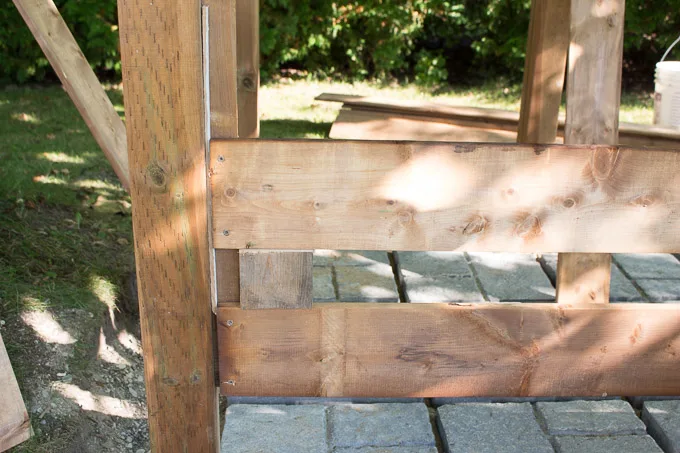
We secured the second fence board, leaving the 2 1/2″ gap.
We continued this all up along the outside of the shower and then repeated on the inside as shown.
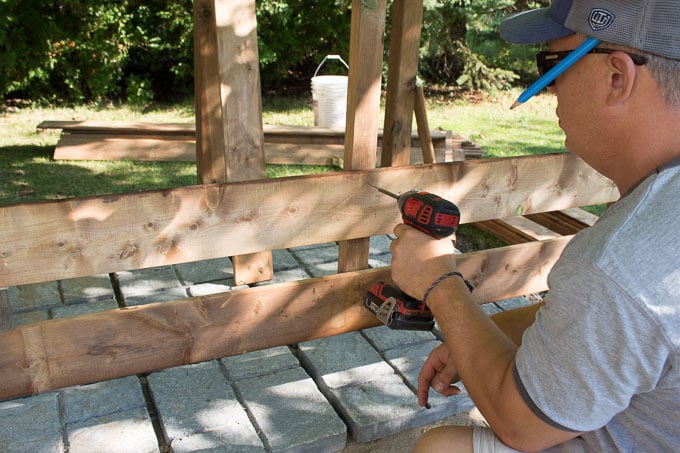
Next was the second wall. We made sure that the framing was level before continuing.


Even Sonja got in on the action 🙂

This is how our shower looked with two sides completed.


We continued on to the other sides, leaving the opening for the door.
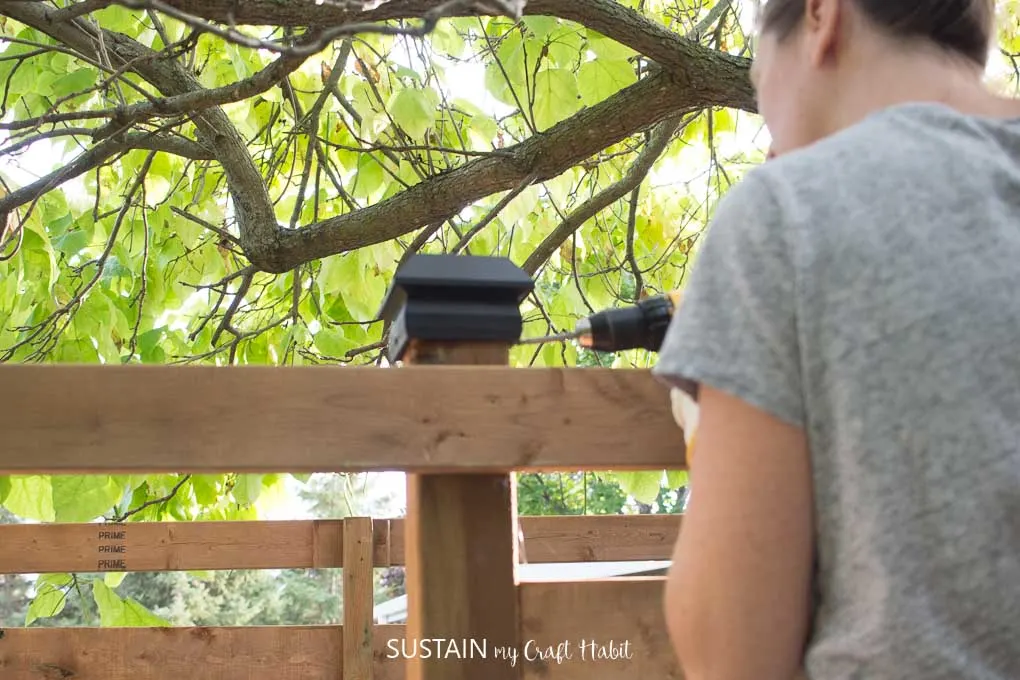
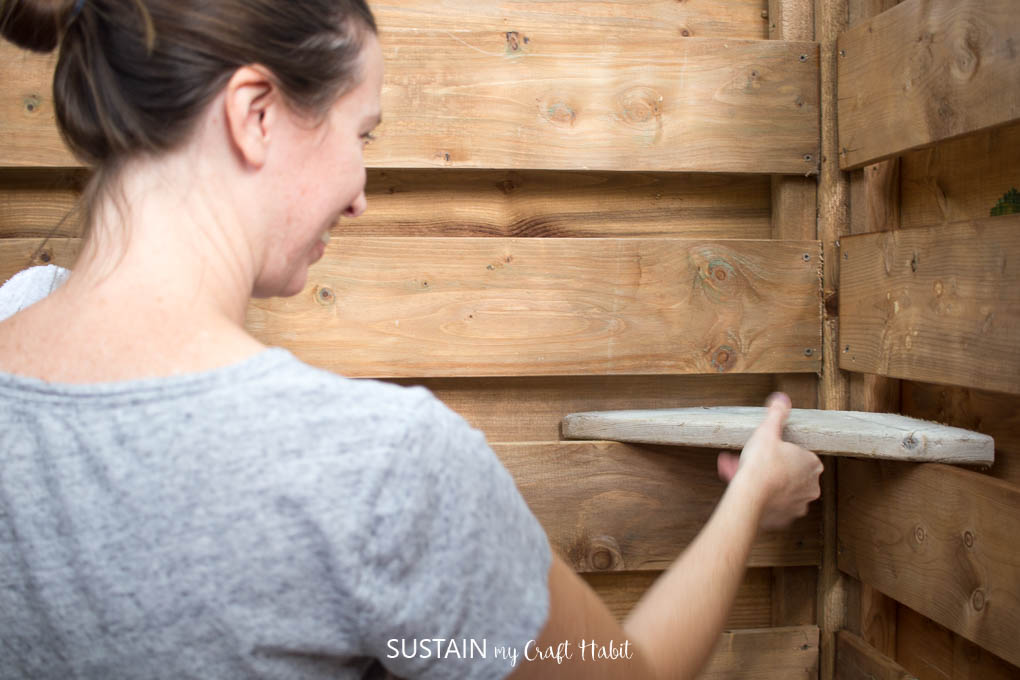
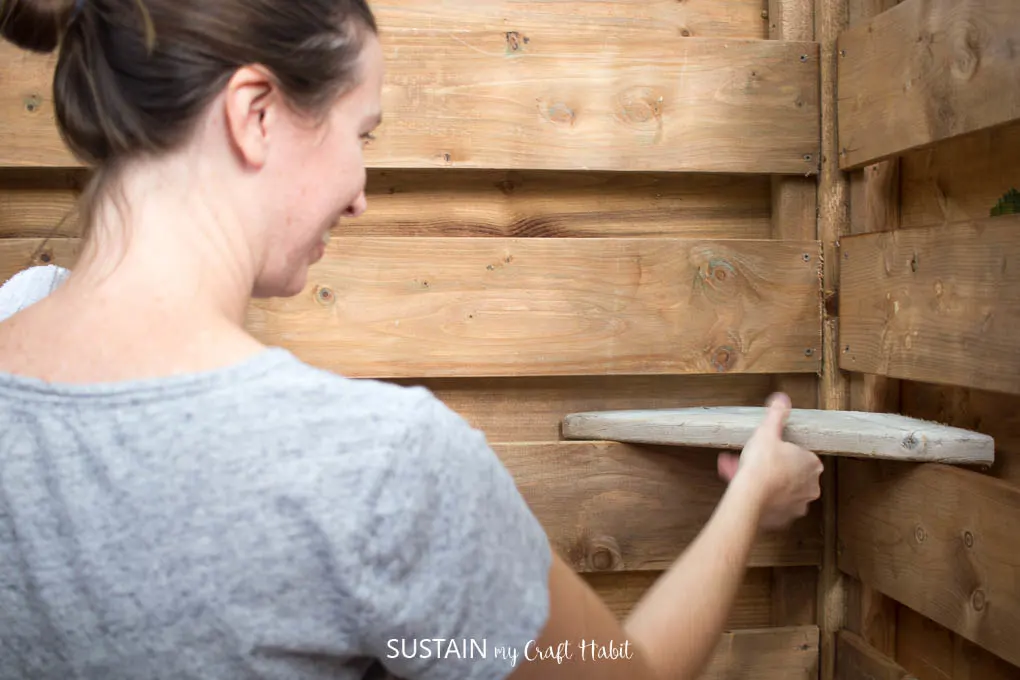
Step 7: Finishing Touches
Finally our beautiful DIY outdoor shower enclosure was nearly done and we had just a few finishing touches to go.
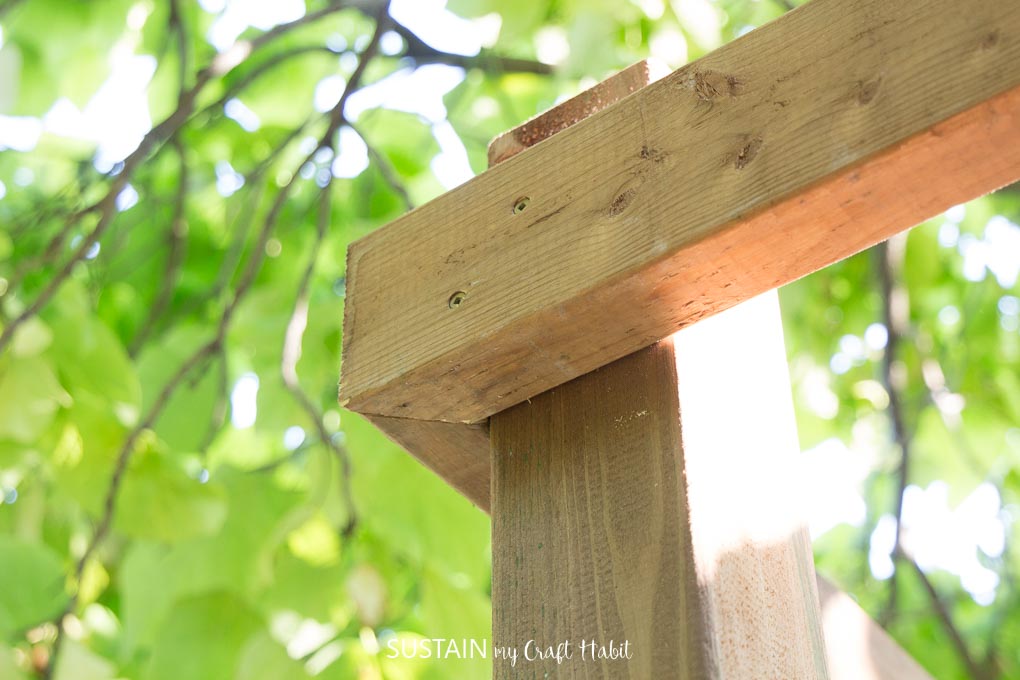
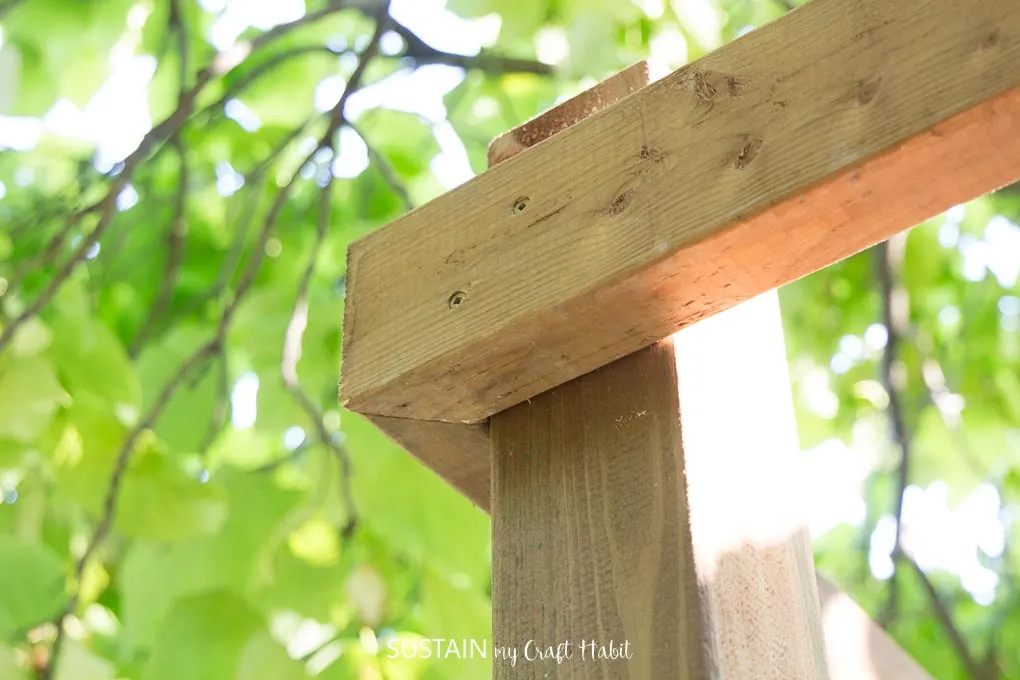
We installed these fancy post caps to keep the water out of the posts (and they look nice)!

We installed a few simple corner shelves for shampoos and soaps and a couple of hooks we had for clothing and towels.
We weren’t too worried about the open door as we’re in a very private area. However, for completely privacy you can add a bar with a shower curtain, or build a hinged wooden door.

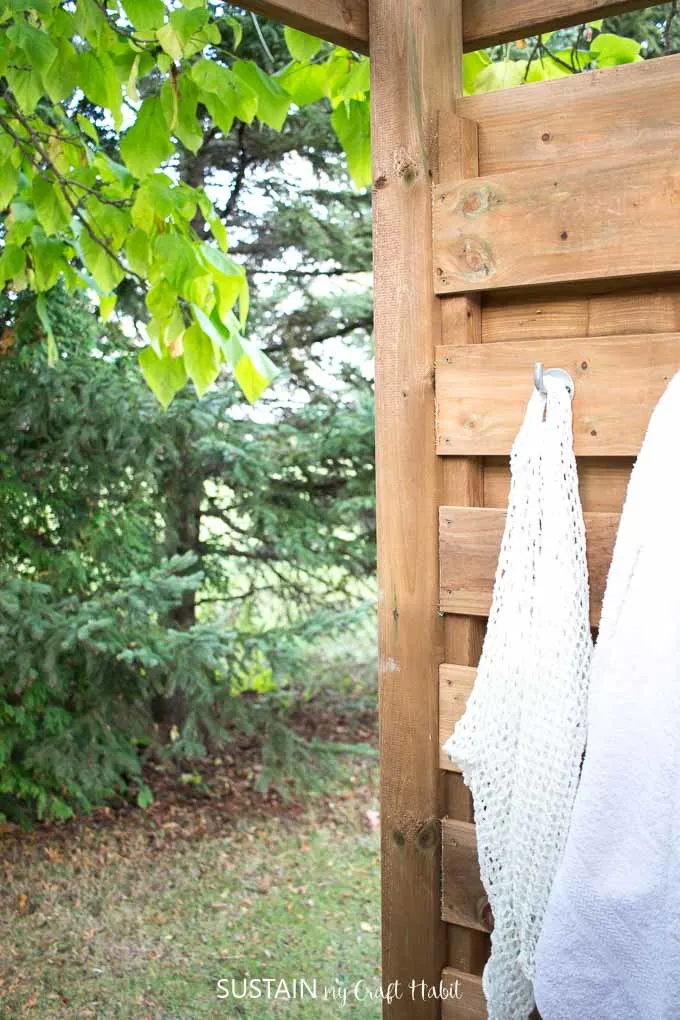
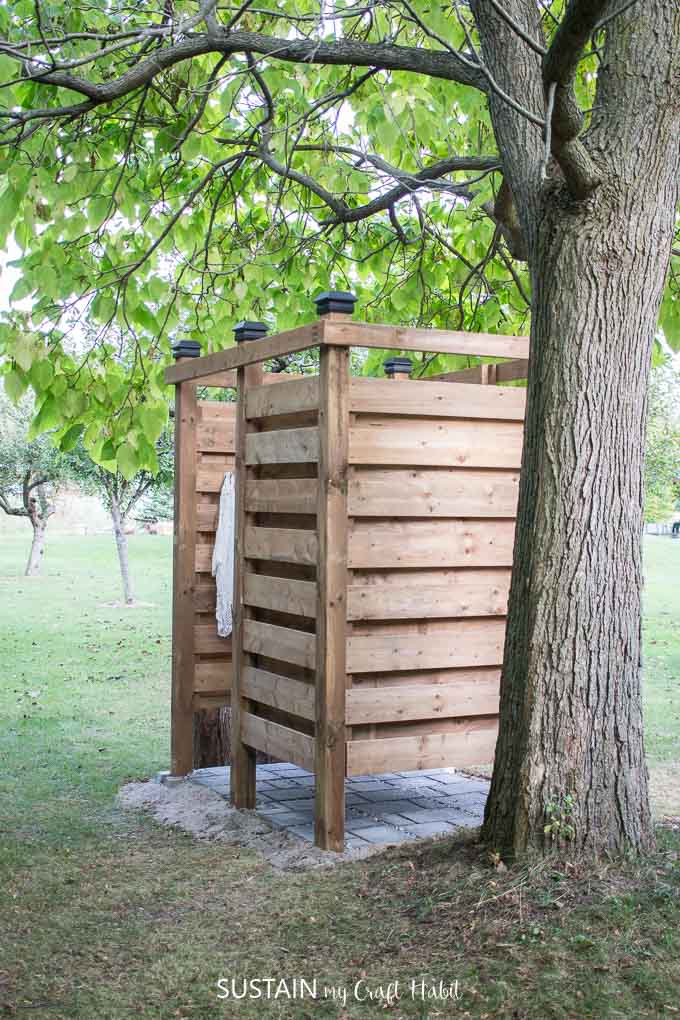
And there she is: our new private outdoor shower enclosure! We’re quite happy with how it turned out – it’s quite spacious and private. It’ll be perfect for showering after the beach without needing to go indoors.

Options for the Hot Water Supply
When we first built this outdoor shower enclosure we planned to install a Gardena Garden Shower from The Home Depot Canada to the inner wall opposite to the shower door opening. However, we realized the kids wouldn’t be happy with cold water showers.
So next we ordered this inexpensive camp shower with a built in shower head from Amazon. It did provide some warm water but and was a great option except that there wasn’t enough water for all five kids (plus adults). Also, you need to leave the bags in direct sunlight to heat for several hours which we often forgot to do.
We also tried leaving out an extra long garden hose to be heated by the sun. This worked great until the water ran out half way through showering.
In the end, the best thing for us was to hire a plumber who added an an outdoor hot water line to the side of the house so that we could easily enjoy our outdoor showering experience with hot water on demand.
We are so excited to get to use this new addition to the Graystone Beach cottage. If you are curious about some of the updates we’ve made to the inside spaces, be sure to check out our beach-themed bathroom , coastal bedroom decor ideas and coastal kitchen makeover.

Like it? Pin it for later!

Vivian
Sunday 16th of April 2023
You did a good job explaining the steps needed to complete your outdoor shower.
Jane and Sonja
Wednesday 3rd of May 2023
Thank you! So glad you found it helpful.
JAY
Wednesday 7th of September 2022
Hello! I love this simple design and plan to build it in a couple weeks. Anything you've learned since you built it that you would change? And a specific question: the design definitely offers privacy from anyone casually walking by... how about privacy from mischievous cousins who are trying to peak in? :)
Jane and Sonja
Monday 26th of September 2022
Hi there, thanks for your questions. We're planning on making another one soon and we'd follow the same instructions. Although I would consider reducing the spacing between the boards for added privacy, especially from michievous cousins :). Additionally, you could start the boards lower to the ground if privacy is a concern.
Kevin Scott McCarson
Wednesday 9th of June 2021
Hello, I am in the process of laying it all out but noticed I need to do some simple math to figure out the spacing of the concrete deck footings. Or, if you can remember, provide those measurements to me?
Tina Brownell
Friday 16th of April 2021
Please send me plans & video. Thank you!
Jane and Sonja
Monday 19th of April 2021
Hi there, Here is the link to the video - https://youtu.be/h-8aGRxLAqY and the shower plans can be accessed directly in the post when signing up with your email. Thank you!!
Jen Kidd
Tuesday 4th of August 2020
Love your shower! We have a barndominium in East Texas at my hubs family farm & are trying to think of ways to install an outdoor shower in one of the old horse stalls. Right now it’s just plain dirt, and we’ve collected a ton of pavers that were dumped with our lakes dirt/rocks for the road. How do you keep the water draining? I noticed a few other comments have not been answered yet, regarding the sand staying in place? How’s it holding up? Hope to hear from you soon! Looking forward to following more of your projects!
Jane and Sonja
Tuesday 4th of August 2020
Hi Jen! That sounds amazing. The sand and stones have been staying in place no problem. For the water source we've hooked up a shower nozzle to the hose so the water pressure is never overpowering. The water just drains into and around the stones. We do have grass surrounding which may help to keep everything in place. But honestly it's really good. We've built two similar showers for other cottages without any problems. Hope that helps! Jane