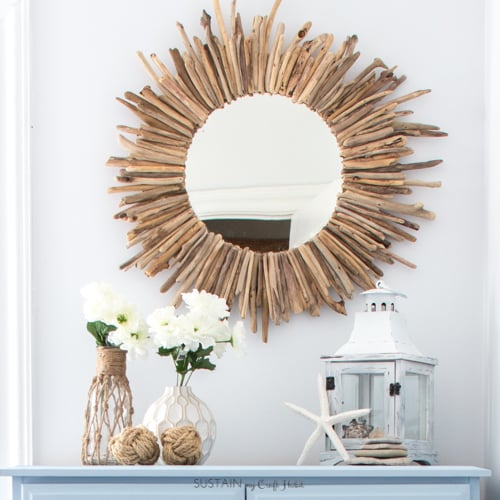
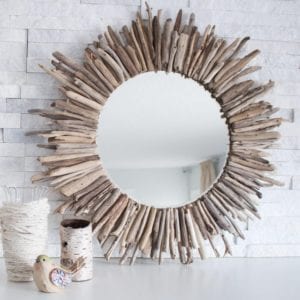
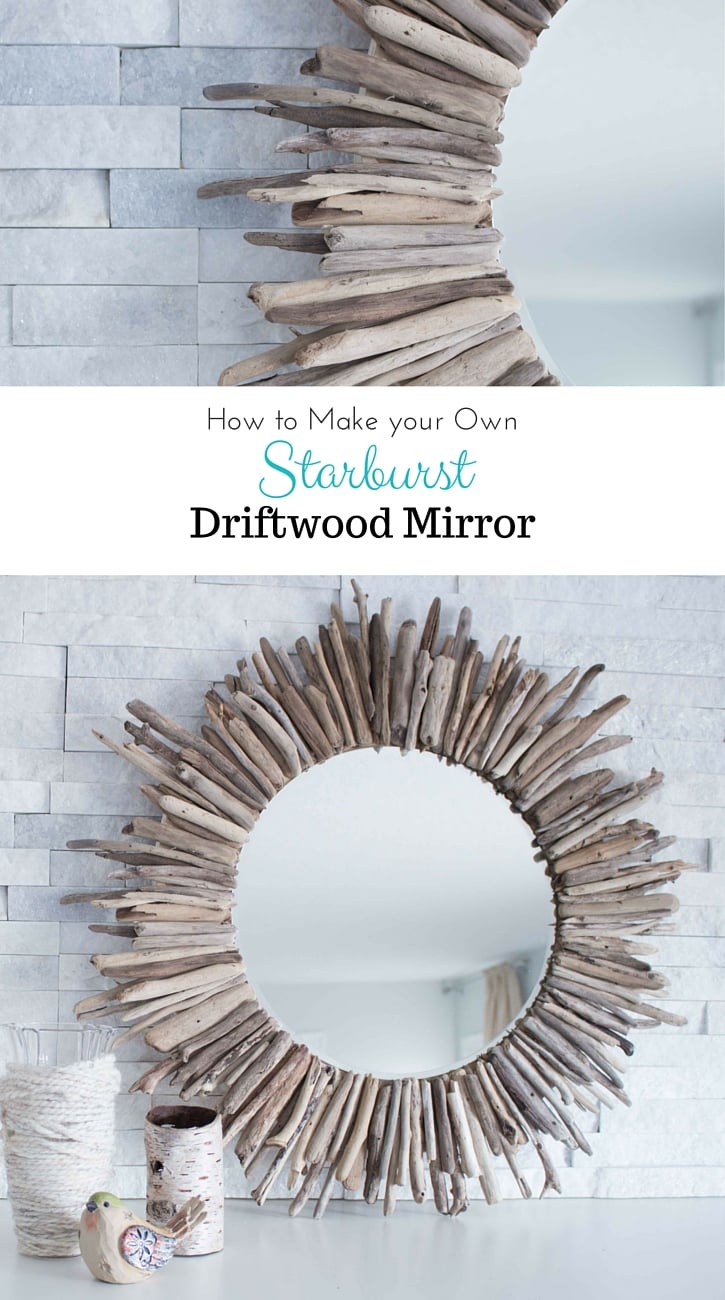
As many of you already following along have probably gathered by now, we LOVE driftwood! And we love to use it many different ways to make all kinds of stuff, such as our driftwood lavender window wreath, driftwood Christmas tree, and our driftwood tree ornament and the project shown here. The list goes on and on and on and high on that list has been to make a DIY driftwood mirror!
But for those of you stopping by for the first time, we’ll let you in on one of our most favourite past times…collecting driftwood along the shores of Lake Huron.
The opportunity doesn’t happen nearly as often as we would like but when it does, we jump at the chance to walk the beach with our bags in hand. Afterwards, we love to joke about what a “hard day at the office” it was!
We have yet to run out of ideas for making things with driftwood as you can see in this collection of over 50 driftwood crafts!
This DIY driftwood mirror tutorial is one of the most popular on the blogs. But if you’d prefer to buy rather than DIY, scroll to the bottom of the post for our driftwood mirror shopping guide.
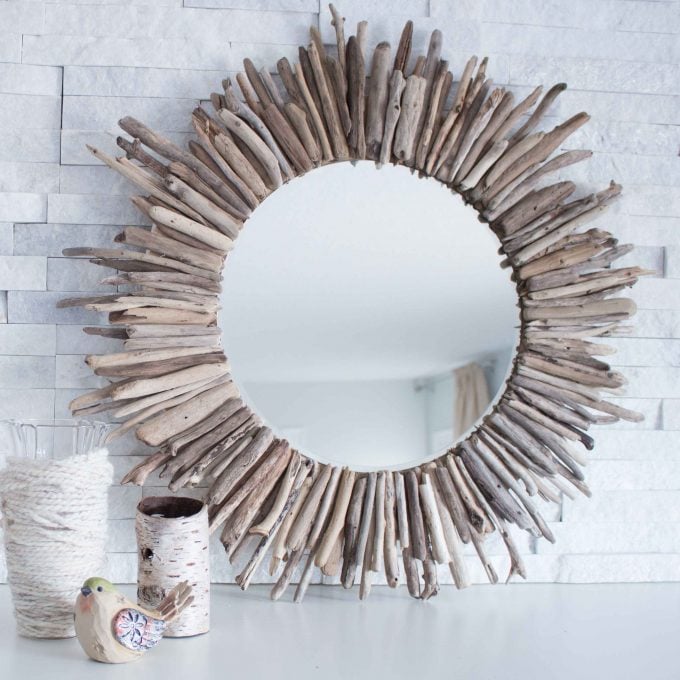
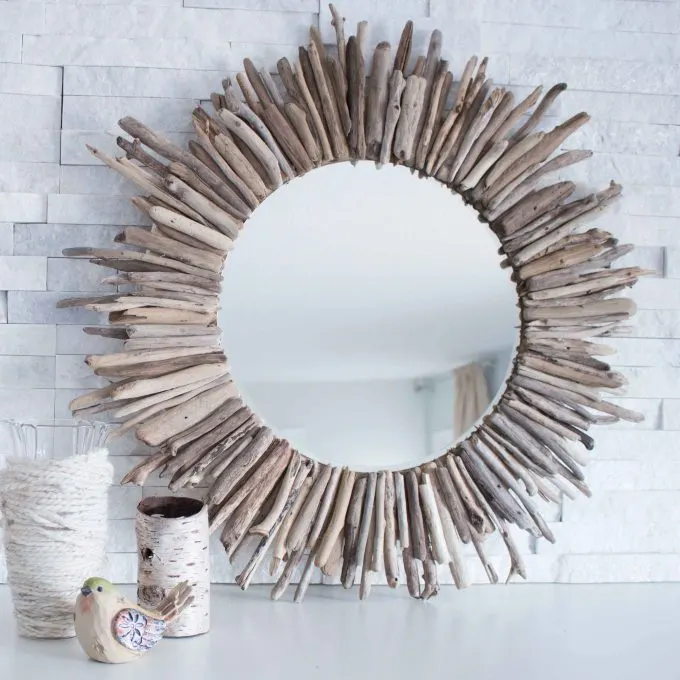
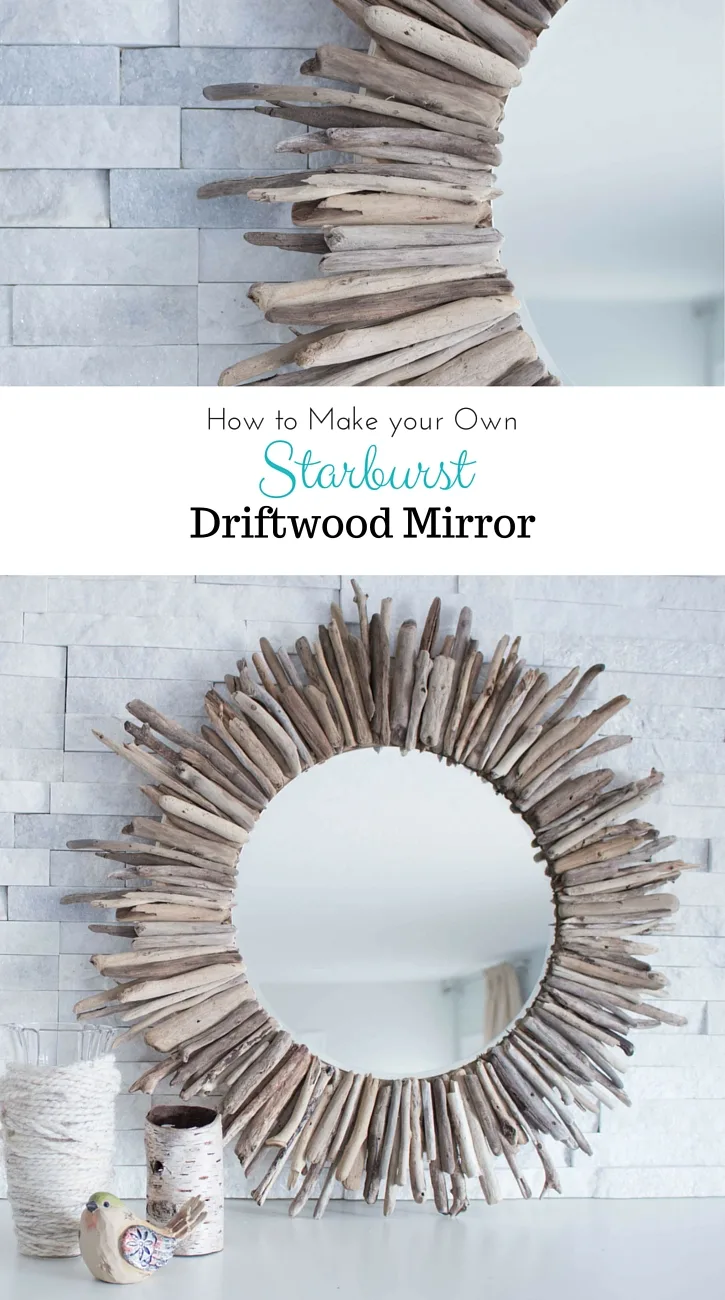
DIY Driftwood Mirror
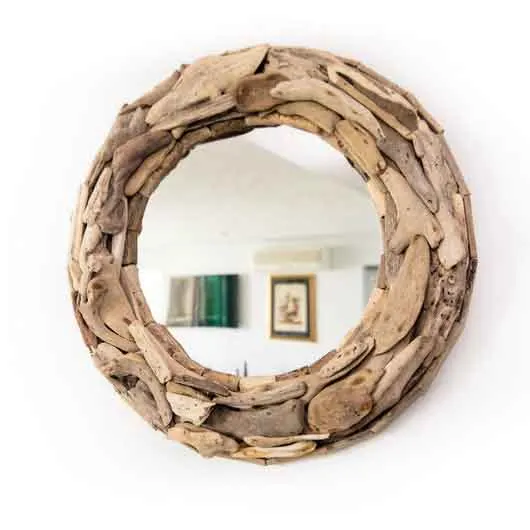
Making this round driftwood mirror has been on our minds for a while. S
o over time we’ve collected and sorted driftwood specifically to use for this project. And when we came across an assortment of various sized flat mirrors at Michaels, we knew it was time to make one! This particular project used up about 150 individual driftwood pieces.
We’re happy to share a free, 5-page printable project workbook for this DIY coastal decor project. We’ll send it straight to your email box! You’ll also receive our weekly awesome e-mail with fabulous and inspiring DIY, crafts and home decor ideas each week.
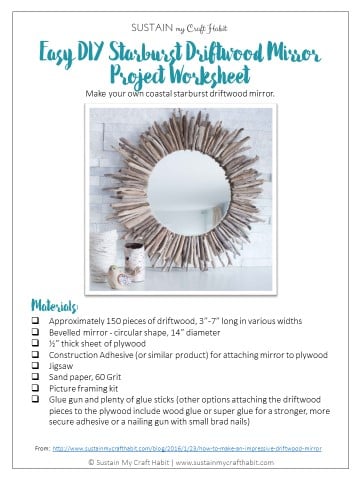
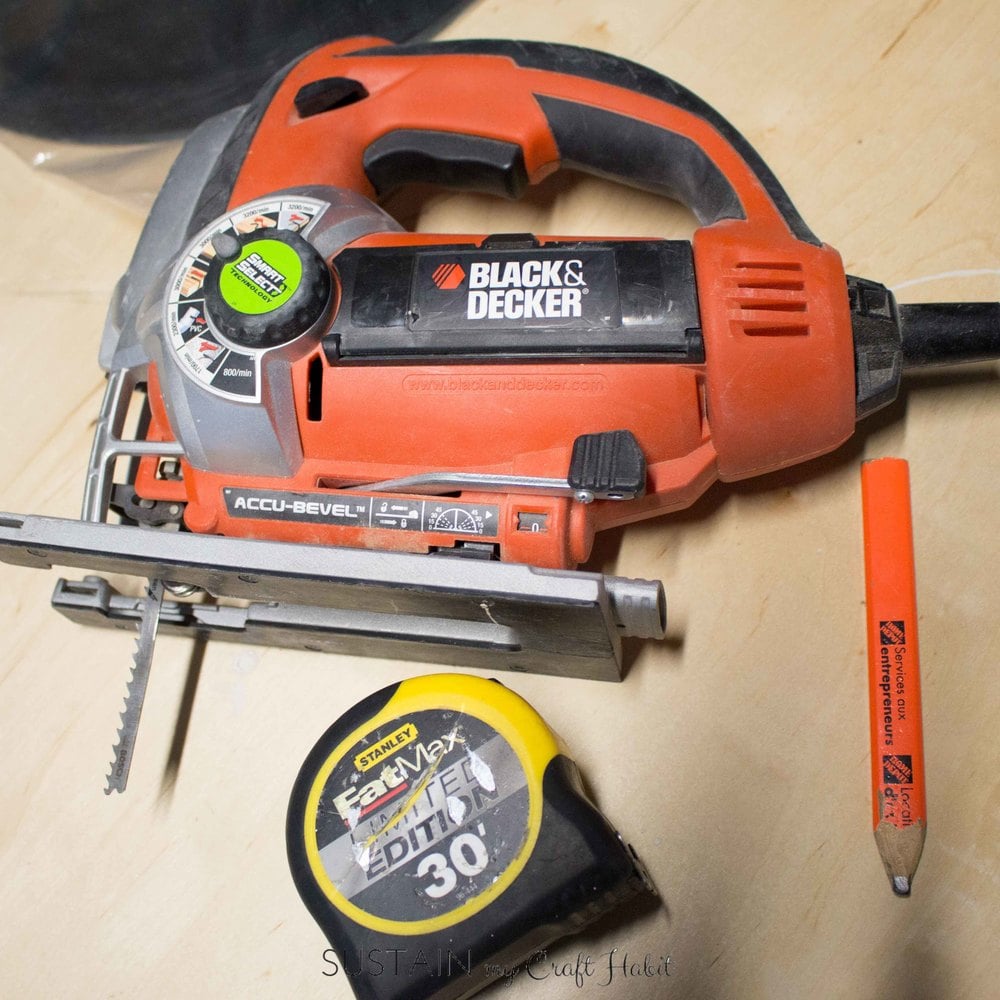
Materials Needed for this DIY Driftwood Mirror:
“This post contains affiliate links which means if you buy any products through these links – at no additional cost to you – we make a small commission. You can find our full disclosure here.”
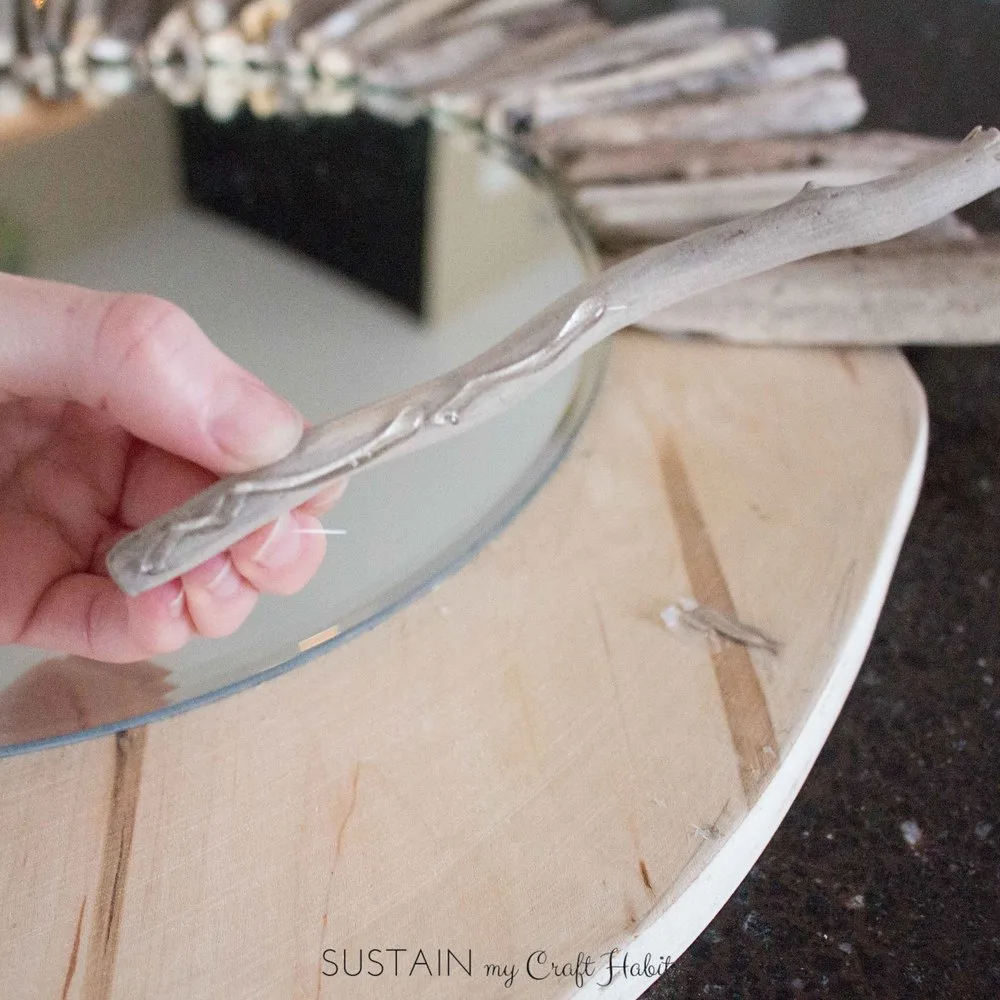
- Assorted driftwood pieces – sized 3” to 7” long in various widths
- Beveled mirror – round shape, 14” diameter*
- Construction Adhesive* (or similar product) for attaching mirror to plywood
- ½” thick sheet of plywood
- Picture framing kit* (this one from Amazon holds up to 30 pounds)
- Jigsaw
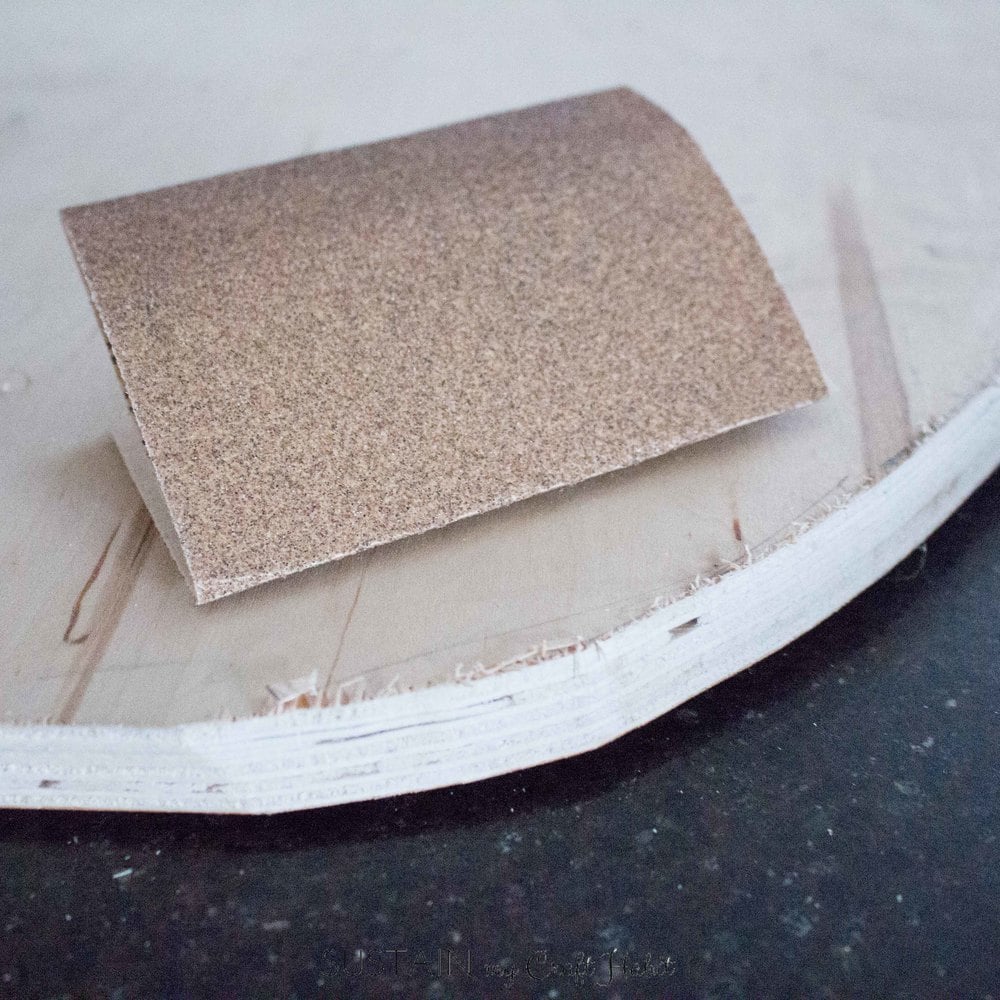
- Sand paper; 60 Grit
- Glue gun and plenty of glue sticks
- Some other suggestions for applying the driftwood are 1. use a wood glue or super glue for a stronger, more secure adhesive or 2. nailing gun with small brad nails
How to Make a Driftwood Mirror
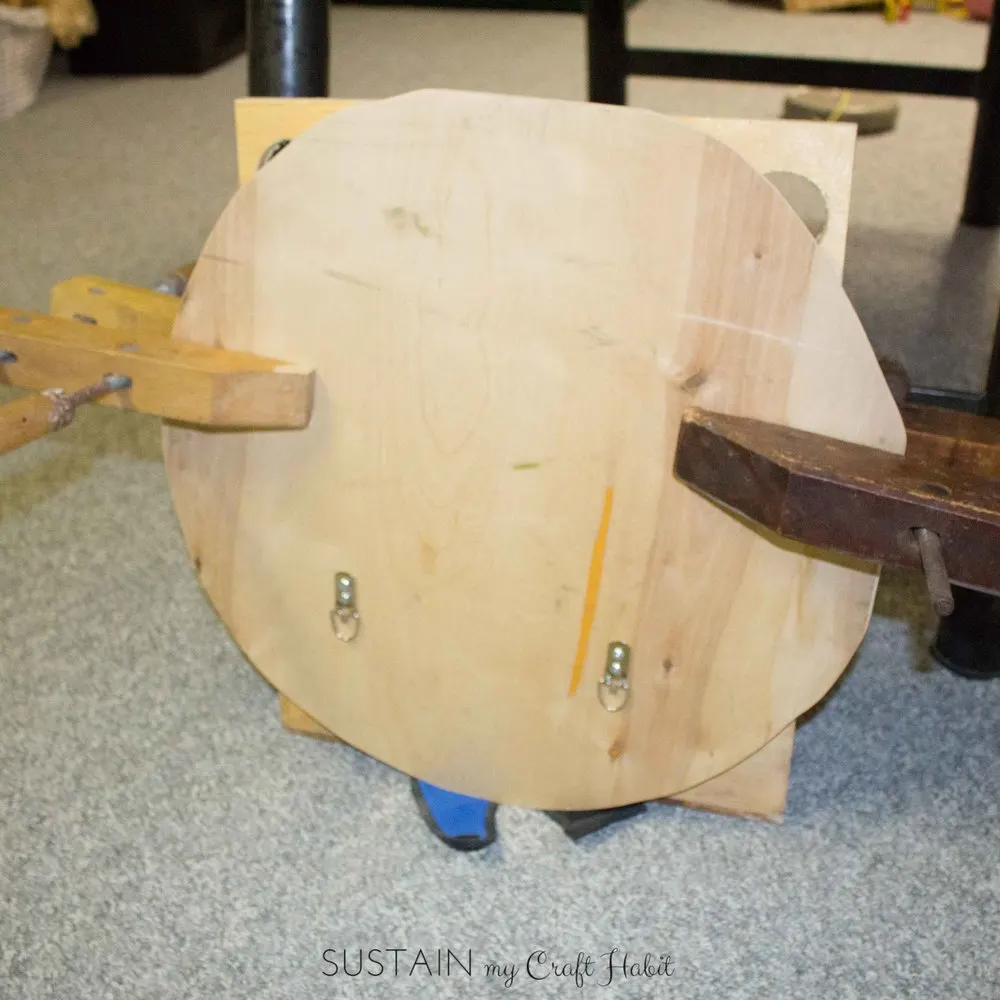
Step 1: Prepare the Mirror Base
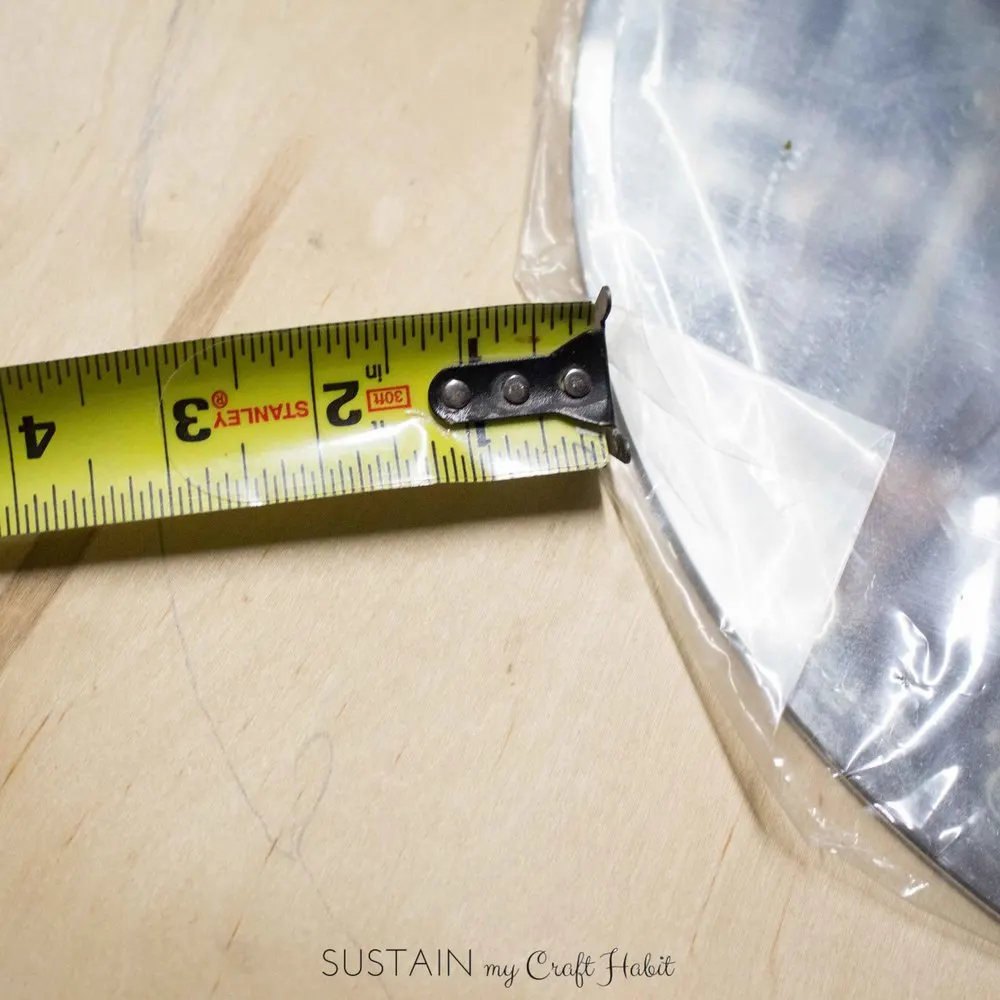
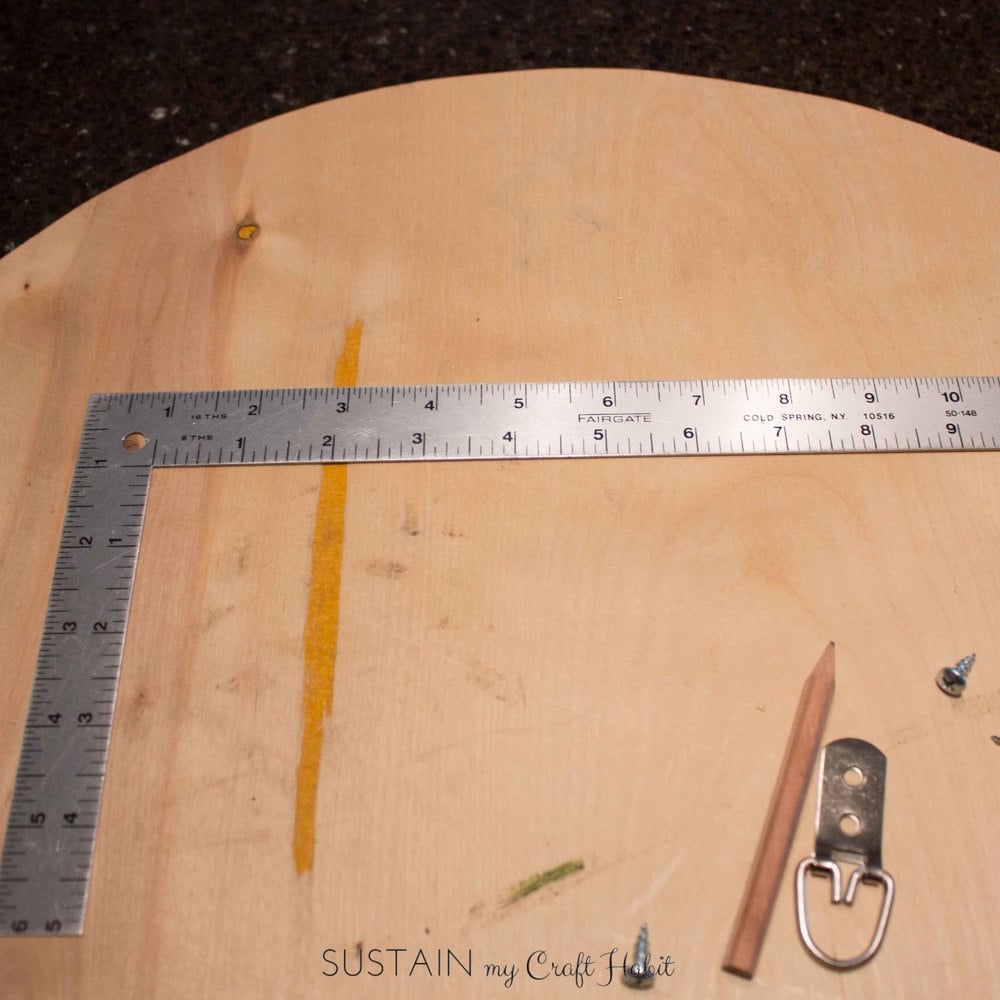
We used a ½” thick sheet of leftover plywood and cut it in a circular shape to match the mirror shape. Since we wanted 2 ½” of plywood to show beyond the mirror all around, the finished size of the cut out plywood is 19”. Here’s the math behind it: 14” for the size of the mirror + 2 1/2” (exposed plywood) + 2 ½” (exposed plywood) = 19”.


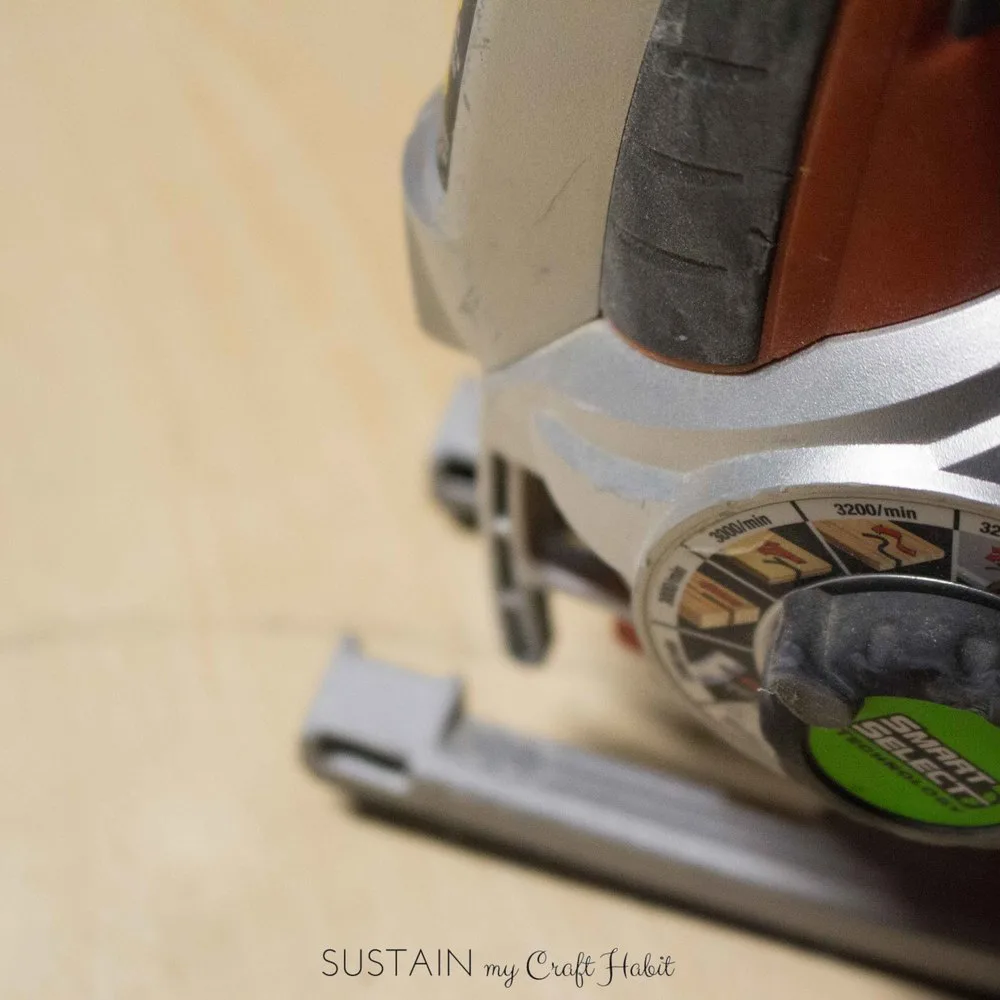
Using a jigsaw, we cut along the marked line to create the base. Once the base was cut, we gently sanded down all the edges for a smooth finish. We used 60 grit, about a medium grade sandpaper to do this.
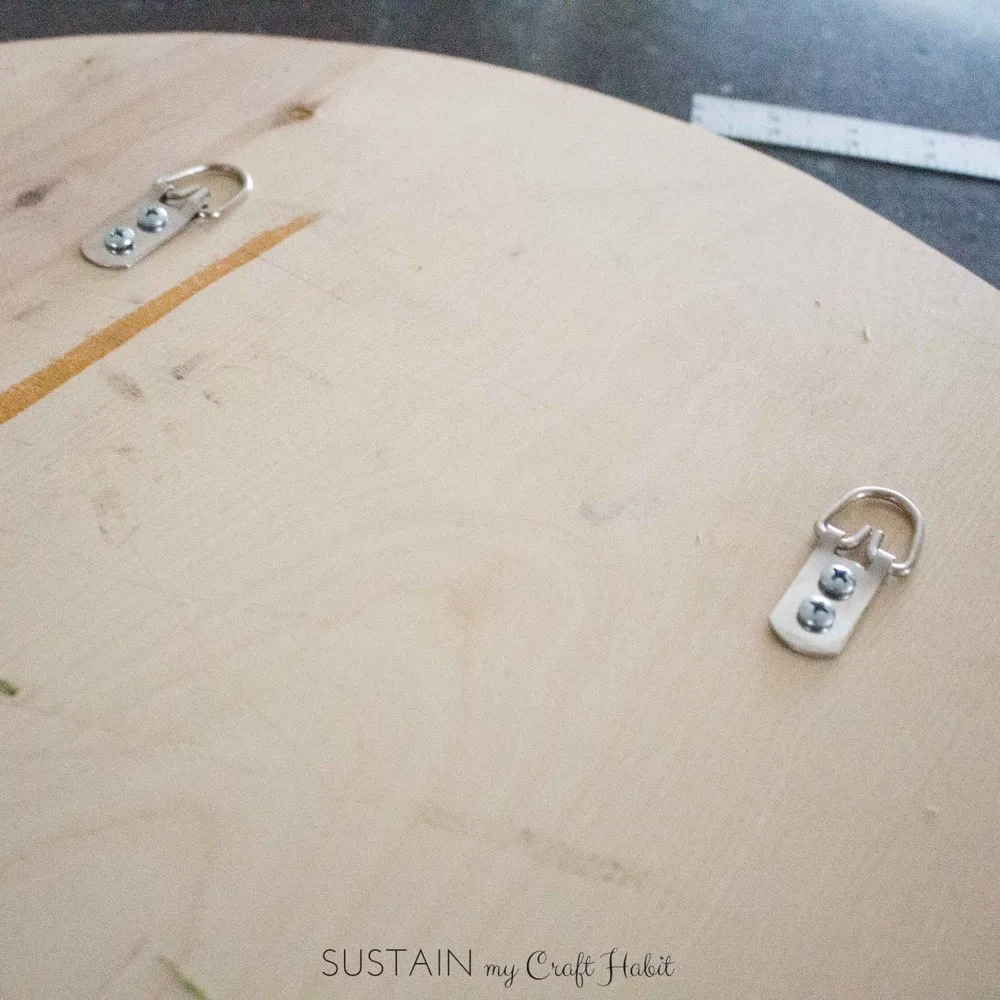
We picked up a picture framing kit at the nearest home hardware store. And following the instructions on the back of the kit, we added two sets of hooks to the back side of the base. This was the side that was hung up against the wall.


Step 2: Attach the Mirror to the Base
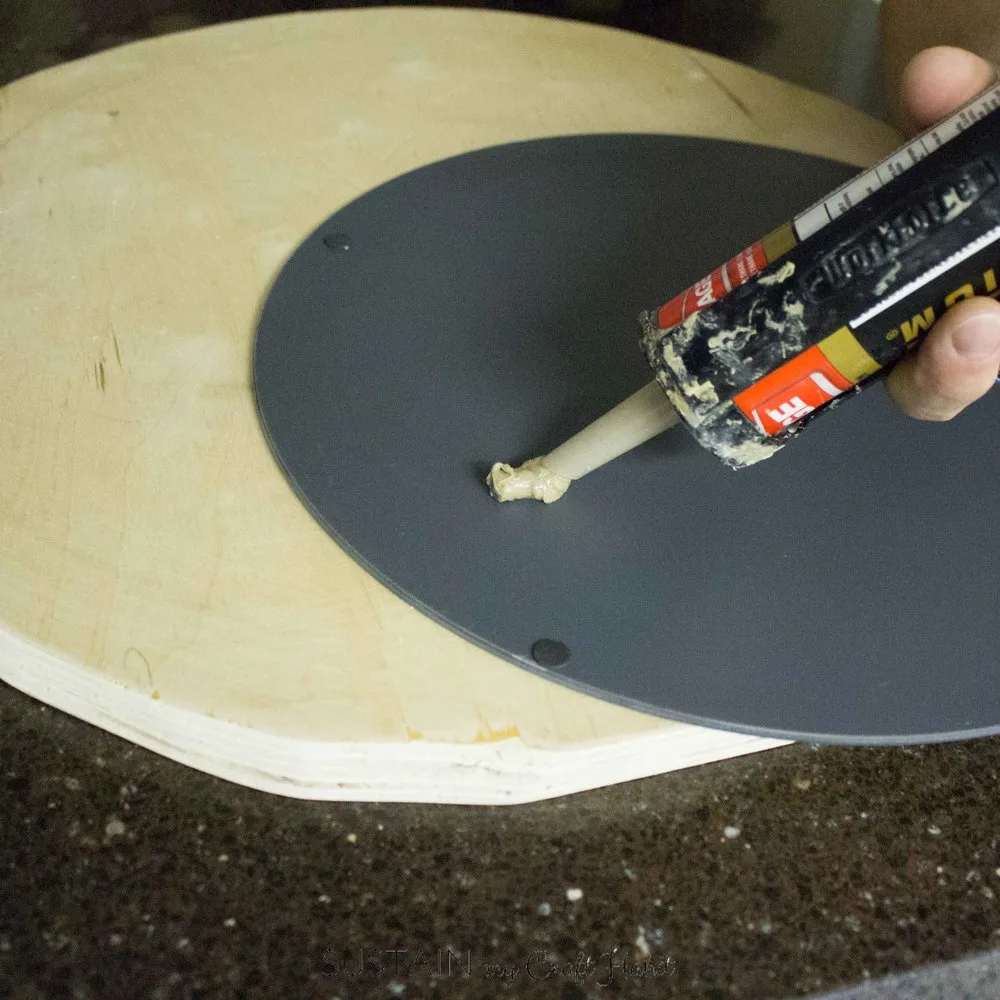
To apply the mirror onto the base, we carefully turned the mirror right side down on
a smooth surface, taking care to ensure the mirror didn’t get scratched or broken!
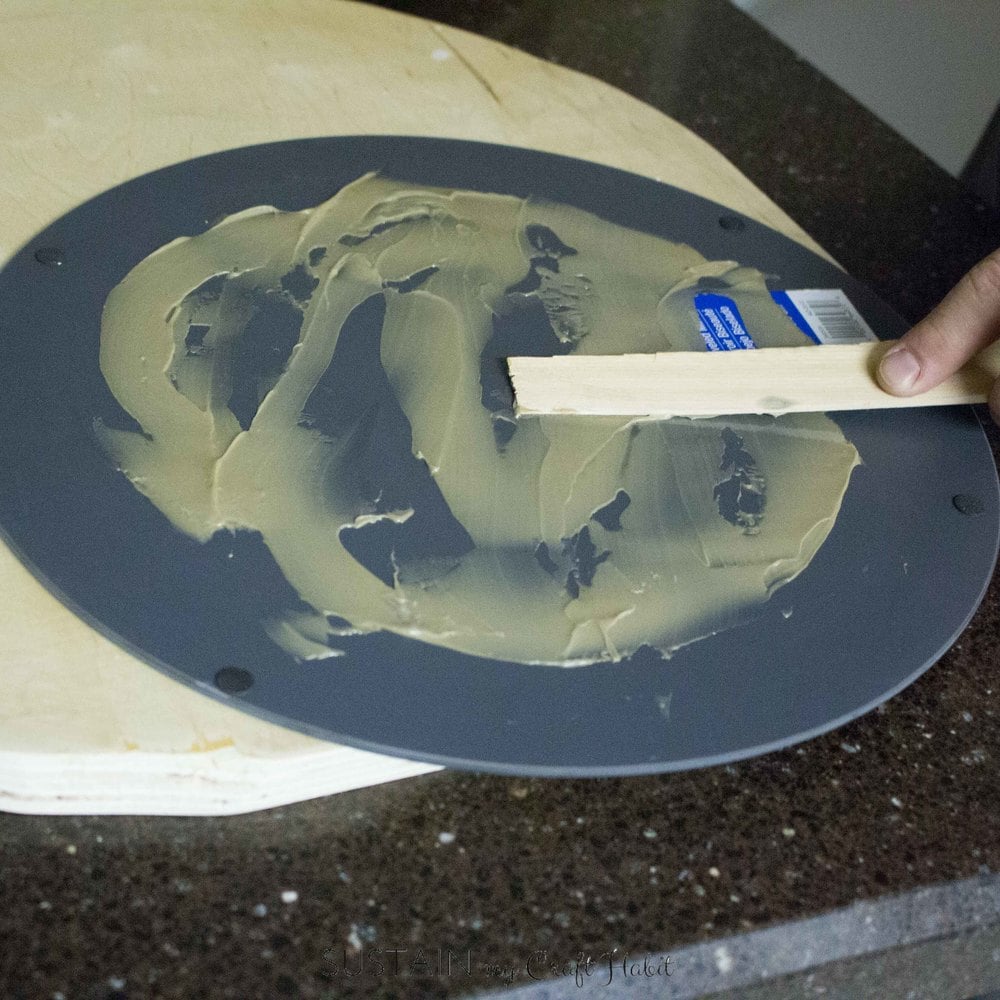
Using the construction adhesive, we squeezed a good amount of the glue onto the back of the mirror and spread it out with a flat spatula (a paint stick would also do).
Again, we gently turned the mirror back over and placed it centered on top of plywood. We needed to clamp the plywood and mirror together and allowed it to dry for several days before moving on to the next steps (aka the fun part!).


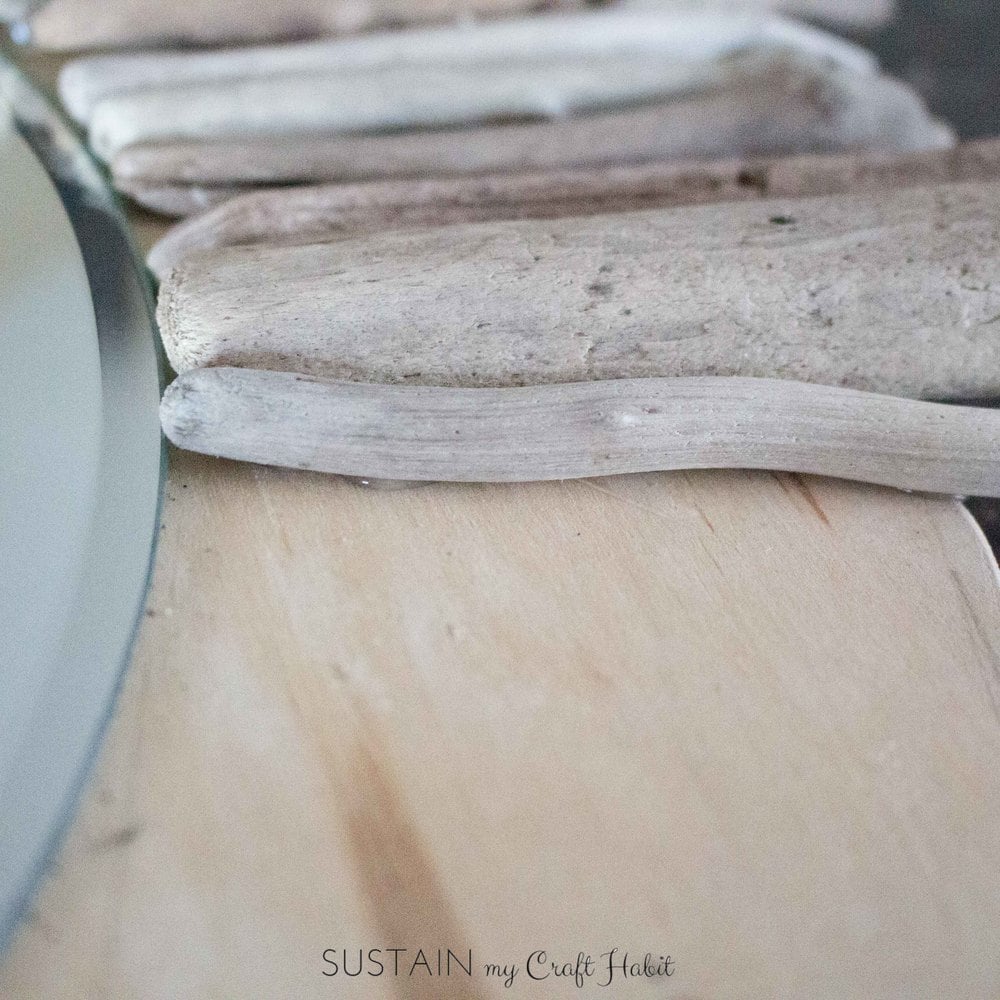
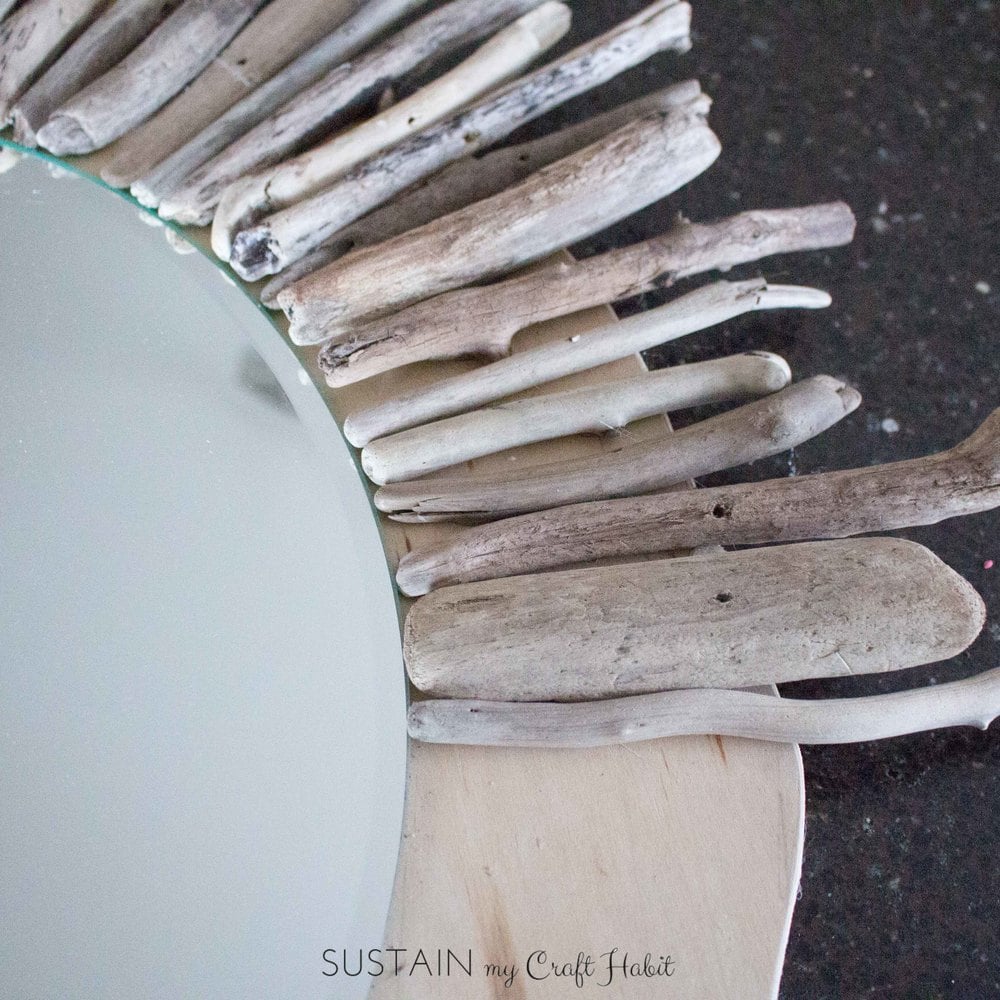
Step 3: Attach the Driftwood Pieces
Once the mirror was secured in place we removed all the clamps and laid the mirror right side up. Using a hot glue gun (or you could use one of the other options suggested in the materials list above), we began to apply the longer driftwood pieces to the exposed plywood base. We continued to work around the circle.
We layered shorter driftwood pieces on top and in between the longer driftwood pieces to hide the exposed plywood underneath.
Because hot glue is not the strongest adhesive, the finished driftwood mirror was somewhat fragile so we found we had to be very careful when moving it around. But once the mirror was hung in place, the hot glue did what it needed it to!


We found this helpful post from Adhesives.org that outlines all the different types of glue and appropriate uses for each.
If you’d rather use a stronger adhesive for your DIY driftwood mirror, we’d suggest a wood glue or super glue.

If you liked this DIY driftwood mirror project, you have to see our DIY driftwood wall art idea video. Be sure to subscribe to our YouTube channel for more coastal-inspired DIY ideas!

How To Make A DIY Driftwood Mirror (or Where to Buy!)
Materials
- Assorted driftwood pieces - sized 3” to 7” long in various widths
- Beveled mirror - round shape, 14” diameter
- *Construction Adhesive* (or similar product) for attaching mirror to plywood
- ½” thick sheet of plywood
- Picture framing kit* (this one from Amazon holds up to 30 pounds)
- Jigsaw
- Sand paper 60 Grit
- Glue gun and plenty of glue sticks
- Some other suggestions for applying the driftwood are 1. use a wood glue or super glue for a stronger, more secure adhesive or 2. nailing gun with small brad nails
Instructions
- We used a ½” thick sheet of leftover plywood and cut it in a circular shape to match the mirror shape. Since we wanted 2 ½” of plywood to show beyond the mirror all around, the finished size of the cut out plywood is 19”. Here’s the math behind it: 14” for the size of the mirror + 2 1/2” (exposed plywood) + 2 ½” (exposed plywood) = 19”.
- Using a jigsaw, we cut along the marked line to create the base. Once the base was cut, we gently sanded down all the edges for a smooth finish. We used 60 grit, about a medium grade sandpaper to do this.
- We picked up a picture framing kit at the nearest home hardware store. And following the instructions on the back of the kit, we added two sets of hooks to the back side of the base. This was the side that was hung up against the wall.
- To apply the mirror onto the base, we carefully turned the mirror right side down on a smooth surface, taking care to ensure the mirror didn’t get scratched or broken!Using the construction adhesive, we squeezed a good amount of the glue onto the back of the mirror and spread it out with a flat spatula (a paint stick would also do).
- Again, we gently turned the mirror back over and placed it centered on top of plywood. We needed to clamp the plywood and mirror together and allowed it to dry for several days before moving on to the next steps (aka the fun part!).
- Once the mirror was secured in place we removed all the clamps and laid the mirror right side up. Using a hot glue gun (or you could use one of the other options suggested in the materials list above), we began to apply the longer driftwood pieces to the exposed plywood base. We continued to work around the circle.We layered shorter driftwood pieces on top and in between the longer driftwood pieces to hide the exposed plywood underneath.Because hot glue is not the strongest adhesive, the finished driftwood mirror was somewhat fragile so we found we had to be very careful when moving it around. But once the mirror was hung in place, the hot glue did what it needed it to!
Notes

We also have over 20 of the best craft kits for adults or learn how to make a pine cone wreath instead!
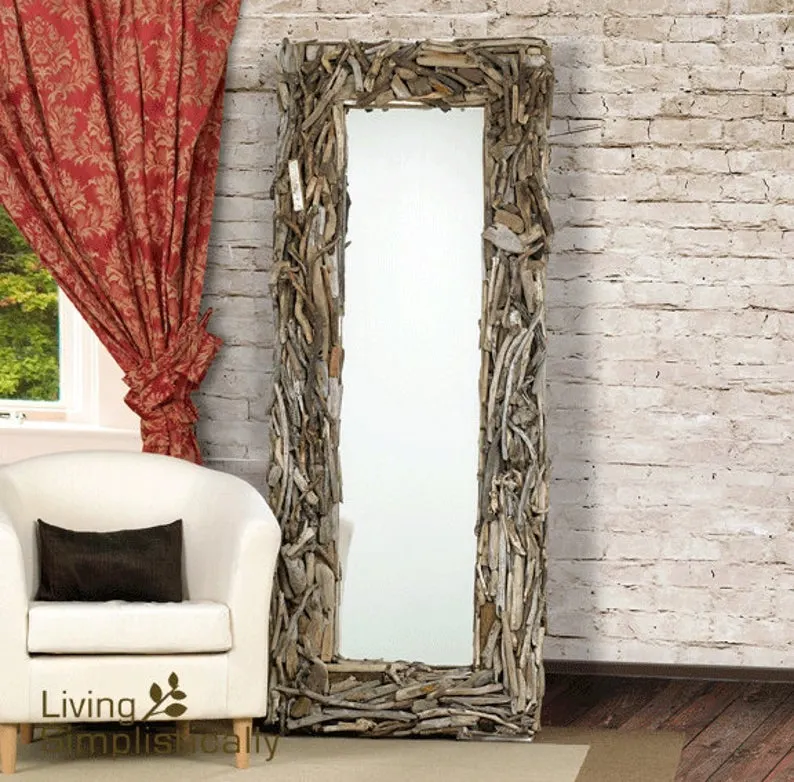
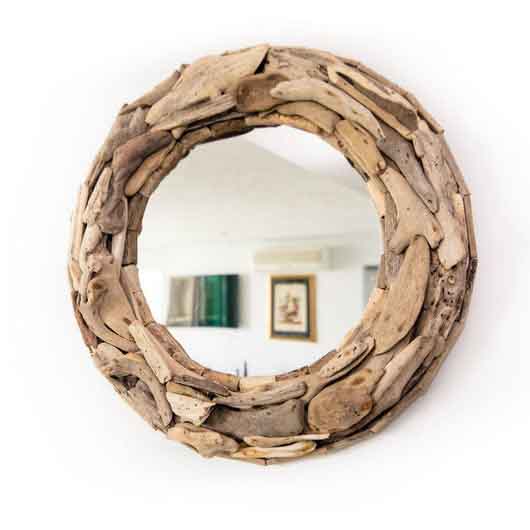
Where to Buy a Driftwood Mirror
Here are a few of our favourite sources for driftwood mirrors:
Etsy.com

-


- Driftwood Mirror

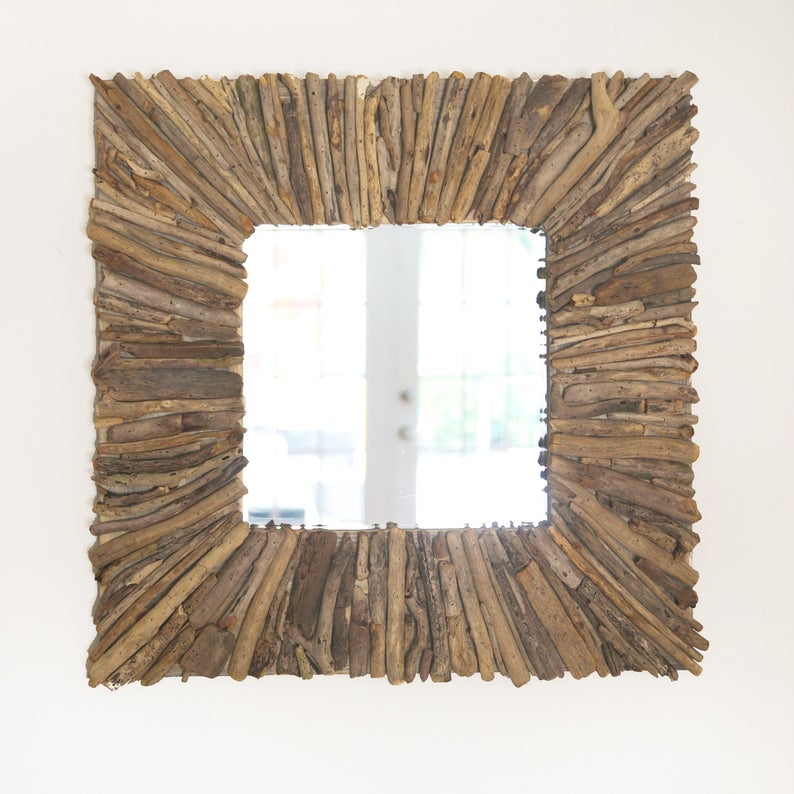
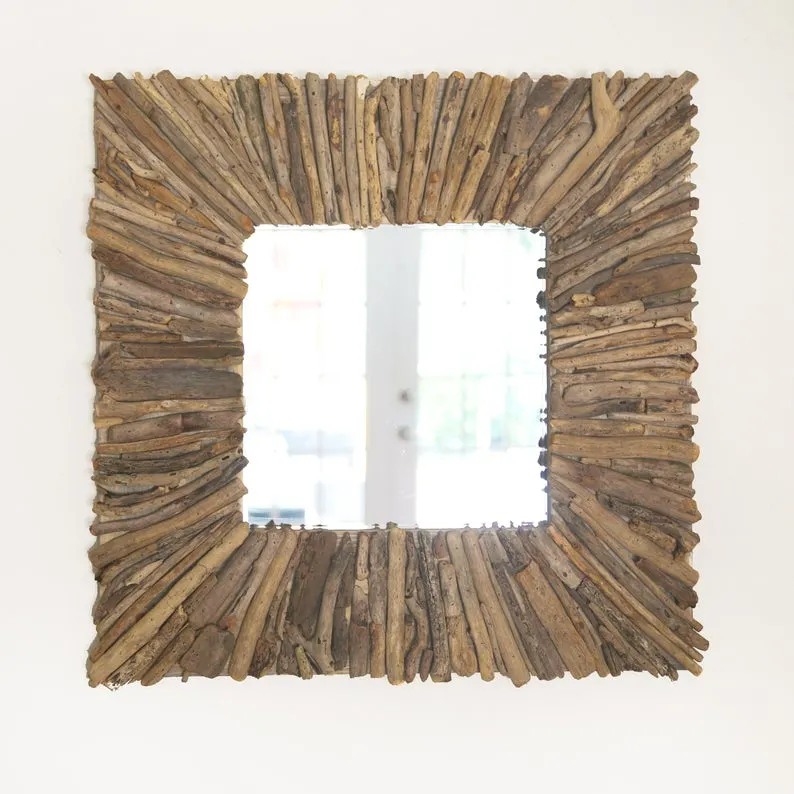
Amazon.com
Specialty Retailers
Like it? Pin it for Later!
Fredro
Friday 20th of September 2019
Nice post!
Jane and Sonja
Friday 20th of September 2019
Thank you!
Leah
Sunday 21st of October 2018
I was wondering if you could tell me, did you treat thevdriftwood first? Soak it or wash it? Thank you for your reply in advance!
Jane and Sonja
Friday 20th of September 2019
Hi Leah, We typically wash all our driftwood by placing it in warm soapy water and then rinsing it off. Then we leave it to dry completely, ideally in the sun. This has worked for us as it removed the sand, dirt and any bugs. Hope this helps! Jane
Ali W.
Monday 30th of October 2017
Hi there, the mirror is gorgeous! What's the size of the finished product? Thanks!
Jane and Sonja
Monday 30th of October 2017
Thank you Ali! The final size will depend a bit on the size of driftwood pieces you use. Ours, with the 14" mirror and driftwood pieces that were up to 7" long ended up being about 30" wide (at the widest points). Hope this helps!
Sue bibeault
Sunday 3rd of September 2017
Going to make this mirror for our beach house! Thank you so much for sharing.
Jane and Sonja
Tuesday 5th of September 2017
Our pleasure Sue! You'll love it. I have a smaller one in my main floor bathroom at home and I'm still not tired of seeing it after two years. Let us know if you have any questions along the way. -Jane
mirrorworld
Saturday 25th of June 2016
Drift wood mirrors are looking so beautiful.their designs are so simple but unique.These mirrors can be made easily.It's a great idea to make home decors.