DIY Hot Cocoa Bar Sign with Cricut
Making a cozy spot for enjoying hot chocolate on a Winter’s day with this DIY hot cocoa bar sign made with
Making a Hot Cocoa Bar Sign
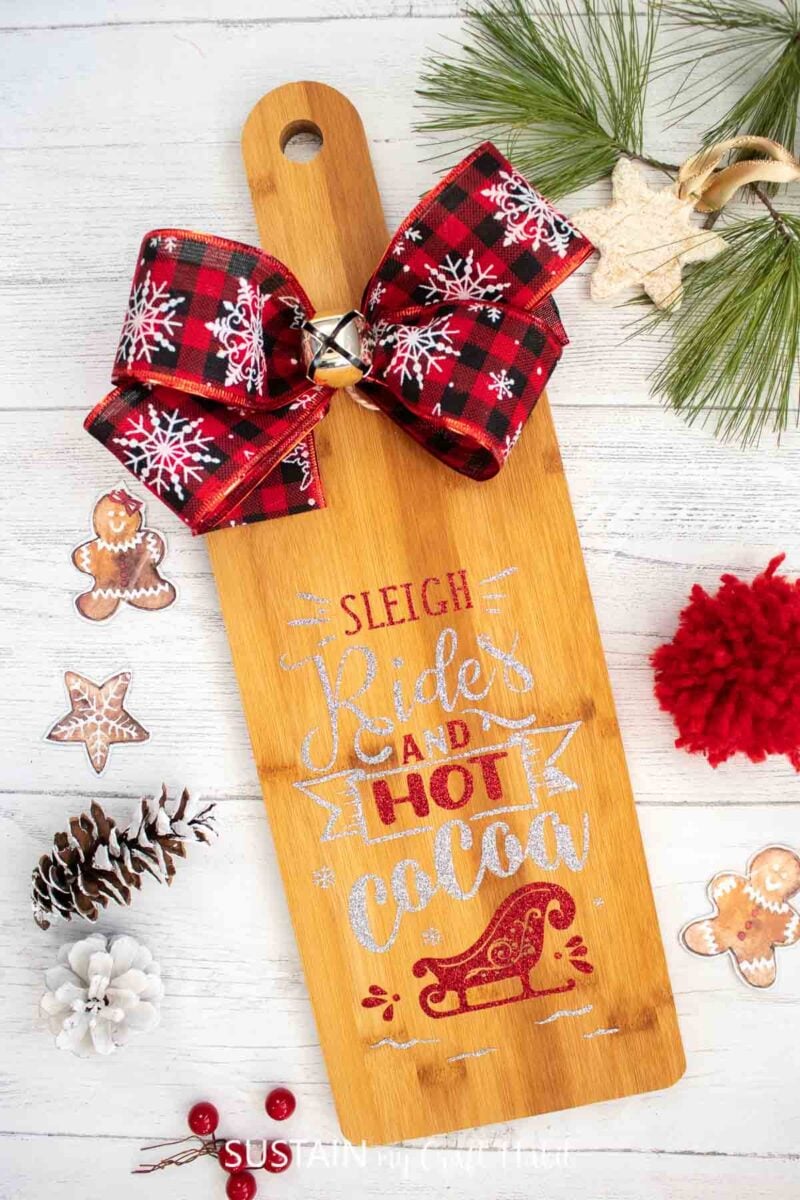
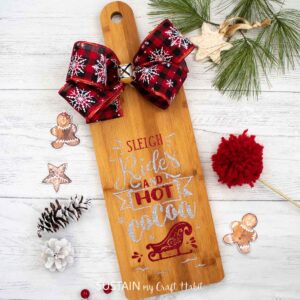
What says Winter more than sleigh rides and hot cocoa? Well maybe ice skating and snowman making! But nevertheless, we created this sign using a charcuterie board and loads of glittery vinyl with a pre-designed Wintry phrase from Cricut’s Design Space. Although the craft was at times touch and go during the Facebook Live video, in the end it turned out even better then I expected!
Get updates on the latest posts and more from Sustain My Craft Habit straight to your inbox by joining our weekly newsletter. We promise to send you only the good stuff!

We chose to use
Materials Needed
Disclosure: This post contains affiliate links for your shopping convenience. Should you choose to purchase through them, we will make a small commission at no extra cost to you. You can read our full disclosure here.
- Cutting Board or charcuterie board
Cricut Maker Iron On Glitter Vinyl Weeder Cricut Easy Press - wide decorative ribbon and silver bell
How to Make a Hot Cocoa Bar Sign with Cricut
As I mentioned above, we made this hot cocoa sign on a recent Facebook live which you can find here and then hope over to this video to check out how the finished sign looks.
Preparing the Vinyl Phrase

We chose the “sleigh rides and hot cocoa” design (M27D012CA) from Cricut’s Design Space for this hot cocoa bar sign and used our Cricut Maker 3 to cut it in two parts using red and silver Iron On Glitter Vinyl.


Applying the Iron On Vinyl to the Charcuterie Board
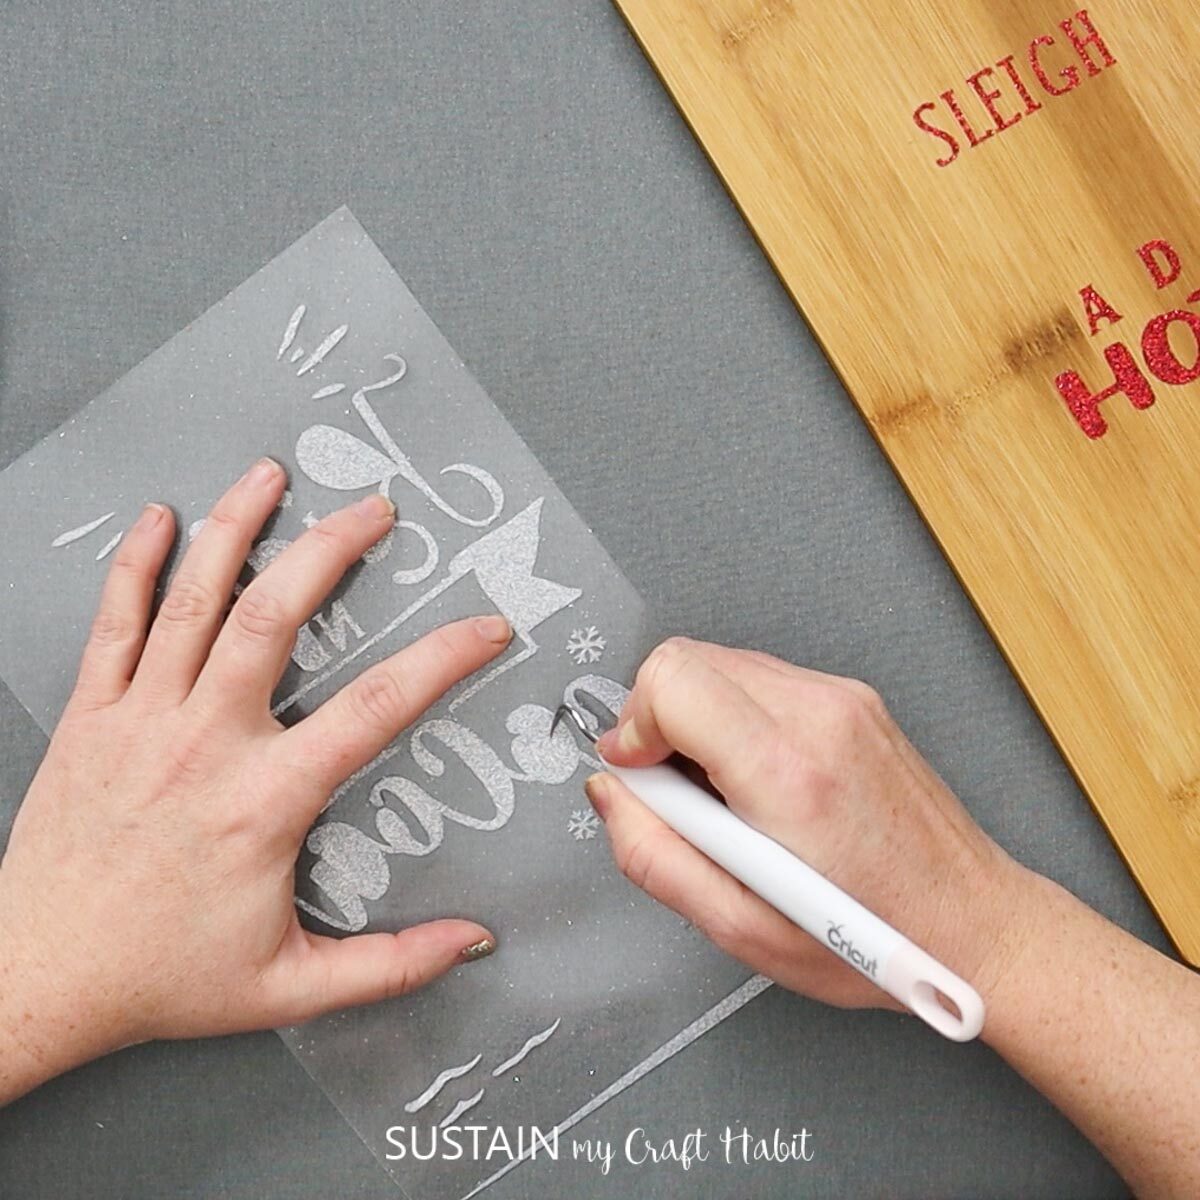
Peel away the excess vinyl using a weeder, leaving just the phrase. Since we used two colors of vinyl, repeat this for both parts of the phrase.


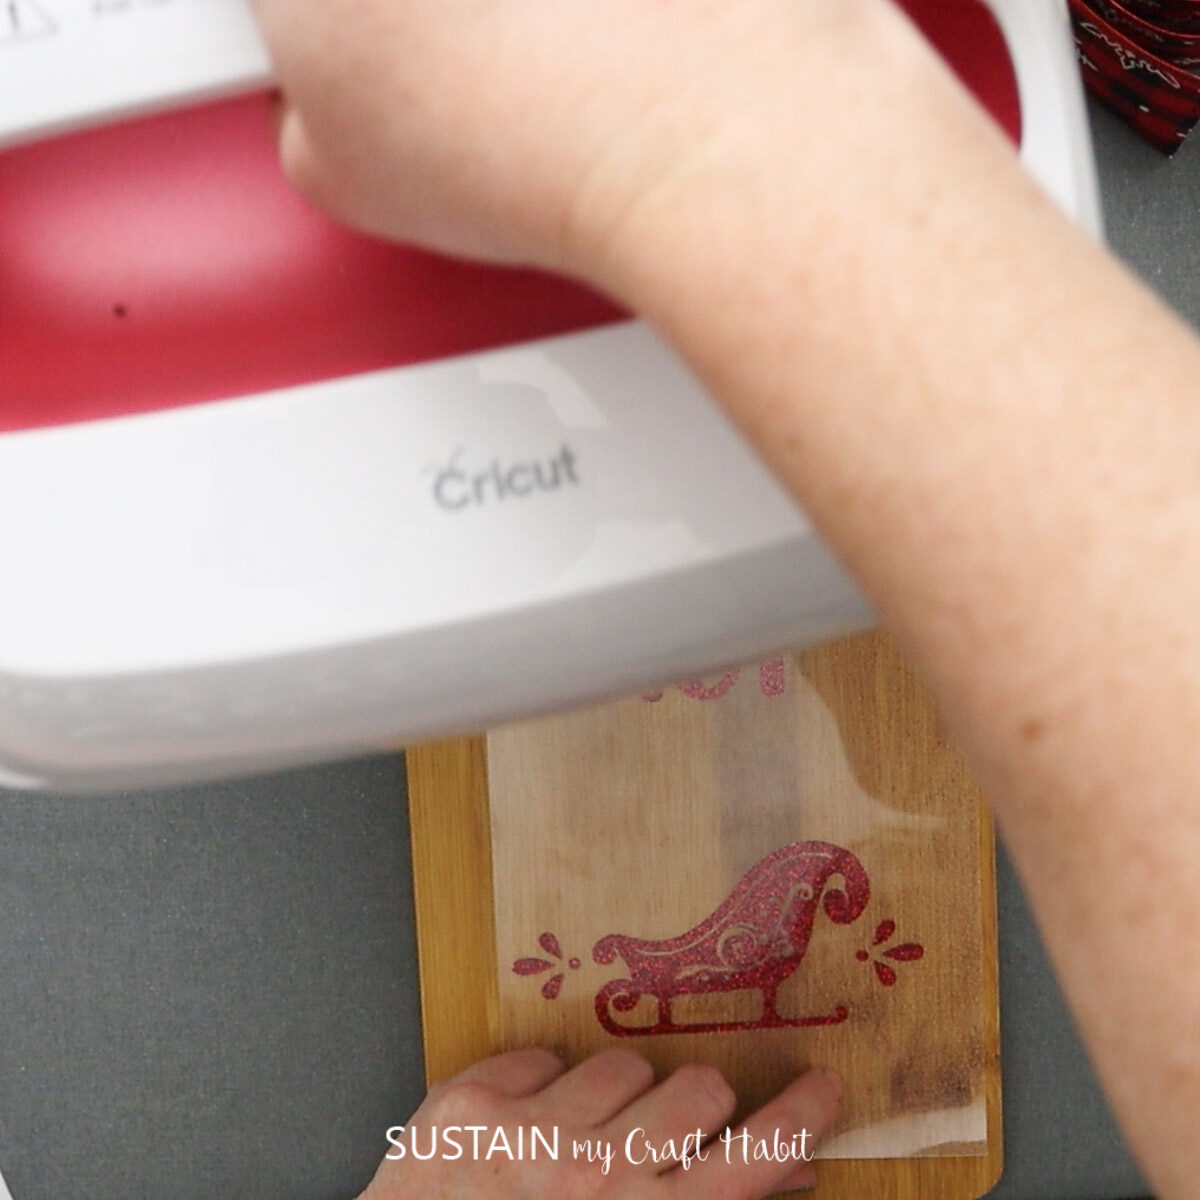
Using the Cricut Easy Press, preheat the cutting board following the instructions on Cricut’s Heat Guide page. Starting with one color, lay the vinyl phrase on the board in the desire spot and place the Easy Press back on top of the board and hold down for time required.
After removing the Easy Press, allow the vinyl too cool before trying to peel off the plastic protective layer.

Next, place the other part of the phrase in the other color over top of the board to complete the design and repeat the heating process with the Easy Press.


Once the vinyl has cooled, peel away the plastic protective layer to reveal the completed Wintry phrase.

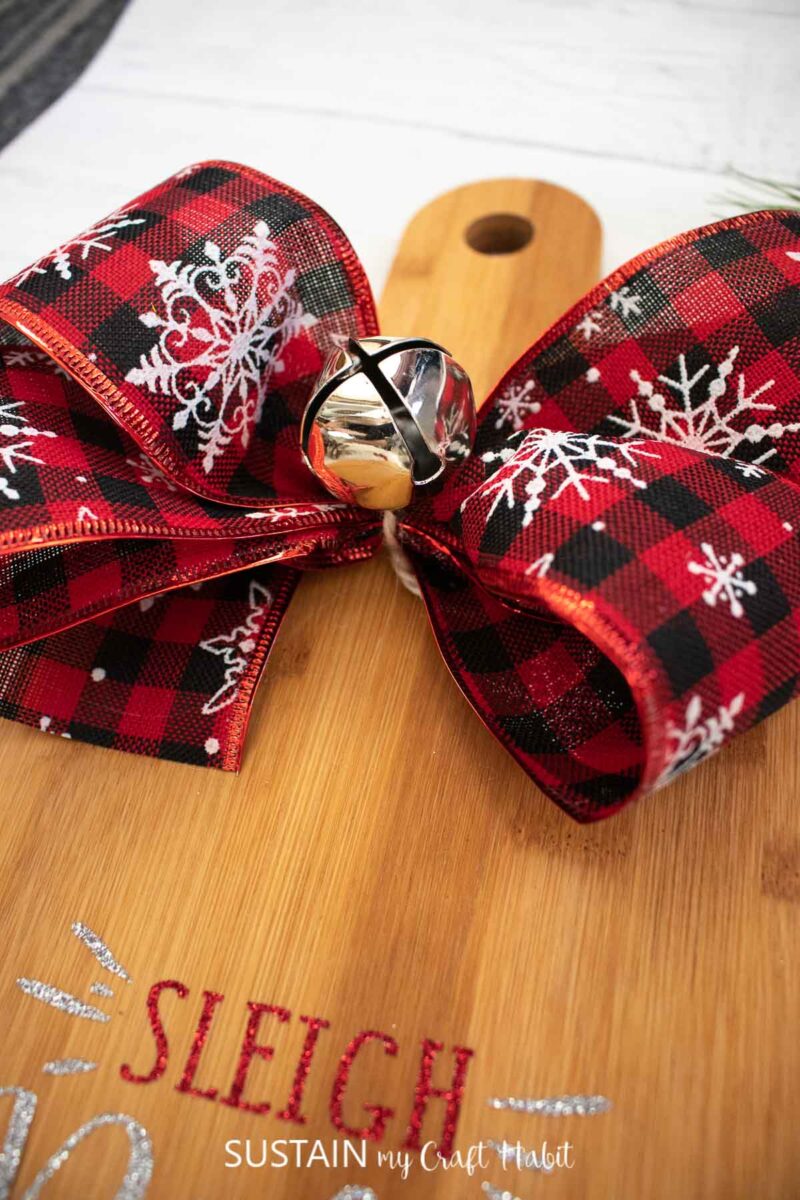
Embellishing the Hot Cocoa Bar Sign
Lastly, add a pretty bow and a jingle bell to the handle for an added touch.

We are considering painting the handle as well. What do you think…would you leave the handle as is or give it some color with paint?
More DIY Signs Made using a Cricut Cutting Machine
- Dollar Store Christmas Sign Craft
- DIY Bathroom Sign
- Spring Thrift Store Craft
- Farmhouse Inspired DIY Round Wood Sign

Christmas Sign 
Bathroom Sign 
Spring Sign Farmhouse Inspired Wood Signs


Now that the cocoa bar sign is complete, I can start adding the mugs, hot chocolate, sprinkles, marshmellows and more! Thanks so much for visiting. Before you go, you can become a Sustain My Craft Habit insider to receive more crafting inspo and fun freebies!

Like it? Pin it for later!

DIY Hot Cocoa Bar Sign with Cricut
Materials
- Cutting Board or charcuterie board
- Glitter Vinyl Sign made with the Cricut
- Cricut Easy Press
- Decorative ribbon and bell
Instructions
- Using the Cricut Easy Press, preheat the cutting board.
- Lay the vinyl cut out on the cutting board and place the Easy Press back on top. Hold down for time required and let cool.
- Peel away the protective plastic to reveal the phrase.
- Add a bow and a bell to the top of the cutting board.