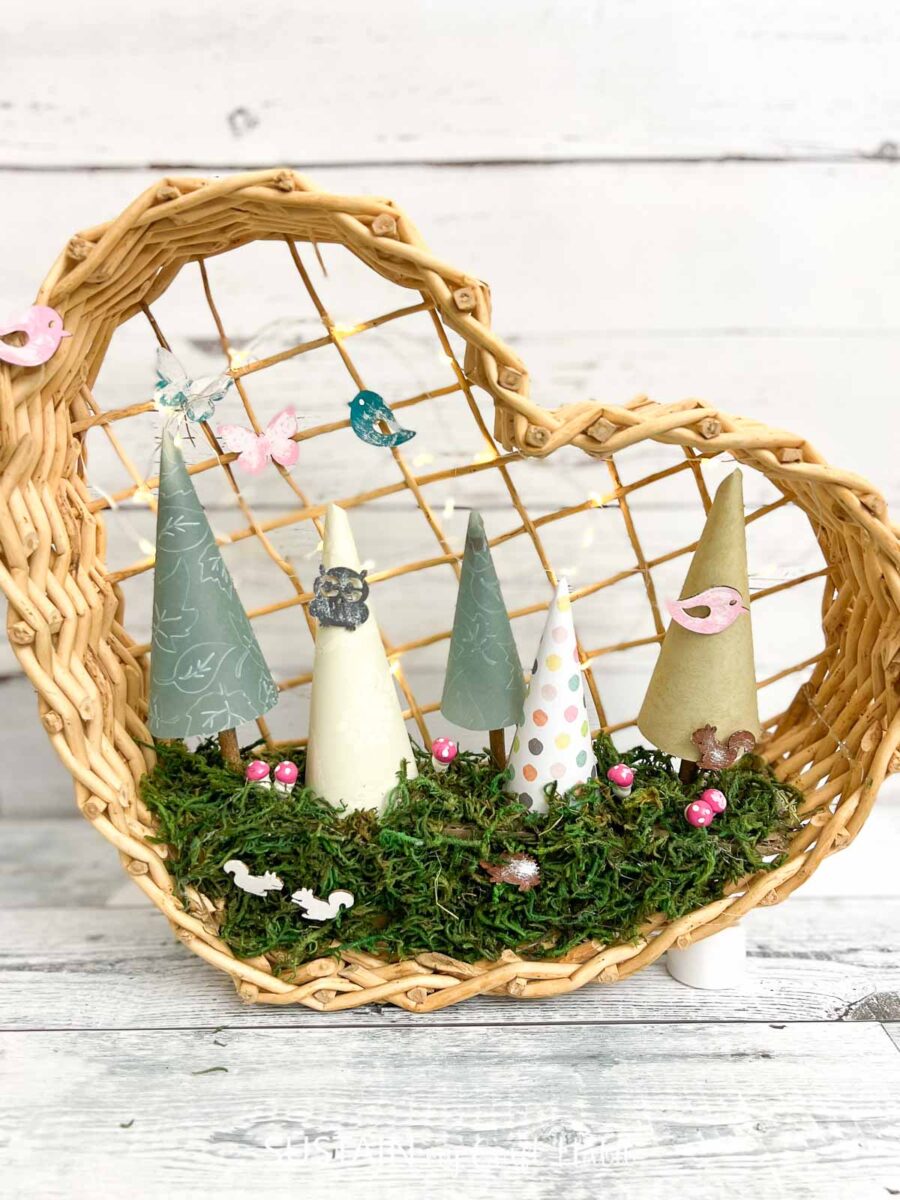
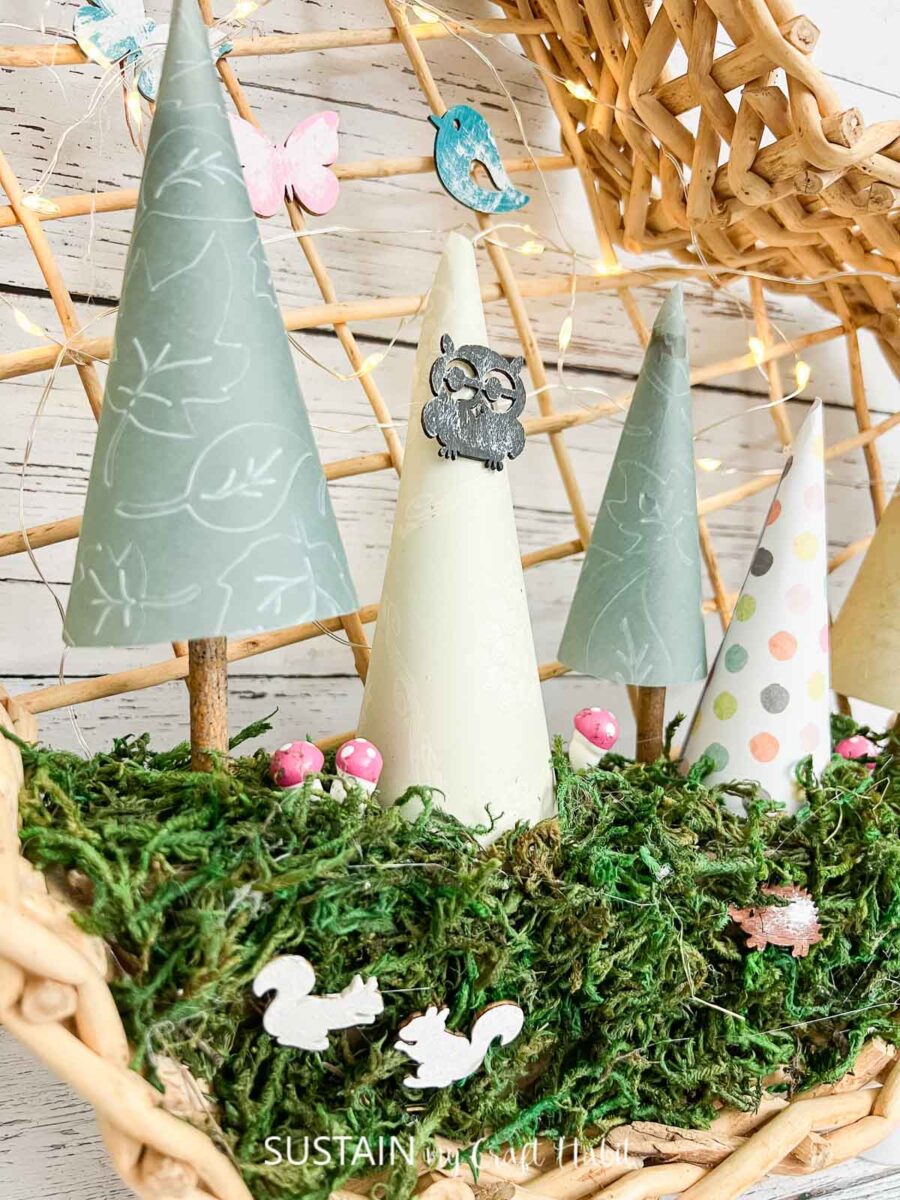
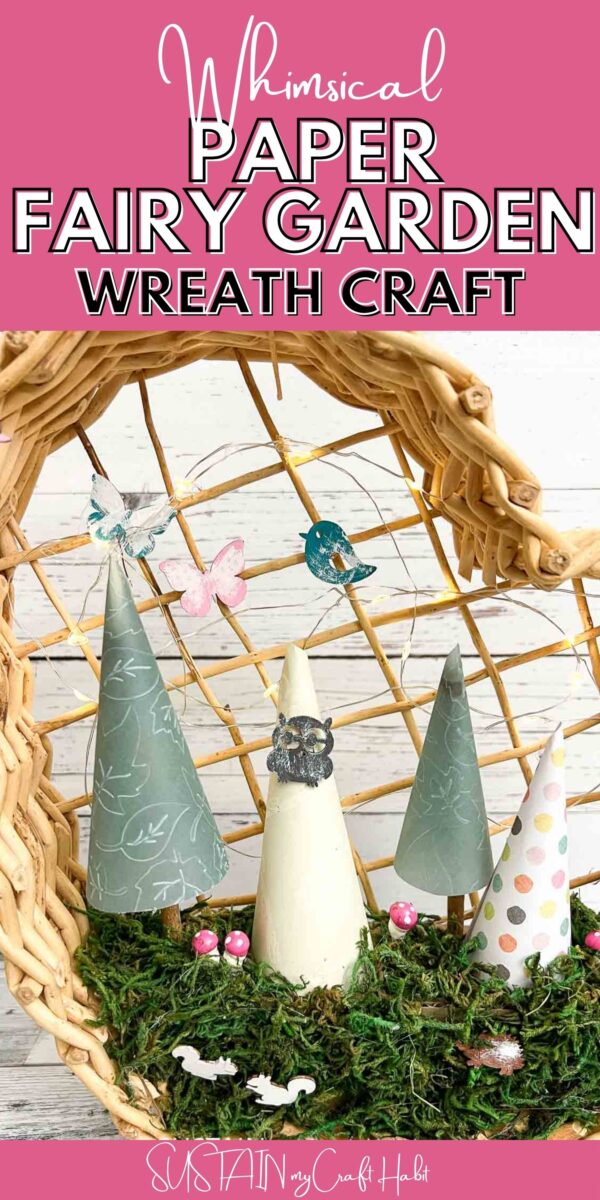
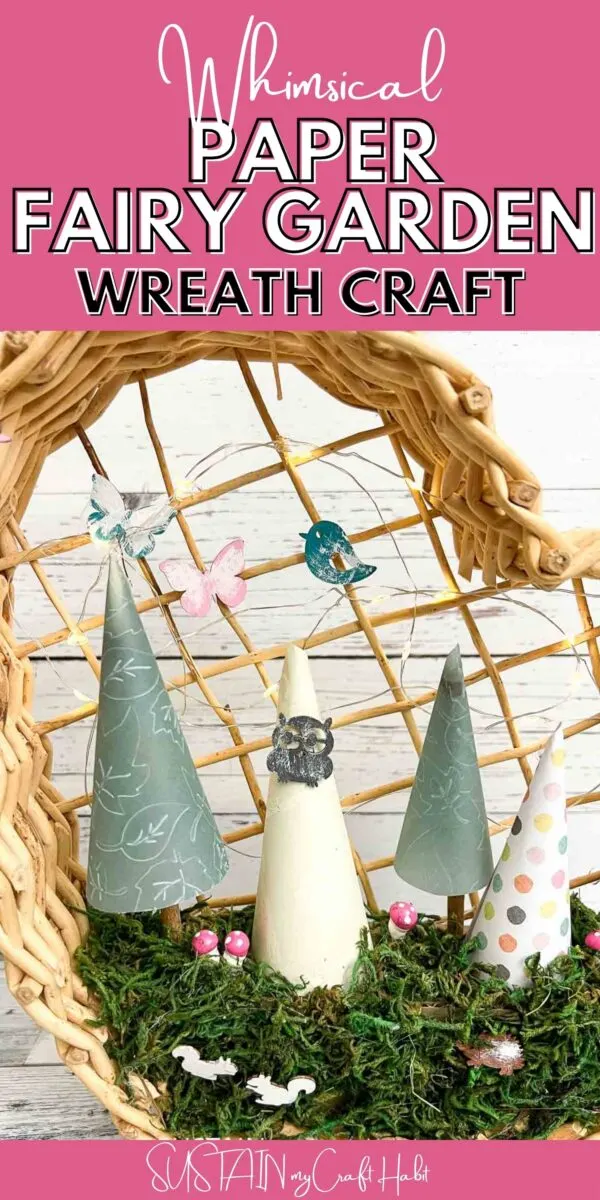
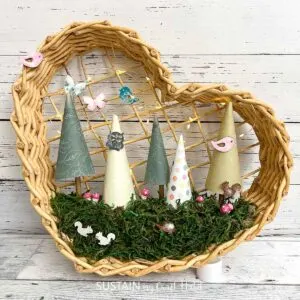
Creating a whimsical homemade fairy garden wreath craft using paper, decorative moss and some sweet woodland themed accessories all placed inside a heart-shaped wicker basket.

Homemade Fairy Garden Wreath Craft
Looking back through all our crafts here on the blog, I was surprised to see we haven’t yet done a homemade fairy garden craft! While on the other hand, we have plenty of DIY terrarium, such as our 3D paper cactus terrarium, upcycled pickle jar Christmas terrarium, a mini terrarium for Halloween and my favorite, this beachy air garden terrarium.
So there’s no better time than the present to create an adorable fairy garden craft using supplies I have around the house. Starting with this heart shaped wicker basket for the base and using an assortment of green colored craft paper, I assembled this earthy wall decor on a recent FB Live video.
Want to receive a ton of inspiration and money saving ideas for decorating, gift-giving and crafting? Join HERE!
Materials Needed
Disclosure: This post contains affiliate links for your shopping convenience. Should you choose to purchase through them, we will make a small commission at no extra cost to you. You can read our full disclosure policy here.
- Wicker Basket/Wreath Form Heart
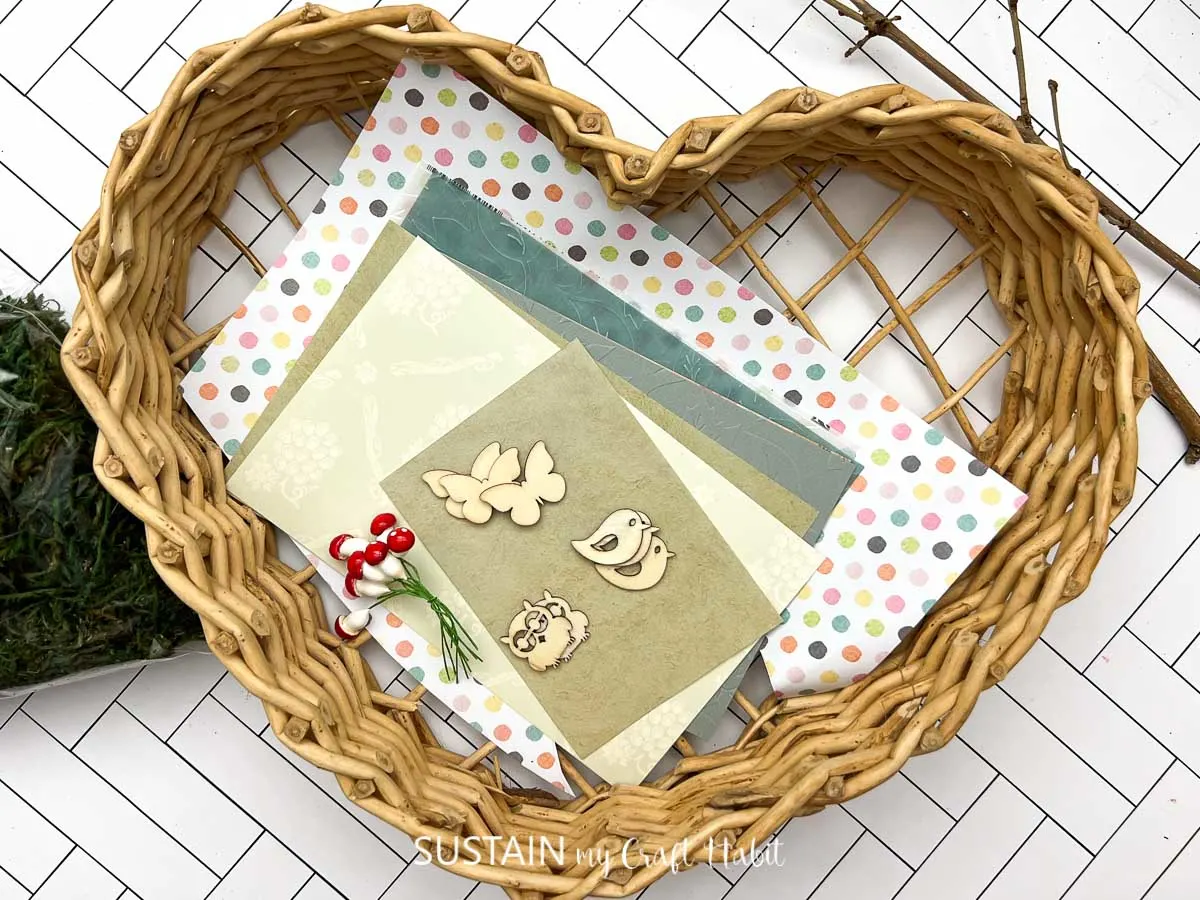
- Wooden Cut-outs (woodland themed) and decorative craft mushrooms
- Decorative Paper
- Cardboard
- Decorative Moss
- Wooden stick or 1/4″-1/2″ dowel
- Paint
- Paint brush
- Small twinkle lights
- Hot Glue Gun

How to Make a DIY Whimsical Paper Fairy Garden Craft
As I mentioned above, here you’ll find the step-by-step video of the paper fairy garden craft I made on our Facebook page. If you want the step by step instructions, continue reading below.
Preparing the Supplies
Cut some cardboard strips to fit into the wicker heart to create a ‘platform’ and glue it into place. Alternatively, you could use some floral foam for this step. It woul hold the paper trees in place better and make it easier to assemble.
Apply some glue to the cardboard platform and place the moss onto the cardboard to cover completely.
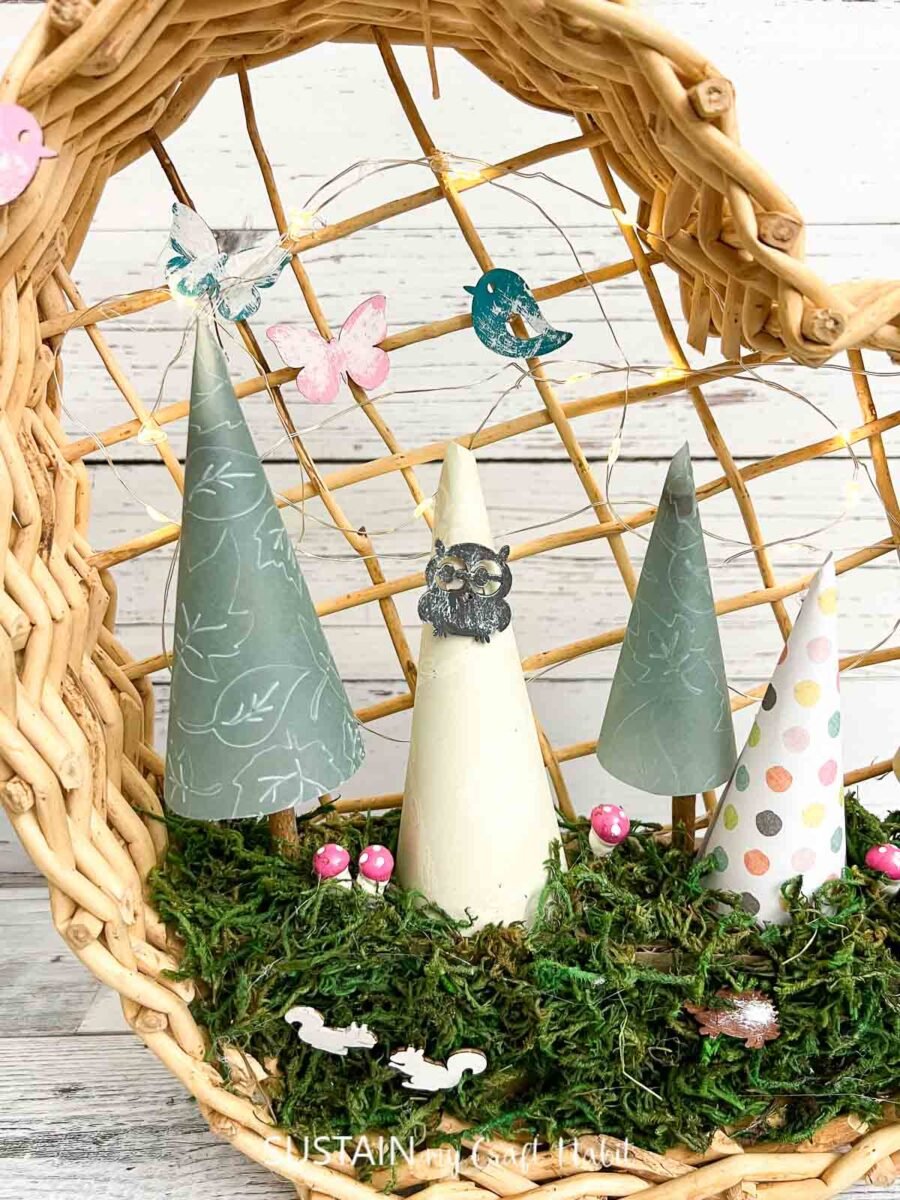
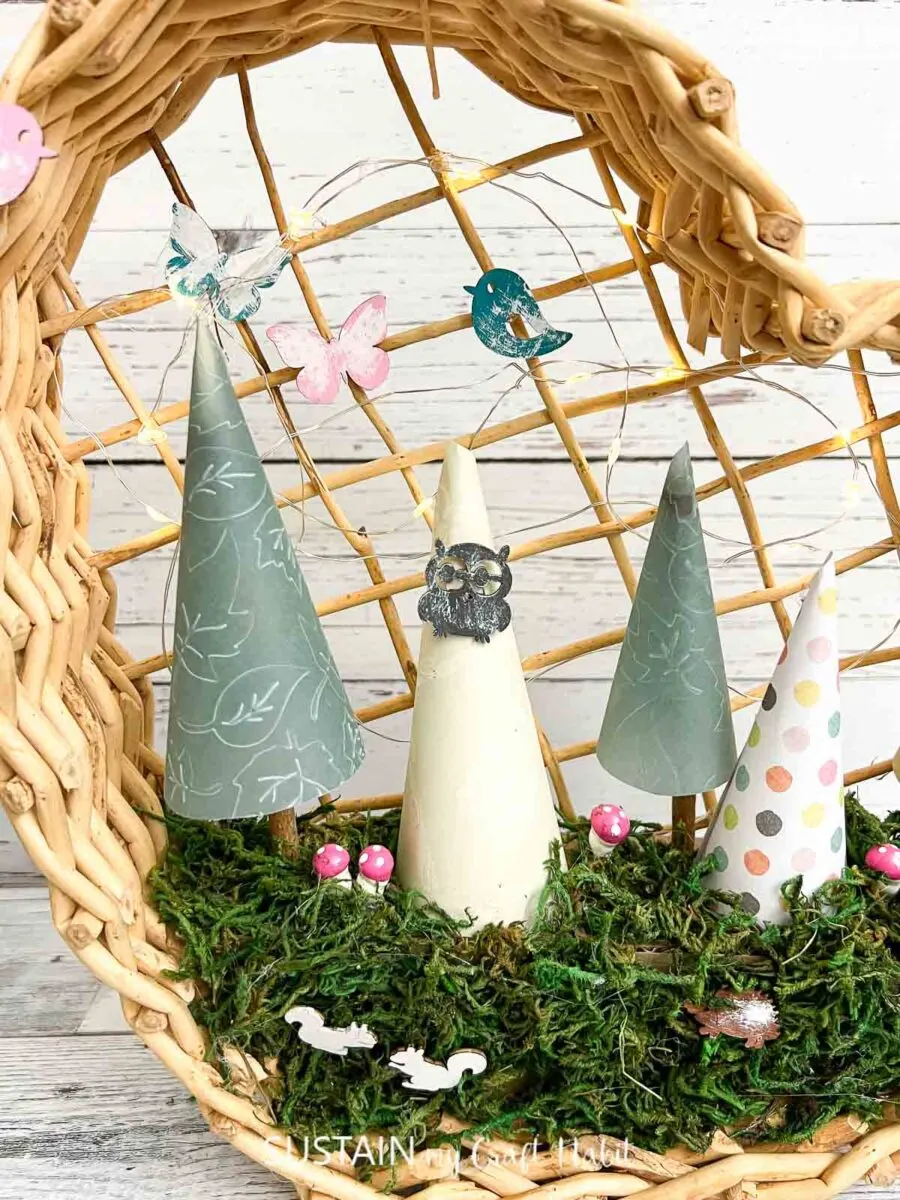
Take the decorative paper and cut out a cone shape. Then add some glue to one edge and overlap the sides to form a 3D cone. Repeat this step to form additional trees.
Using a wooden stick just a bit longer than the height of th epaper cone, glue the wood stick to the inside of the paper cone to form the tree.
Apply some glue to the base of the cardboard tree and apply it to the cardboard platform. Using a sharp narrow tipped knife or pen, poke a hole into the cardboard platform and glue the ‘stump’ of the tree into the hole. This is where a piece of floral foam would make this craft easier to assemble.
Finishing Touches
Paint the woodland creatures in any color of your choosing and let them dry.
Take the twinkle lights and wrap them in the wicker behind the trees and glue them into place.
Lastly, glue the woodland creatures and mushrooms around the garden and add some additional moss to cover any visible cardboard.

More Paper Crafts to Try
There are so many wonderful crafts to make with paper! In addition to this sweet paper DIY fairy garden, you can make all of these creative ideas:
- Framed Paper Peony Flowers
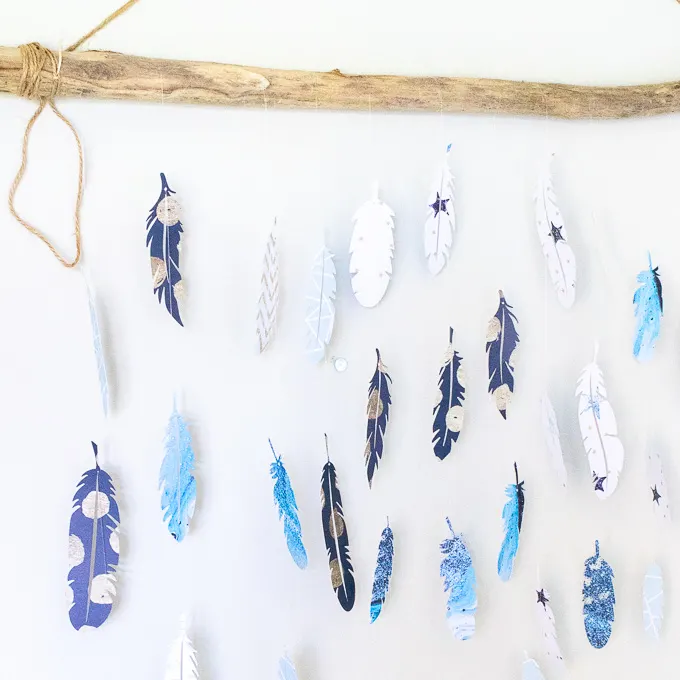
- Earthy Paper Feather Wall Decor
- Paper Bow Fridge Magnet
- How to Assemble Daffodils from Paper
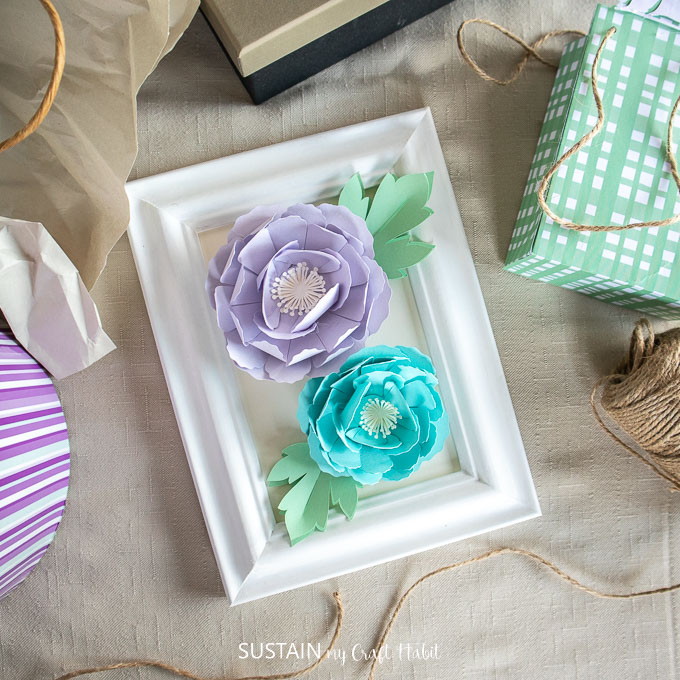

Paper Peony Framed Art 
Paper Feather Wall Hanging 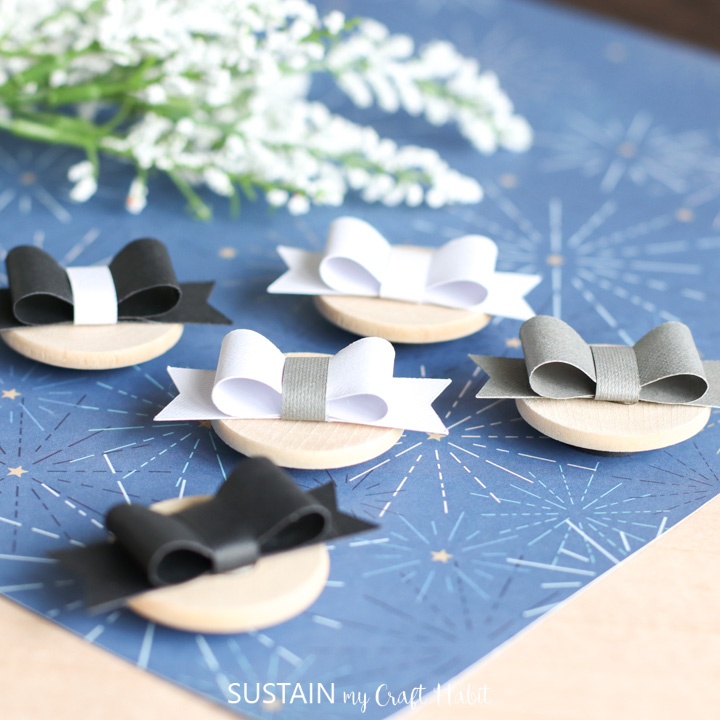

Fridge Magnets with Paper 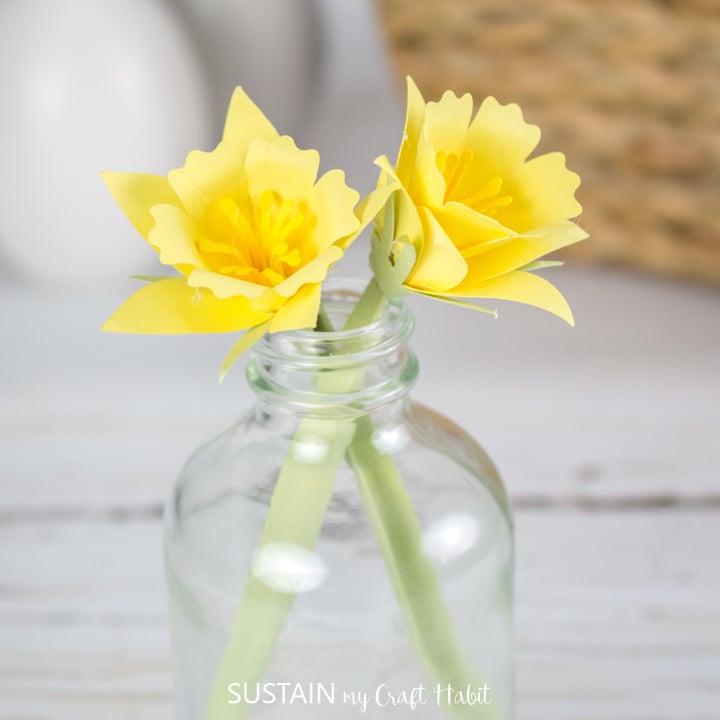
Paper Daffodils


Thank you so much for stpping by and visiting us here at Sustain My Craft Habit. We would love for you to become a Sustain My Craft Habit insider to receive fun freebies and crafting inspiration!
Like it? Pin it for later!

DIY Whimsical Paper Fairy Garden Craft
Materials
- Wicker Basket/Wreath Form Heart
- Wooden Cut-outs
- Decorative Paper
- Cardboard
- Decorative Moss
- Wooden stick
- Paint
- Paint brush
- Small twinkle lights
- Glue Gun
Instructions
- Cut some cardboard strips to fit into the wicker heart to create a ‘platform’ and glue it into place.
- Apply some glue to the cardboard platform and place the moss onto the cardboard and cover completely.
- Take the decorative paper and cut out a cone shape and add some glue to one edge and glue to create a cone.
- Repeat this step to form additional trees.
- Using a small piece of wood and glue the wood to the inside of the paper tree.
- Apply some glue to the base of the cardboard tree and apply it to the cardboard platform.
- Using a sharp narrow tipped knife or pen, poke a hole into the cardboard platform and glue the ‘stump’ of the tree into the hole.
- Paint the woodland creatures and let them dry.
- Take the twinkle lights and wrap them in the wicker behind the trees and glue them into place.
- Glue the woodland creatures into the craft.