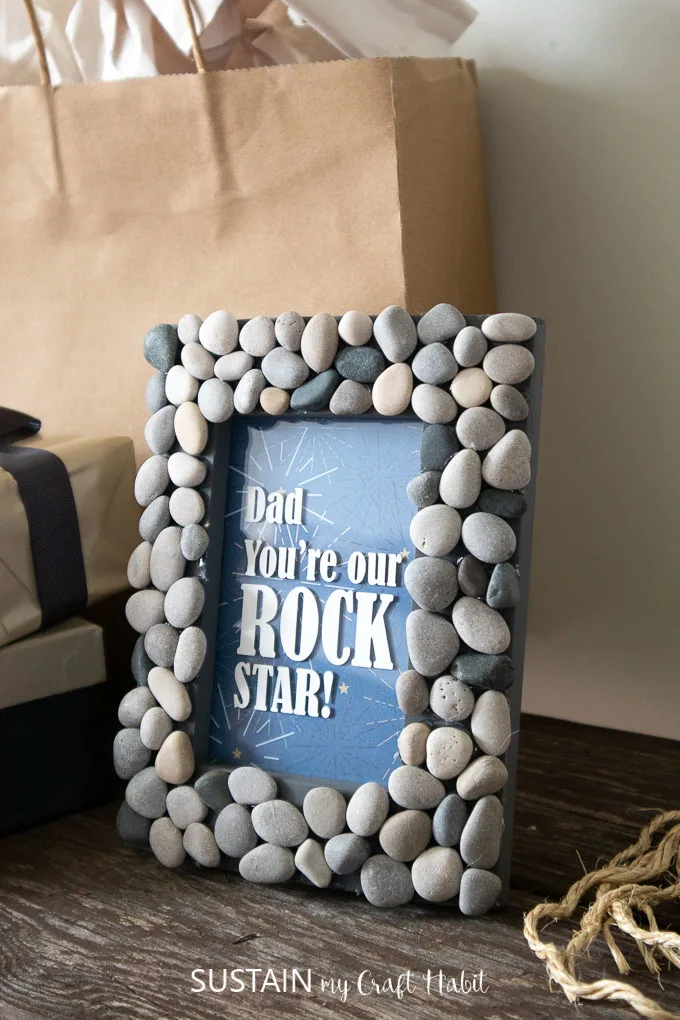
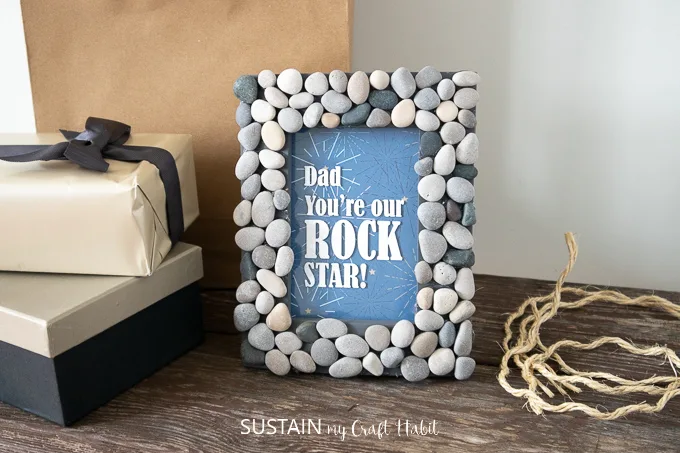
With Father’s Day just around the corner, we wanted to create a gift giving idea we were sure dads would appreciate. This rock’n Father’s Day picture frame is perfectly rustic and thoughtful all at the same time.

Making Father’s Day Picture Frames
Using pebbles we’d collected in various shapes and colors, we covered an old picture frame we had lying around the house. Each pebble is about the size of a dime so it’s best to use a frame with a wider surface area.
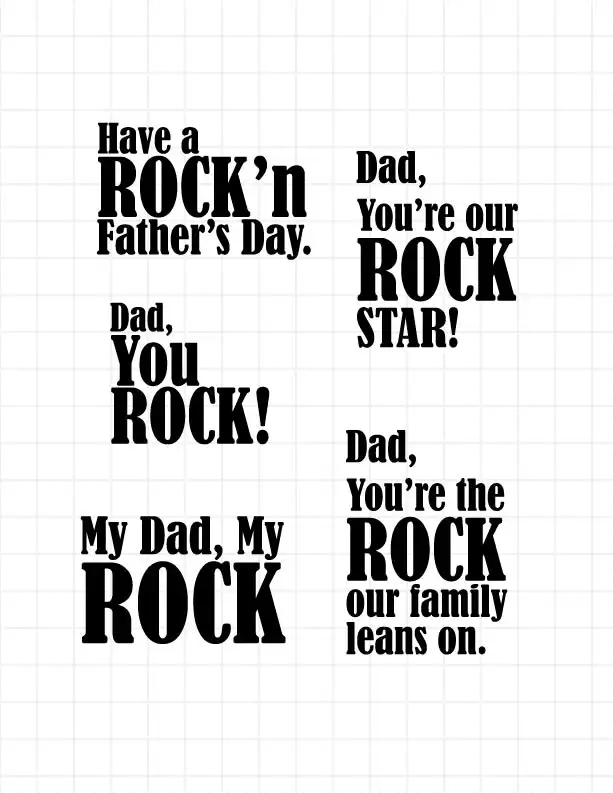
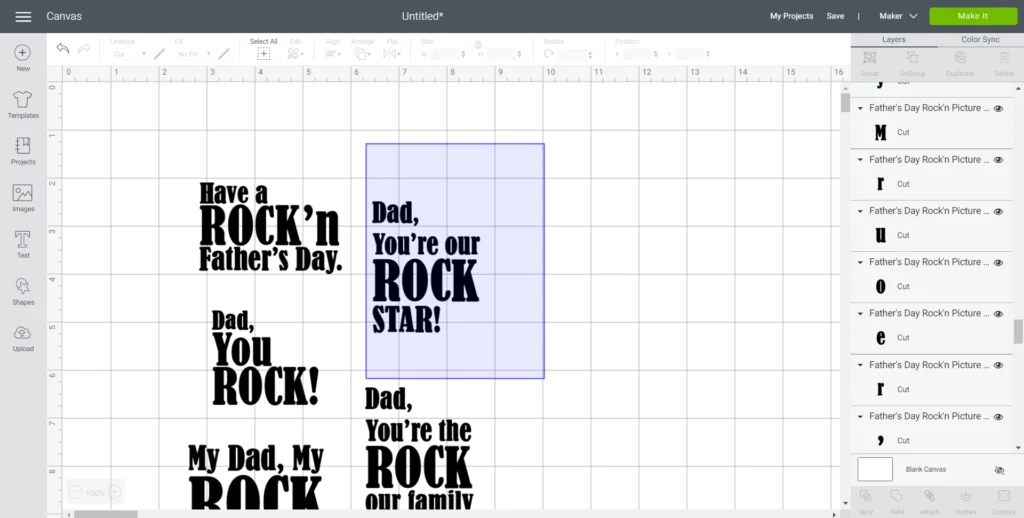
We’re providing the SVG cut file for this phrase as well as 4 other “rock’n” phrases so chose the one that suits your dad best! Which one do you like best?

For more gift giving ideas, check out these 25+ personalized gifts for him using the Cricut Maker, Father’s Day crafts from the kids or consider some of these non-stuff gift giving ideas for him.


Materials Needed to Make This Rock’n Picture Frame
Disclosure: This post contains affiliate links for your shopping convenience. Should you choose to purchase through them, we will make a small commission at no extra cost to you. You can read our full disclosure policy here.
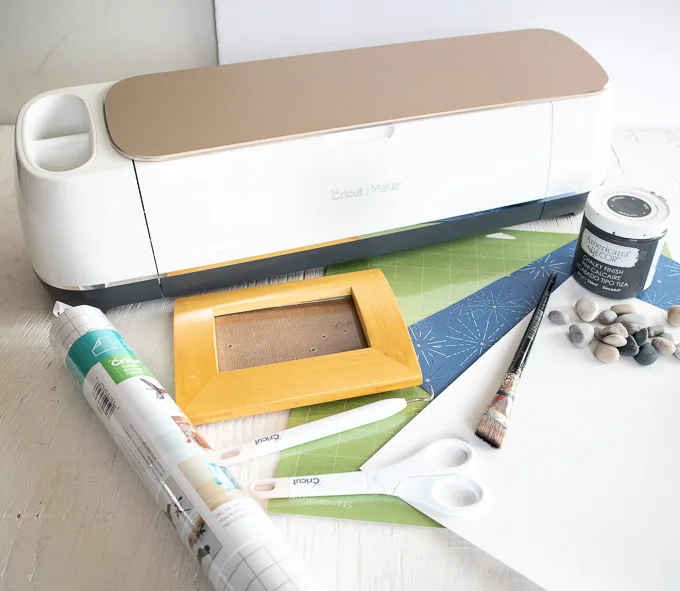
- Photo frame (grey or painted charcoal with chalky paint); 3” x 5” with wide wood frame or similar size
- Cricut Maker or Cricut Joy
- Standard grip mat
- Cricut Premium Vinyl, Removable (Light Gray from Vibrant Value Pack)
- Cricut’s Hostess with the Mostess Winter Sparkle Deluxe Paper, 1 sheet
- Cricut Transfer Tape
- Rock’n SVG cut file
- Small Pebbles
- Hot glue gun with clear craft glue

How to Make a Rock’n Father’s Day Picture Frame
Preparing the Frame
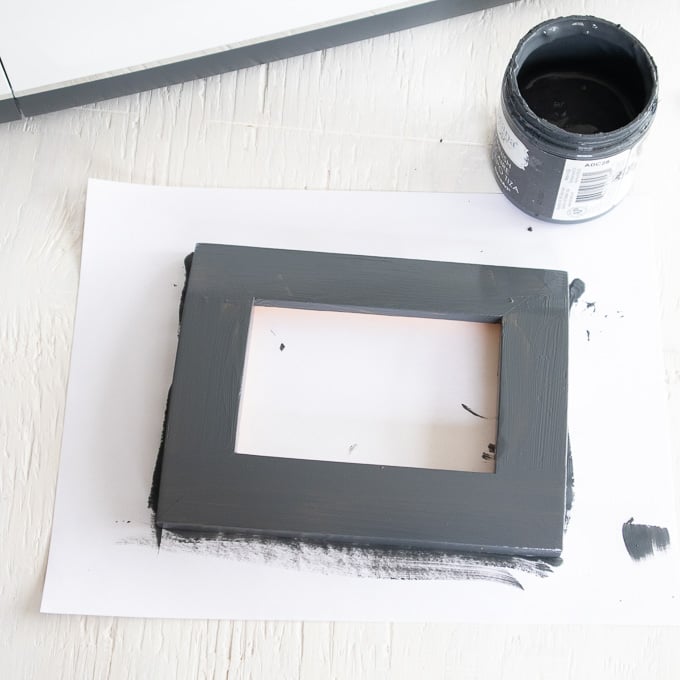
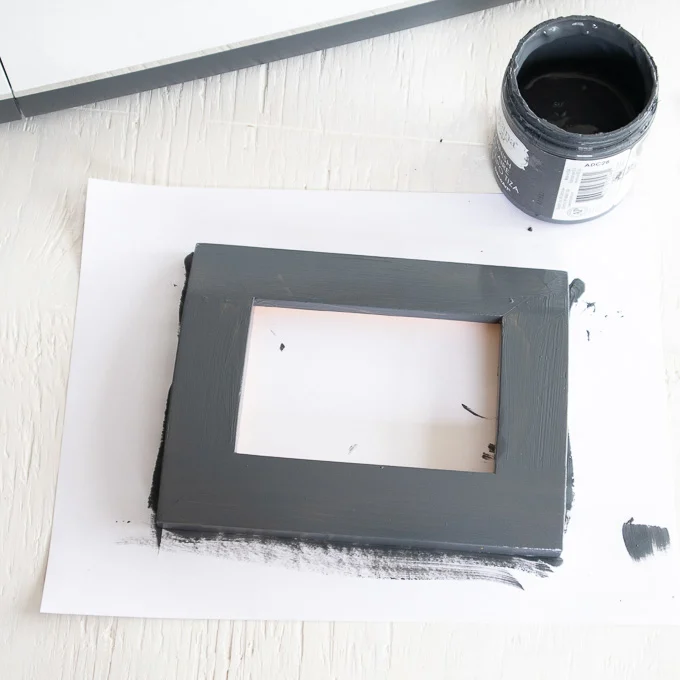
Disassemble the photo frame, removing the glass, which can be carefully discarded. If needed, paint the frame with 1-2 coats of relic (charcoal) chalky paint. Set aside to dry.


Once dry, heat a hot glue gun with clear glue sticks.
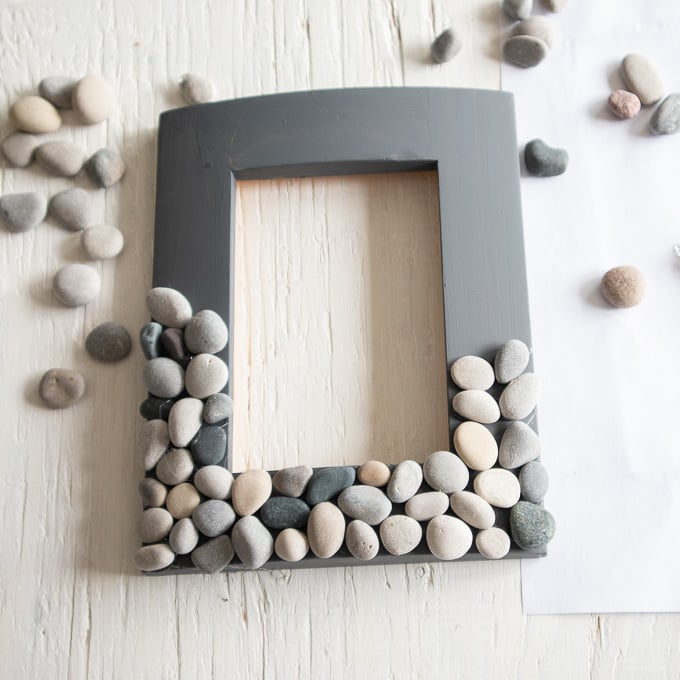
Starting in one corner of the picture frame, apply a dab of hot glue. Working quickly and carefully, press one small pebble into the glue.

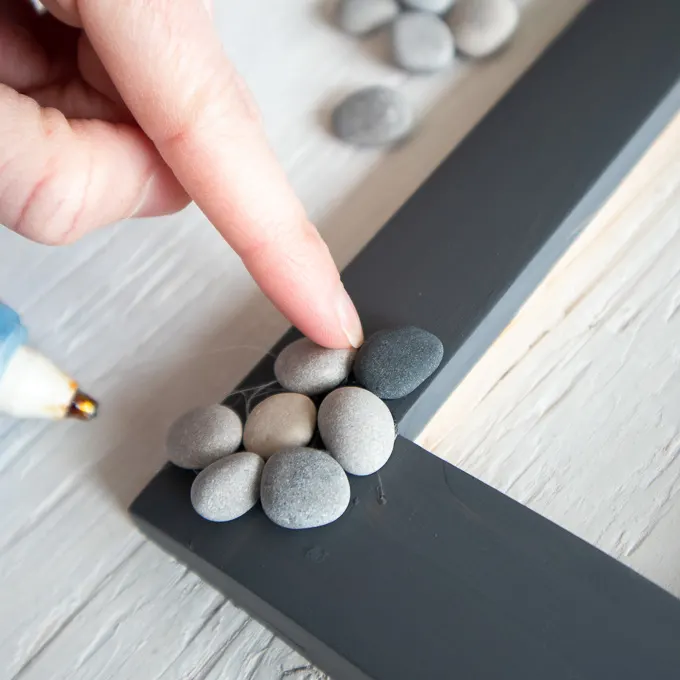
Continue covering the surface of the frame with pebbles until finished.

Uploading the SVG Pattern
Upload Father’s Day Rock’n Phrases SVG File into Design Space.
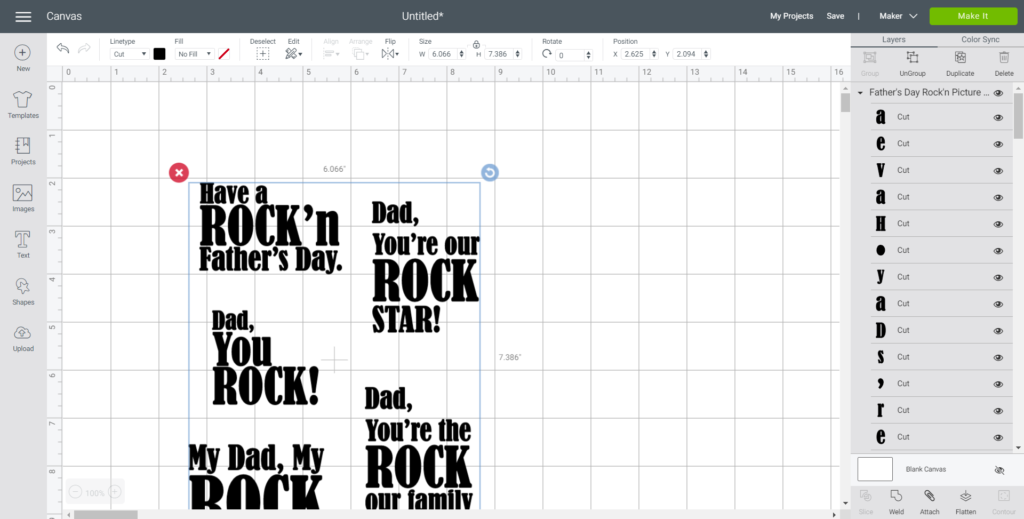

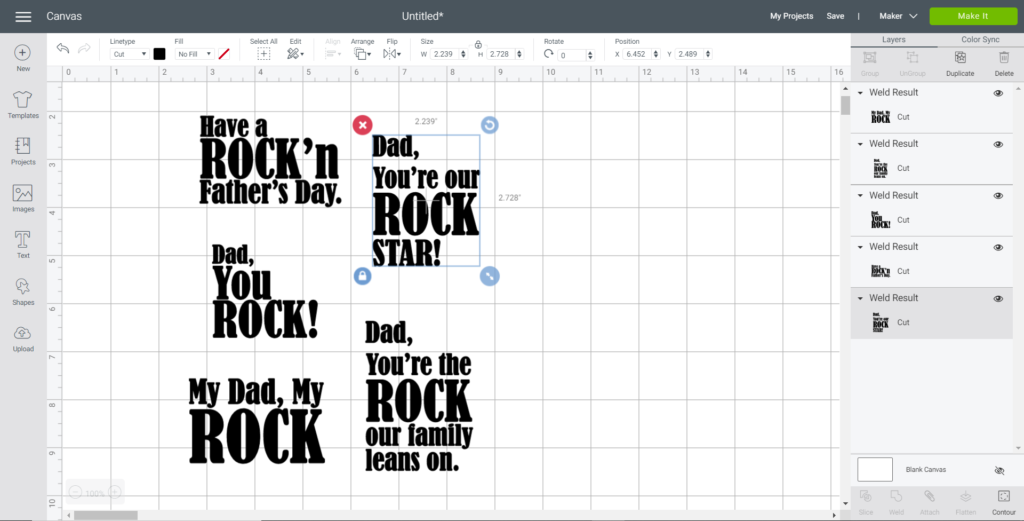
Click Ungroup.

Click and drag over each of the phrases separately. With the phrase highlighted, click on the “Weld” button”. Repeat for all phrases.


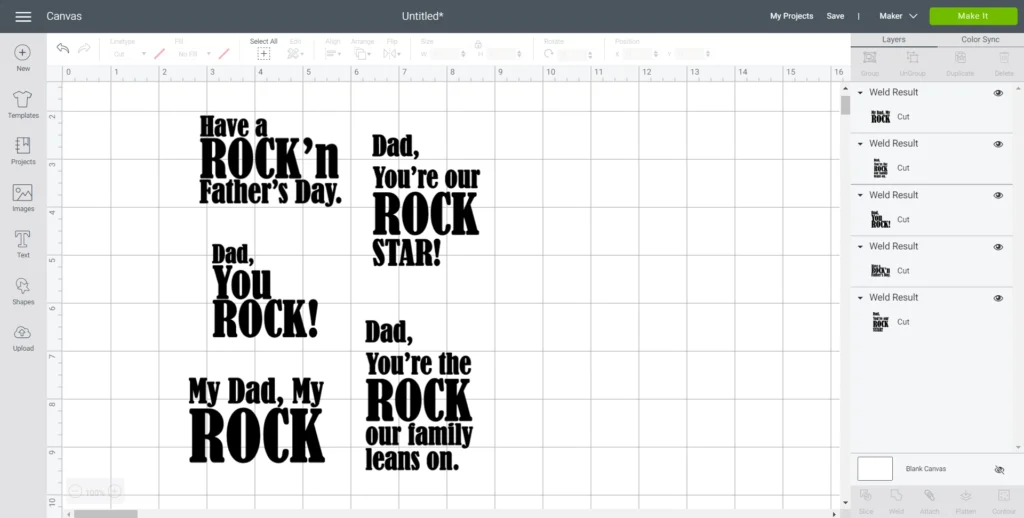
Adjust phrase sizes to fit inside the picture frame accordingly.

Insert one square shape onto the Design Space canvas to create the photo frame backing. Size the square to match the size of the picture frame, in our case it was 3.5” wide x 5” high.

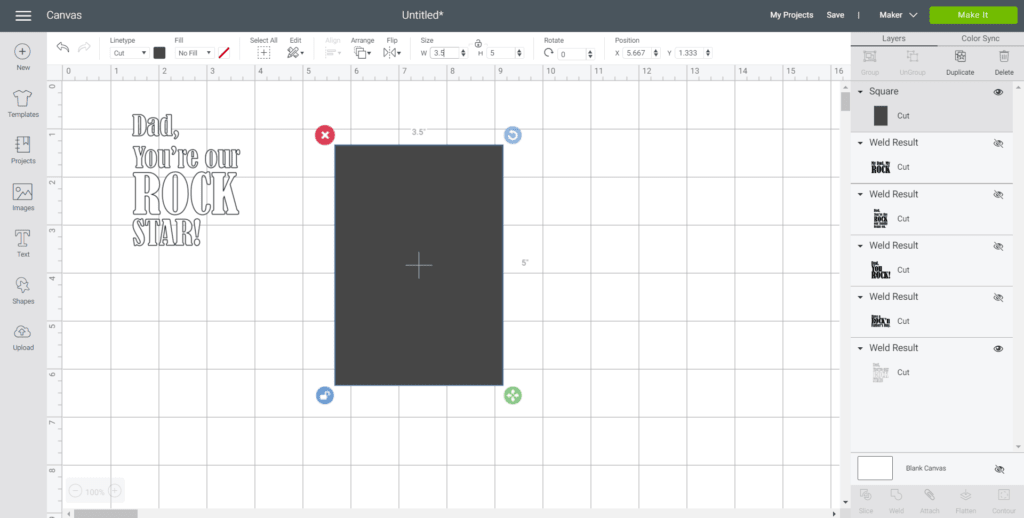
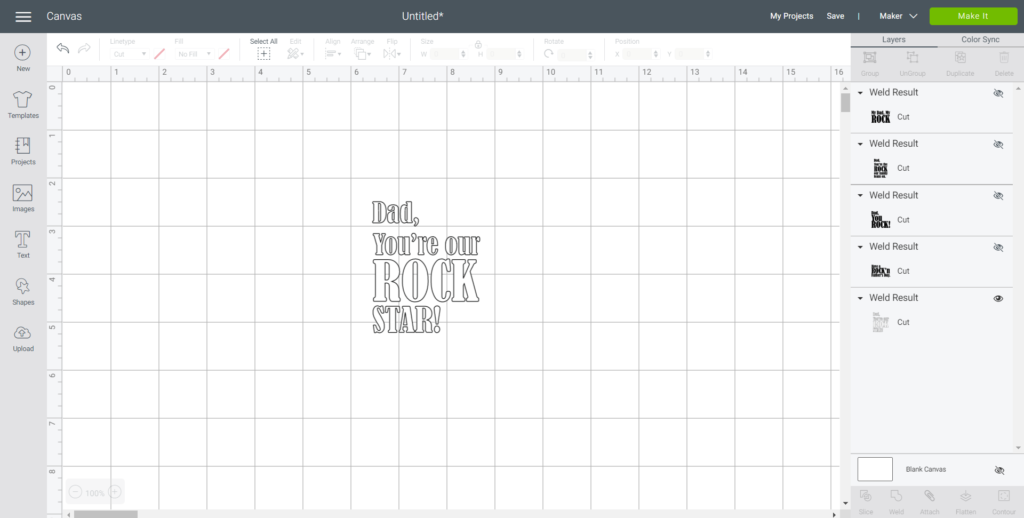
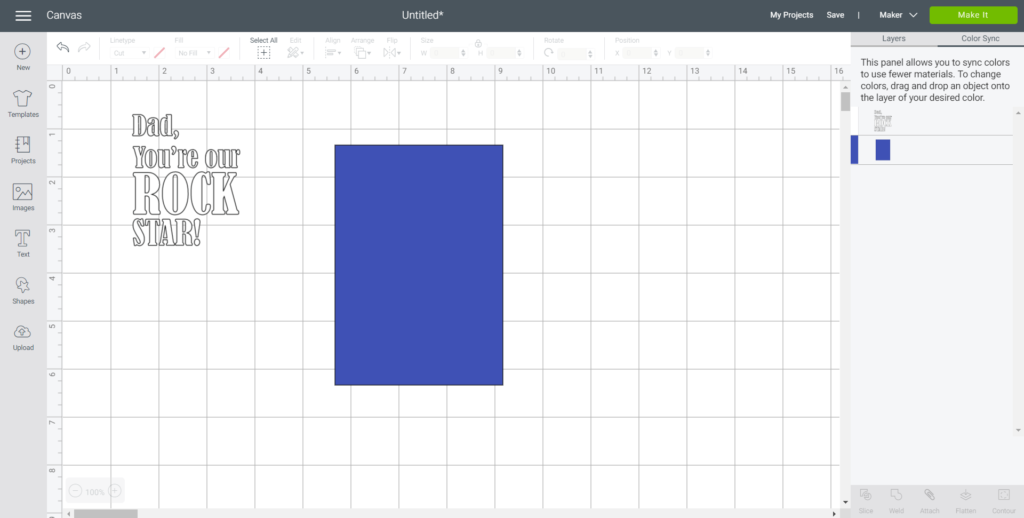
Use the color sync tab to assign colors to the images for different material types: Premium Vinyl and Cardstock (Deluxe Paper).

Cutting the Image
Select “Make It” in Design Space.

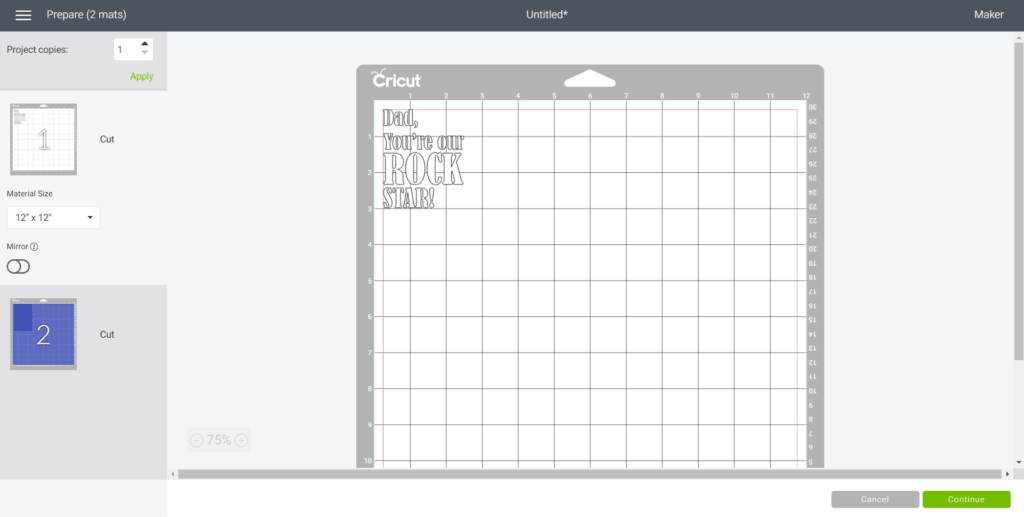
For the vinyl phrases, set the material type to Premium Vinyl. Follow prompts for loading the mat into the Cricut Maker or Cricut Joy and cutting the Premium Vinyl. When prompted, unload the mat from the cutting machine.

Remove the Premium Vinyl from the mat.
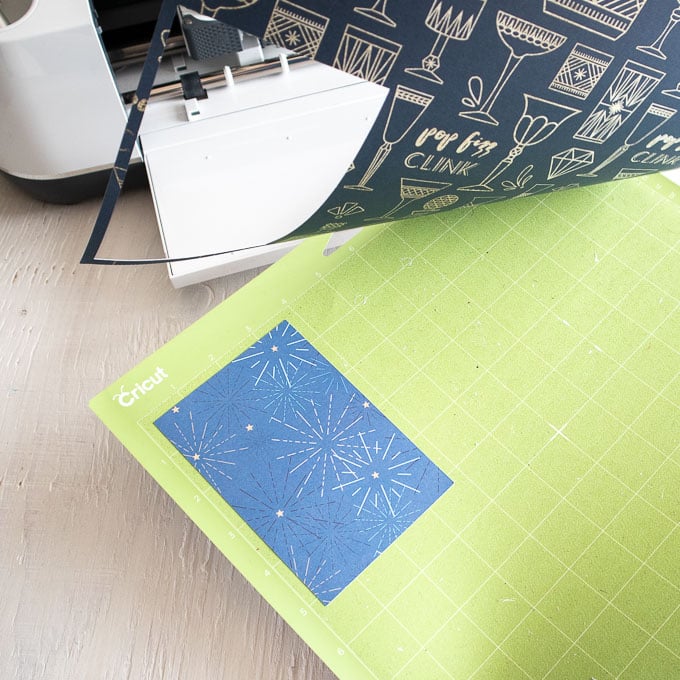

For the paper photo frame backing, set the material type to cardstock, medium weight. Follow prompts for loading the mat into the Cricut Maker or Cricut Joy and cutting the Deluxe Paper. When prompted, unload the mat from the cutting machine.
Remove the Deluxe Paper from the mat.
How to Assemble the Frame
Place the glass from the photo frame on a flat surface.
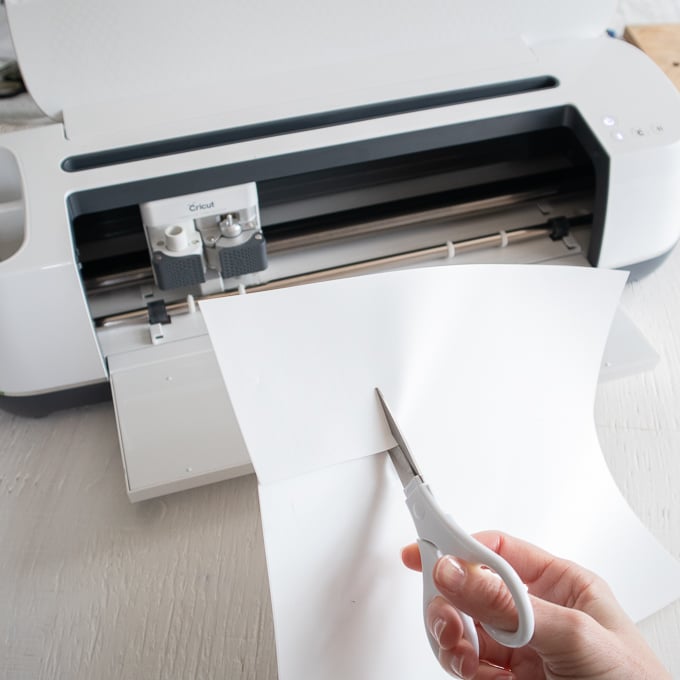
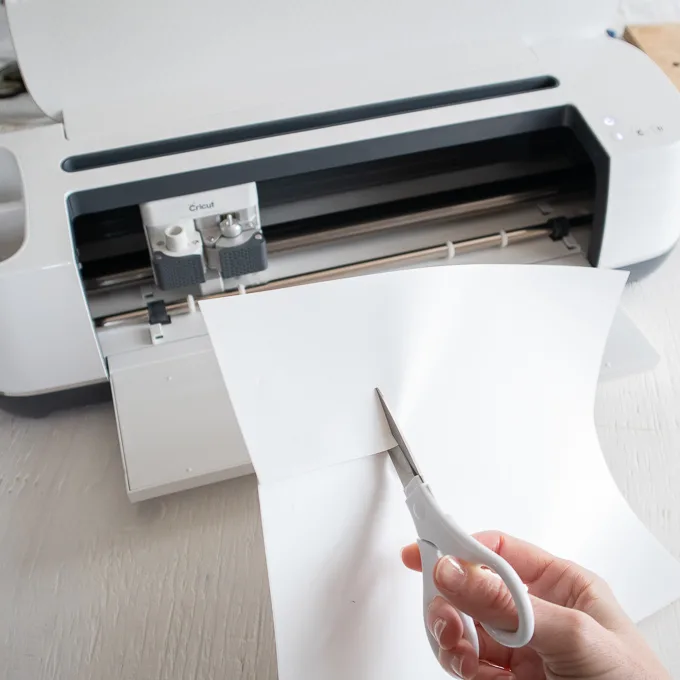
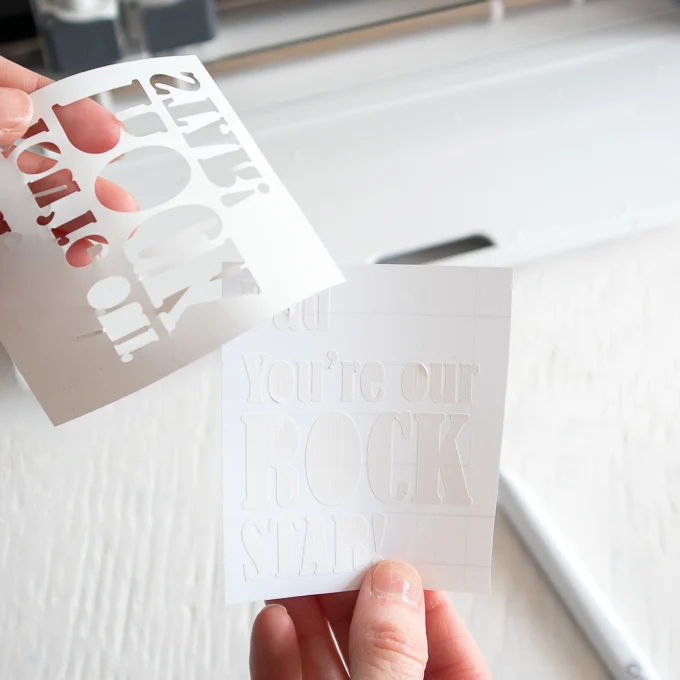
Cut around the vinyl cut phrase with a pair of scissors.
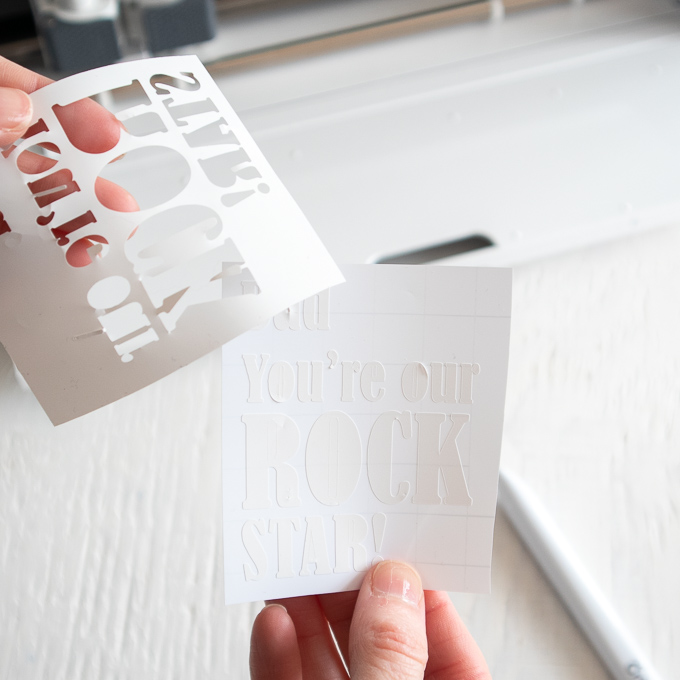
Using the weeding tool, peel away the excess vinyl around the cut phrase and discard.
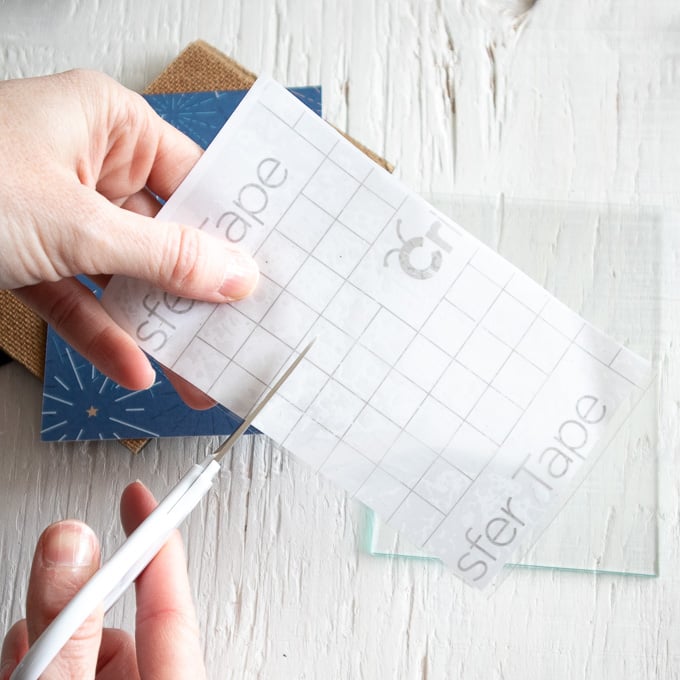
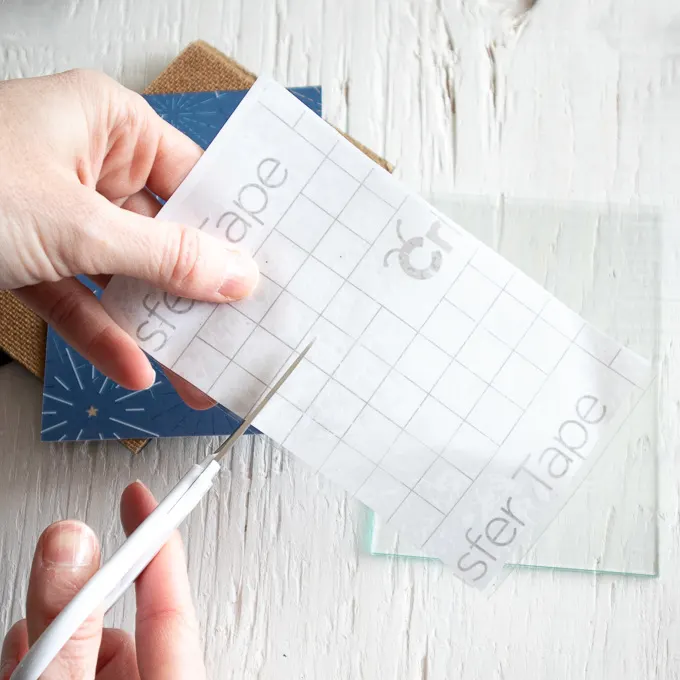
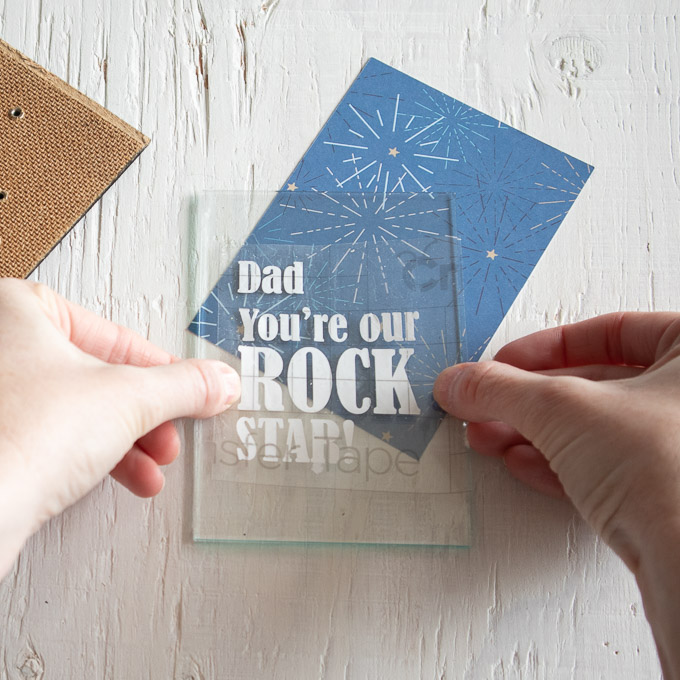
Cut a piece of transfer tape a bit larger than the size of the phrase.
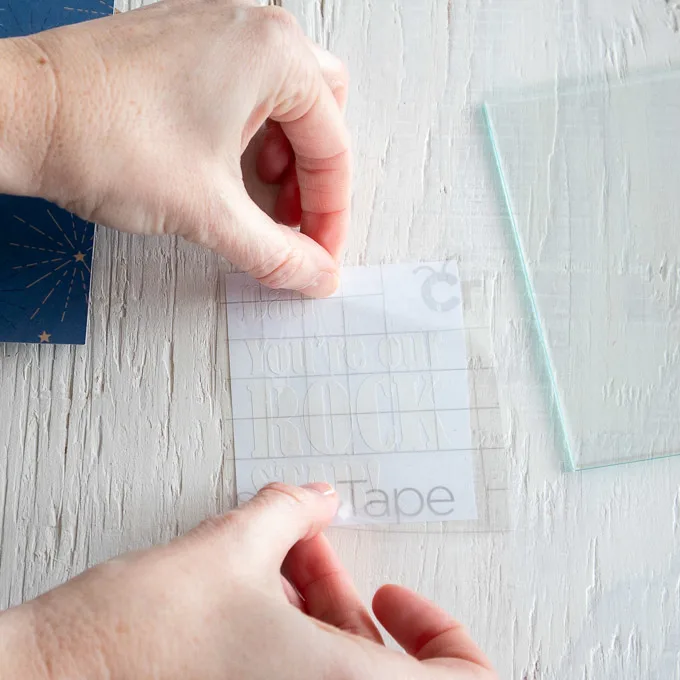
Peel away the transfer tape backing and place the transfer tape overtop of the cut phrase. Gently rub the vinyl to help it stick to the transfer tape.
Peel away the vinyl backing, leaving just the phrase adhered to the transfer tape.

Position the phrase with the transfer tape on to the glass and press in place.
Press the vinyl phrase down with your fingers or with the Cricut scraping tool to help it to stick to the glass surface.
Slowly and carefully remove the transfer tape leaving the vinyl phrase on the glass.

Place the glass back into the pebble picture frame.

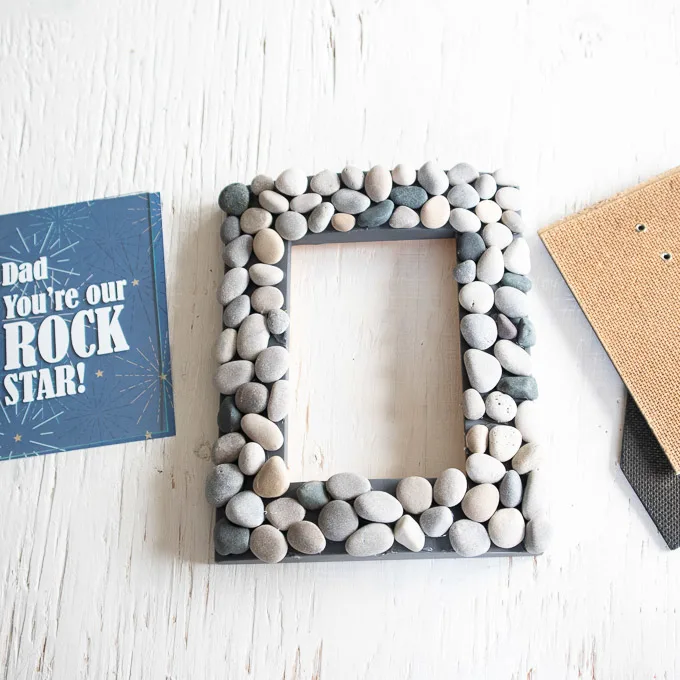
Place the blue cardstock paper mat into the frame against the glass. Reassemble the backing into the frame.

Do you think your dad would appreciate this gift? And which of the 5 phrases will you use?
For more rustic framed art ideas, check out this wood slice photo frame idea or this DIY framed pebble art.
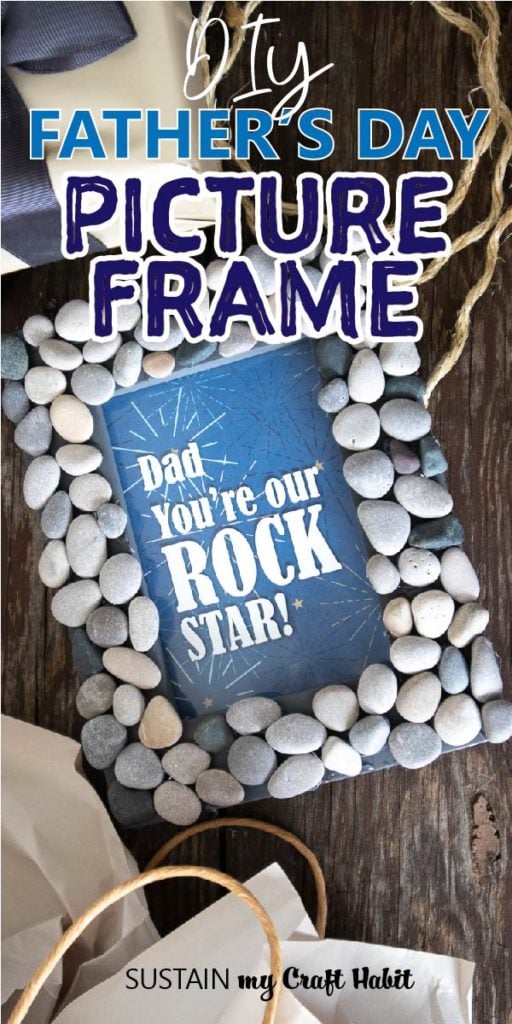
Like it? Pin it for later!


Cricut Rock’n Picture Frame for Father’s Day
Materials
- Photo frame grey or painted charcoal with chalky paint; 3” x 5” with wide wood frame
- Cricut Maker or Cricut Joy
- Standard grip mat
- Cricut Premium Vinyl Removable (Light Gray from Vibrant Value Pack)
- Cricut’s Hostess with the Mostess Winter Sparkle Deluxe Paper 1 sheet
- Cricut Transfer Tape
- Rock’n SVG cut file
- Small Pebbles
- Hot glue gun with clear craft glue
Instructions
- Disassemble the photo frame.
- Starting in one corner of the picture frame, apply a dab of hot glue. Working quickly and carefully, press one small pebble into the glue.
- Continue covering the surface of the frame with pebbles until finished.
- Uploading the SVG Pattern, upload Father’s Day Rock’n Phrases SVG File into Design Space.
- Adjust phrase size to fit inside the picture frame accordingly.
- Insert one square shape onto the Design Space canvas to create the photo frame backing. Size the square to match the size of the picture frame.
- Use the color sync tab to assign colors to the images for different material types: Premium Vinyl and Cardstock (Deluxe Paper).
- Select “Make It” in Design Space and follow the prompts on the screen to cut out the images.
- When done, remove the Premium Vinyl from the mat and then cut and remove the Deluxe Paper from the mat.
- To assemble the Frame, place the glass from the photo frame on a flat surface.
- Cut around the vinyl cut phrase with a pair of scissors. Using the weeding tool, peel away the excess vinyl around the cut phrase and discard.
- Cut a piece of transfer tape, peel away the transfer tape backing and place the transfer tape overtop of the cut phrase.
- Peel away the vinyl backing, leaving just the phrase adhered to the transfer tape and position the phrase with the transfer tape on to the glass and press in place.
- Press the vinyl phrase down and slowly and carefully remove the transfer tape leaving the vinyl phrase on the glass.
- Place the glass back into the pebble picture frame and place the blue cardstock paper mat into the frame against the glass. Reassemble the backing into the frame.