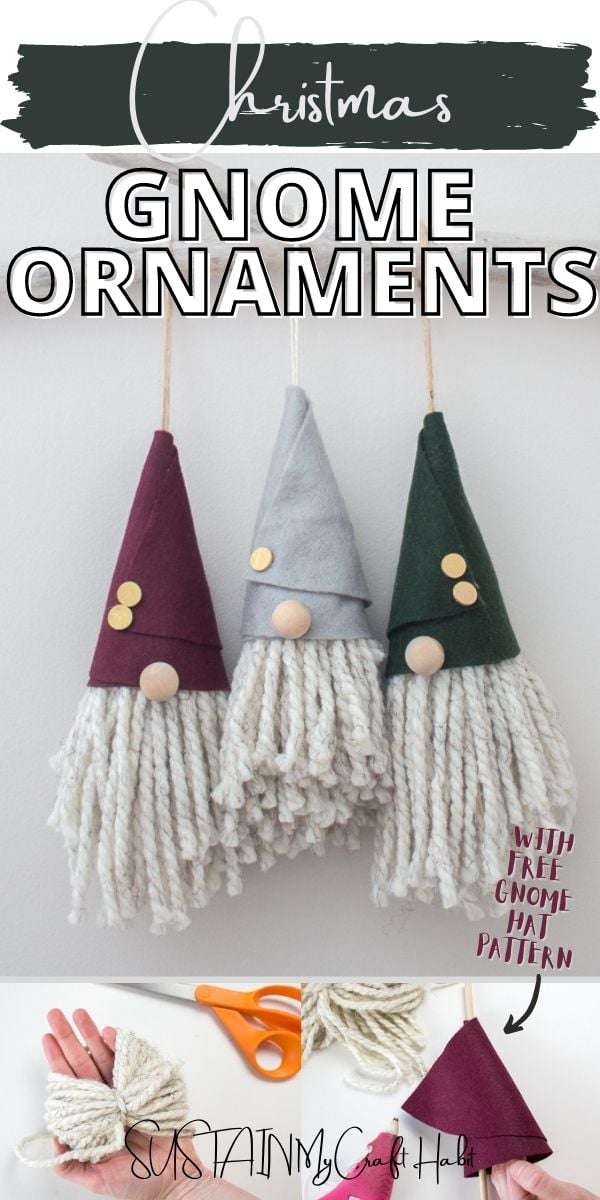
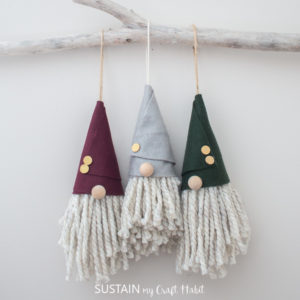
Easy DIY Gnome Christmas Ornaments
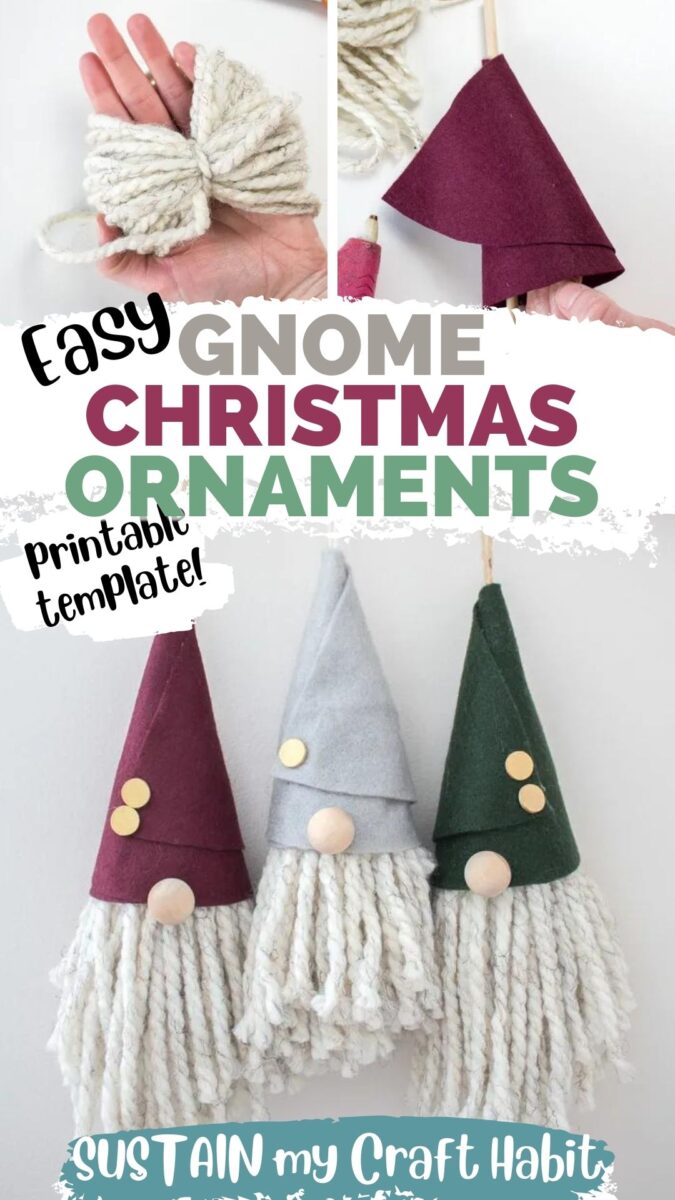
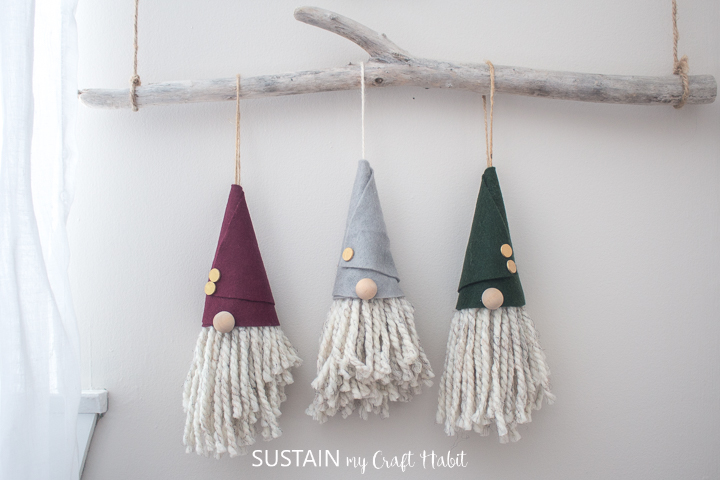
Well hello there cutie pies! Did you know you can make your own adorable DIY gnome Christmas ornaments in less than 30 minutes? This easy, no-sew Christmas craft is perfect for hanging on the tree, stringing together to make Christmas decor (like we have here) or to give as gifts for the holidays!
DIY Gnome Christmas Ornaments using Scrap Yarn
I was inspired to make a DIY version of those adorable Christmas gnomes after seeing so many images of gnomes online. You absolutely have to check out our friend Kippi’s easy DIY gnome tutorial to make a larger gnome, or this fun pine cone gnome ornament idea.
Although I didn’t have any faux fur in my craft stash (which is typically what they are made with), I didn’t let that stop me! Looking through my supplies, I decided all my leftover scrap yarn has got to be good for something.
I started off by making the pom pom but left all the hanging ends longer as a gnome beard would naturally be! I recently also made some DIY tassels with my old yarn…it feels so good to use what you already have! And the rest of our adorable gnome ornaments came together fairly quickly after I picked out some soft felt, twine and wood beads to use (also all in my supply stash).
If you’re also on the gnome-crafting wagon, we have this DIY gnome wine bottle bag you could make this year as well.

Materials Needed to Make DIY Gnome Ornaments:
Disclosure: This post contains affiliate links for your shopping convenience. Should you choose to purchase through them, we will make a small commission at no extra cost to you. You can read our full disclosure policy here.
- Wool-Ease Thick & Quick Yarn by Lion Brand, Wheat
- Felt Sheet in color of your choosing (we used maroon, forest green and grey)
- Fabric Scissors
- Twine, 3mm
- Wood bead or ball, solid unfinished, ¾” diameter
- X2 wood circles, (size ¼” diameter)
- Printable Gnome Hat pattern
- Hot glue gun with clear glue sticks
- DecoArt Extreme Sheen in 24K Gold
- Fine tip paintbrush

How to Make Christmas Gnome Ornaments:
Making the Pom-Pom with Scrap Yarn
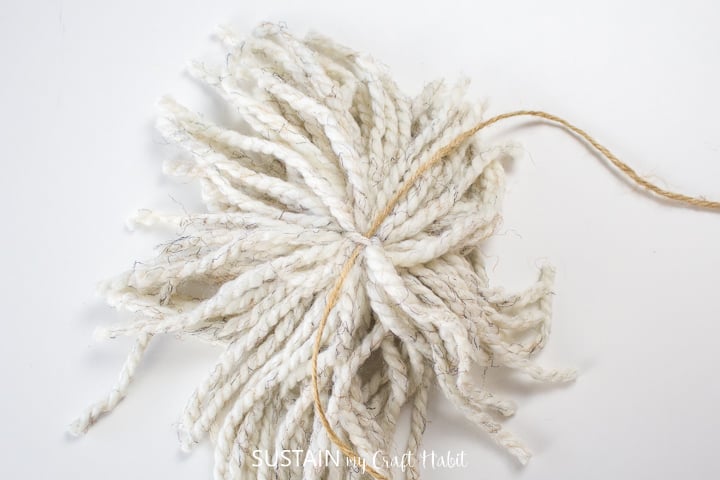
We’re going to start by making a large pompom to form the beard. Take one end of the yarn and begin wrapping it loosely around the palm of your hand, approximately 50 times.


Cut a 5” long strand and secure that around the wrapped yarn, removing your hand.

Tie the strand into a tight knot around the wrapped yarn.
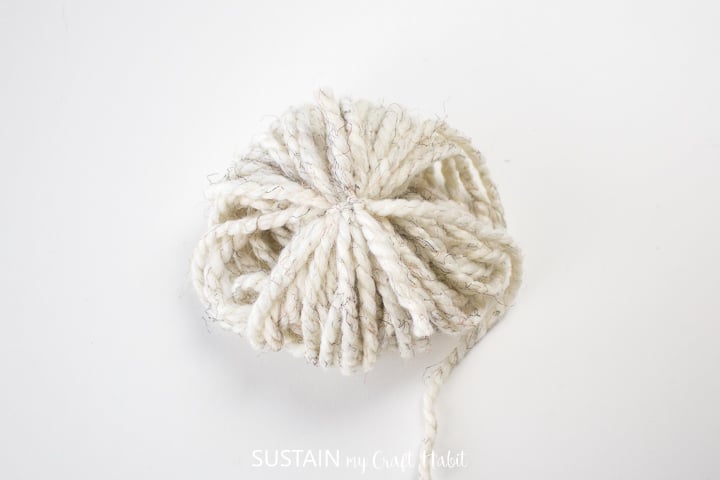
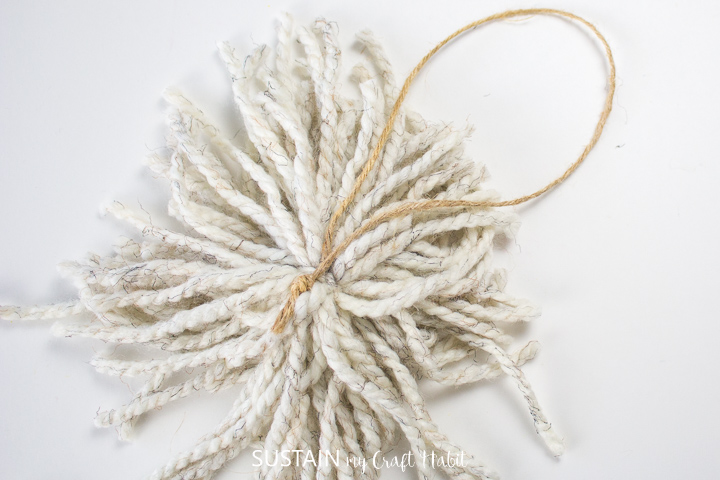
Cut the yarn loops to form pom-pom. Put pom-pom aside for the time being.

Preparing the Gnome Hat and Other Accessories
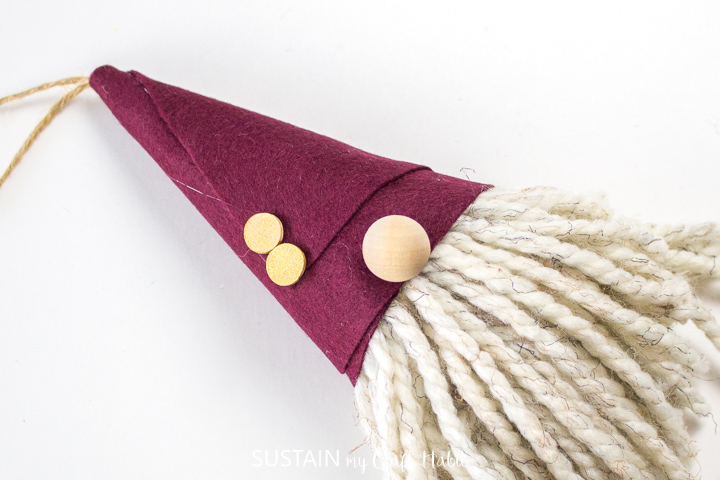
If you don’t have buttons, you can look around the house and use whatever other similar items you have! In my case, I happened to have loads of plain small wooden discs (why, I have no idea!) but I decided to use them instead. I gave them a coat of metallic gold paint first.

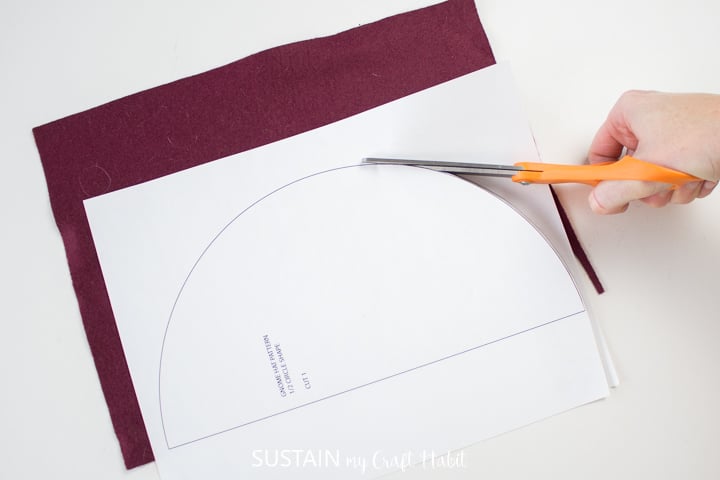
Next, print out the gnome ornament pattern and place the pattern on top of the felt sheet in any color of your choosing. Cut along the solid line.
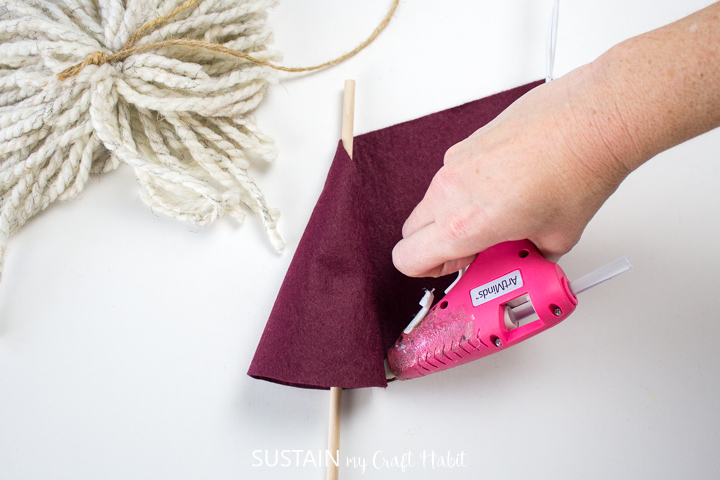
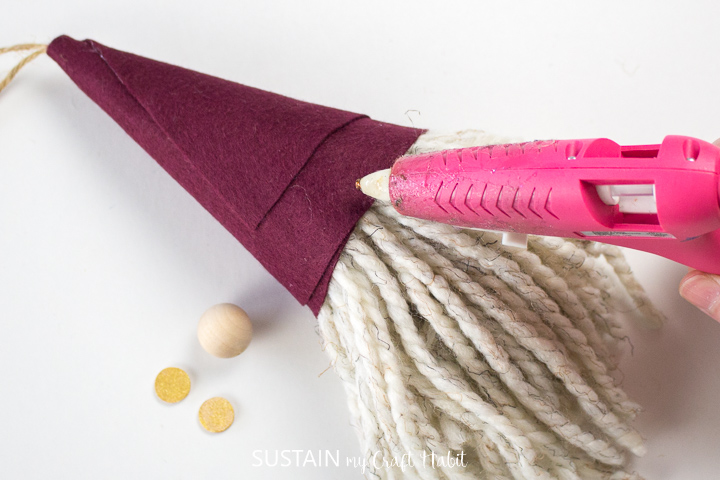
Wrap the felt into a cone-shaped gnome hat using a wooden dowel (or pencil) to help wrap the felt around leaving a small opening at the cone tip.
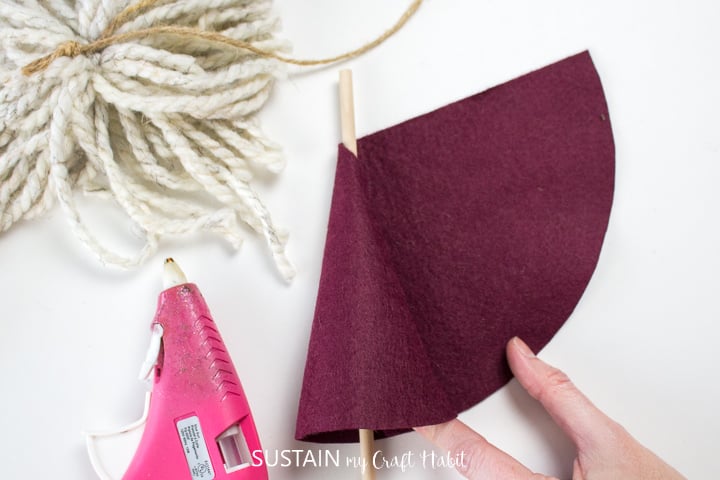
Glue the overlapping edges of the felt cone-shaped hat to hold in place.


Cut a piece of twine 20” long and fold in half.

Tie the cut ends of the twine around the pom-pom.
Thread the looped end of the twine through the hole at the top of the hat.
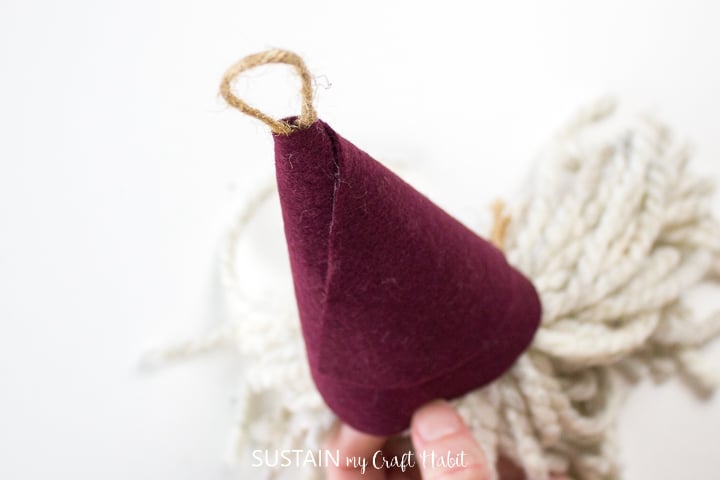
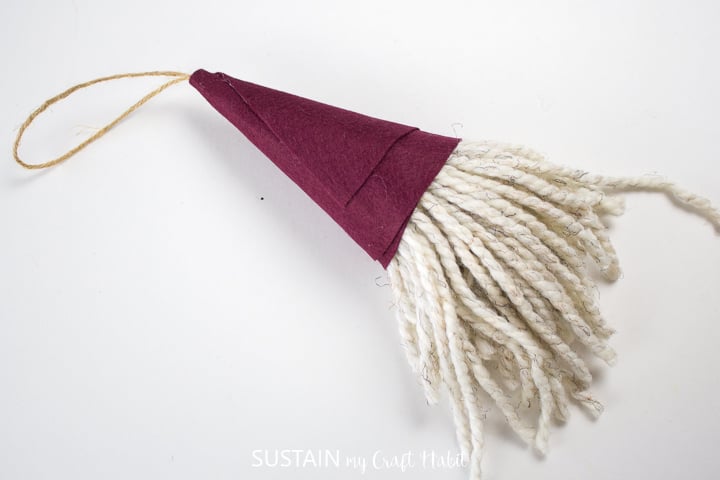
Pull on the twine loop to force the hat on top of the pom-pom.
Finishing the Gnome Ornaments
Glue one wood ball to the bottom edge of the hat and then glue the two painted wood circles (or buttons) onto the front of the hat as shown.
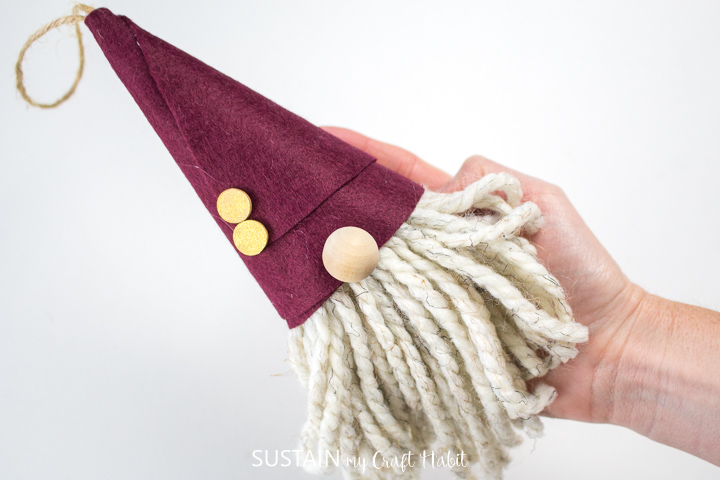
Trim any really long and uneven yarn ends, while keeping the yarn in the center front the longest to mimic the gnome beard.
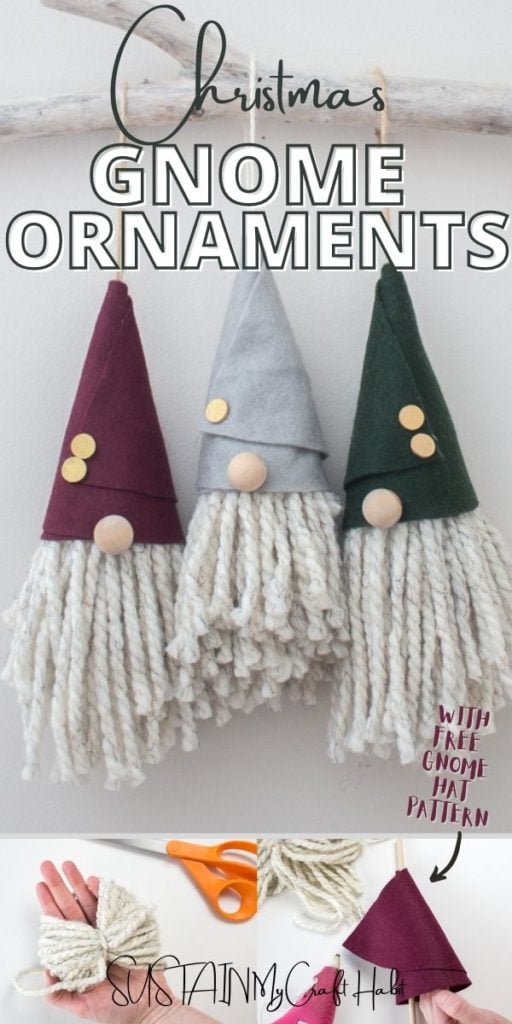
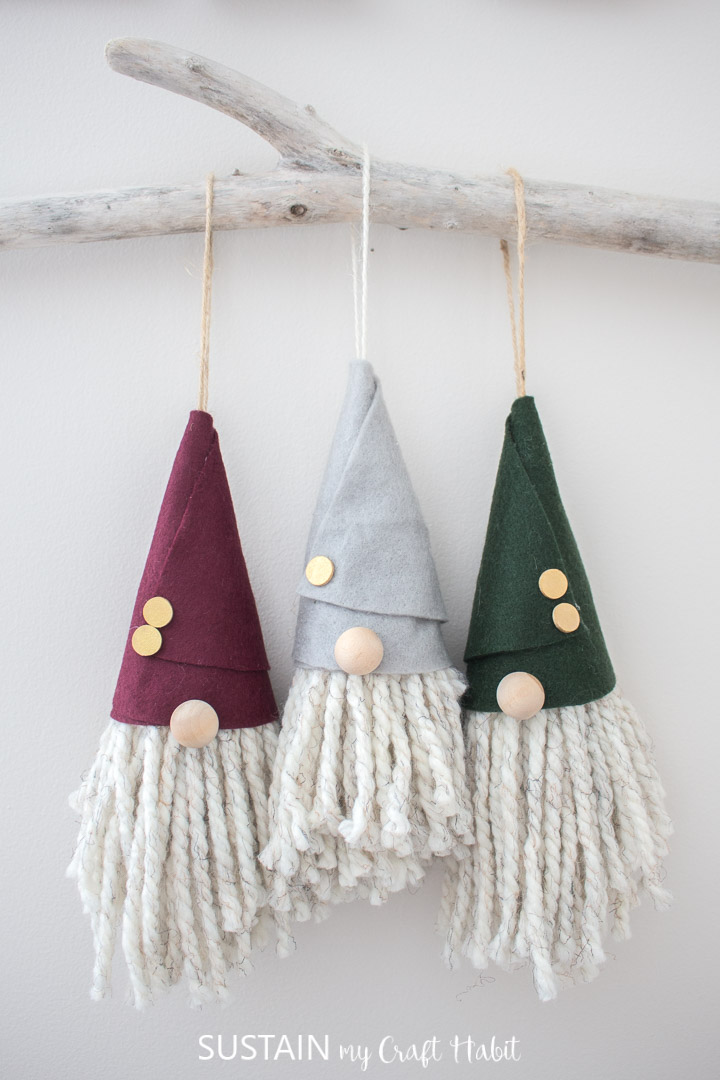
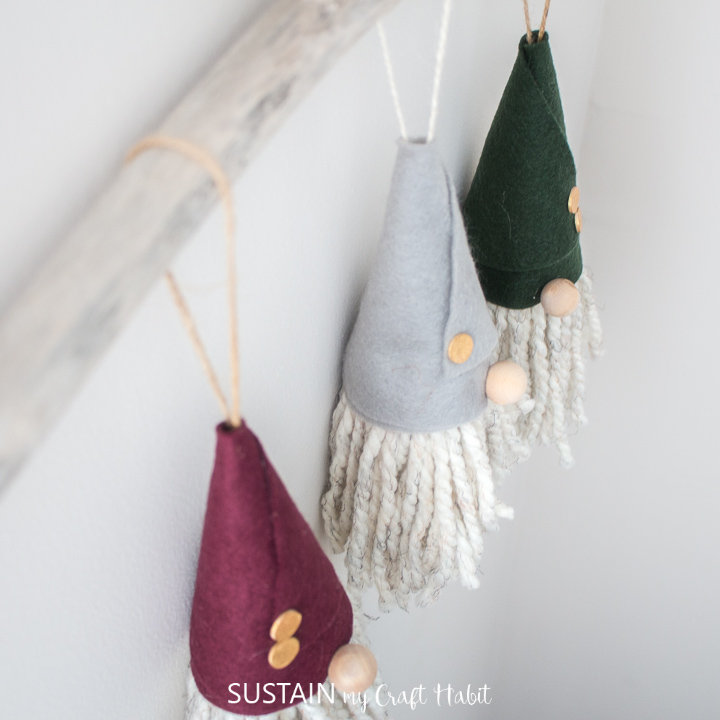
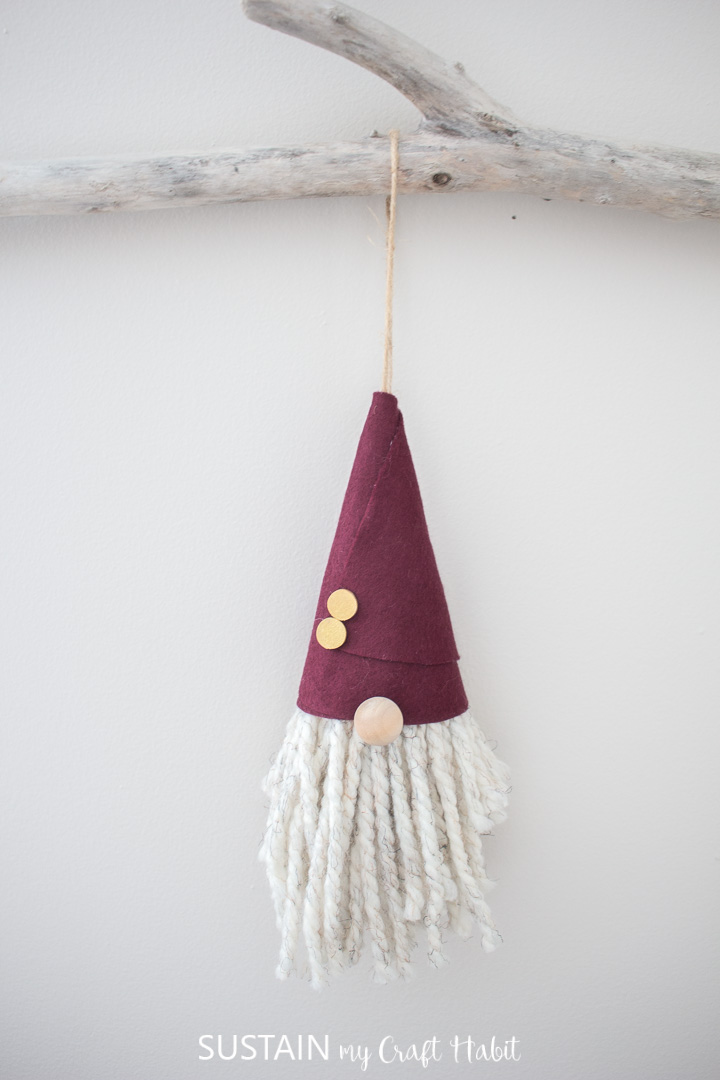
There you go! You’ve made a delightful ornament inspired by those whimsical garden gnomes that’ll surely become treasured pieces of holiday decor.
I bet you won’t be able to stop at just one cute gnome Christmas ornament! These holiday gnomes are easy to craft and would be great gifts or perfect for a Christmas gift exchange. I’ll be creating sets to give as gifts to my sister and friends. Who doesn’t love an adorable little gnome? 🙂
For now, I have my friendly gnomes hanging on a piece of driftwood as wall decor, but I’m excited to see them hanging in my Christmas tree too!
Looking for More DIY Christmas Ornaments?
Christmas is the best time for crafting, check out these fun holiday craft ideas:
- Light bulb Santa Claus ornament
- Retro-inspired 3D felt ornaments
- Canvas Christmas ornaments
- Glittering glass ornaments
- Coastal Christmas ornaments
- Christmas ornament painted rocks


Like it? Pin it for later!
DIY Gnome Christmas Ornaments
Materials
- Lion Brand Wool-Ease Thick & Quick Yarn Wheat
- Felt Sheet in color of your choosing maroon, forest green and grey
- Fabric Scissors
- Twine 3mm
- Wood ball solid unfinished, ¾” diameter
- 2 X Wood circles (size ¼” diameter)
- Printable Gnome Hat pattern
- Hot glue gun with clear glue sticks
- DecoArt Extreme Sheen in 24K Gold
- Paintbrush fine tip
Instructions
- Take one end of the yarn and begin wrapping it loosely around the palm of your hand, approximately 50 times.
- Cut a 5” long strand and secure that around the wrapped yarn, removing your hand.
- Tie the strand into a tight knot around the wrapped yarn.
- Cut the yarn loops to form pom-pom.
- Paint the surface of the wood circles in gold paint.
- Print out the gnome hat pattern. Place the pattern on top of the felt sheet and cut along the solid line.
- Wrap the felt into a cone-shaped gnome hat using a wooden dowel (or pencil) to help wrap the felt around leaving a small opening at the cone tip.
- Glue the overlapping edges of the felt cone-shaped hat to hold in place.
- Cut a piece of twine 20” long and fold in half.
- Tie the cut ends of the twine around the pom-pom.
- Thread the looped end of the twine through the hole at the top of the hat.
- Pull on the twine loop to force the hat on top of the pom-pom.
- Glue one wood ball to the bottom edge of the hat. Glue two painted wood circles onto the front of the hat.
- Trim any really long and uneven yarn ends.


Thank you
easy to make looking forward to doing more
Thank you! So happy to hear that!
Super cute and can’t wait to make a bunch… Just letting you know your link is for 4×4 felt sheets and they are too small for the pattern… may want to fix the link! Getting crafty tonight!
Hi Disa,
Thank you so much! You’ve put a smile on our faces thinking about all the craftiness about to happen!
I’ll take a look at the link – trully appreciate the head’s up.
Jane
Thought this looked cute, but the link to the felt sheets is for 4×4 squares (which are way too small for the template). FYI
In looking at your hat pattern it looks rather big for a tree ornament, so I’m going to try to size it down.
So darn cute! Pinned; 🙂
Would love it if you shared this at the Friday with Friends link party.
Merry Christmas
Rachelle
I would like to make these. I am having a problem finding the wood circles, (size ¼” diameter)
Where can I find them?
Hi Karlene. I think we got ours at Michaels. They were an assorted pack of small wood circles similar to these on Amazon (affiliate link): https://amzn.to/31Qqz4a . But you could also use small gold buttons instead similar to these (affiliate link): https://amzn.to/31Qg7cY . Hope that helps! -Jane
@Jane and Sonja,
yes it does. thank you very much
What is the finished size of this gnome, using the pattern/info as printed? Just looking at size of the hat pattern, it looks like it would be very big for an ornament. To make it smaller, would you just wrap the yard fewer times and scale down the hat pattern?
sooooooo cute! definitely making for xmas gifting next year!