DIY Elegant Poured-Resin Christmas Ornaments

If you’d like to make a truly one-of-a-kind gift for a friend, co-worker or loved one, we have the DIY idea for you! These poured-resin Christmas ornaments are sure to delight and are easier to make than you’d think!
DIY Christmas Ornaments That Shine
Christmas is coming quickly and, yes, we are still making gifts! Luckily there’s still a couple of weeks to create something beautiful for those special people on your gift list.
Luckily there are an endless number of resin craft ideas which you can make as gifts that anyone will be happy to receive. Resin projects take a bit of extra effort, but it’s well worth it because you’ll create professional looking pieces in no time.
EnvirotexLite resin is our go-to for all of our resin projects. It’s really easy to work with and produces flawless, dependable results. Somehow the projects always turn out better than we imagine they will, even when we’re simply experimenting. Here are just a few gift ideas you could make with one 16oz kit of EnvirotexLite Pour-On:

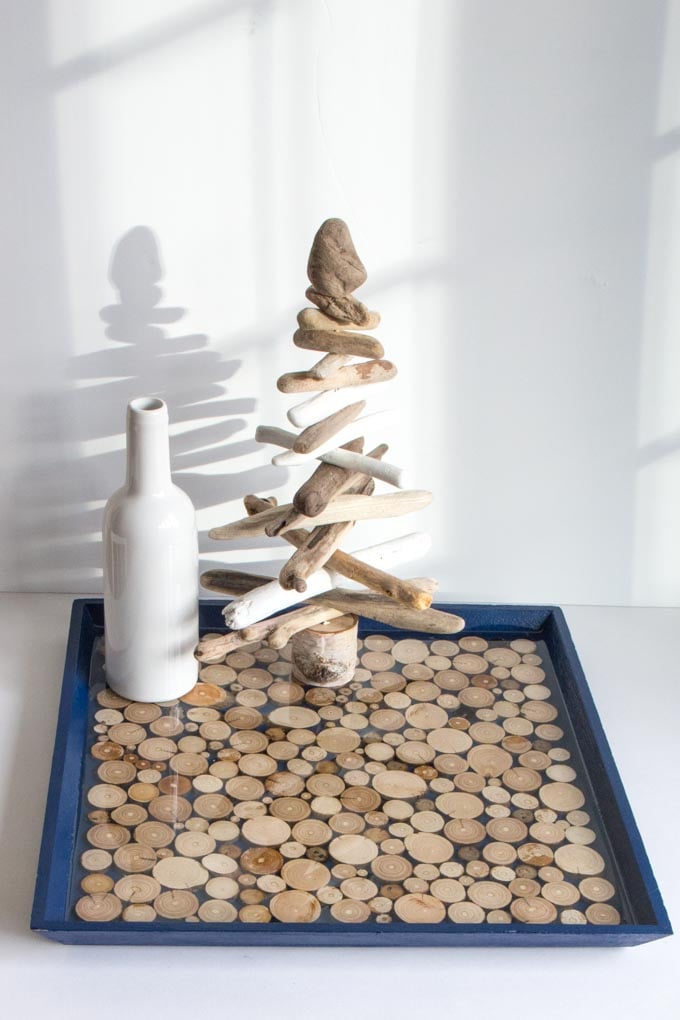
Resin Pour Memento Box

Also, be sure to visit the Resin Crafts Blog for hundreds of additional resin craft ideas.
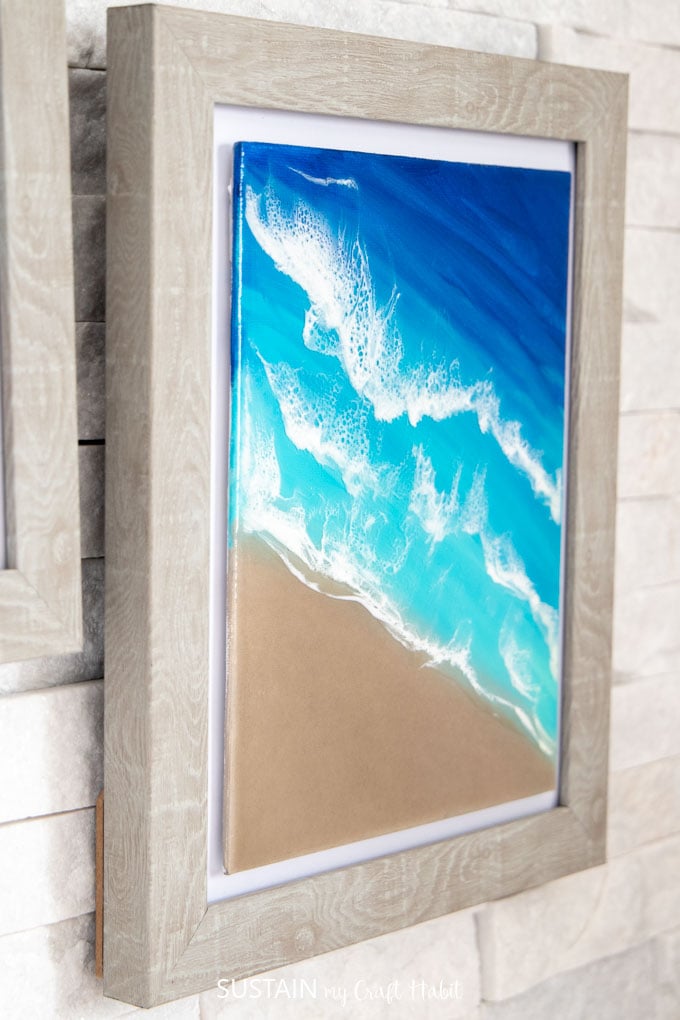
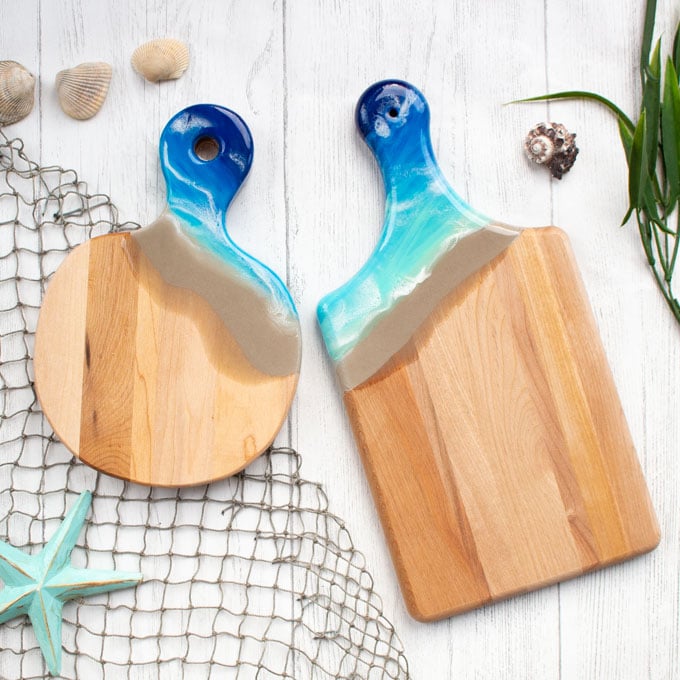
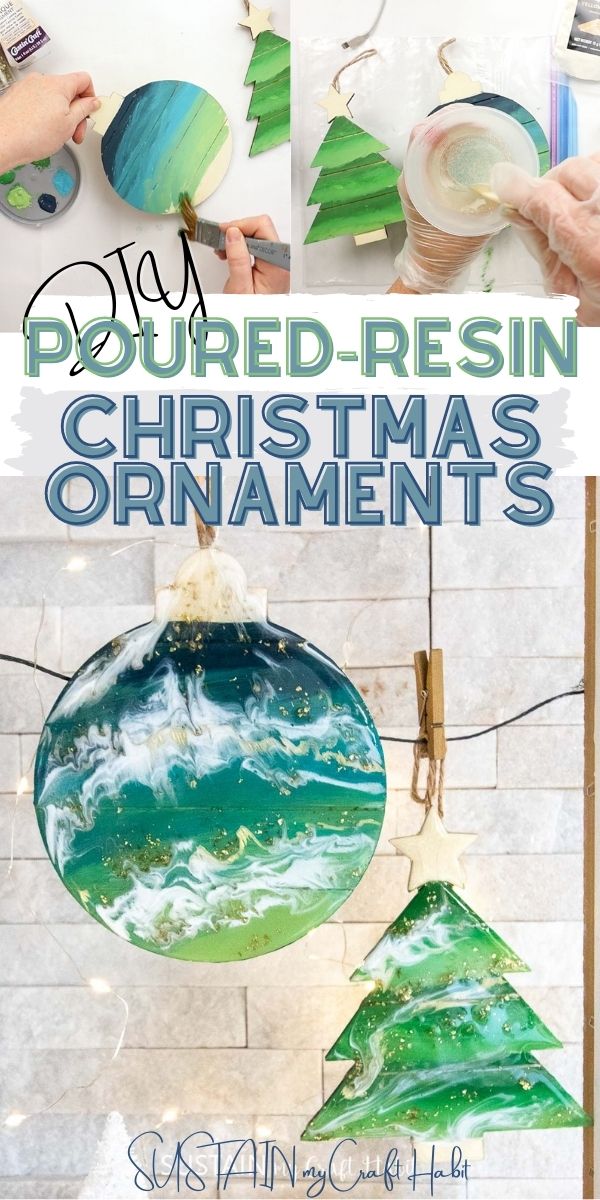
Ever since we made this beautiful seascape-themed cutting boards with resin I’ve been wanting to try the technique again.
So when we came across some wooden ornaments at my local craft store, we were keen to try it again, with a more holiday-themed color palette.
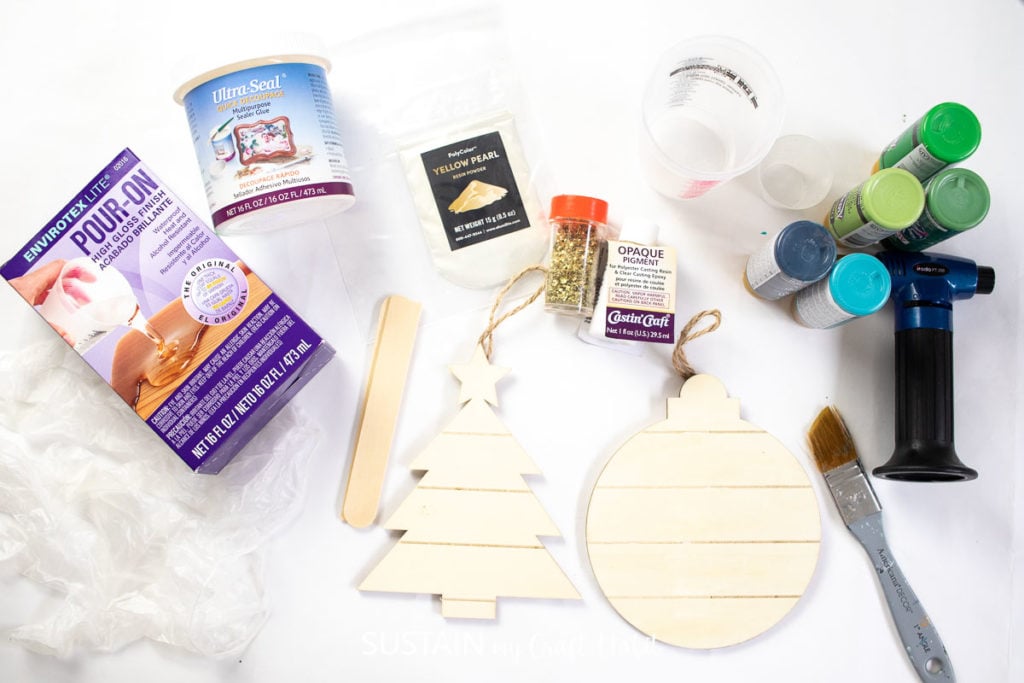
Supplies Needed for this Resin Crafts Projects
- Wood ornament cut outs
- Ultra Seal Multi-Purpose Sealer / Glue (or any clear drying craft glue)
- Decoart Americana Acrylic Paints, Leaf Green, Foliage,
- Paint brush
- EnviroTex Lite Pour-On Resin
- Castin’ Craft Opaque Pigment in White
- Yellow Pearl Pigment
- Gold glitter flakes
- Large and small plastic measuring cups
- Gloves, wooden craft sticks, toothpicks, paper towels, small paint brush
- Blow dryer and small kitchen torch
How to Make Poured-Resin Christmas Ornaments
Read all package instructions. Always use gloves and work in a well-ventilated area on a surface protected with plastic or newspaper.
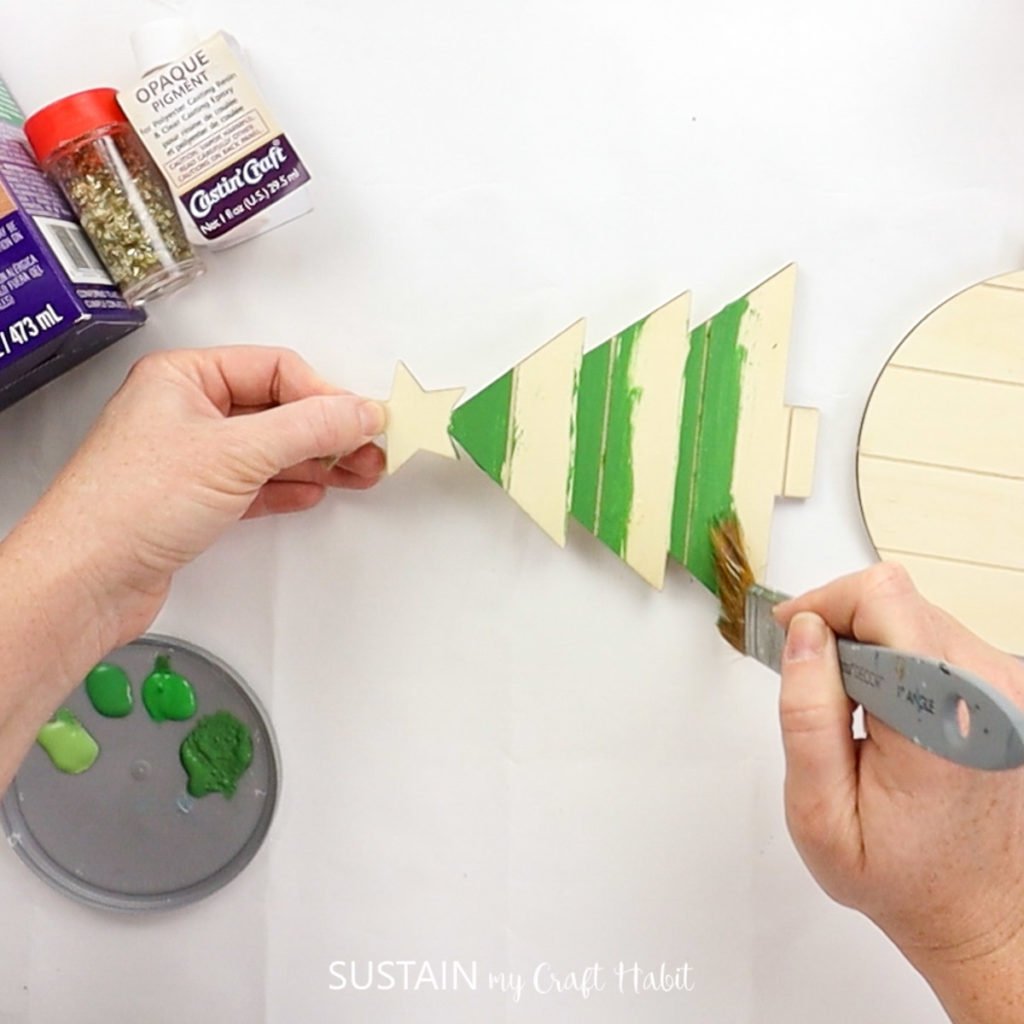
Preparing the Wooden Ornaments
Start by sealing the wood ornaments with a clear-drying sealer. Let dry completely.

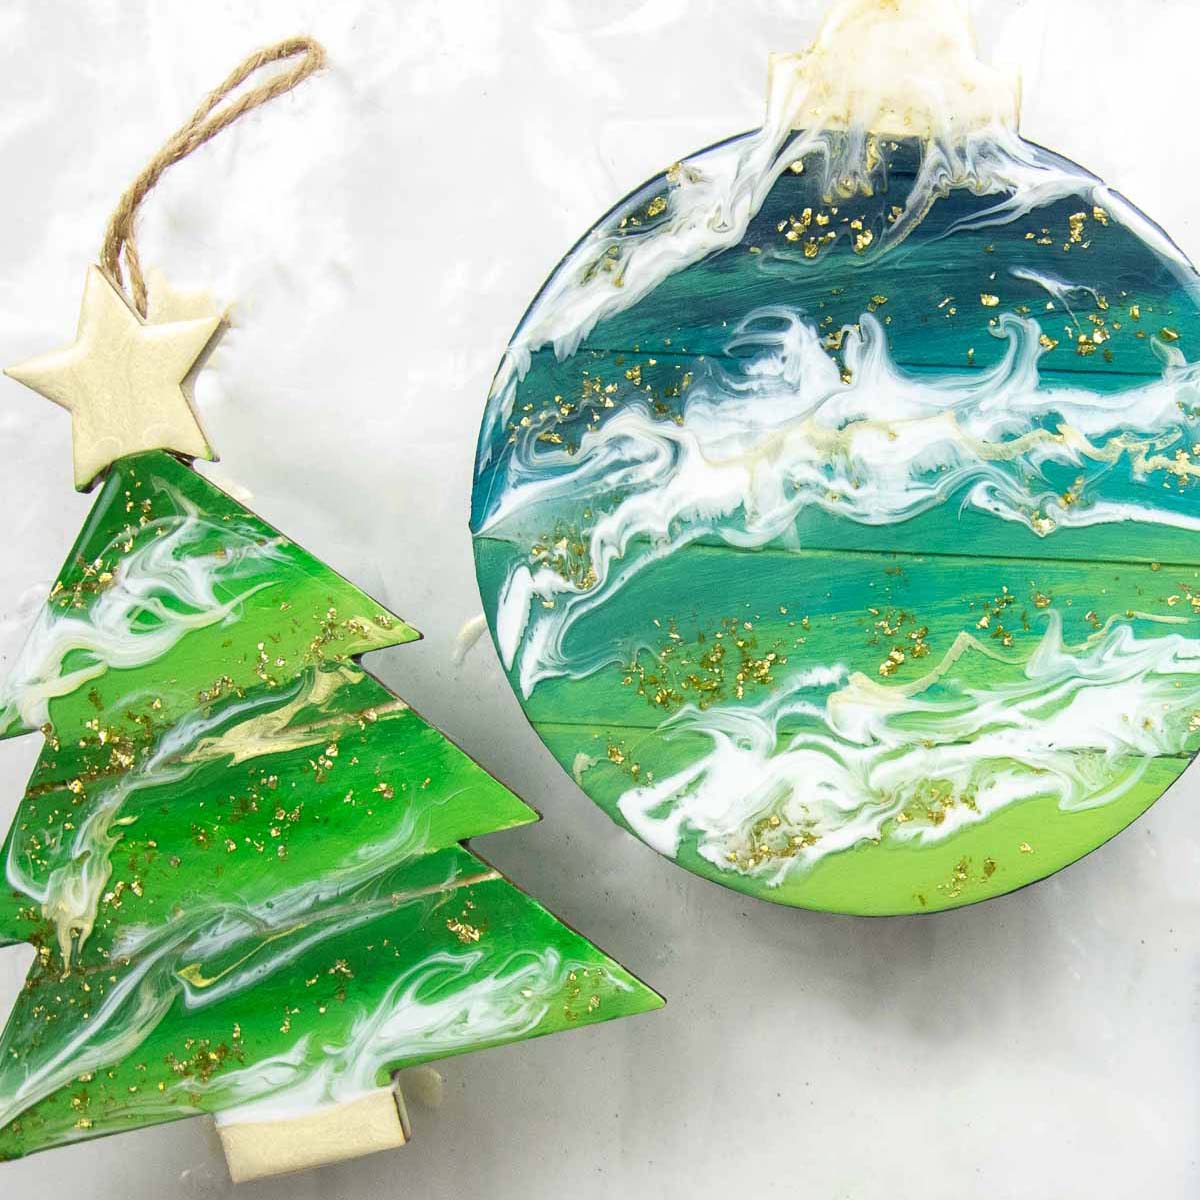
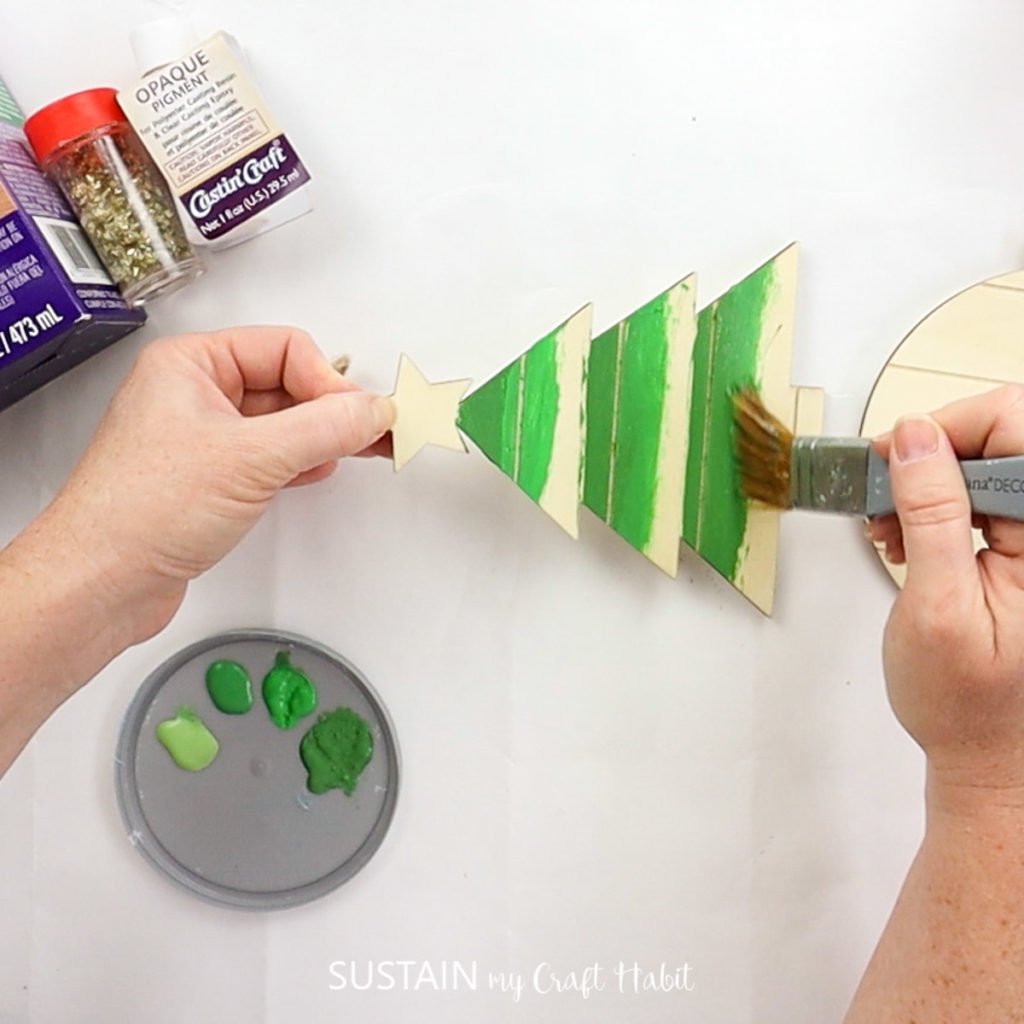
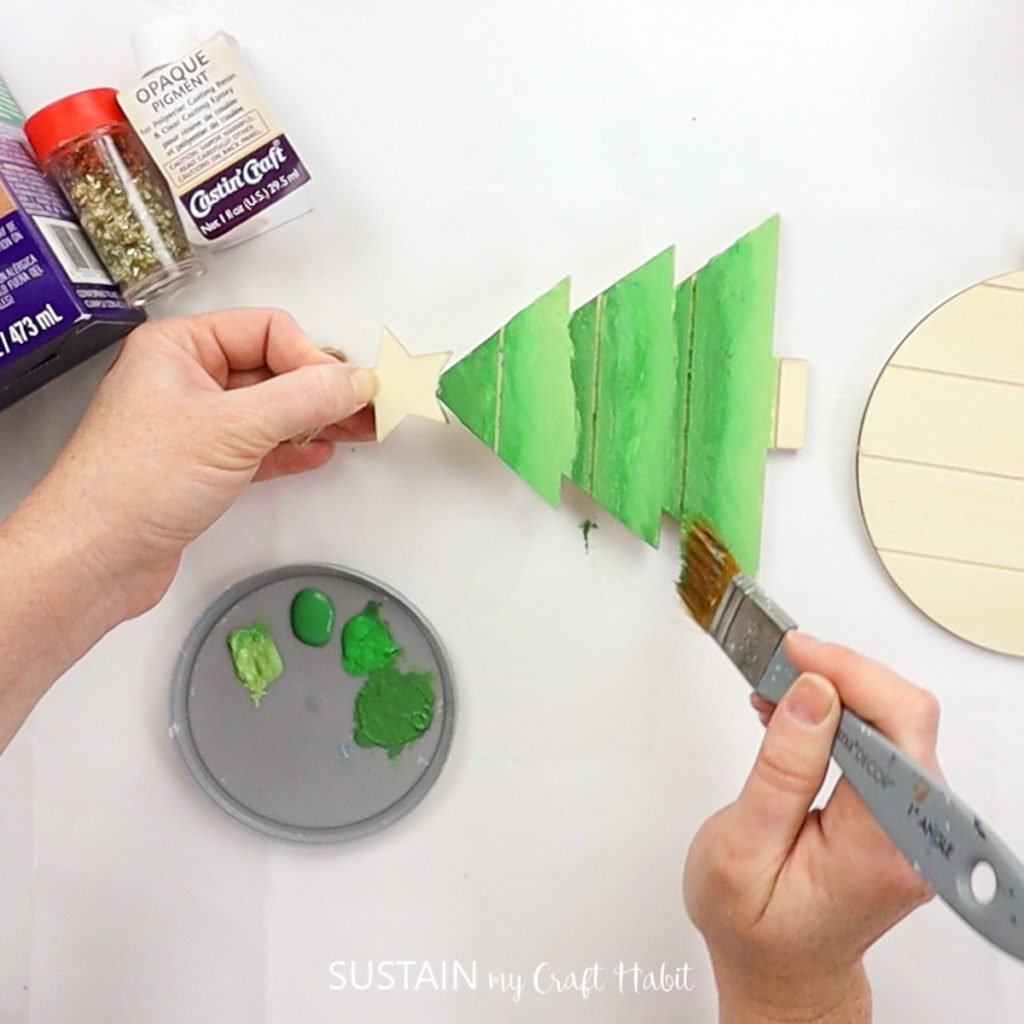
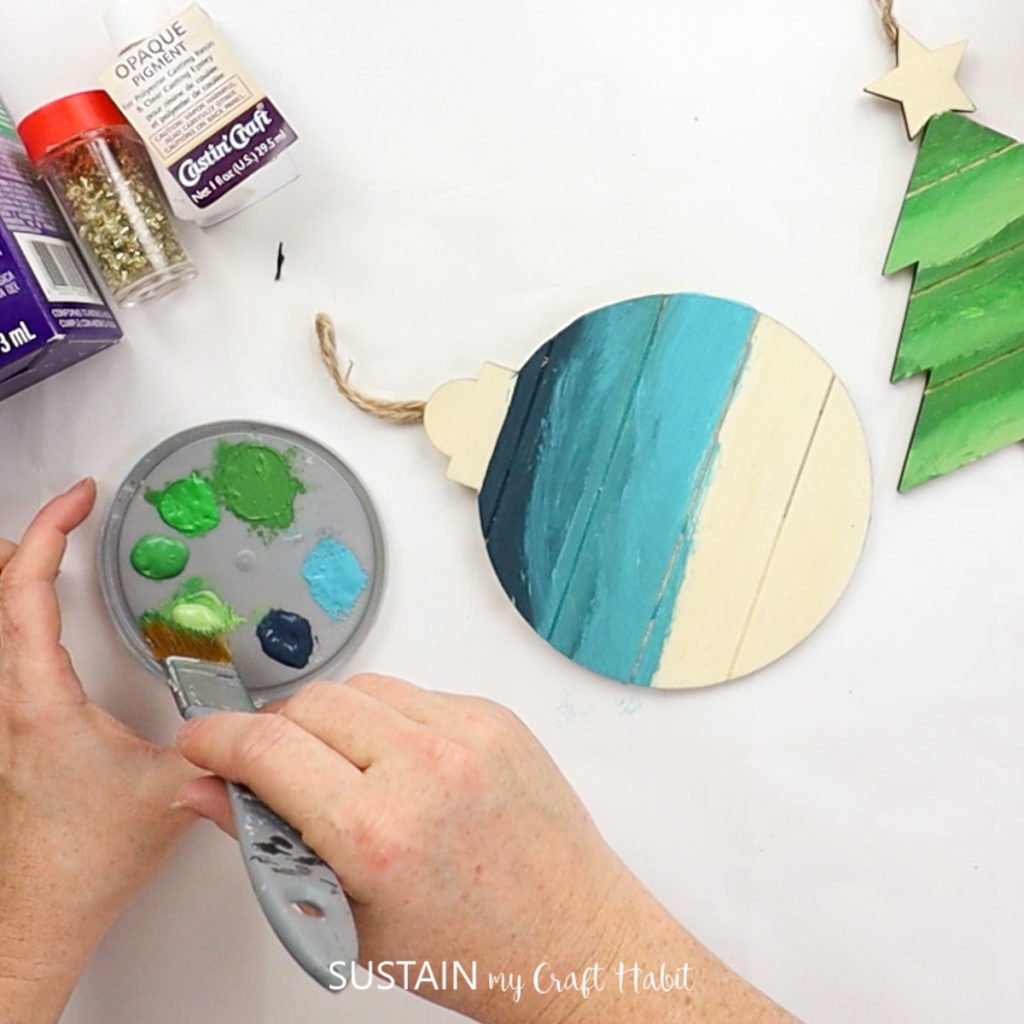
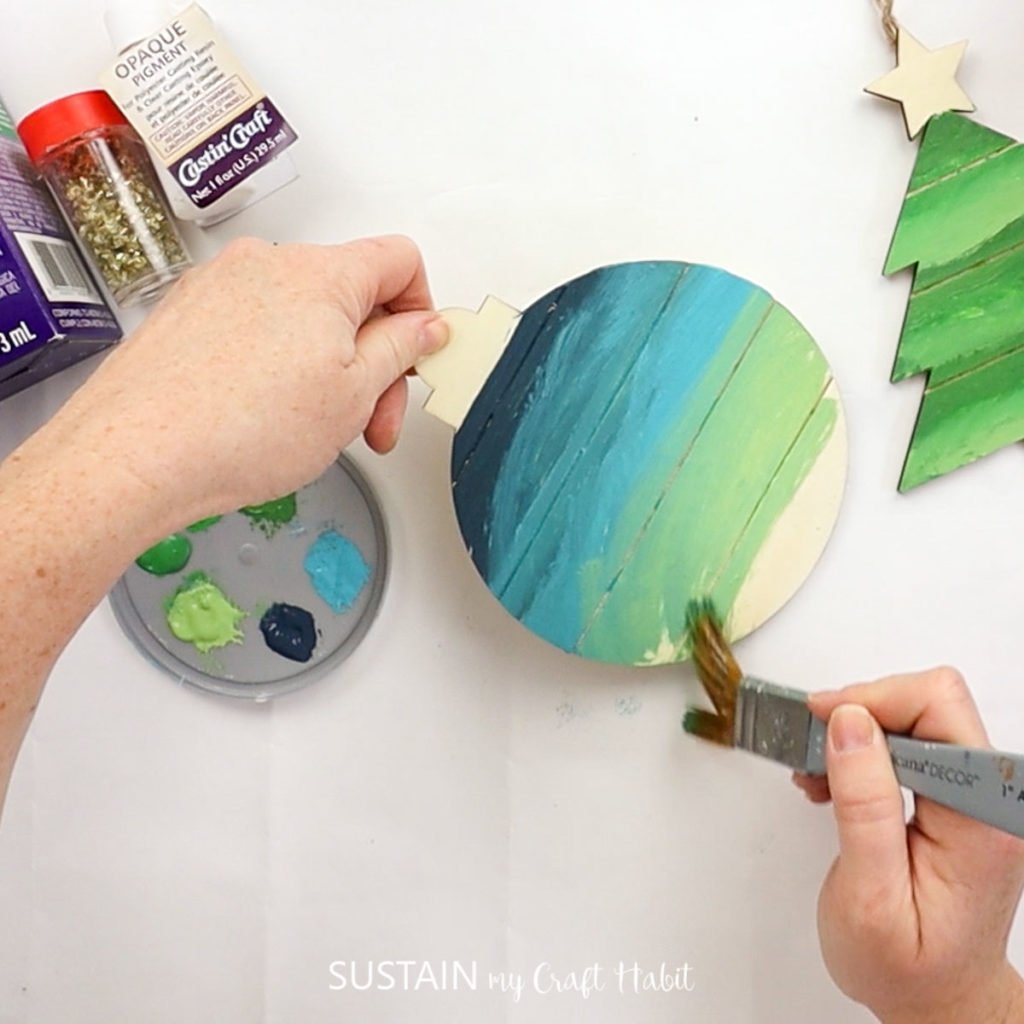
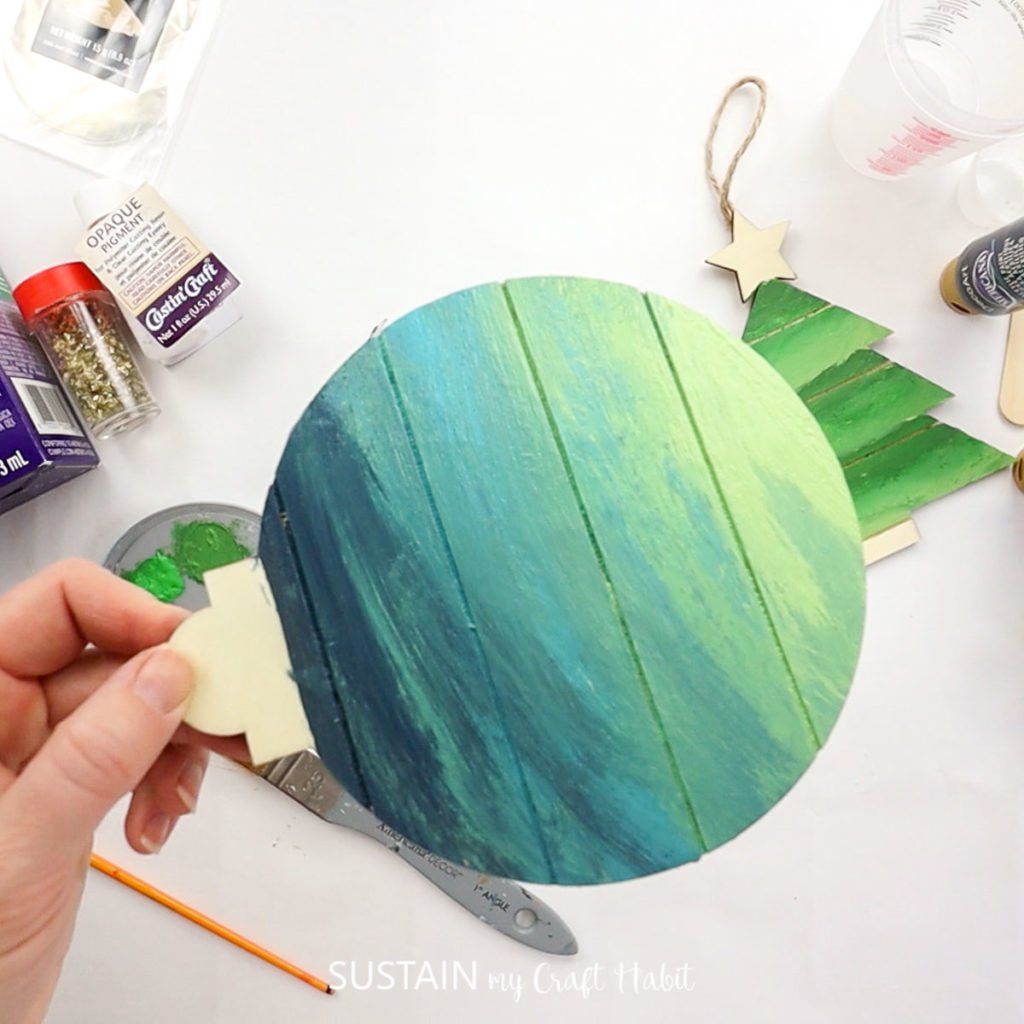
Use three shades of green to paint the tree ornament. Start with the darkest green. Blend in the medium green and finally the light green. Let dry completely.
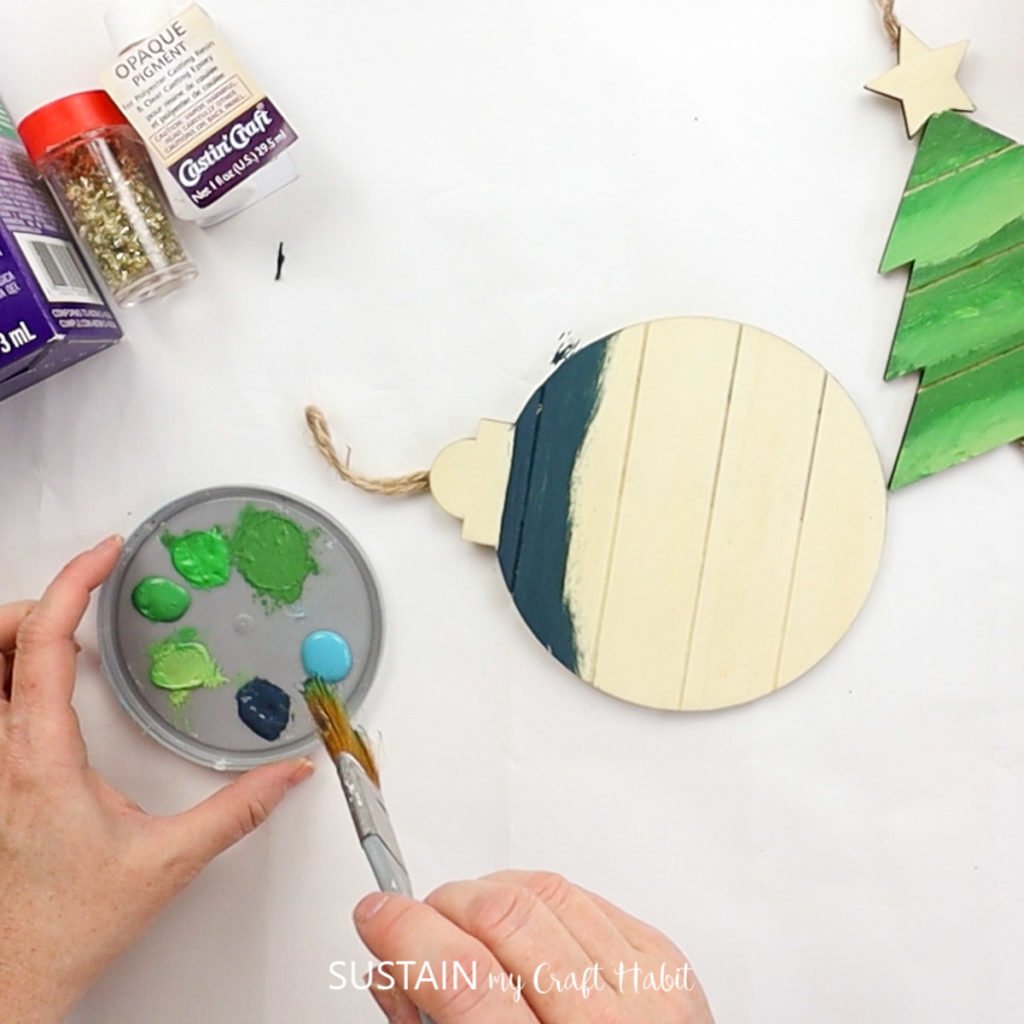
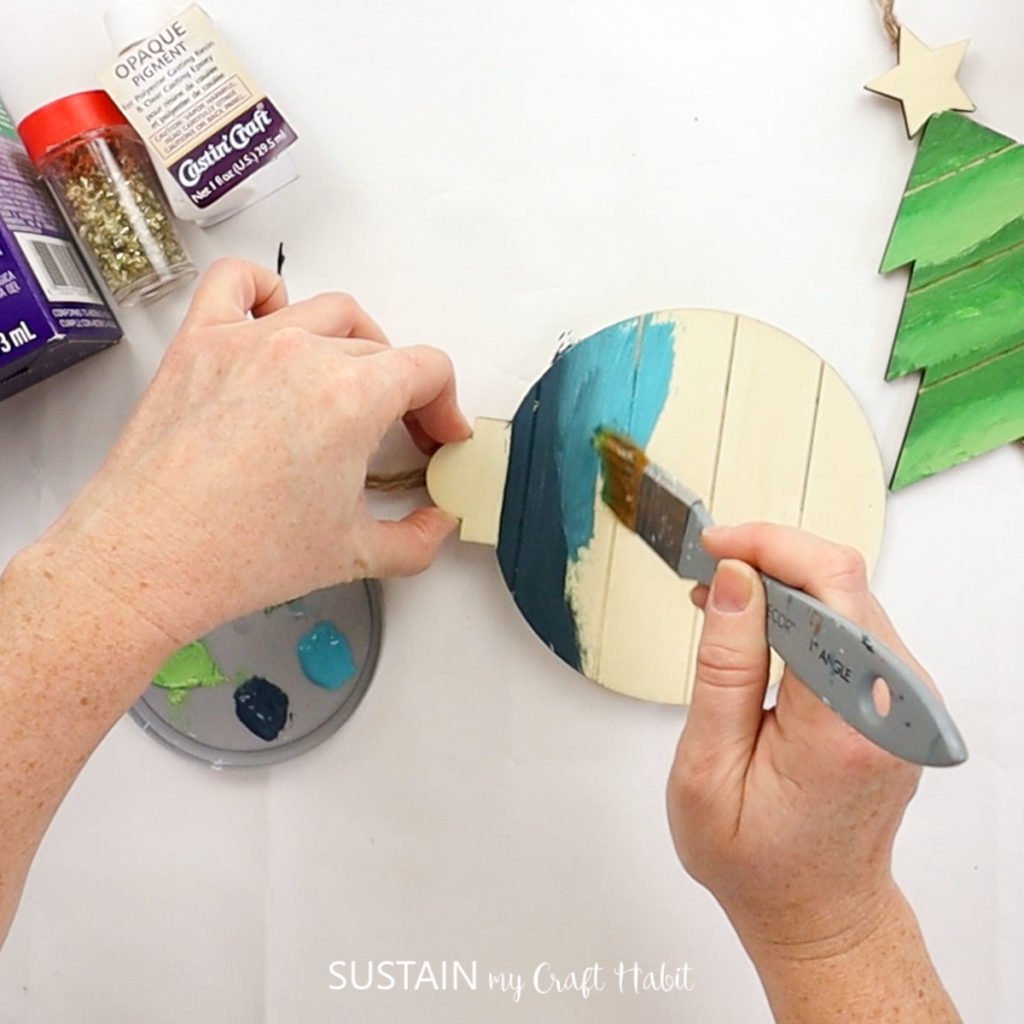
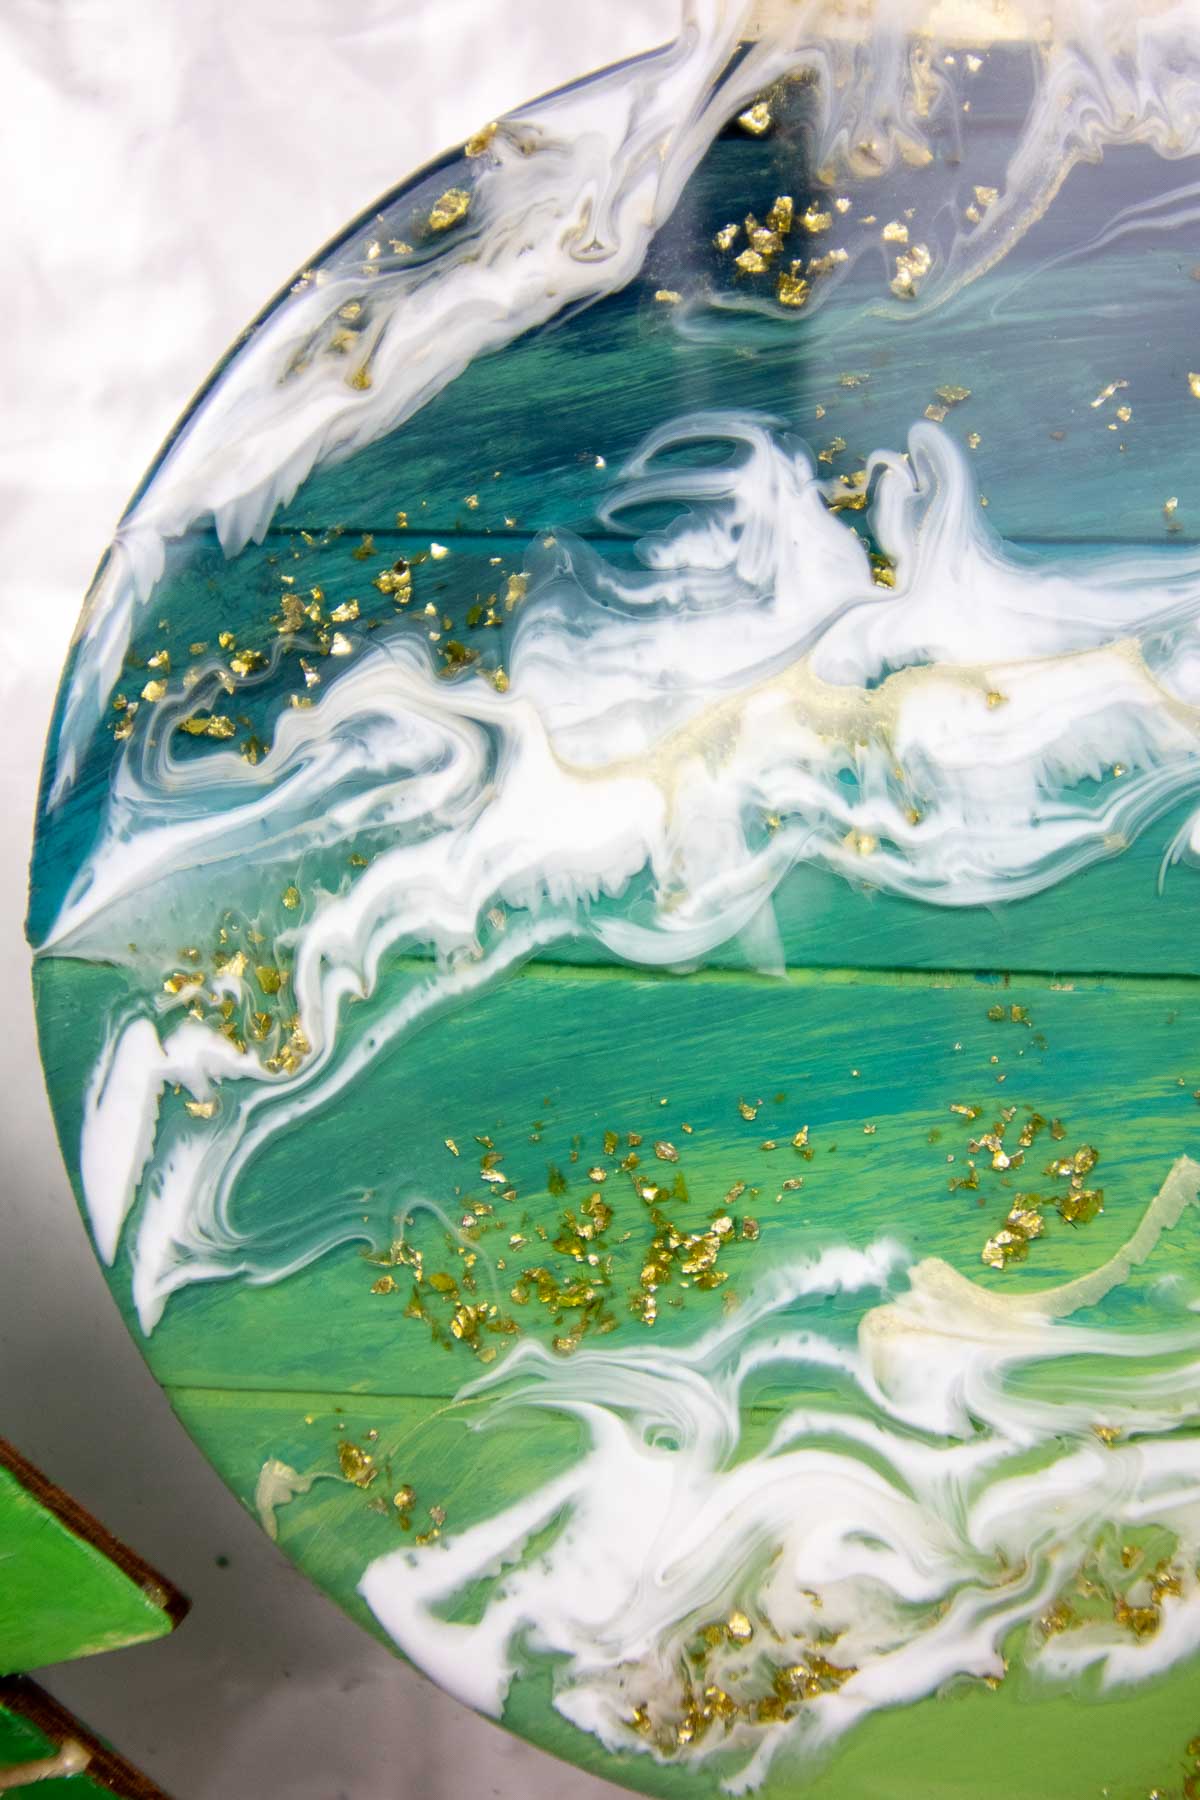
Repeat the painting process with the round wood ornament. Start with dark blue at the top, layer in turquoise next and then light green on the bottom. Blend the colors together. Let dry completely.

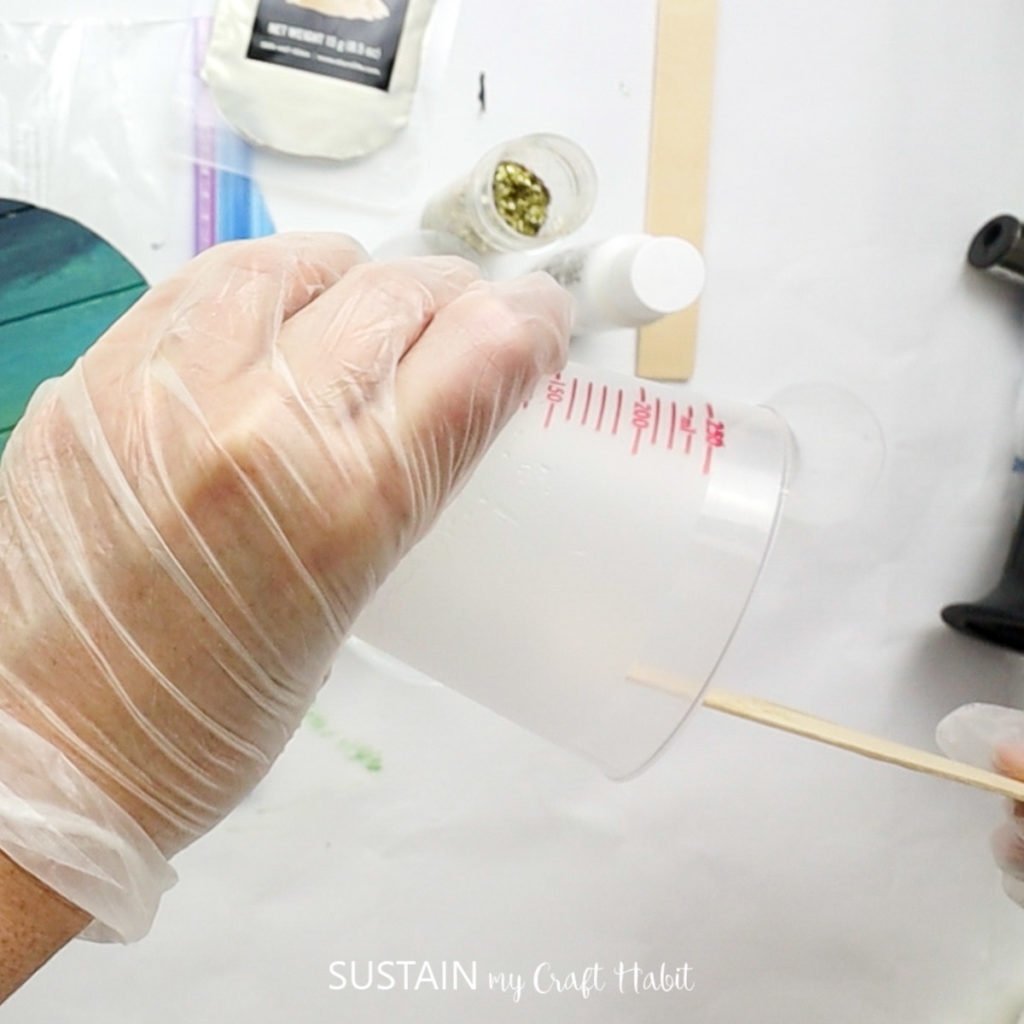
Preparing the Resin
Pour 1oz of resin into a large measuring cup. Add in 1oz of hardener. Stir together completely for 2 minutes, scraping bottom and sides of the cup.
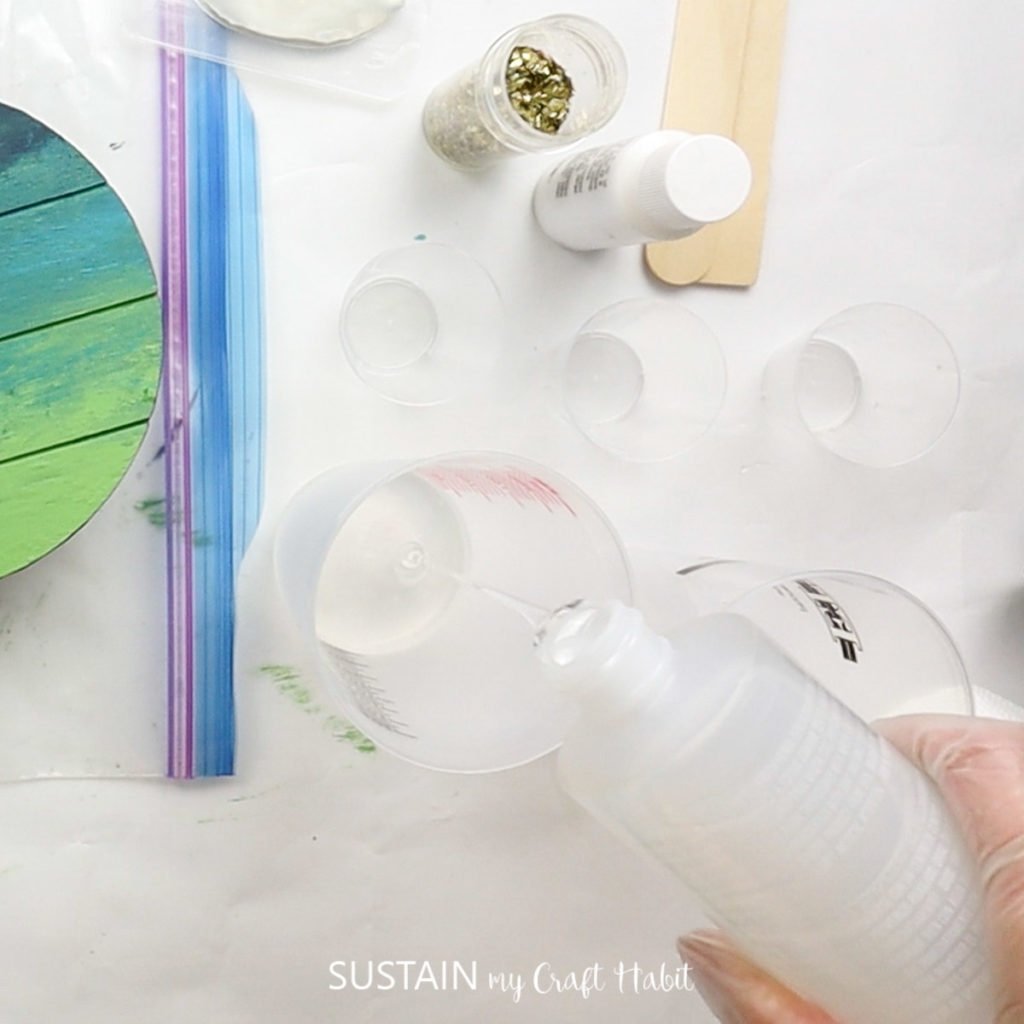
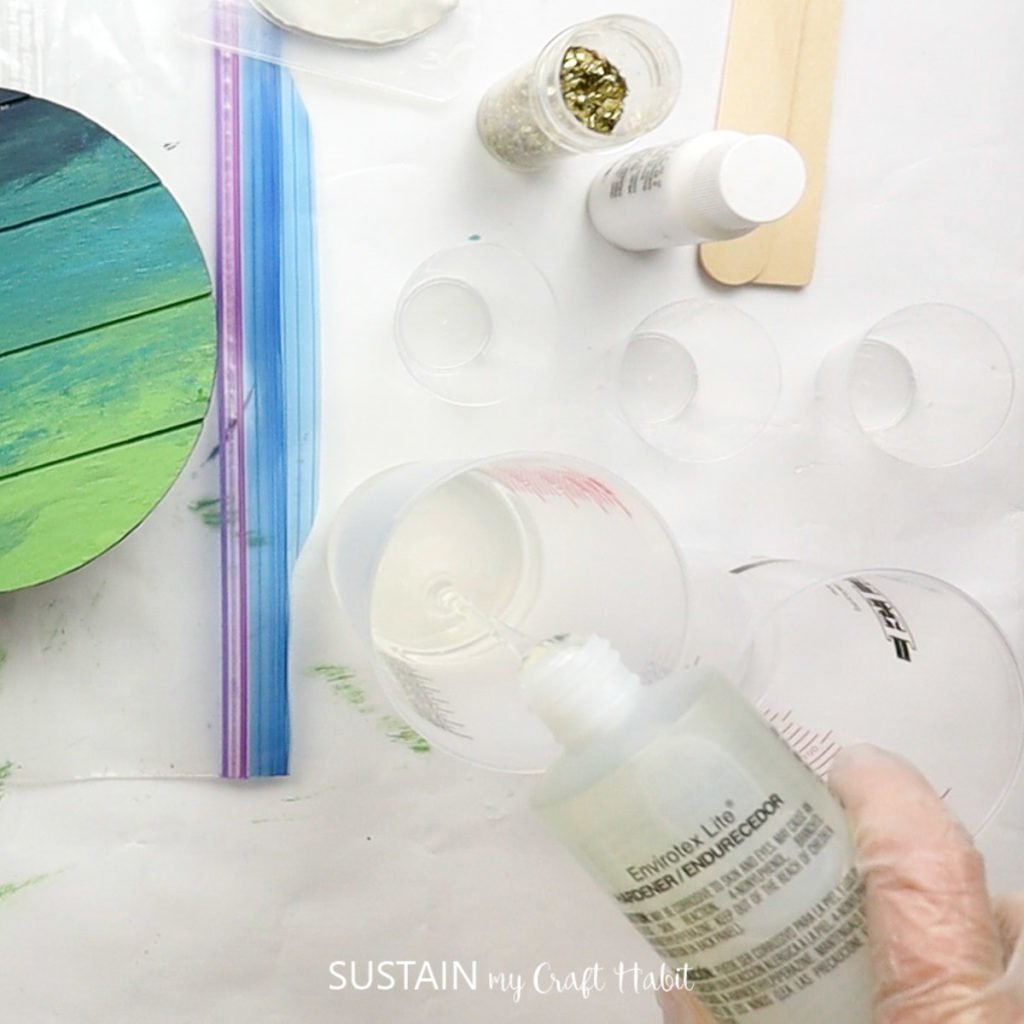

Pour the mixed resin into a second cup. Stir for another minute with a clean mixing stick.
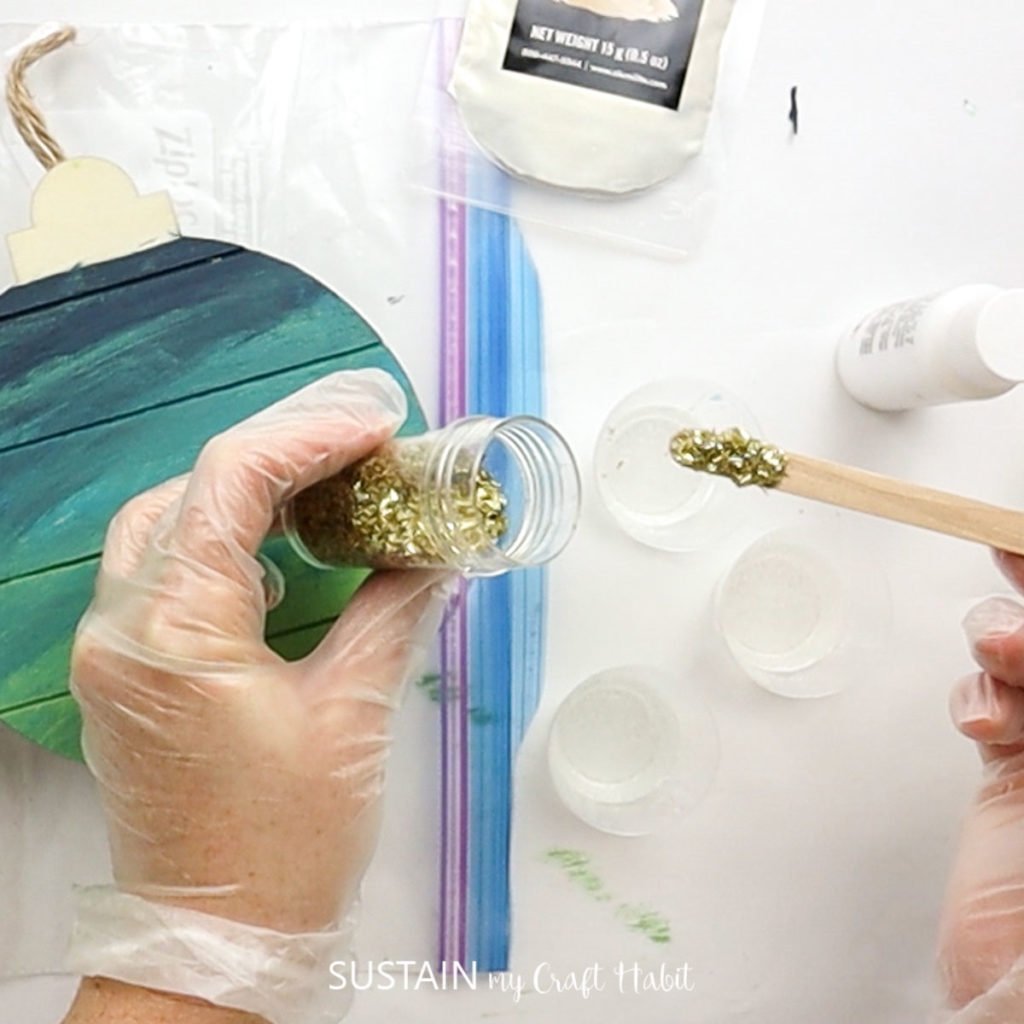
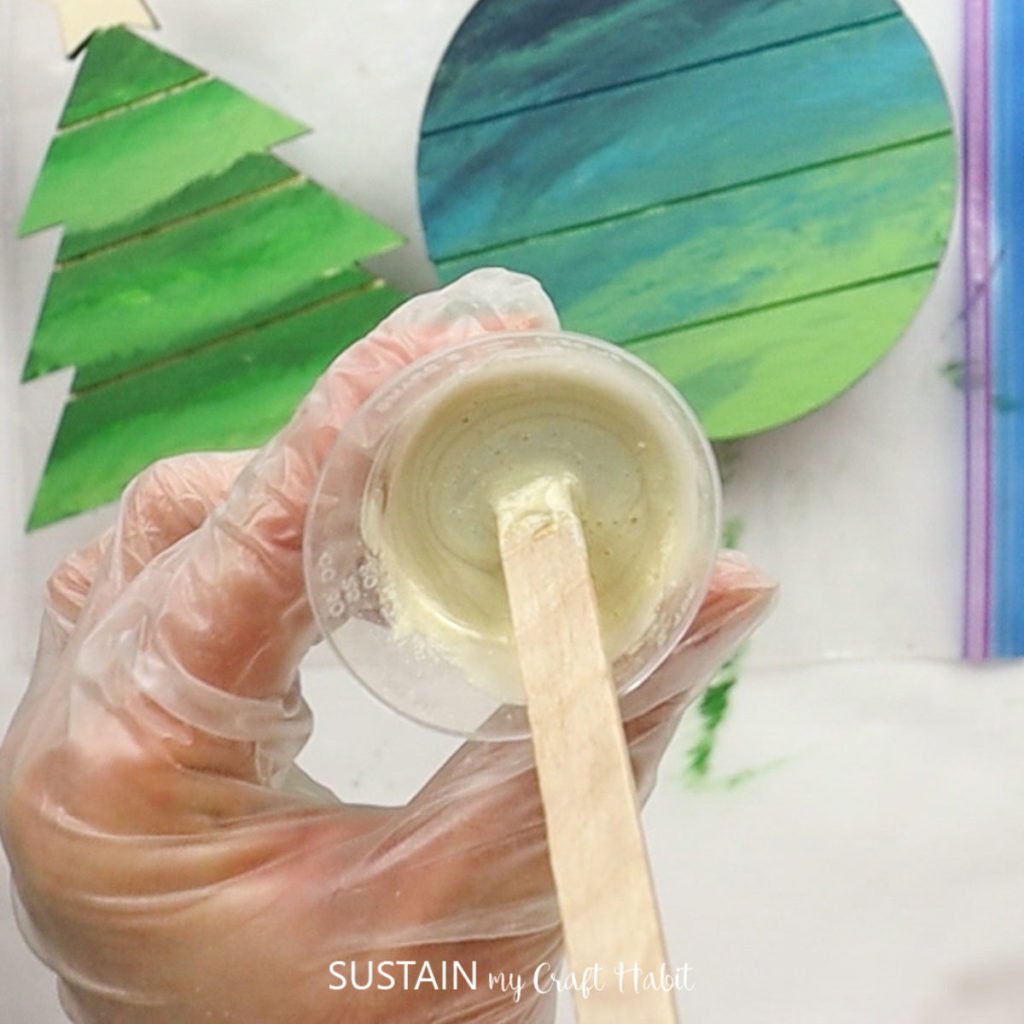
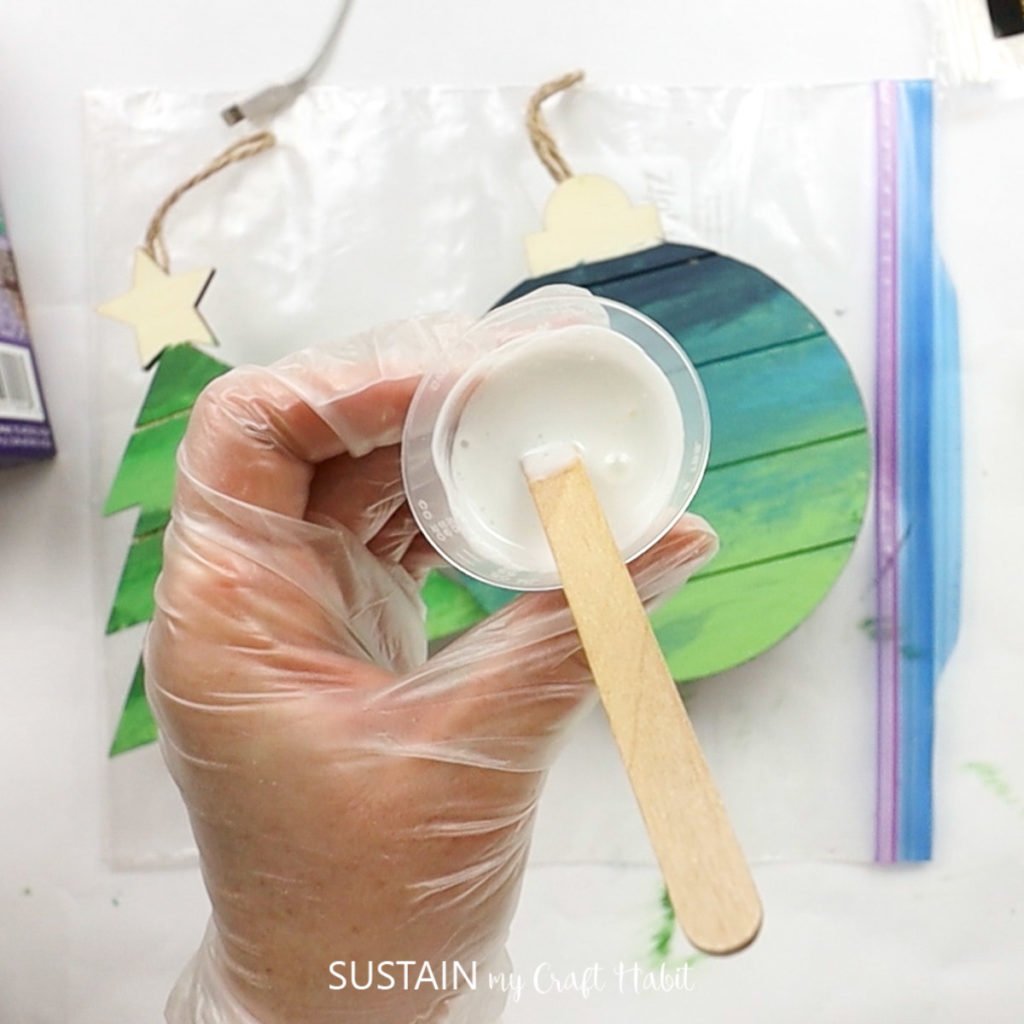
Pour small amounts of the mixed resin into three small cups, reserving about half of the clear resin in the large cup. Add gold flakes in one small cup, yellow pearl pigment in another, and white opaque pigment in the third.
Pouring the Resin
Pour clear resin to cover the surface of the painted ornaments.
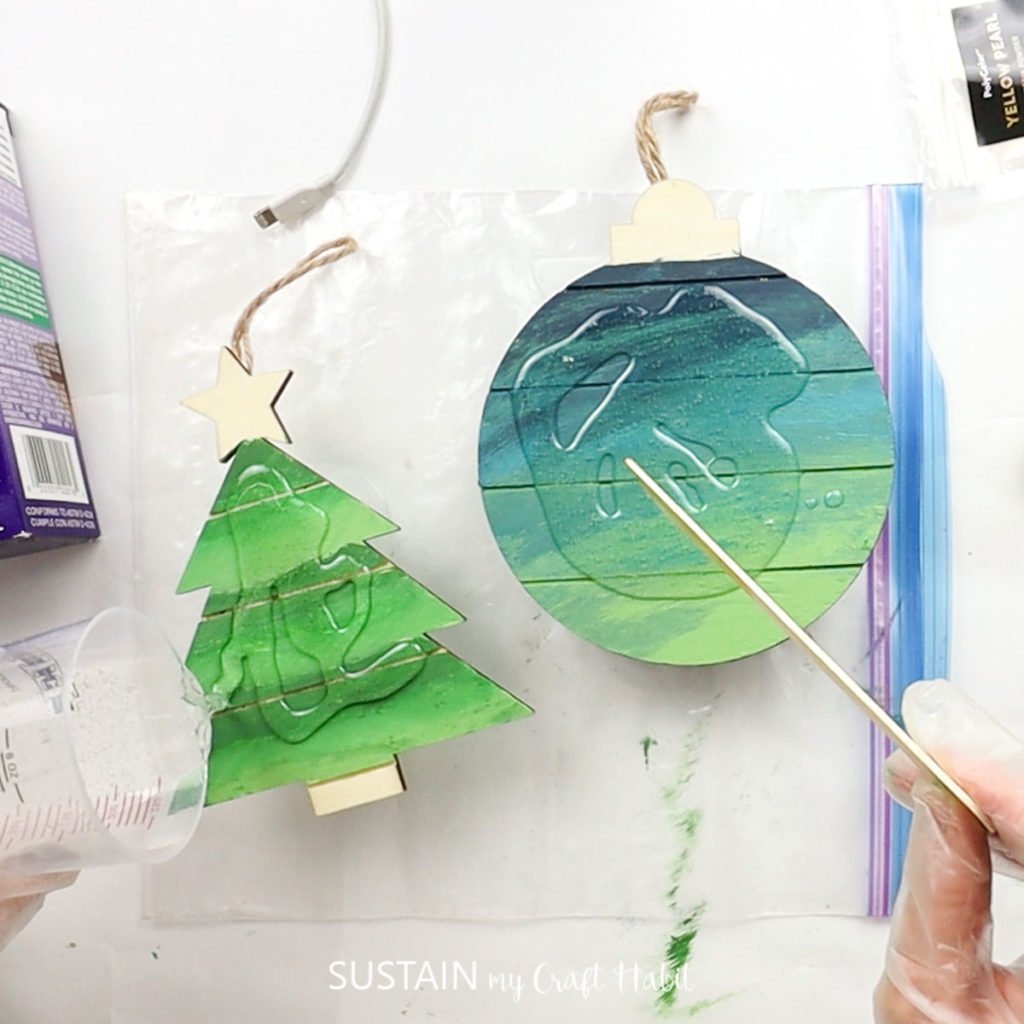
Add threads of white tinted resin.
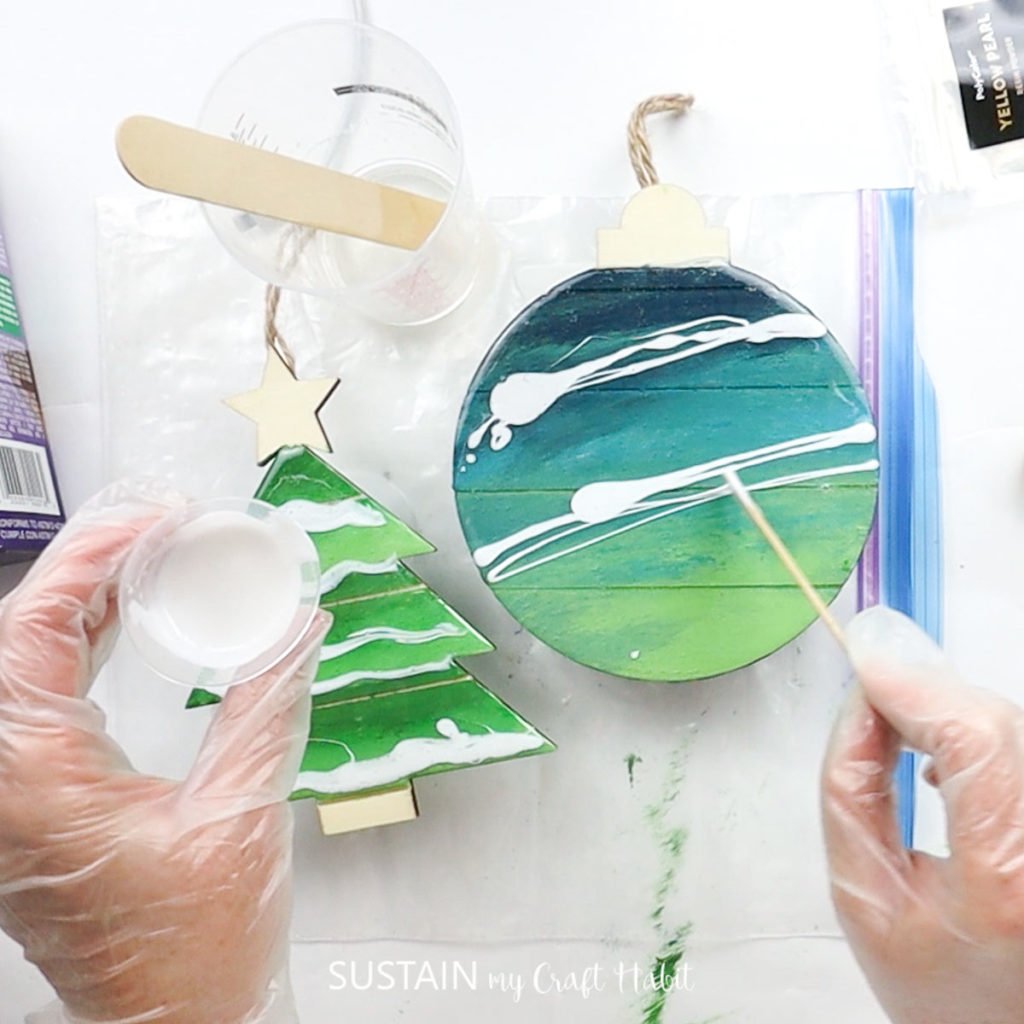
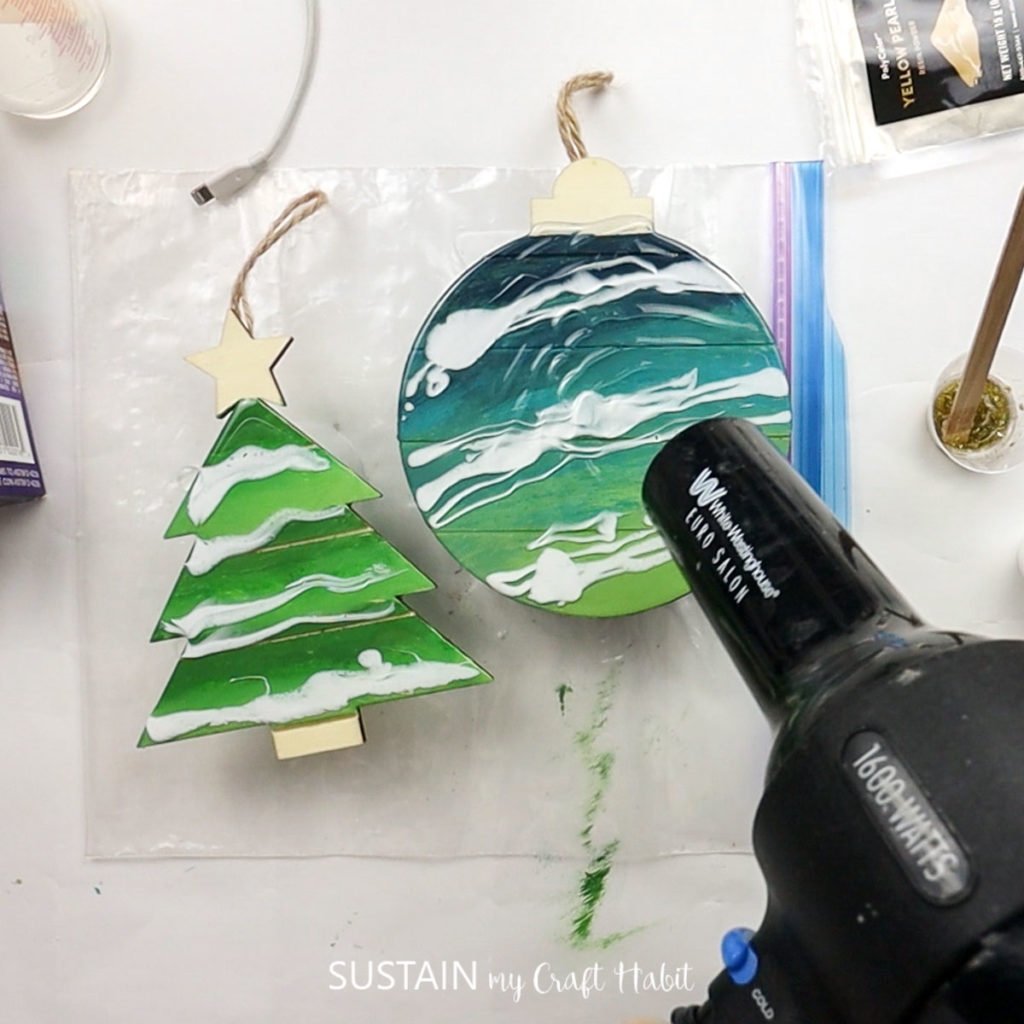
Use an air source such as a blow dryer to gently blend tand soften the white resin.
Drop in thread of resin with gold flakes. Pour pearl resin on star and stump of the tree ornament and top of round ornament.
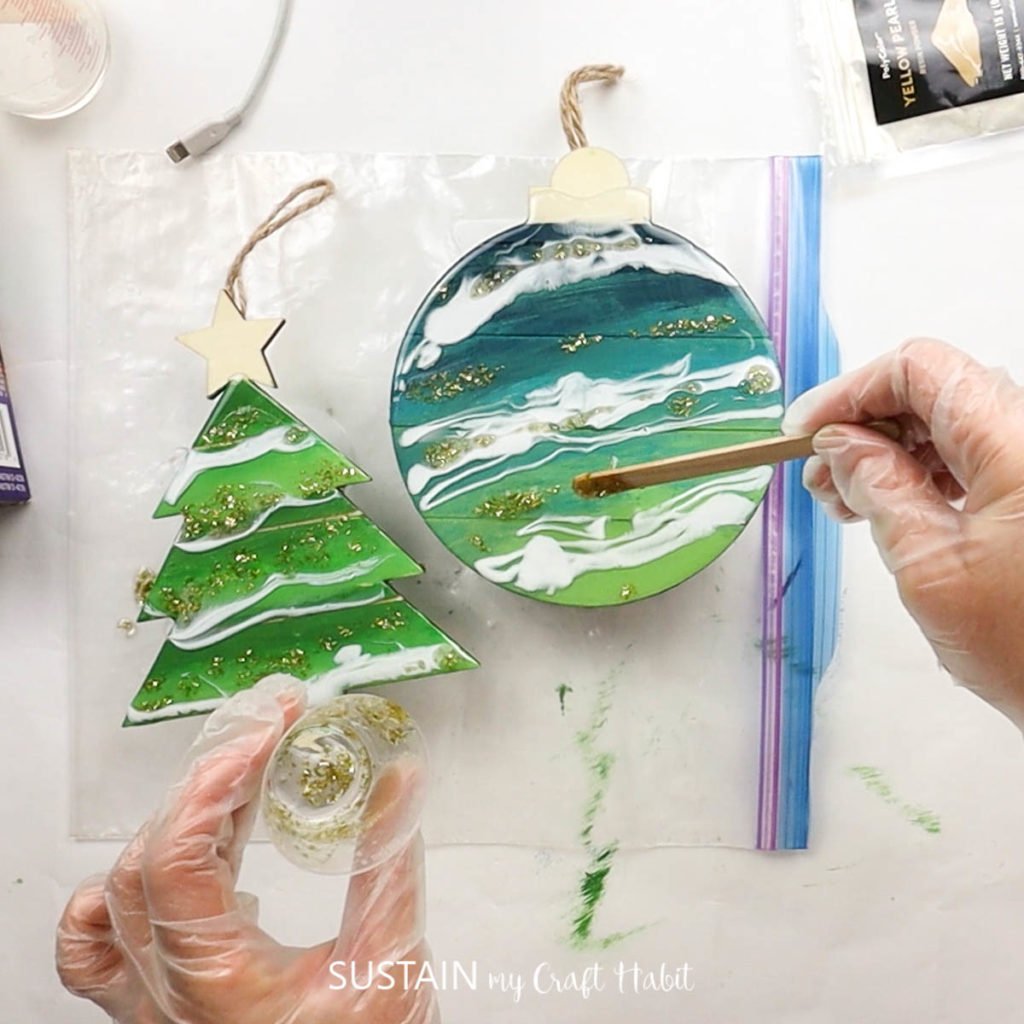
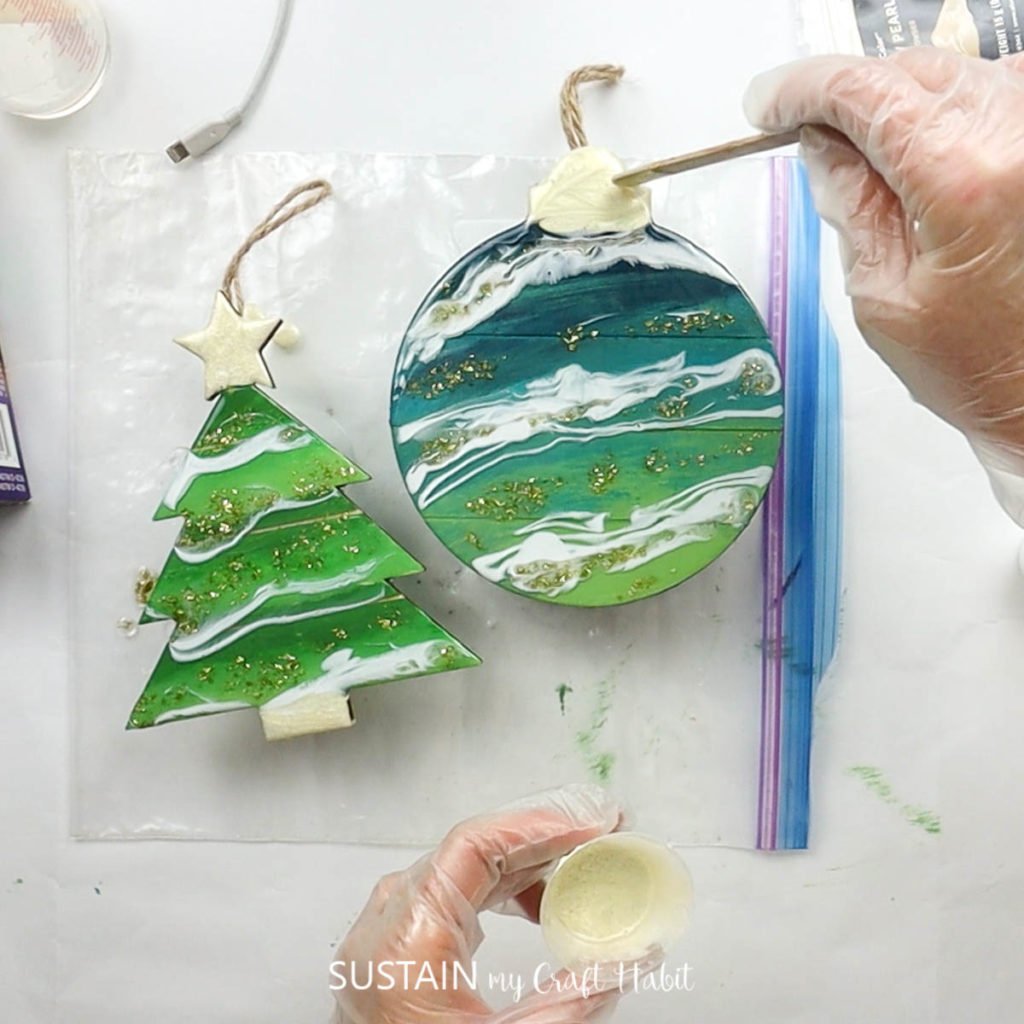
If desired, use stir sticks to add swirls into the resin.
After about 15 minutes, use a kitchen torch to blow off any bubbles that have risen to the surface. Let cure for at least 24 hours (soft cure) and 72 hours for full cure. If desired, repeat this process with the other side of the ornament.
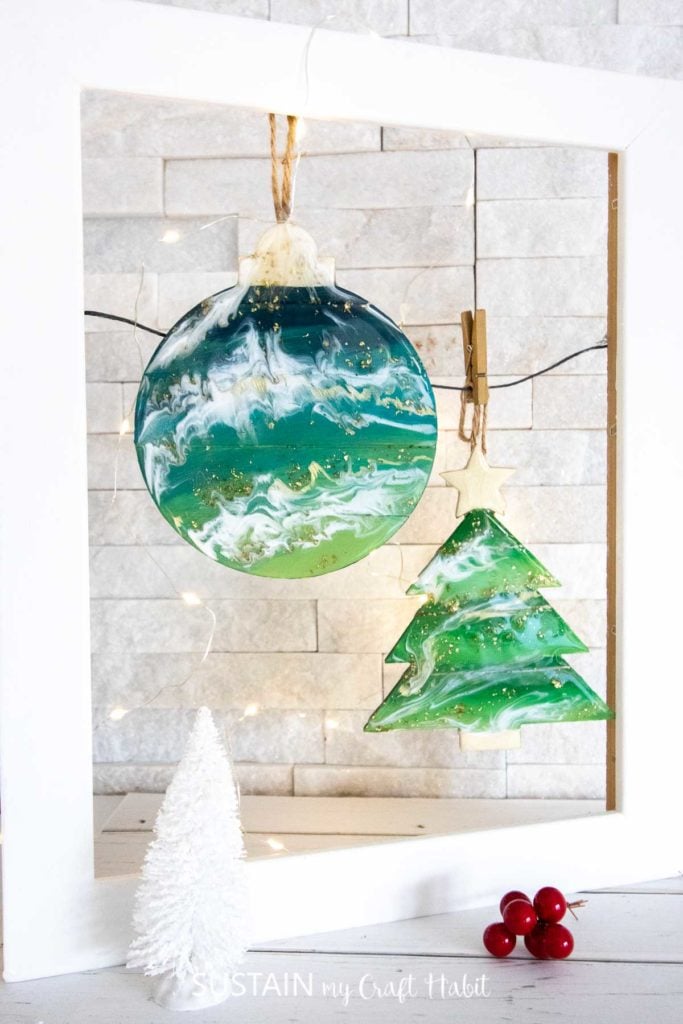
As usual, these poured-resin Christmas ornaments turned out even better than I imagined they would. The rich colour gradients were intensified by the resin. The swirls of white and pearl with gold inclusions are just so interesting and beautiful to see.
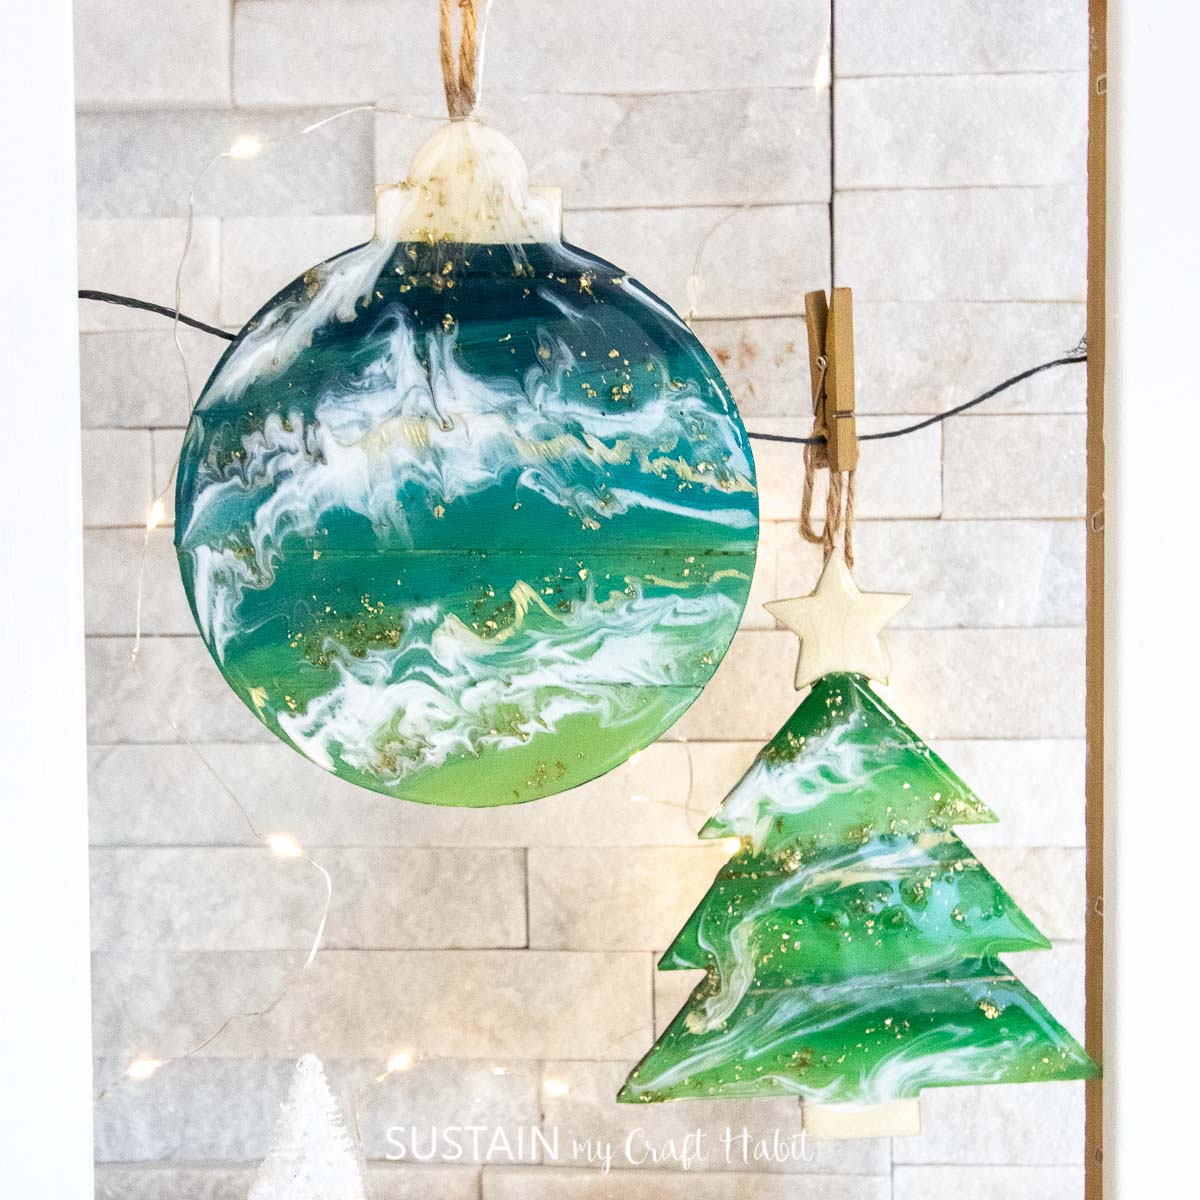
At over 6″ the pieces are actually pretty large for a tree and would make lovely wall hangings as well.
We hope you enjoy this resin gift idea. Don’t hesitate to leave a comment below with any questions!
Like it? Pin it for Later!


Thank you. I have wanted to know how to do something like this. Great details in the instructions. I’m going to LOVE trying this.
Is there a difference betweendeep pour and plain resin?
How did you stop resin from getting on the underneath side? And can you use E6000 glue for sealer?