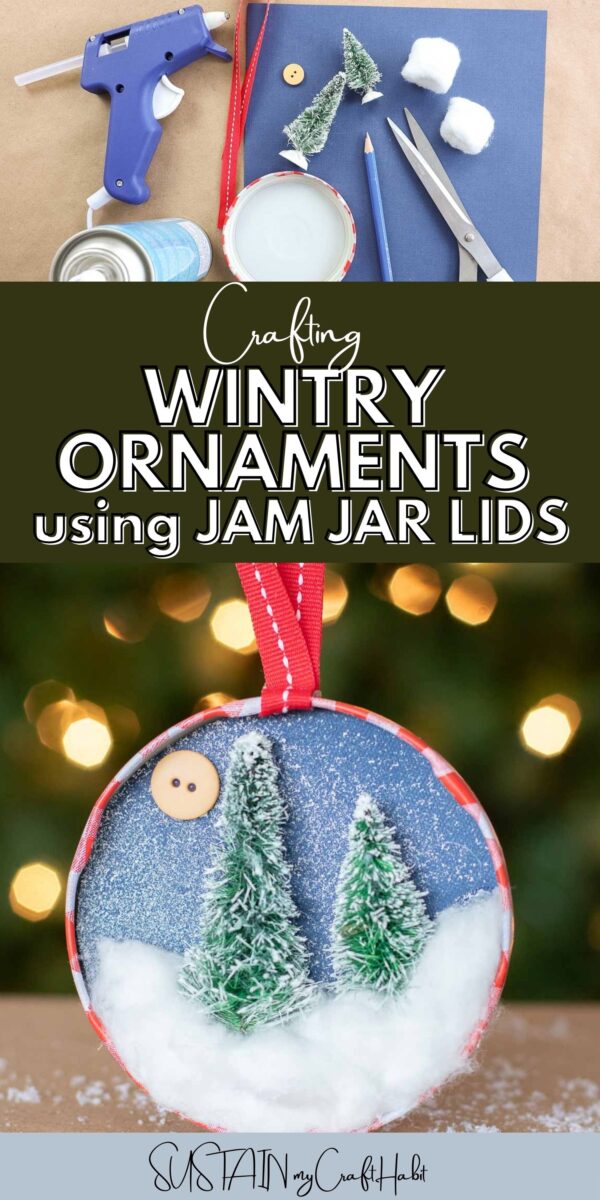
Making Bottle Brush Jar Lid Ornaments
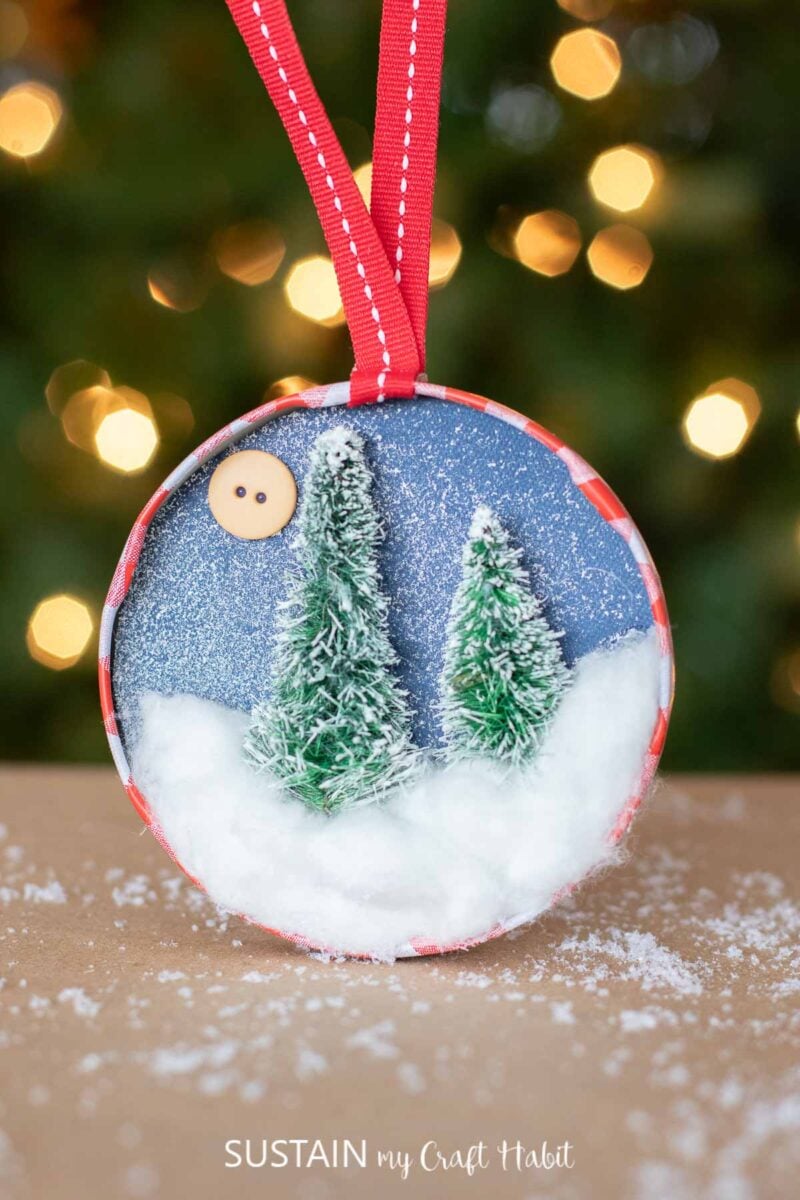
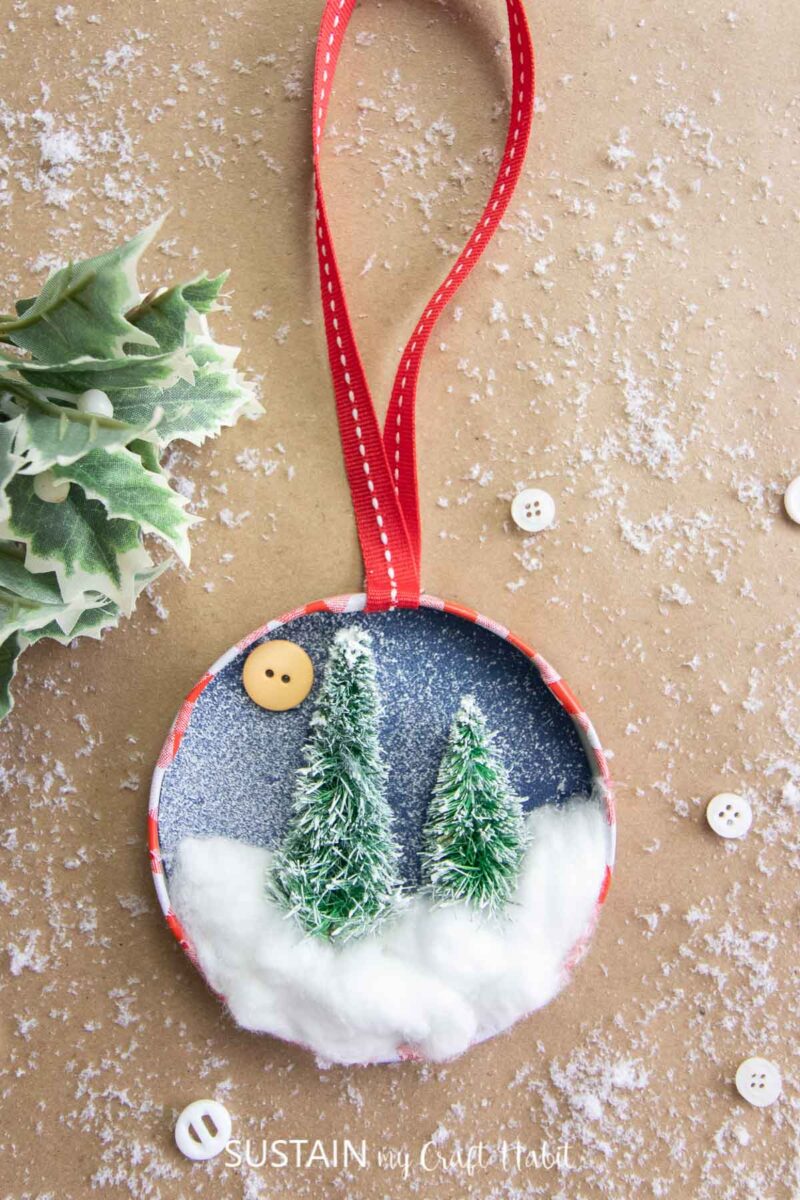
Who knew you could take a jam jar and turn it into bottle brush ornaments? The great thing is, most people don’t even notice at first that it is a jar lid. They are stunned enough by the beauty of this ornament, and then get even more surprised when they realize that it is upcycled!
Bottle Brush Ornaments = Recycling Fun!
If your family likes jam then you will love this craft. These jar lid ornaments are a lovely gift for the holiday season or simply a fun way to decorate your tree.
The reason that they are called bottle brush ornaments is because they include bottle brush trees. A bottle brush tree is version of an evergreen tree that is native in Australia. The flowers they bloom resemble those of bottle brushes and their wood is known to be extra hard and durable, and are often used to make objects such as brooms.
They are also great for crafts that involve evergreen trees such as Christmas time crafts. Make sure to save your jam jar lids so you can turn them into a great upcycling craft.
Want to receive a ton of inspiration and money saving ideas for decorating, gift-giving and crafting? Join HERE!
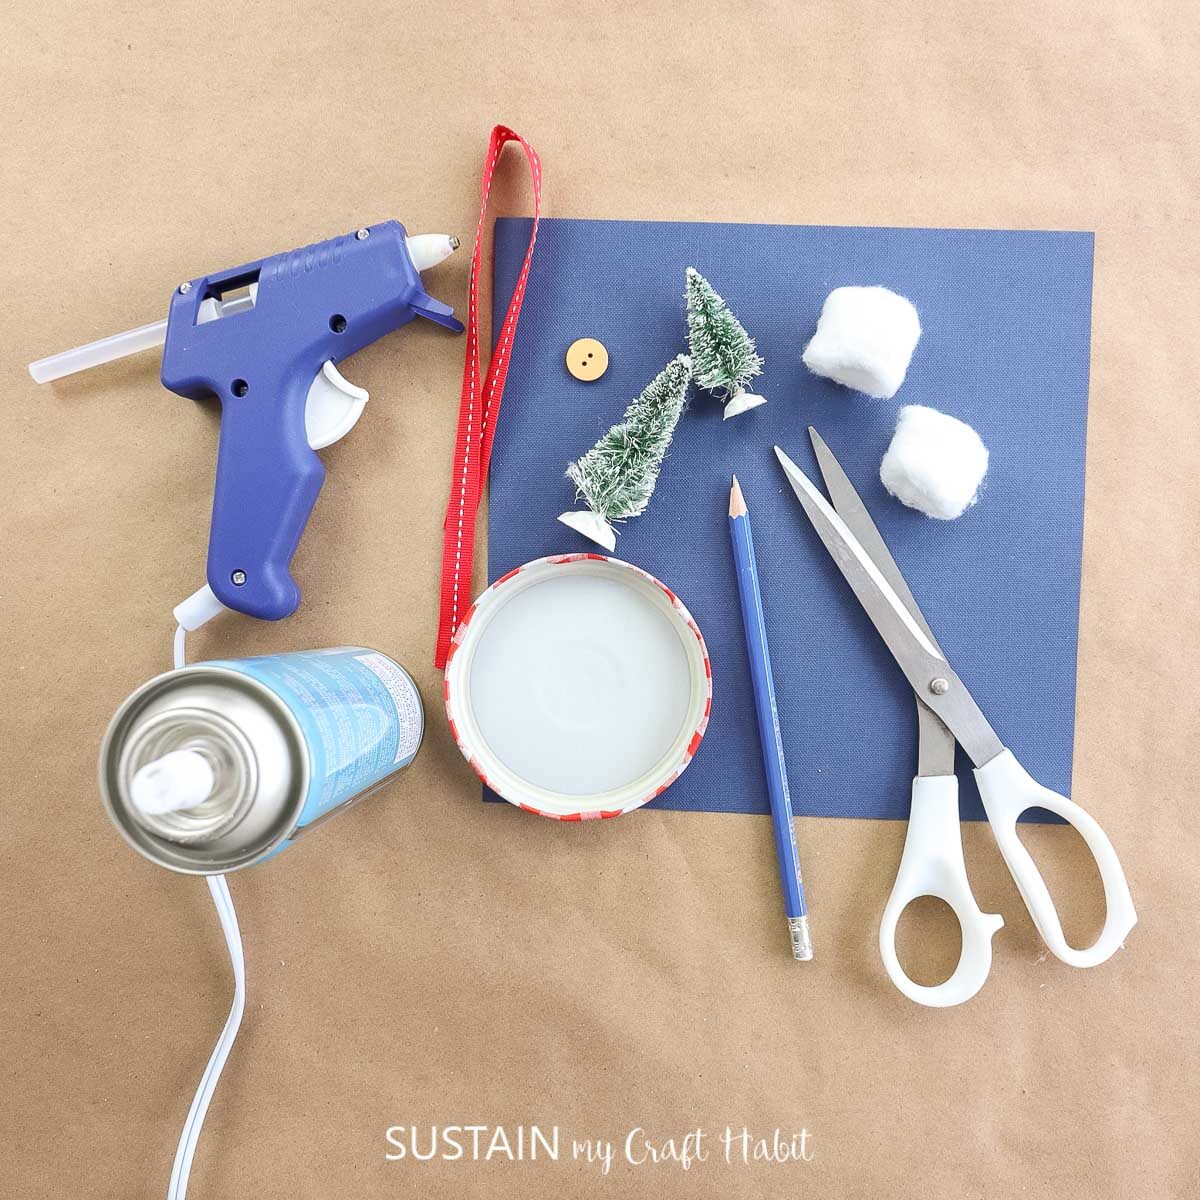
Materials Needed
Disclosure: This post contains affiliate links for your shopping convenience. Should you choose to purchase through them, we will make a small commission at no extra cost to you. You can read our full disclosure policy here.
- Jar lid, approx. 3” diameter
- Hot glue gun and clear glue sticks
- Dark blue cardstock paper
- Scissors
- Pencil
- Ribbon, cut to 12” long
- Bottle brush trees in two sizes, less than the width of the lid
- Cotton ball
- Yellow button
- Snow Spray
How to Make Bottle Brush Jar Lid Ornaments
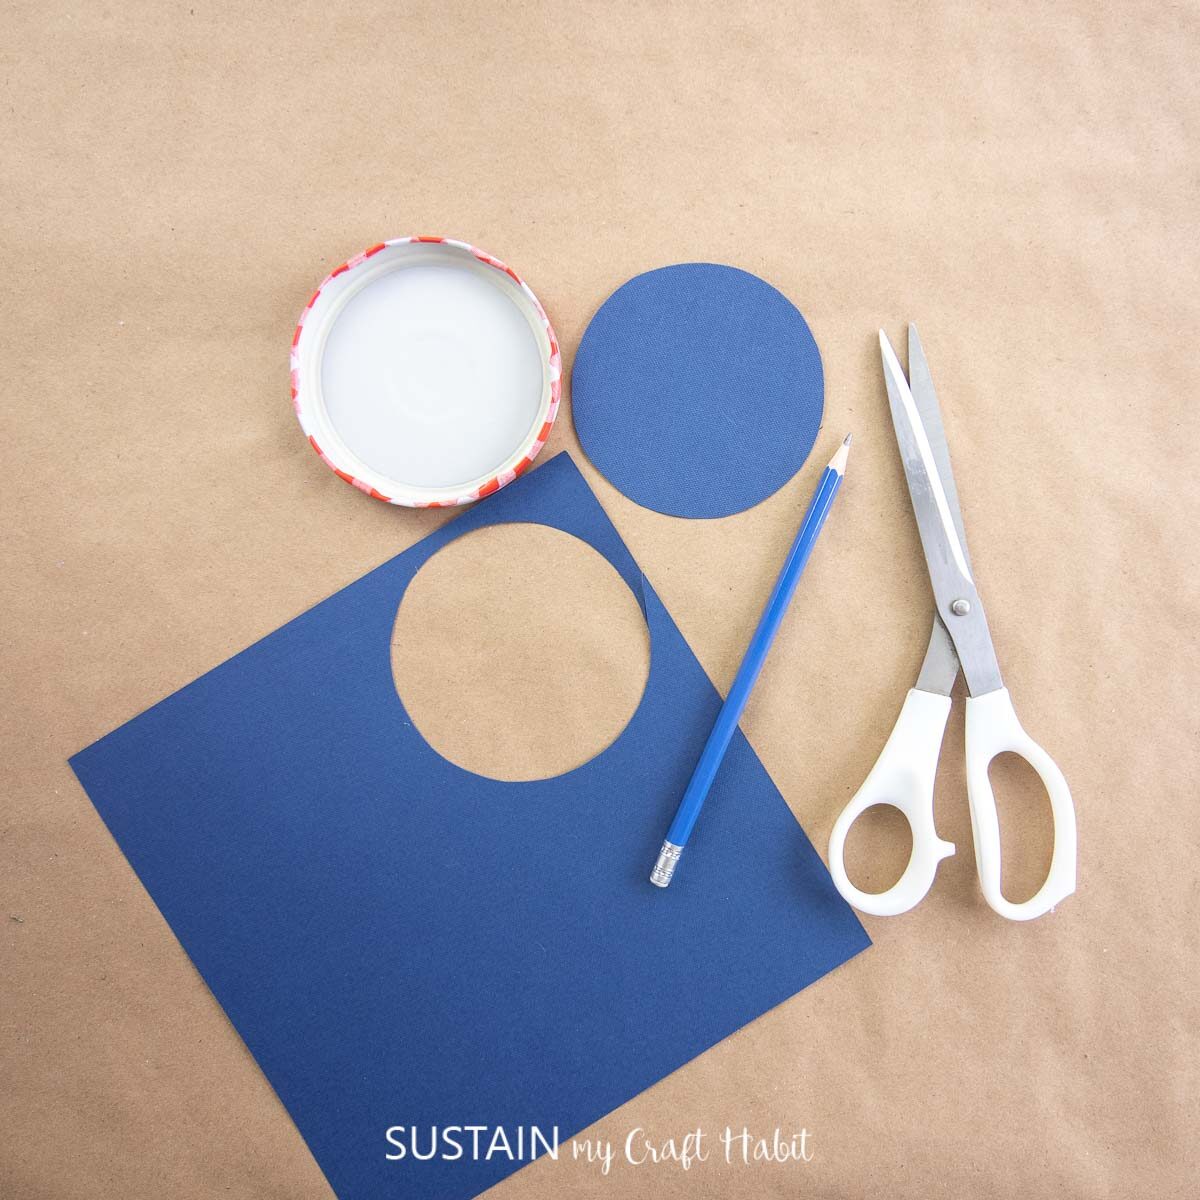
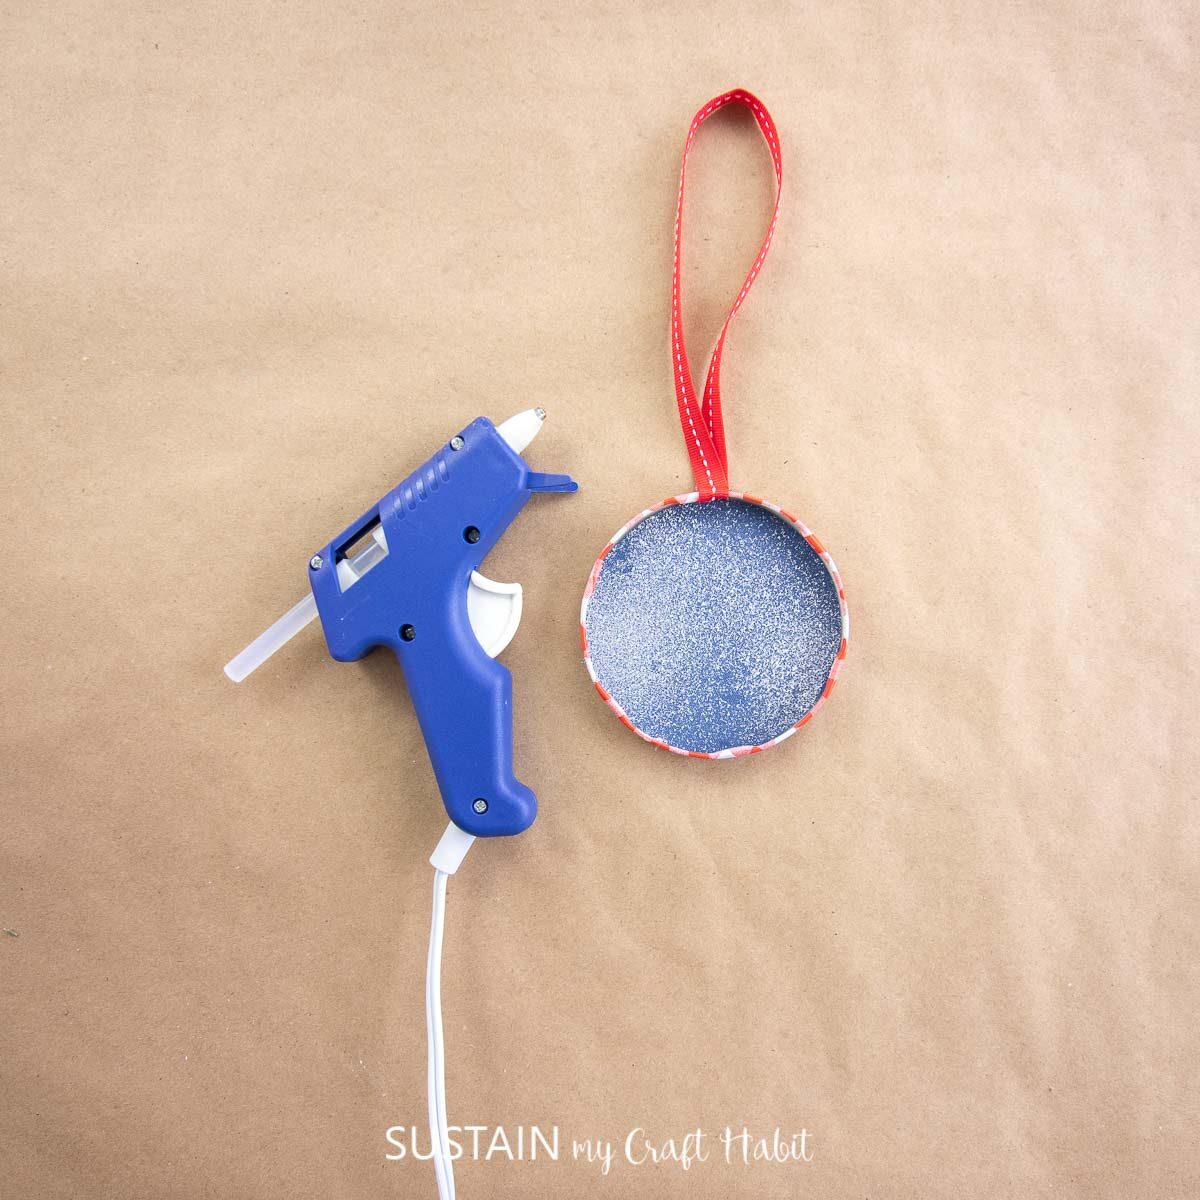
Trace the lid with a pencil onto a piece of decorative paper. Cut out the circle with a pair of scissors slightly inside the pencil lines so it fits inside the lid.
Spray the surface of the circle with snow spray and let it dry.

Fold the ribbon in half and glue the cut ends to the top of the lid.
Insert the paper circle into the lid, gluing the back side in place.
Gently pull apart one cotton ball and glue it to the inner bottom portion of the lid.
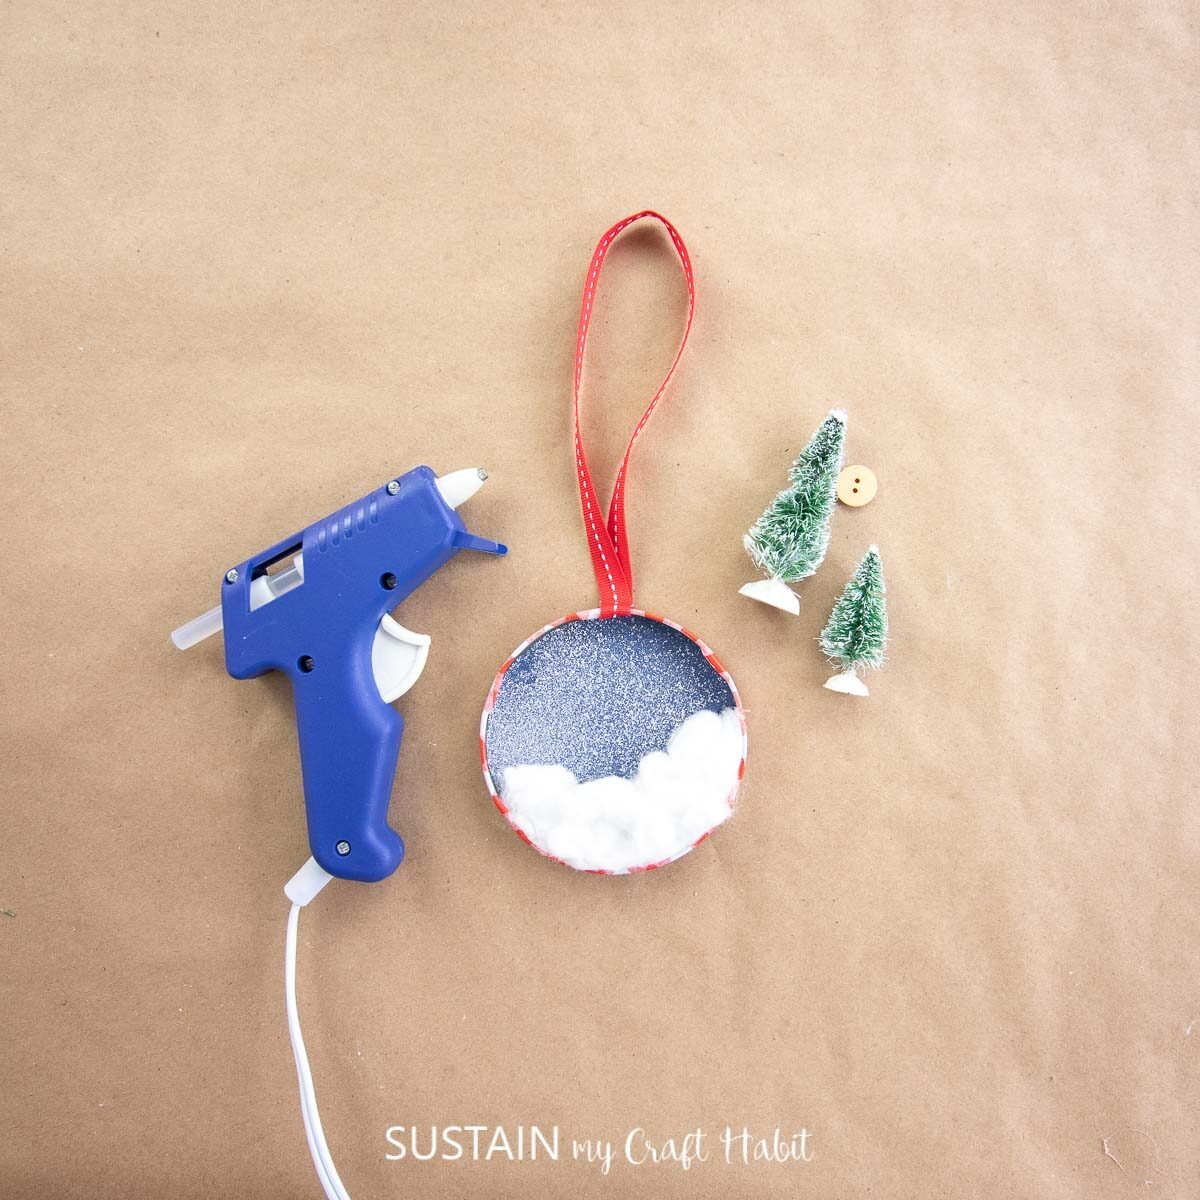
Remove the bases from the bottle brush trees and discard. Glue the bottle brush trees inside the lid over top of the cotton ball.
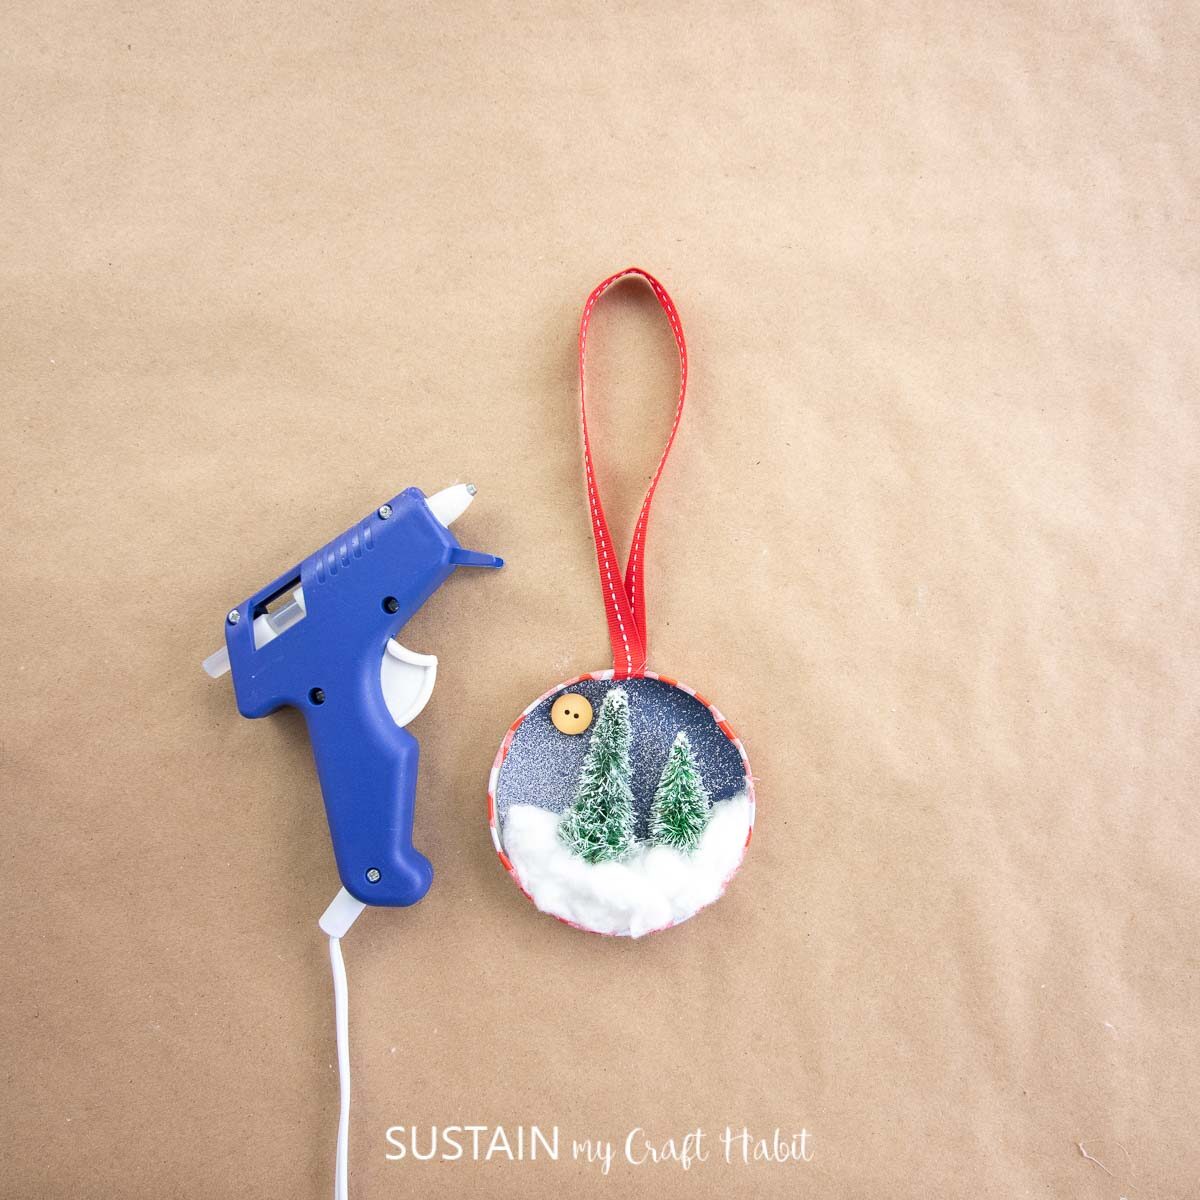
Glue the decorative button above the trees.
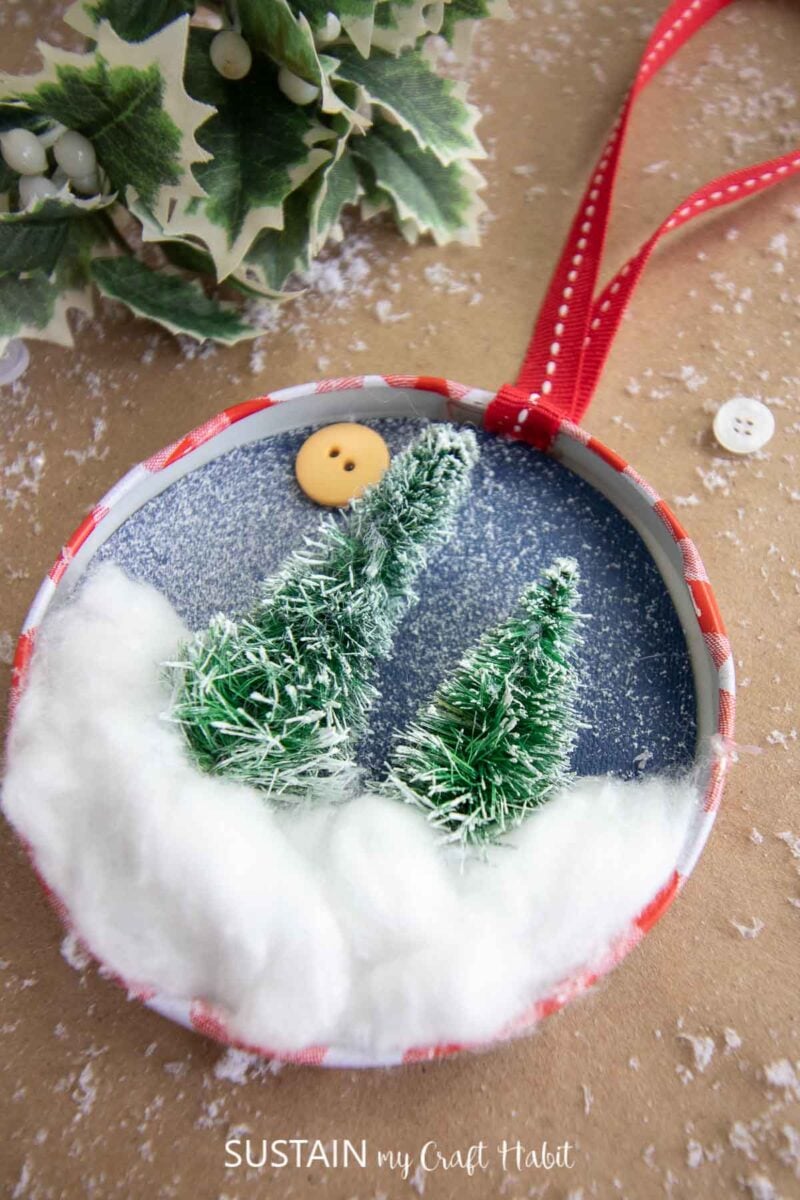
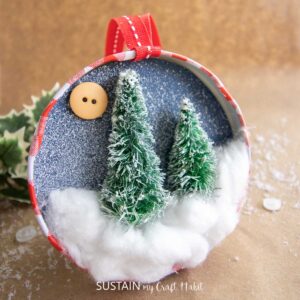
And that’s it! The upcycled jar jam lid with bottle brush trees is now a fun and festive wintry ornament.
More DIY Christmas Ornaments to Make at Home
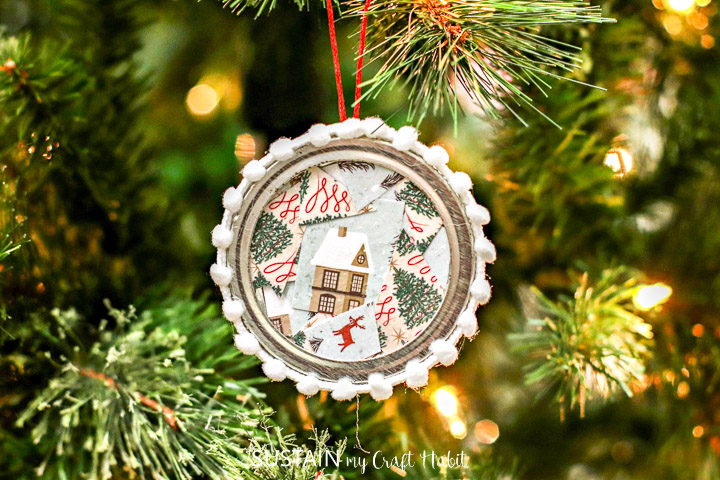
- Canning Jar Lid Ornaments
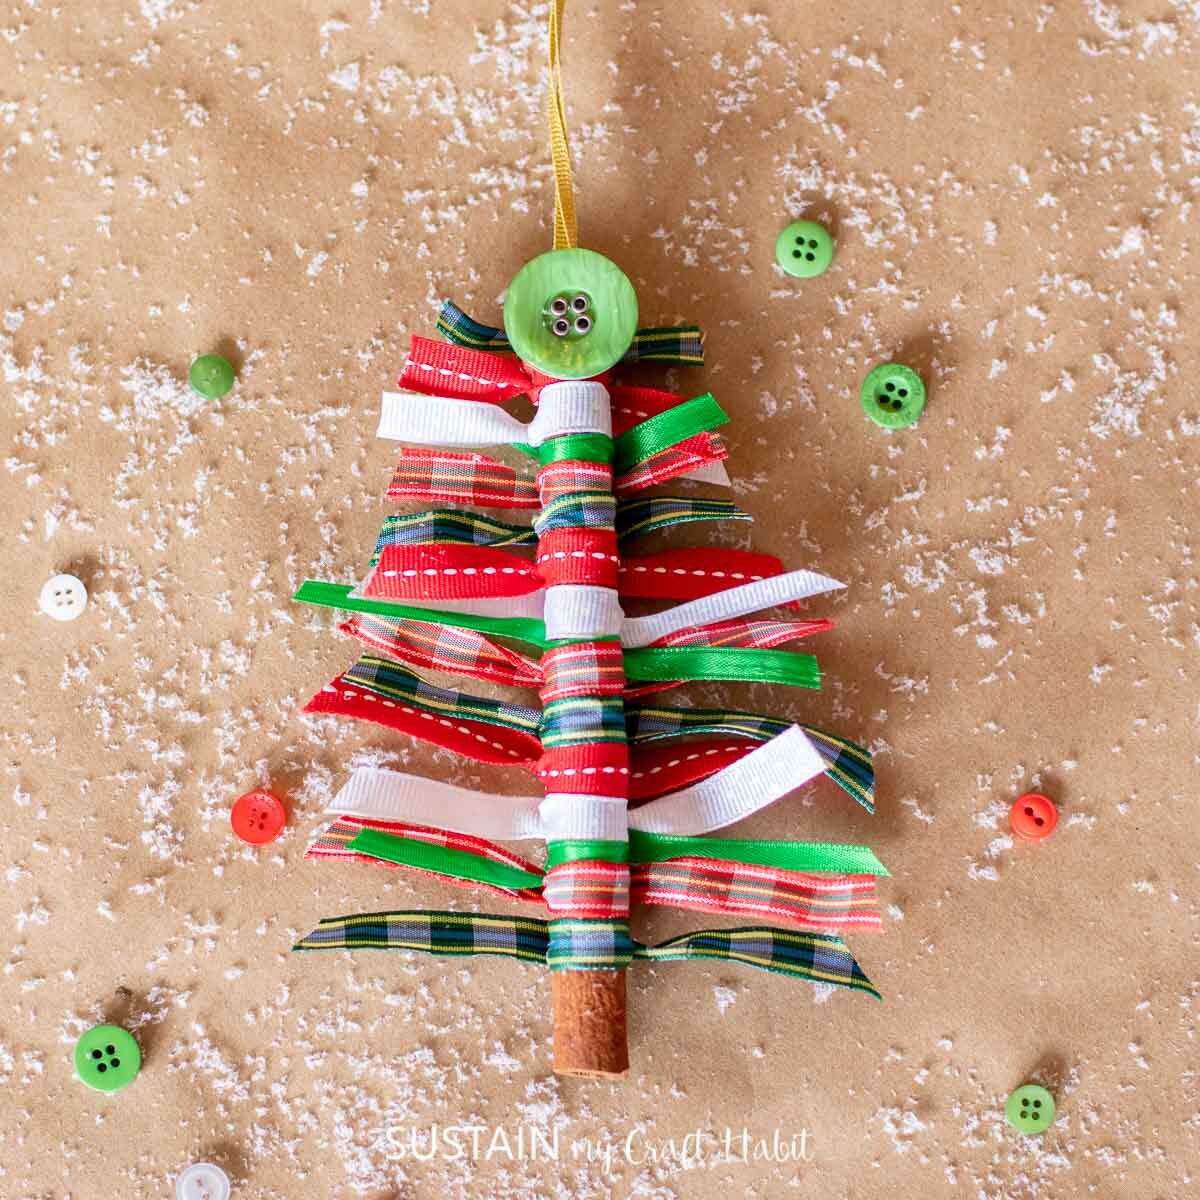
- Cinnamon Stick Ribbon Tree Ornaments
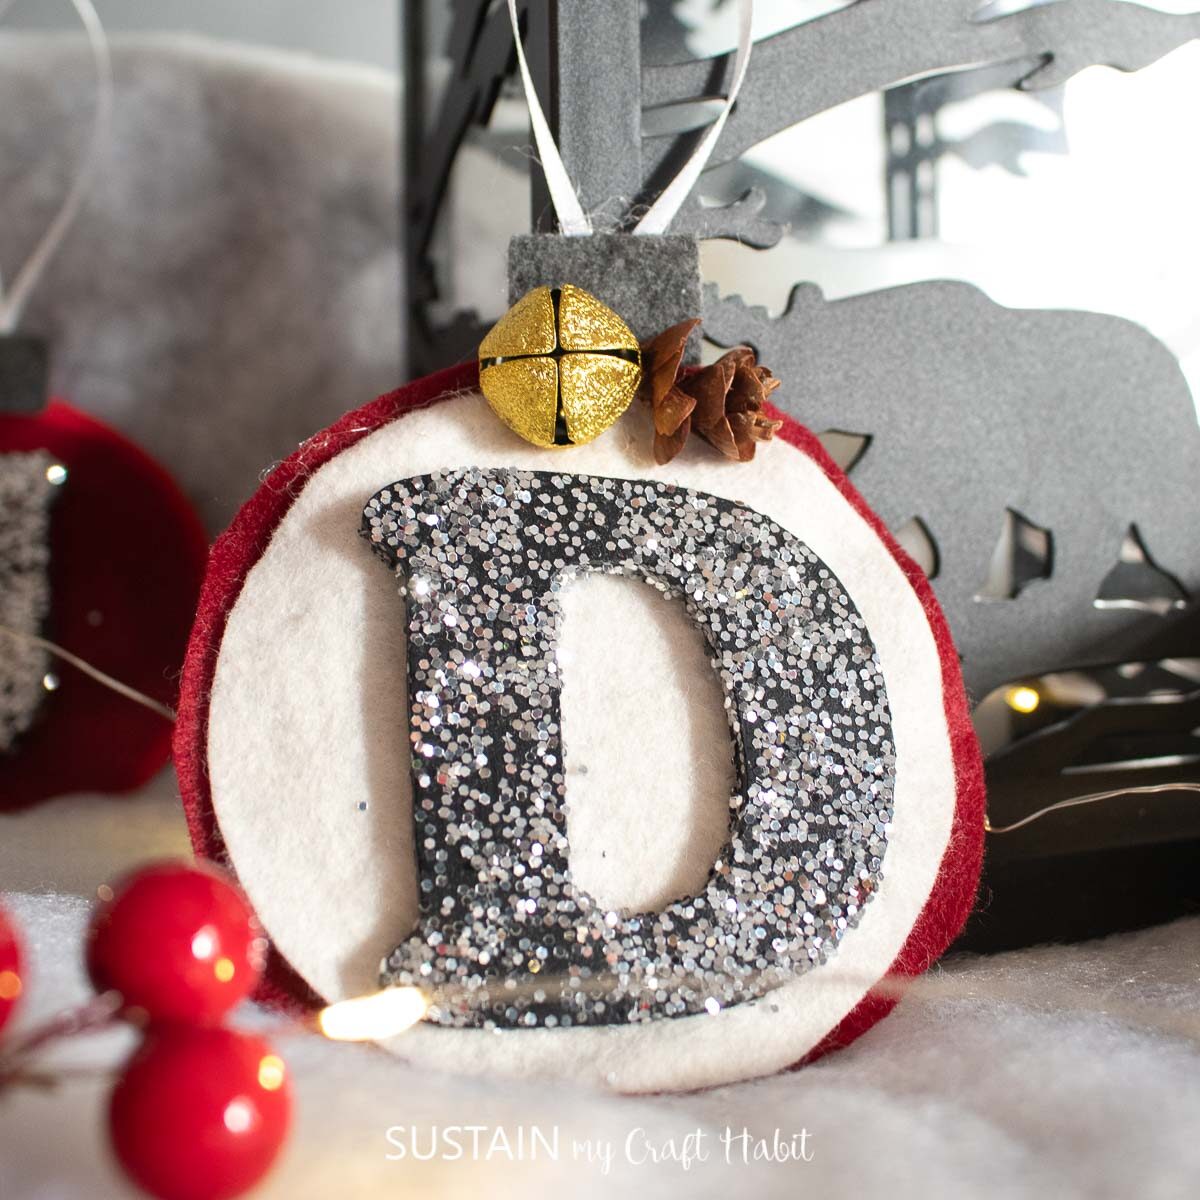
- Felt Monogram Ornaments
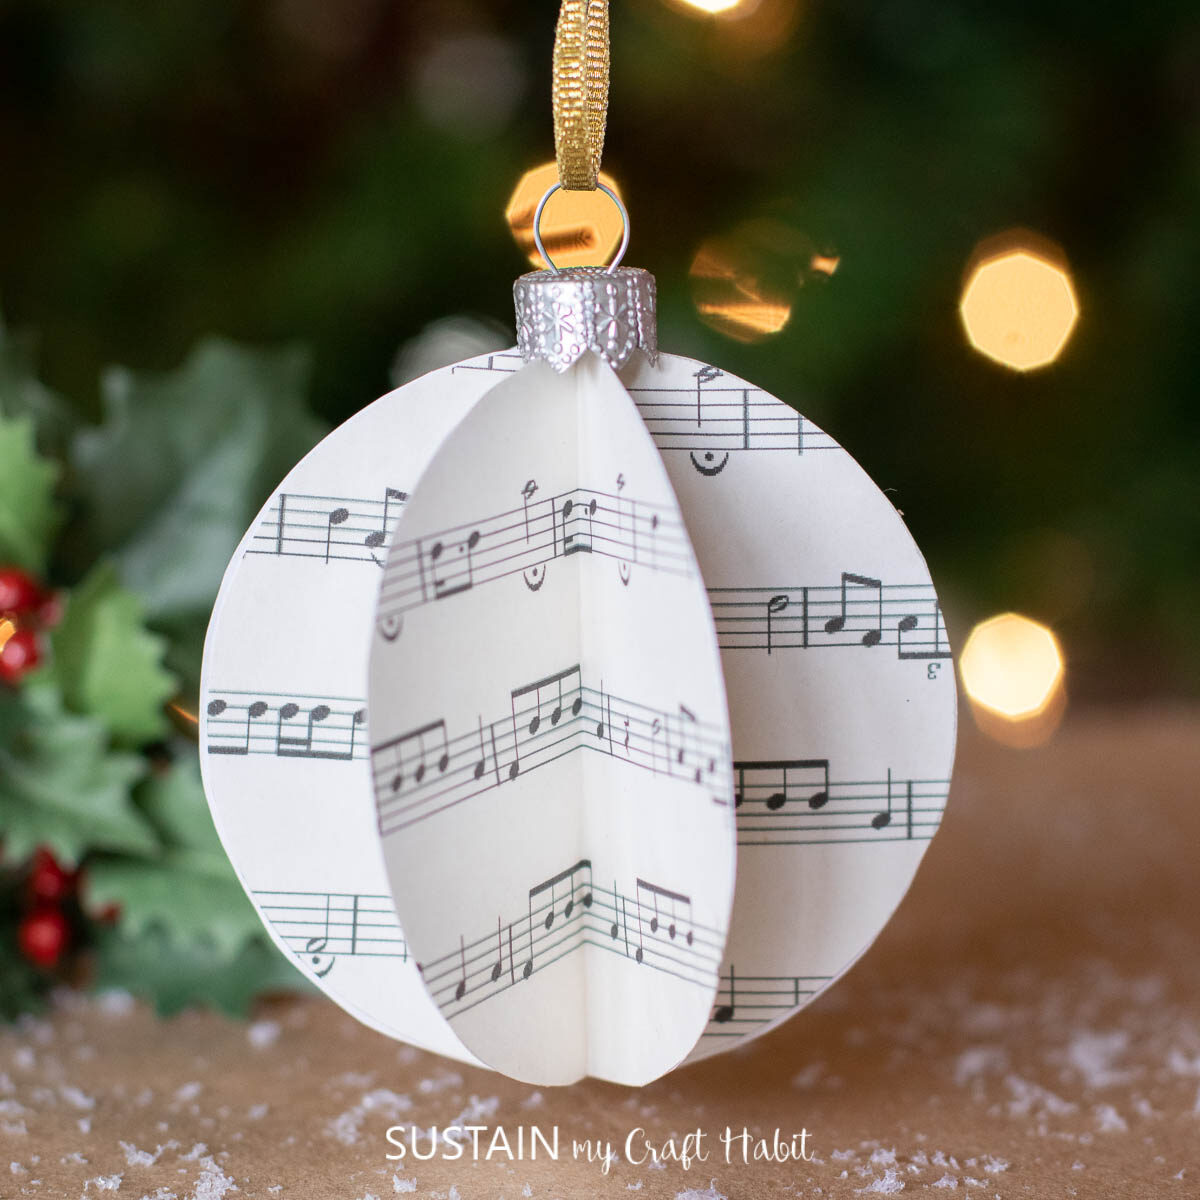
- 3D Sheet Music Ornaments
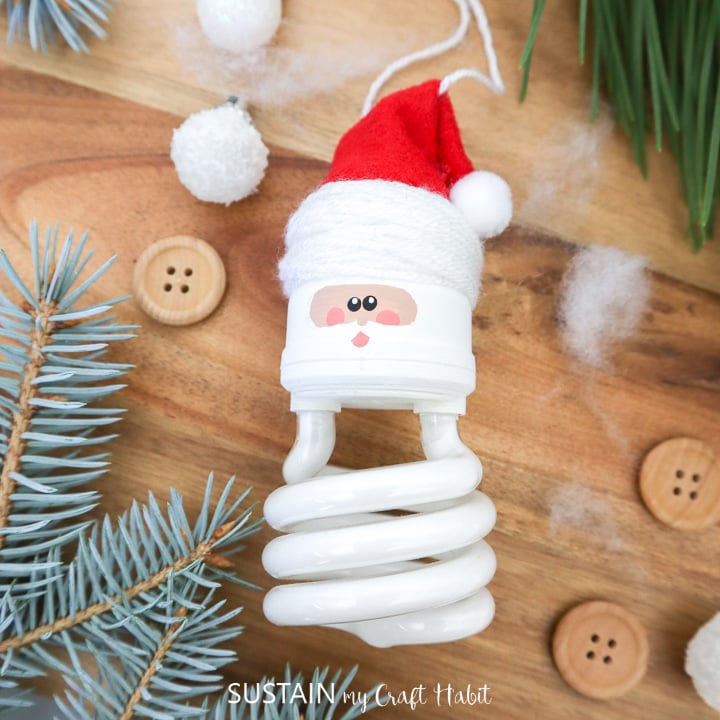
- Light Bulb Christmas Ornaments
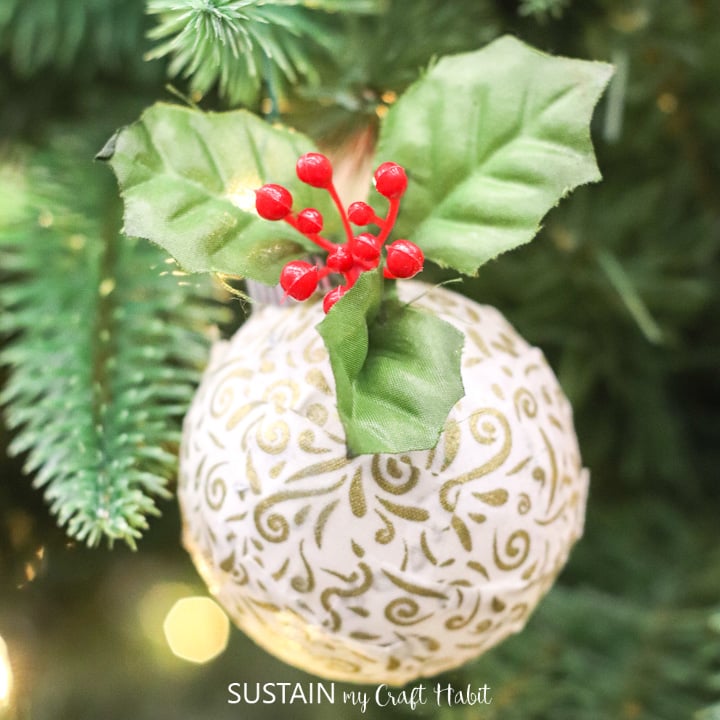
- Scrap Fabric Decoupage Ornaments

Canning Lid Ornaments 
Cinnamon Stick Ribbon Ornaments Felt Monogram Ornaments 3D Music Sheet Ornament 
Santa Lightbulb Ornament Decoupage Ornament
If you share it on Facebook or Instagram, make sure to tag us so we can see too. We love seeing the finished creations!
Get updates on the latest posts and more from Sustain My Craft Habit straight to your inbox by joining our weekly newsletter. We promise to send you only the good stuff.
Like it? Pin it for later!
Making Bottle Brush Jar Lid Ornaments
Materials
- Jar lid approx. 3” diameter
- Hot glue gun and clear glue sticks
- Dark blue cardstock paper
- Scissors
- Pencil
- Ribbon cut to 12” long
- Bottle brush trees in two sizes less than the width of the lid
- Cotton ball
- Yellow button
- Snow Spray
Instructions
- Trace the lid with a pencil onto a piece of decorative paper. Cut out the circle with a pair of scissors slightly inside the pencil lines so it fits inside the lid.
- Spray the surface of the circle with snow spray and let it dry.
- Fold the ribbon in half and glue the cut ends to the top of the lid.
- Insert the paper circle into the lid, glueing the back side in place.
- Gently pull apart one cotton ball and glue it to the inner bottom portion of the lid.
- Remove the bases from the bottle brush trees and discard. Glue the bottle brush trees inside the lid over top of the cotton ball.
- Glue the decorative button above the trees.