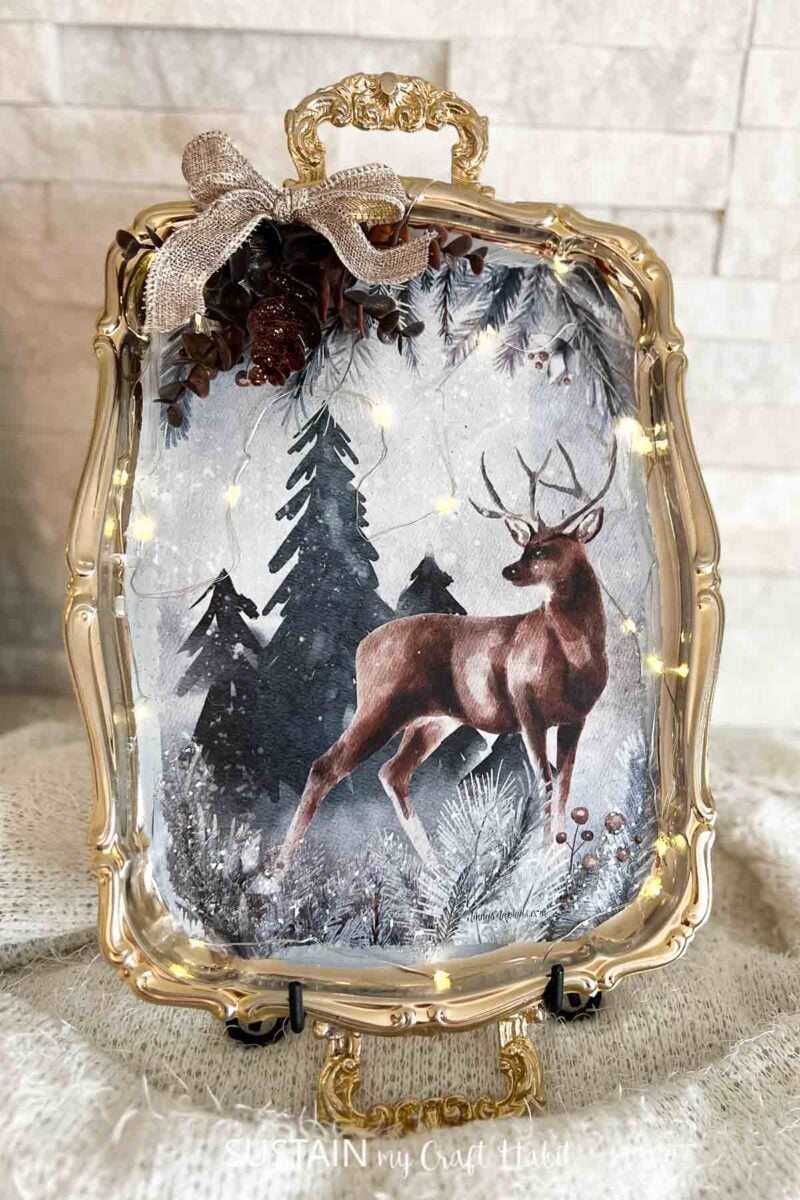
Upcycled Silver Tray with Decoupage
This silver tray, once neglected, became am impressive centerpiece, and now I catch myself looking at every thrift store platter and vintage dish with fresh eyes. There’s something deeply satisfying about rescuing forgotten items and giving them a new lease on life.
Whether you’re new to crafting or already have a stash of Mod Podge and patterned napkins, this is one of those projects that’s part meditation, part design, and all creativity.
Why You’ll Love This Craft
This is a slow-down-and-sip-your-tea kind of craft. You don’t need to be a skilled painter or an expert in precision work. If you can cut, glue, and smooth paper with your fingers, you’re halfway there.
The beauty is in the imperfections—the little crinkles and overlaps give it charm. It’s also incredibly budget-friendly. Most of what you need might already be in your home: an old tray, decorative napkins or leftover wrapping paper, glue, and some sealer.
Ways to Adapt This Craft for Your Home
The joy of decoupage is how versatile it is.
- For a modern farmhouse look, try black-and-white botanical prints or torn pages from an old book.
- A vintage-style kitchen might call for floral napkins or patterns from old recipe cards.
- You can also layer tissue paper, use photocopied family photos (on thinner paper), or even incorporate pressed flowers for a natural look.
Join our crafting community to find more DIYs and upcycled craft ideas. It feels good to repurpose and upcycle!
Materials Needed
Disclosure: This post contains affiliate links for your shopping convenience. Should you choose to purchase through them, we will make a small commission at no extra cost to you. You can read our full disclosure policy here.
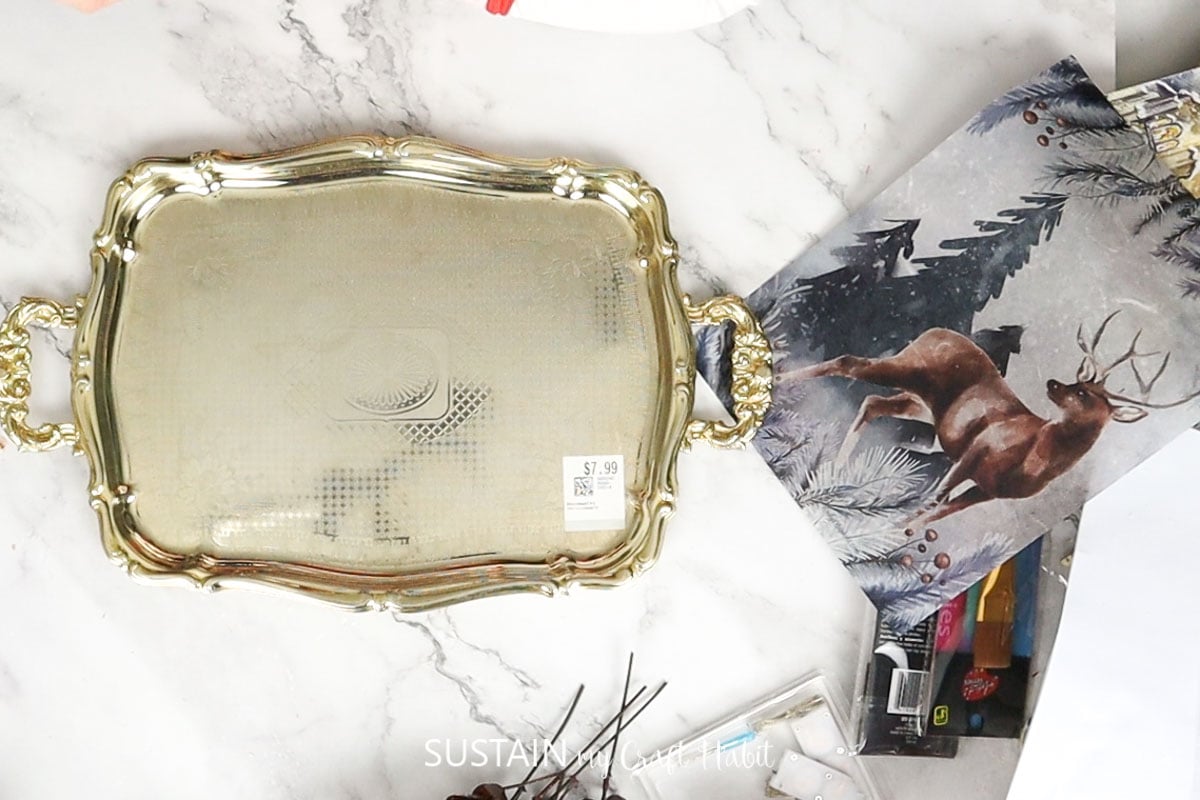
- Silver tray (we got ours from the thrift store)
- Decoupage paper
- Chalky white paint
- Paintbrushes
- Decoupage glue or Mod Podge
- Hot glue
- Twinkle lights
- Diamond dust
- Mini heat press and parchment paper
How to Upcycle a Silver Tray with Decoupage
I shared the simple instructions for this decoupaged silver tray on a Facebook Shorts video, which you can watch here. All of the step by step instructions can be found in the video or if you prefer the photo tutorial, continue reading below.
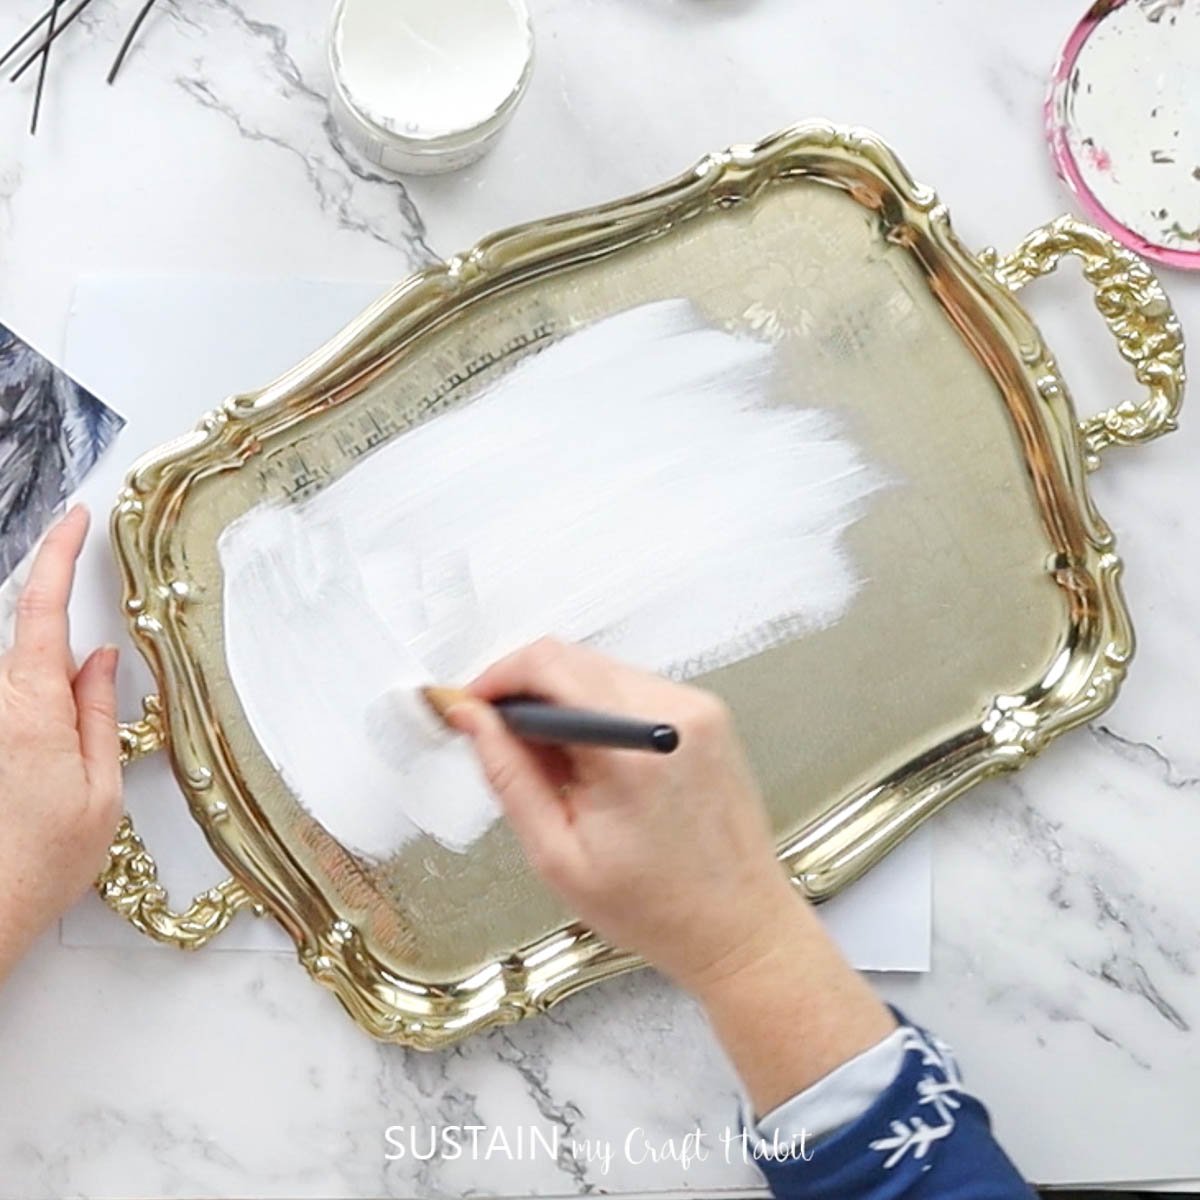
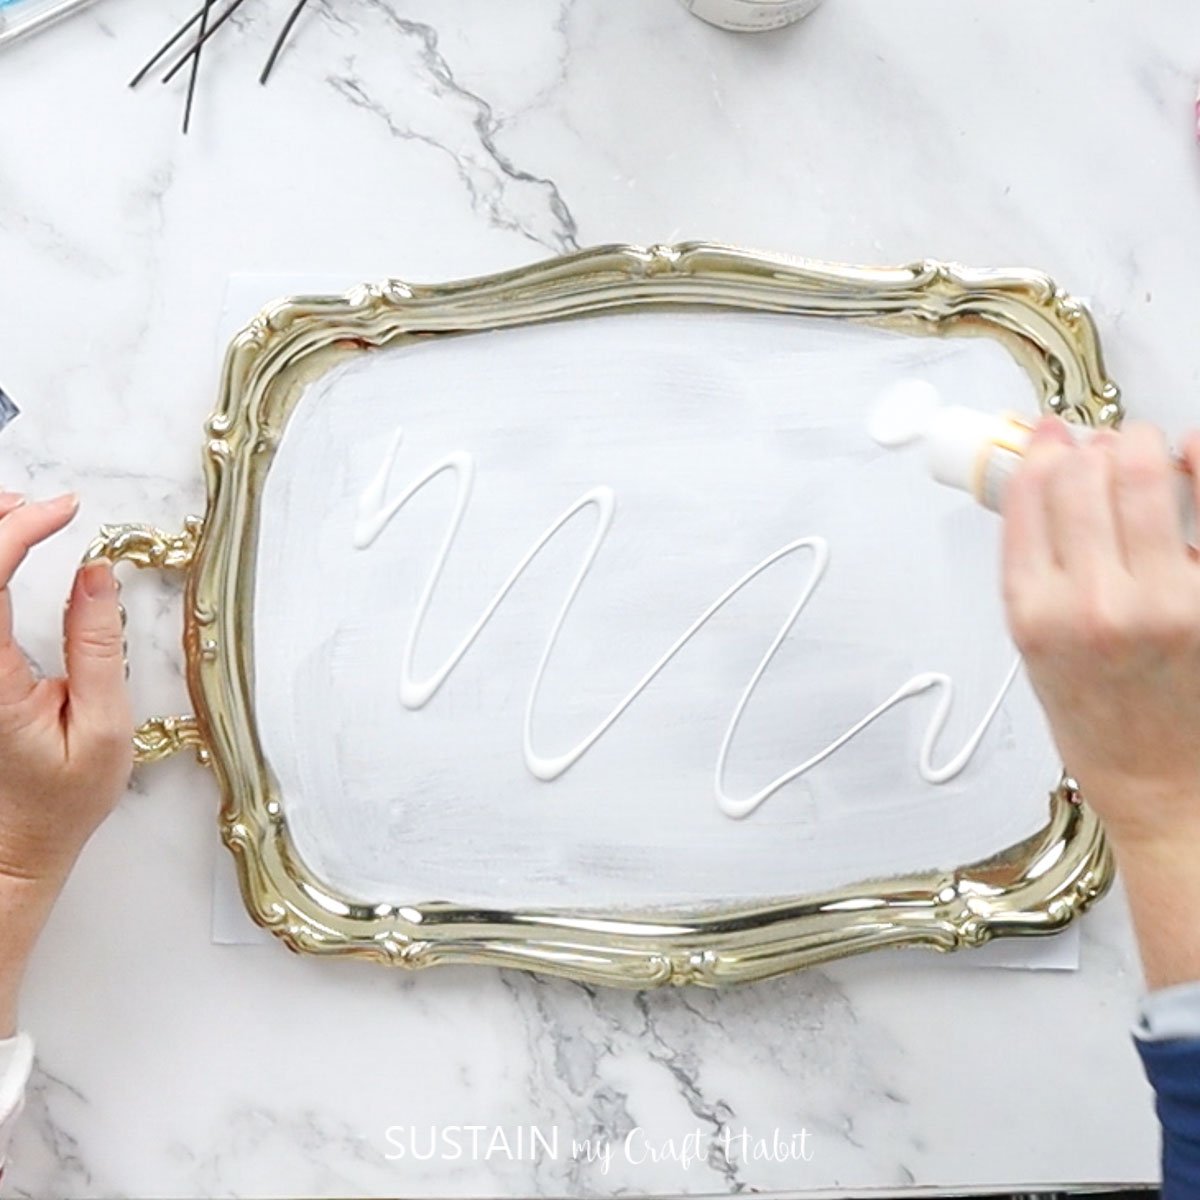
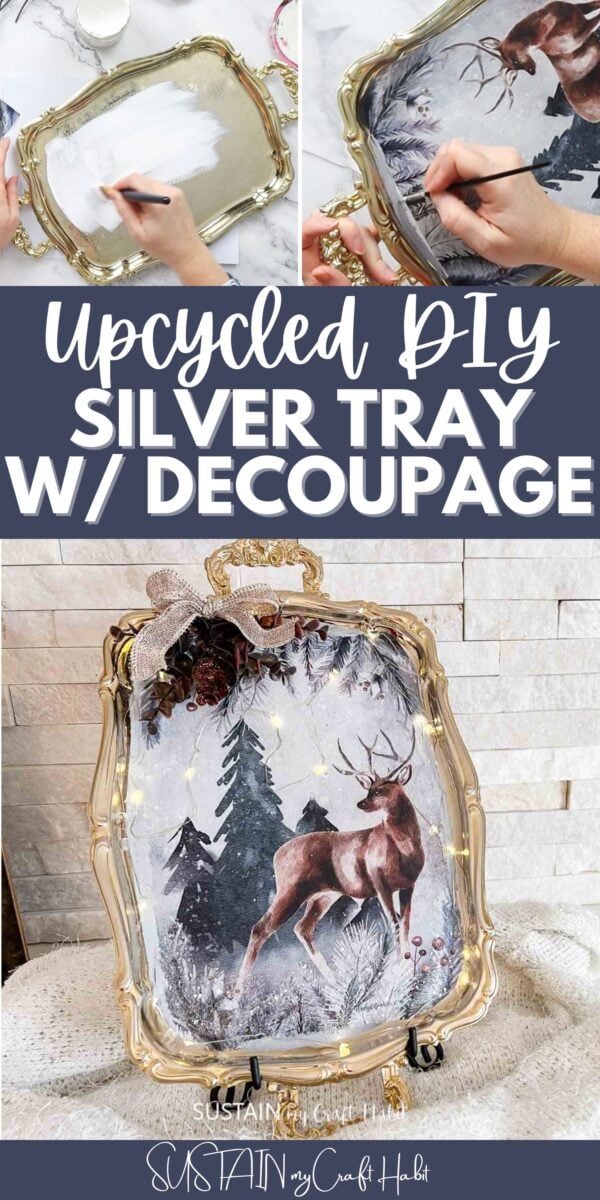
Start by painting your silver tray with white chalky paint and let dry.
Apply a coat of Mod Podge and let dry tacky.
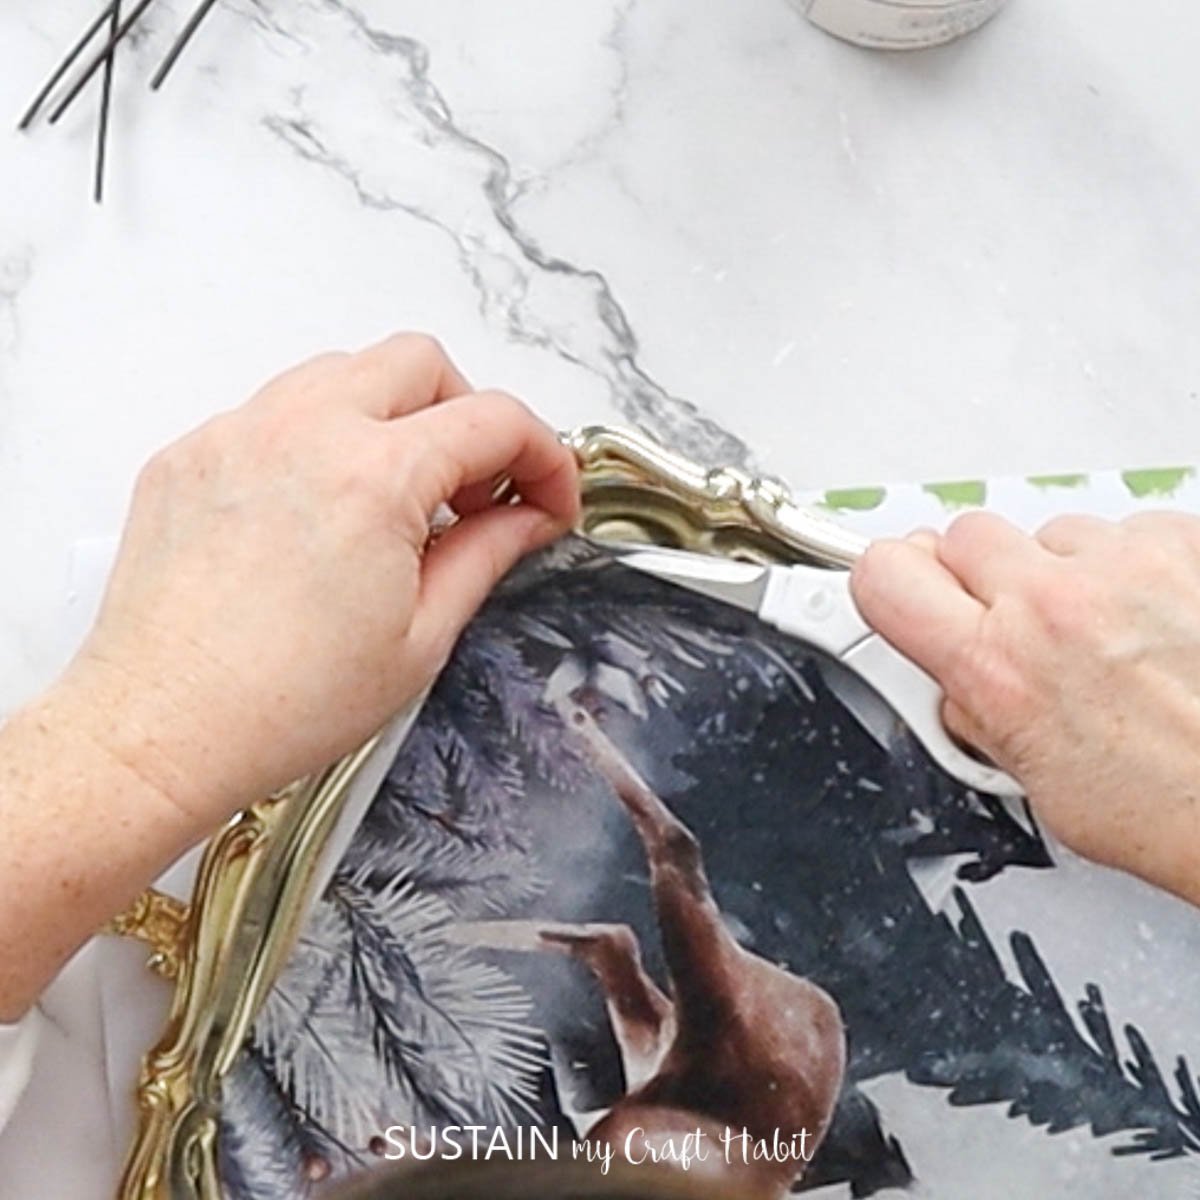
Place the decoupage paper on top of the tray and gently press down with your fingers. Cut off any excess.
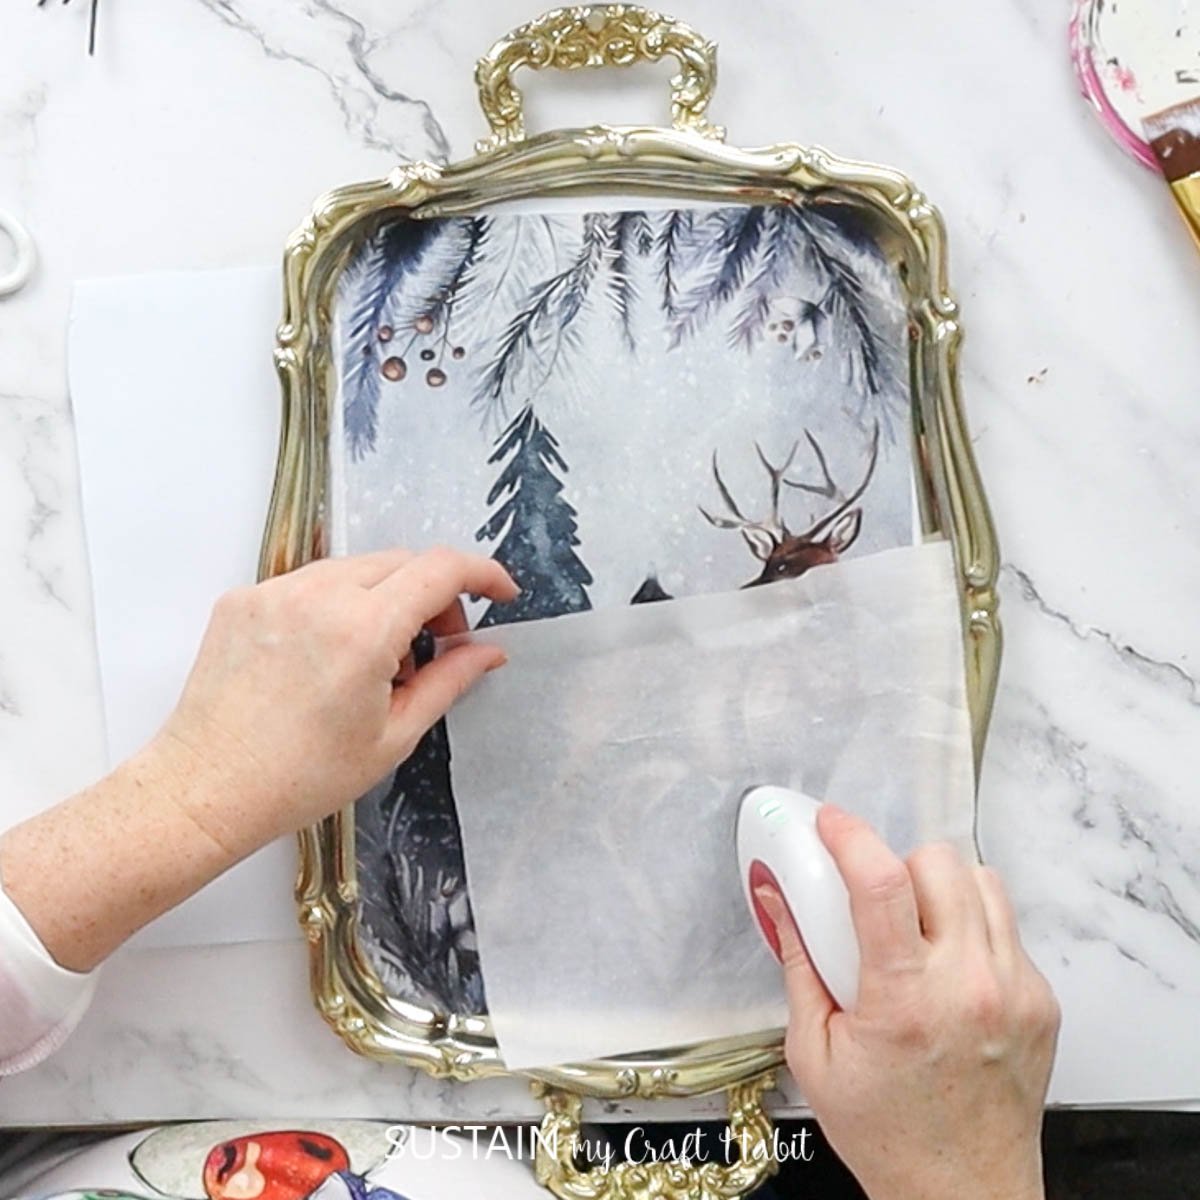
Place a piece of parchment paper over top of the paper and take your heated iron and gently rub back and forth.
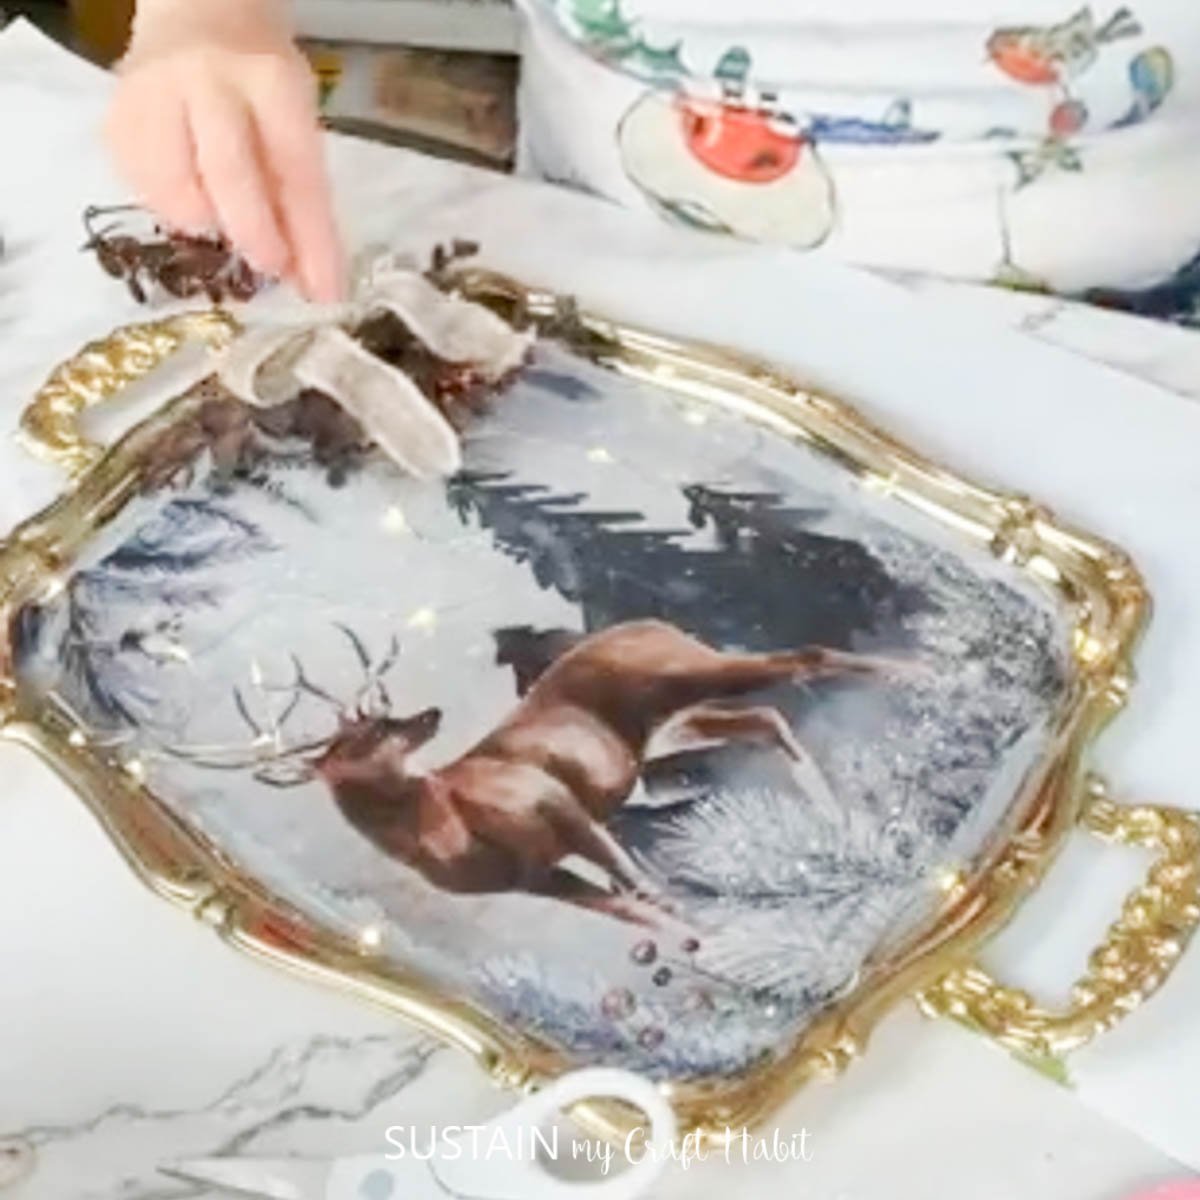
Add hot glue around the edge of the tray and place a strand of twinkle lights over it.
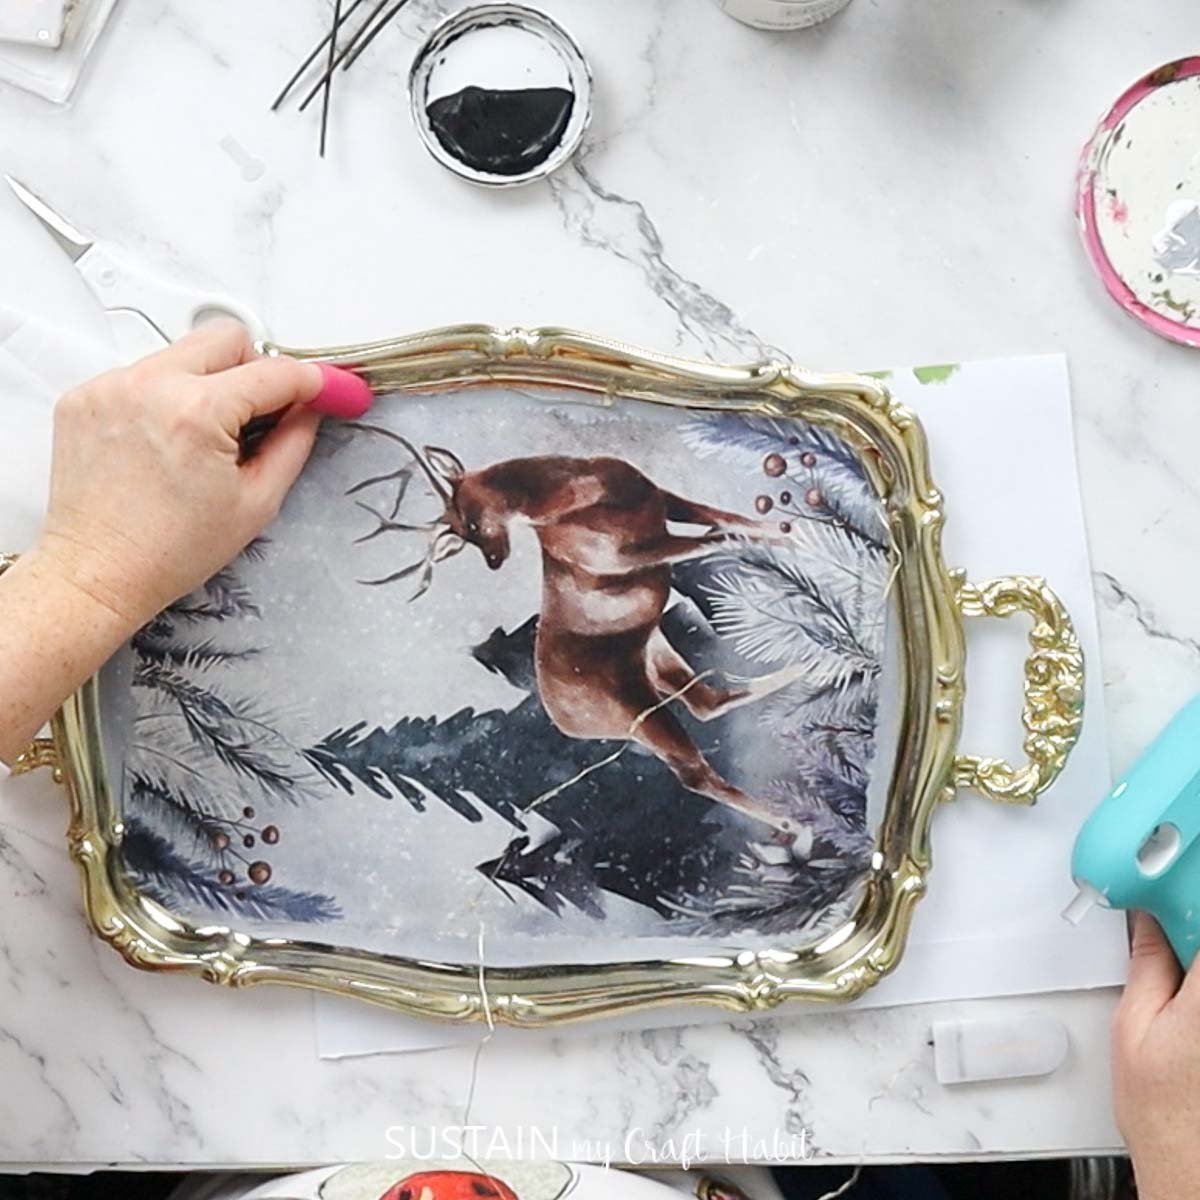
Add a bit of glue to the bottom of the tray and sprinkle on your diamond dust.
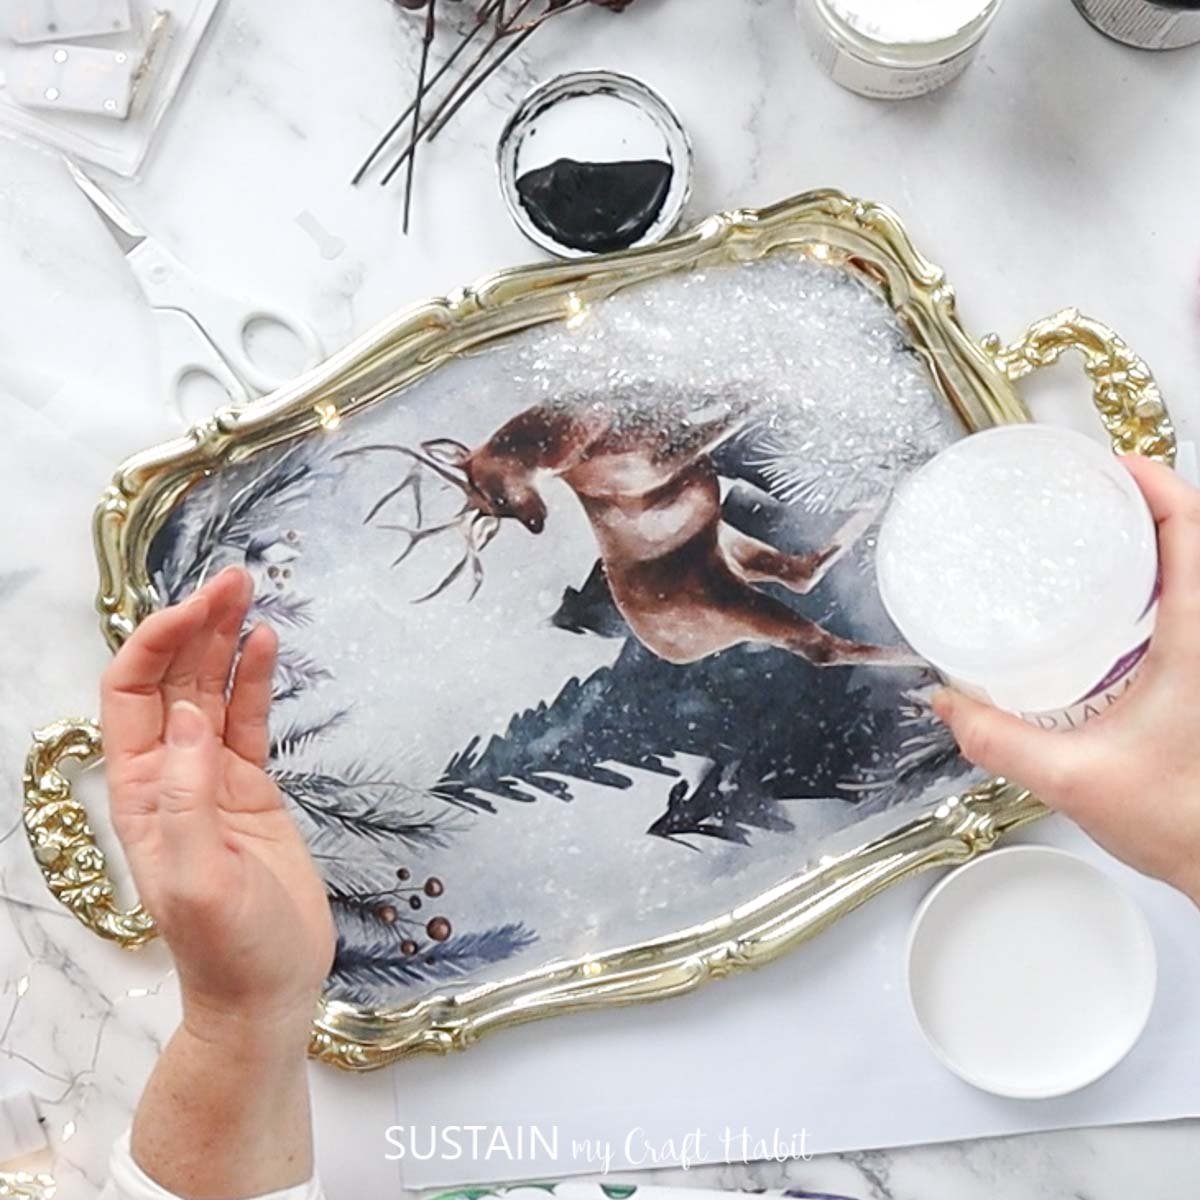
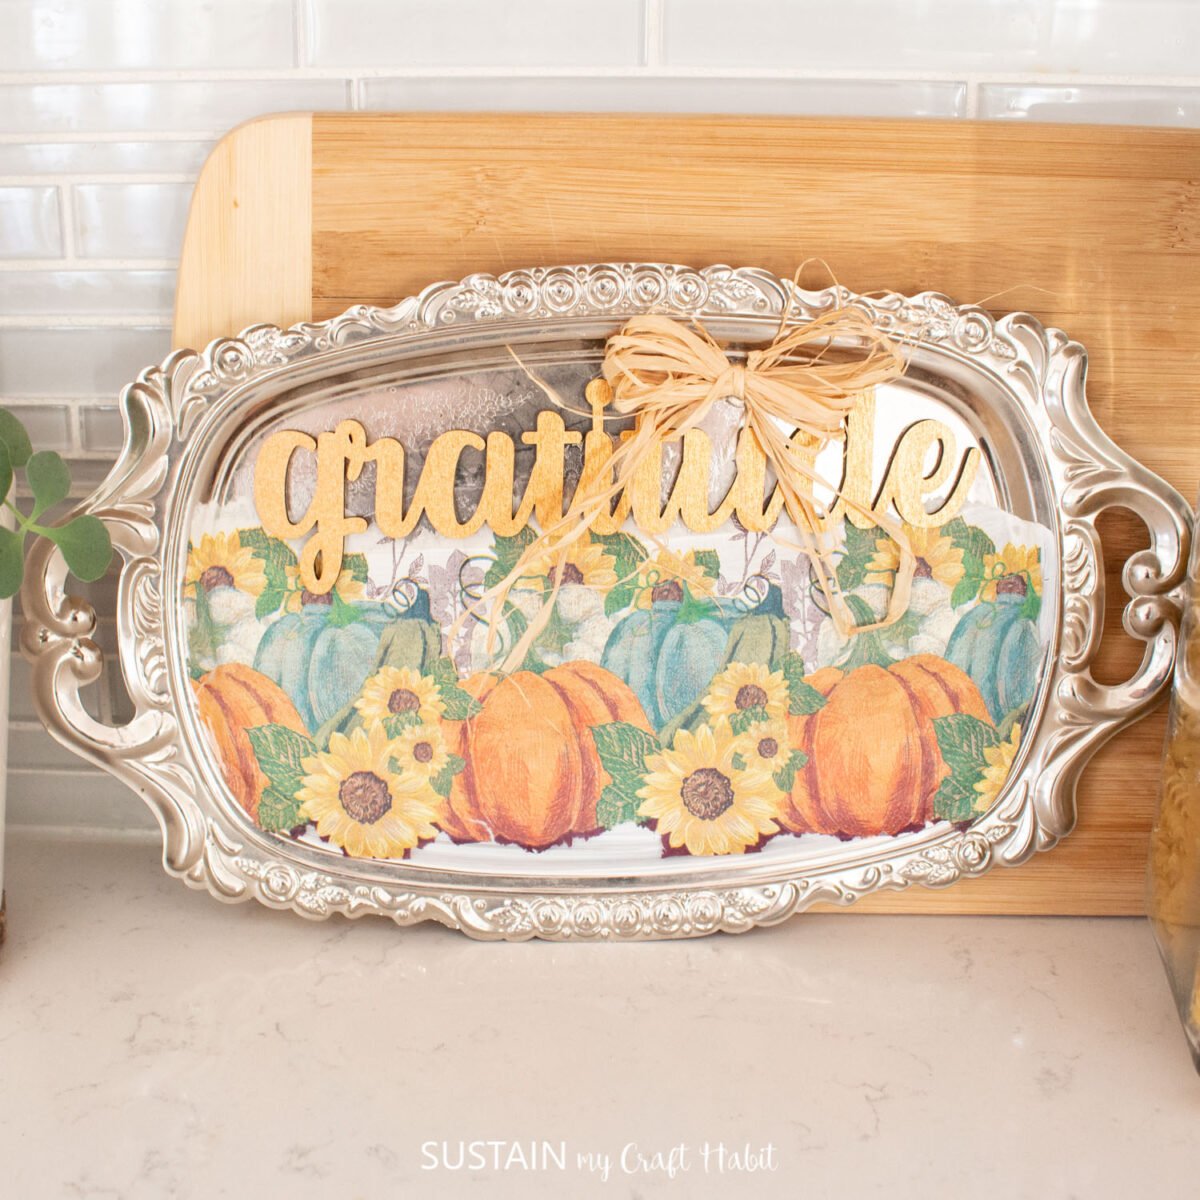
Finally, add any embellishments such as ribbons, pine cones or stems.
Transformation Magic
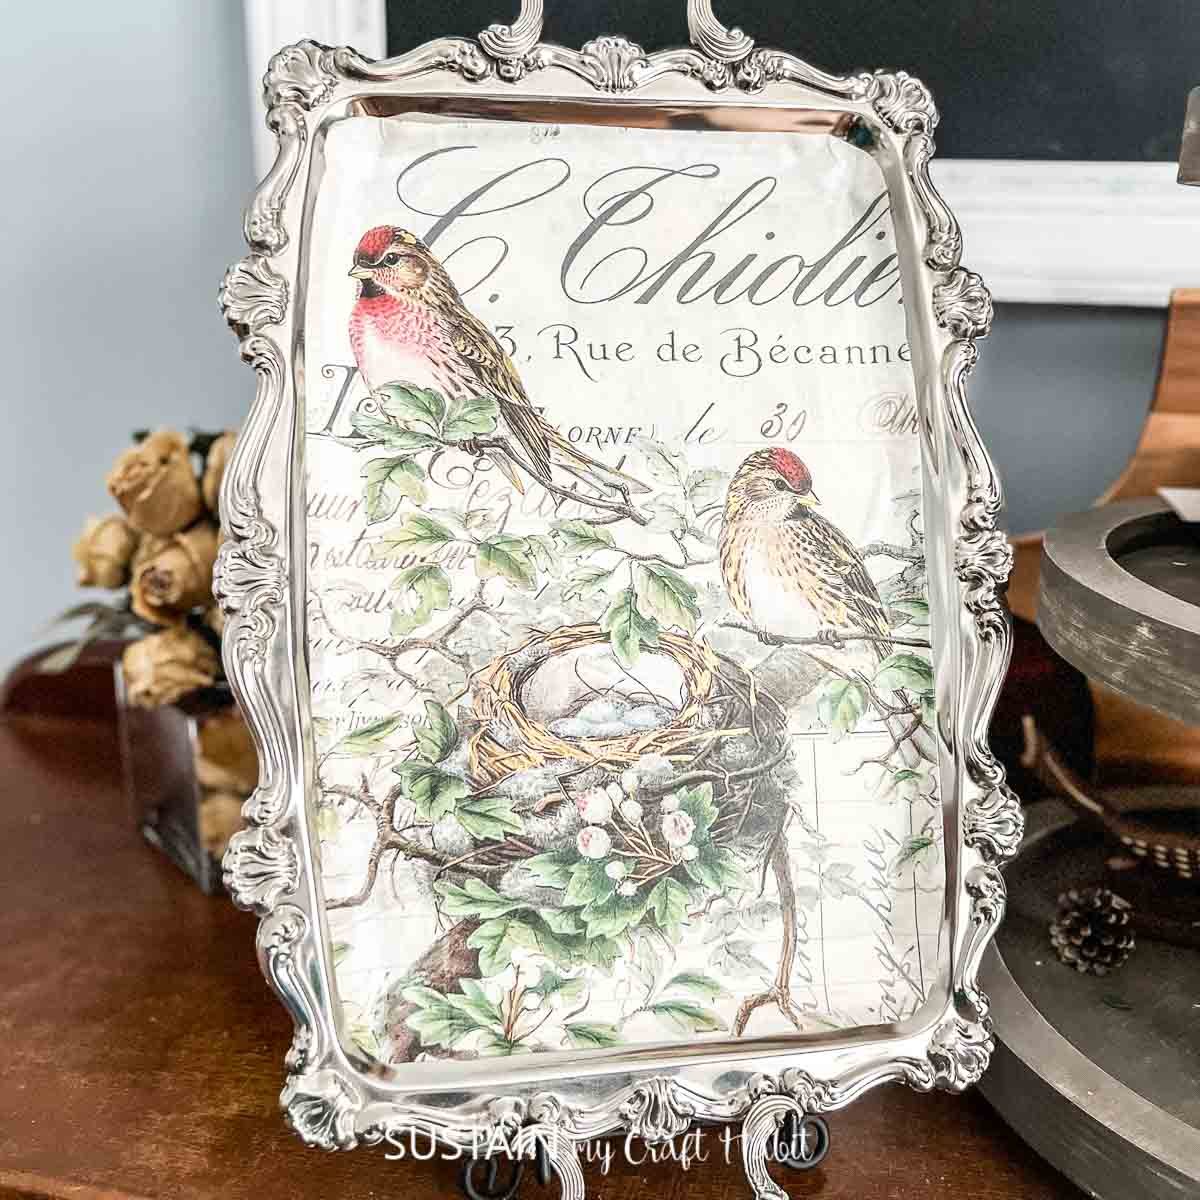
There’s a quiet kind of magic in turning something worn into something beautiful. An upcycled silver tray with decoupage feels like you’re not just decorating a home—you’re adding a story.
Whether it ends up holding plants, perfumes, or biscuits, it brings personality into the room in a way that something store-bought just can’t. And that’s the real heart of crafting: not perfection, but transformation. So dig out that dusty tray, gather some paper and glue, and start crafting something that’s entirely yours.
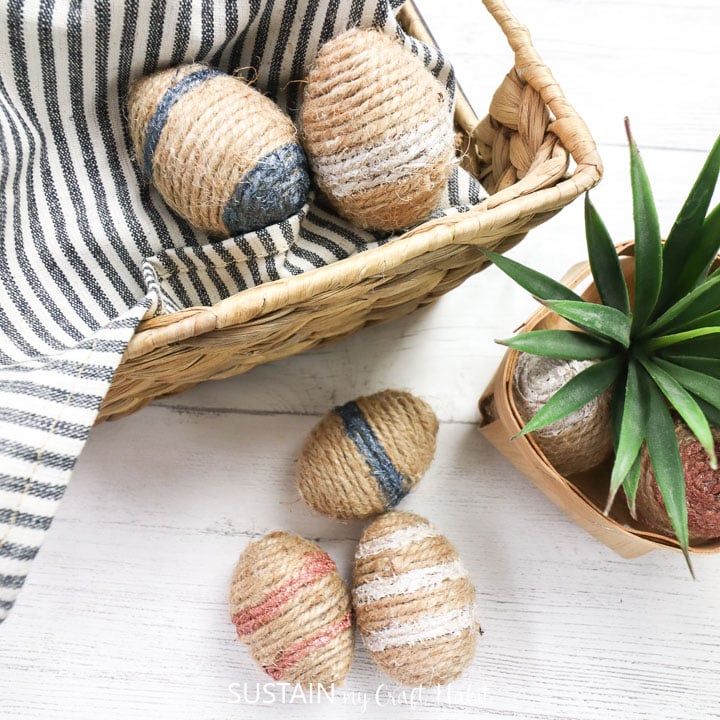
More Upcycled Tray Crafts
- Decoupage on Thrifted Silver Tray
- Upcycled Serving Tray with Decoupage
- Paper Napkin Cardinal Decoupage
- Fall Tray
- Upcycled Silver Tray
- Painted Citrus Serving Tray


Want to receive a ton of inspiration and money saving ideas for decorating, gift-giving and crafting? Join HERE!
Like it? Pin for later!

Upcycled Silver Tray with Decoupage
Materials
- Silver tray we got ours from the thrift store
- Decoupage paper
- Chalky white paint
- Paintbrushes
- Decoupage glue or Mod Podge
- Hot glue
- Twinkle lights
- Diamond dust
- Mini heat press and parchment paper
Instructions
- Start by painting your silver tray with white chalky paint and let dry.
- Apply a coat of Mod Podge and let dry tacky.
- Place the decoupage paper on top of the tray and gently press down with your fingers. Cut off any excess.
- Place a piece of parchment paper over top of the paper and take your heated iron and gently rub back and forth.
- Add hot glue around the edge of the tray and place a strand of twinkle lights over it.
- Add a bit of glue to the bottom of the tray and sprinkle on your diamond dust.
- Finally, add any embellishments such as ribbons, pine cones or stems.