
DIY Wooden Luggage Tags
Travel tags take a beating. Paper bends, plastic cracks, and store-bought ones all look the…
Travel tags take a beating. Paper bends, plastic cracks, and store-bought ones all look the same. DIY wooden luggage tags fix that in one go. They’re sturdy, easy to spot on the carousel, and simple to personalise with names and engraved designs.

This project is ideal if you want something practical that still feels handmade. You can keep it basic with natural wood or dress it up with paint, vinyl and engraving. I’ll walk you through the full step-by-step process, plus size ideas and finish options, so you can make tags that actually last trip after trip. If you enjoy quick craft wins that feel thoughtful, this one delivers. Let’s get started!
Why You’ll Love This Project
- Beginner-friendly woodworking craft
- Great handmade gift idea for travellers
- Customisable for names, fonts, and colours
- Durable upgrade from flimsy plastic tags
Get access to our resource library filled with cut files and other xTool craft ideas!
Materials Needed
- xTool P2 or other laser cutting machine
- 3mm Basswood, 1 sheet 12”x12”
- 1/16” Clear Acrylic sheet
- E6500 Glue
- Paint Pen (optional)
- Ribbon or Zip Tie
- Lacquer Wood Sealer
- Luggage Tag SVG and Luggage Name Label printable
- Printer with Cardstock paper
- Scissors or paper cutter
How to Make Wooden Luggage Tags
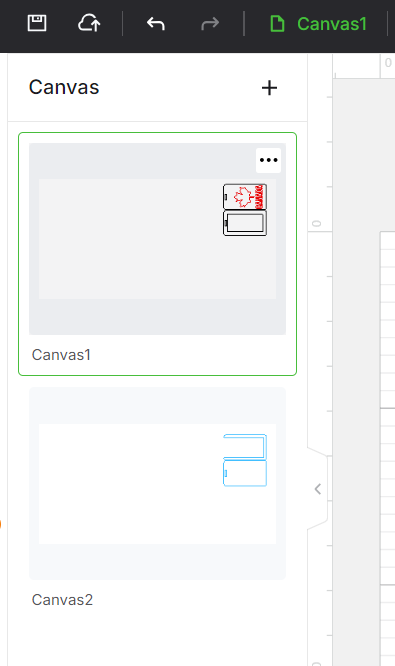
Open Creative Space and select a new project. Insert the luggage tag svg image to the canvas.
Set the material type to 3mm Basswood and use your preferred basswood cut settings. Set the flag/text to SCORE and use your preferred basswood score settings.
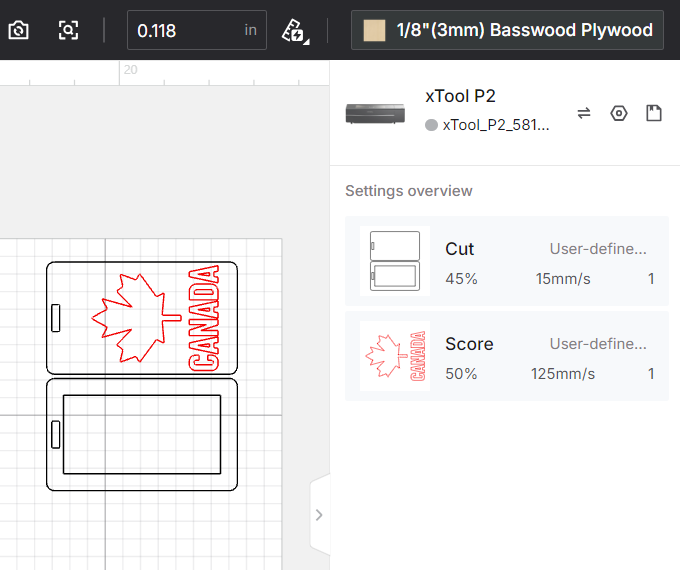
You can remove the flag and CANADA text if you like and upload another design of your choosing as well.
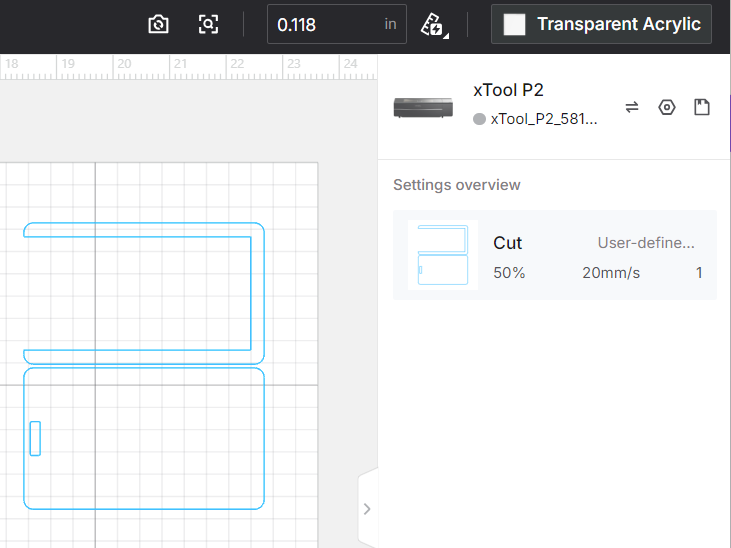
Move the blue-colored shapes to be cut in acrylic on to a separate canvas and set the material type to clear acrylic with the settings set to your default power and speed settings. In our case, we find 50% at 20 seconds works well.
Starting with the wood, insert the material into the xTool P2 and refresh your screen.
Position the design onto the surface and proceed to cutting and follow the prompts on the screen. Hit start and then remove when finished.
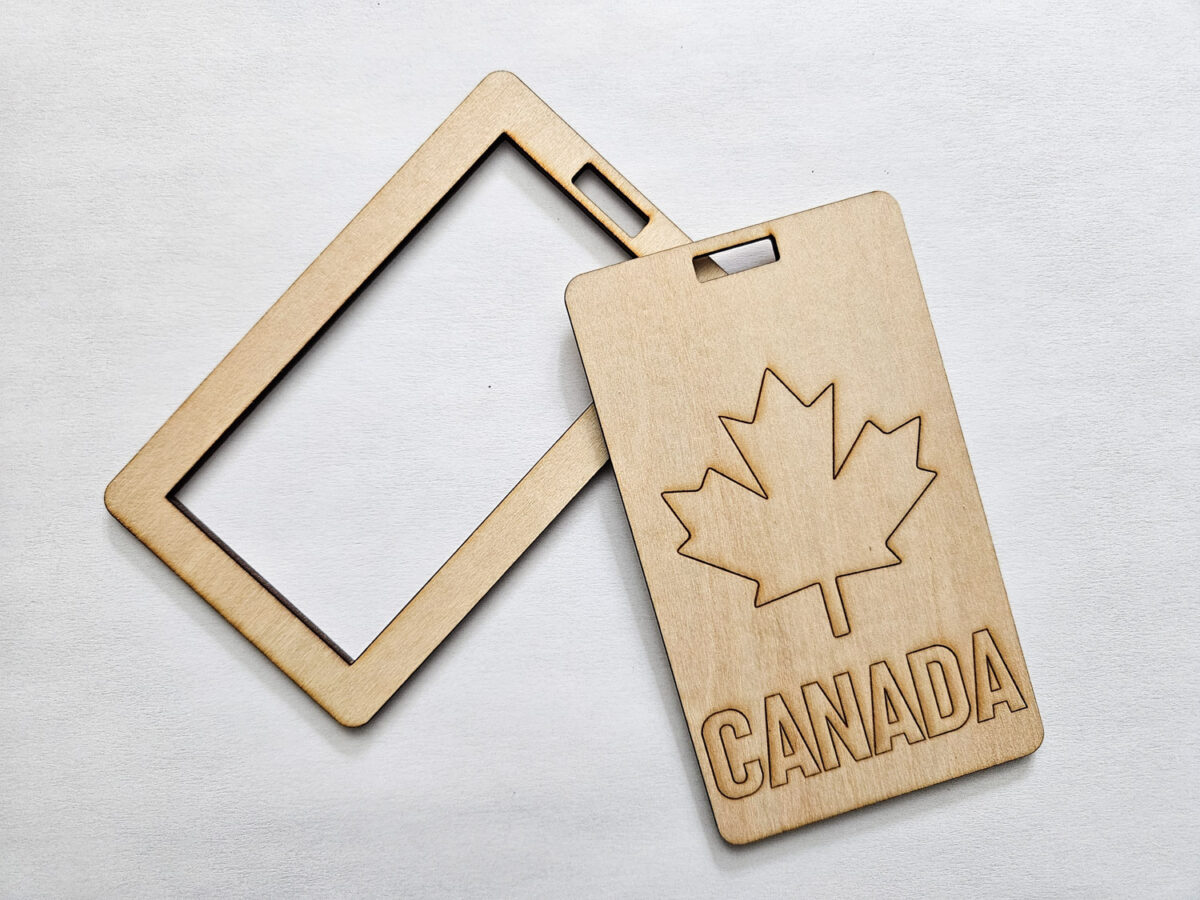
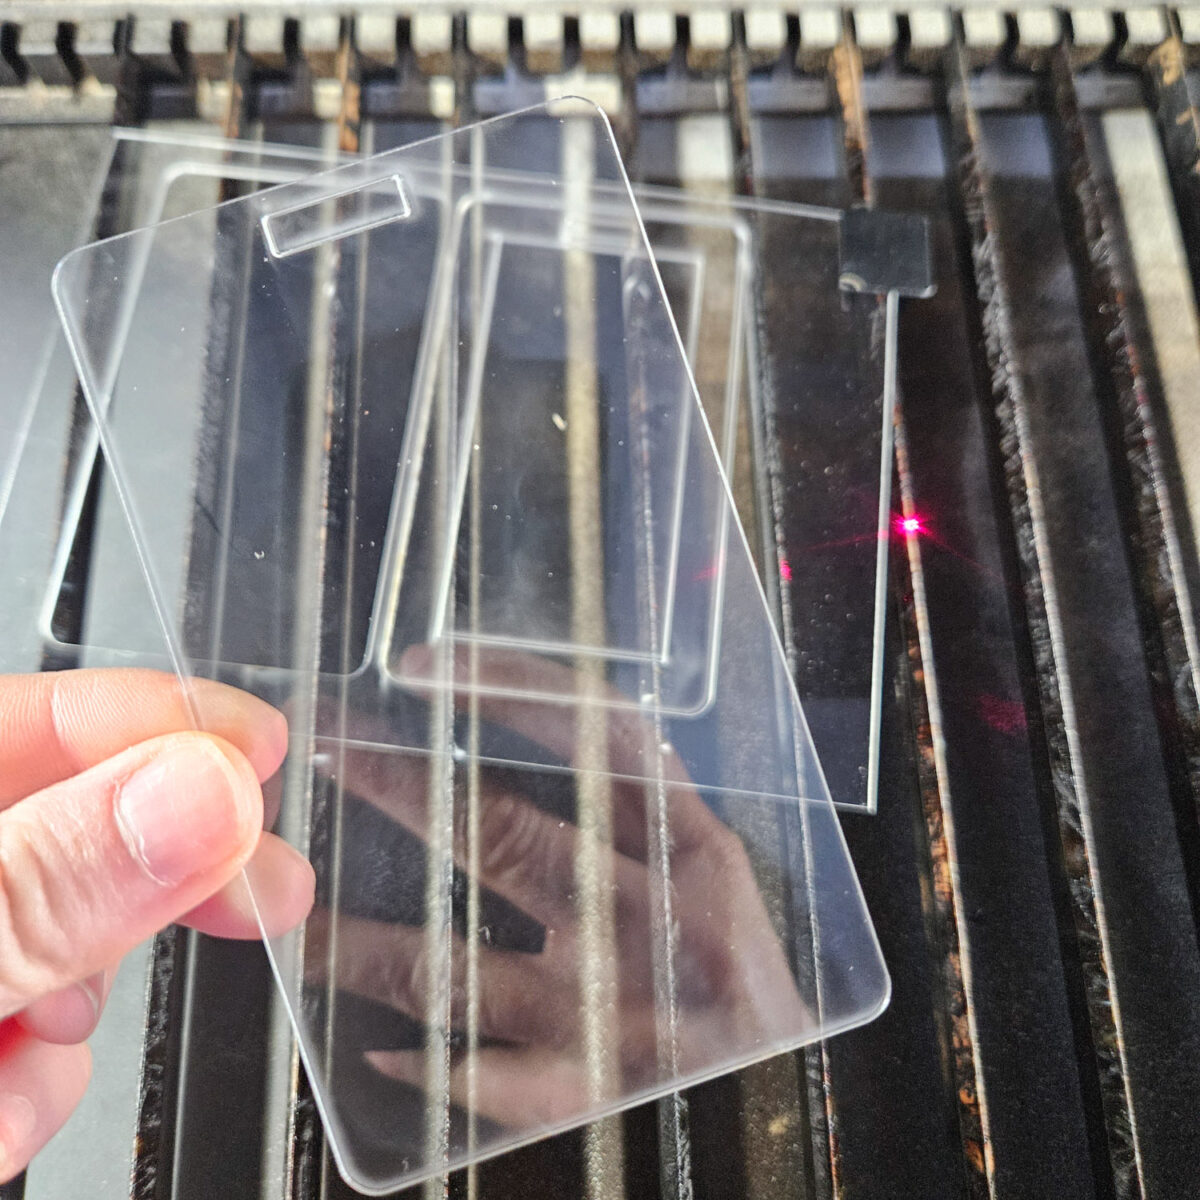
Next, move on to the pieces for cutting out of acrylic. Take care to position the design onto the surface (it’s hard to see because the acrylic is clear).
Hit start when settings are ready and then remove when complete.
Assembling
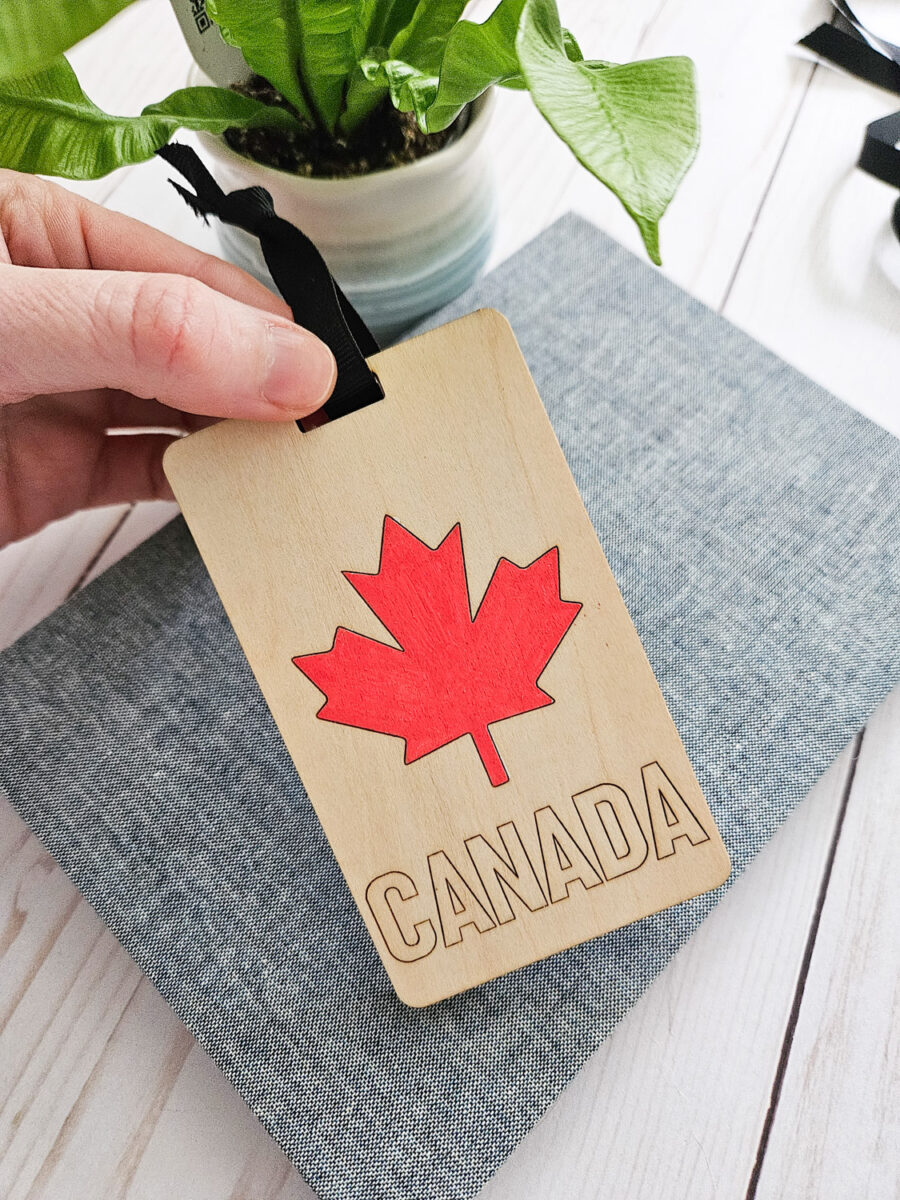
If desired, paint the flag (or whatever motif you have) with acrylic paint pens, they work great for fine detail.
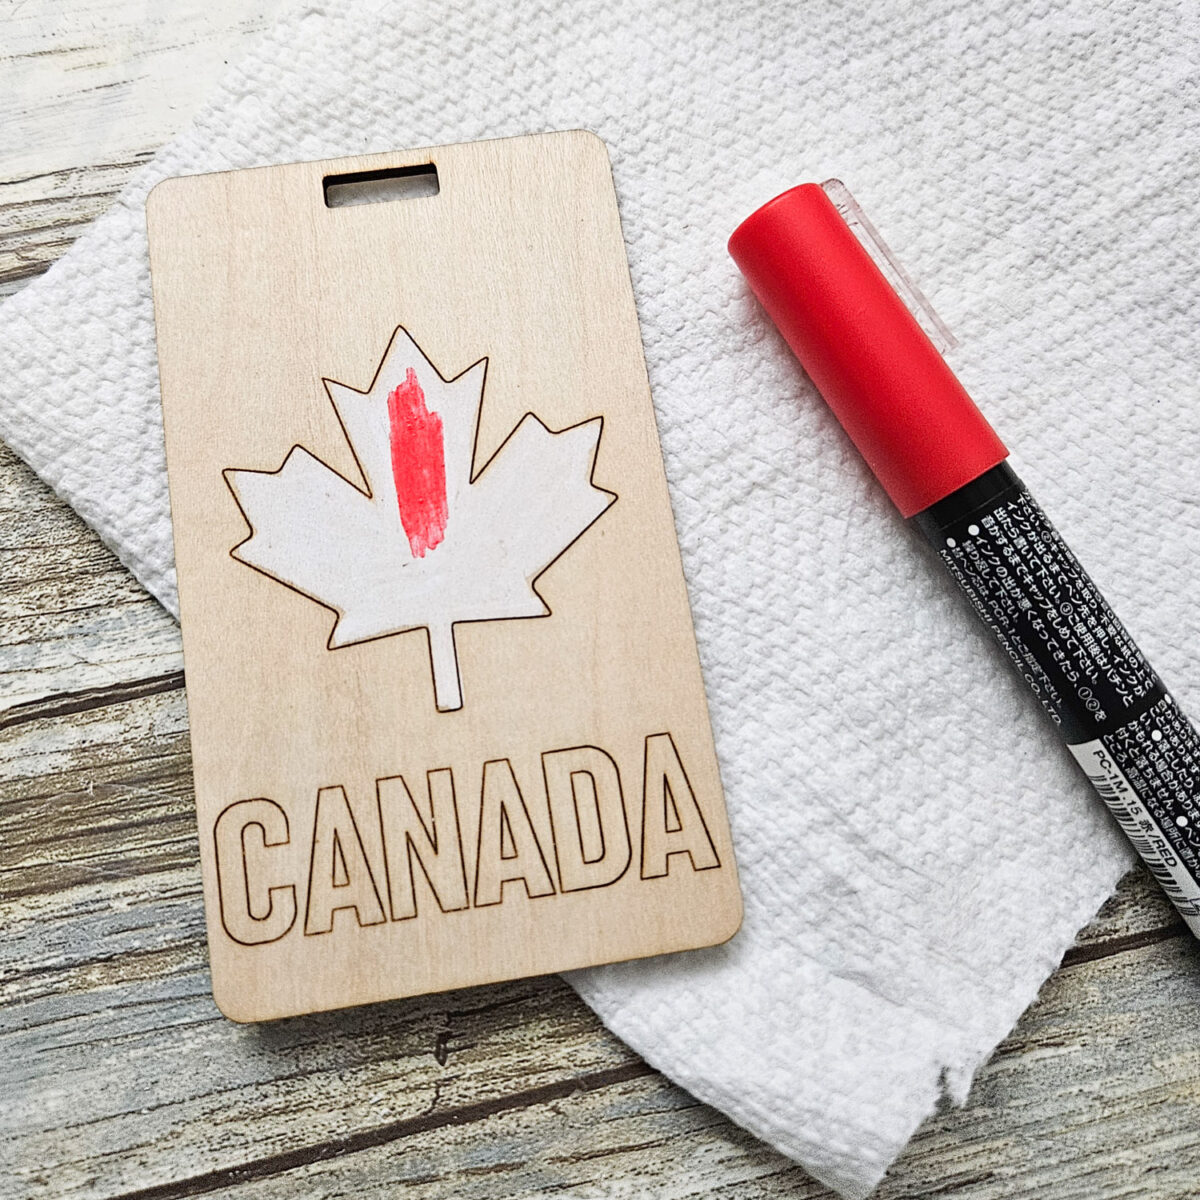
Apply a coating of wood sealer over top of the wood cutouts.
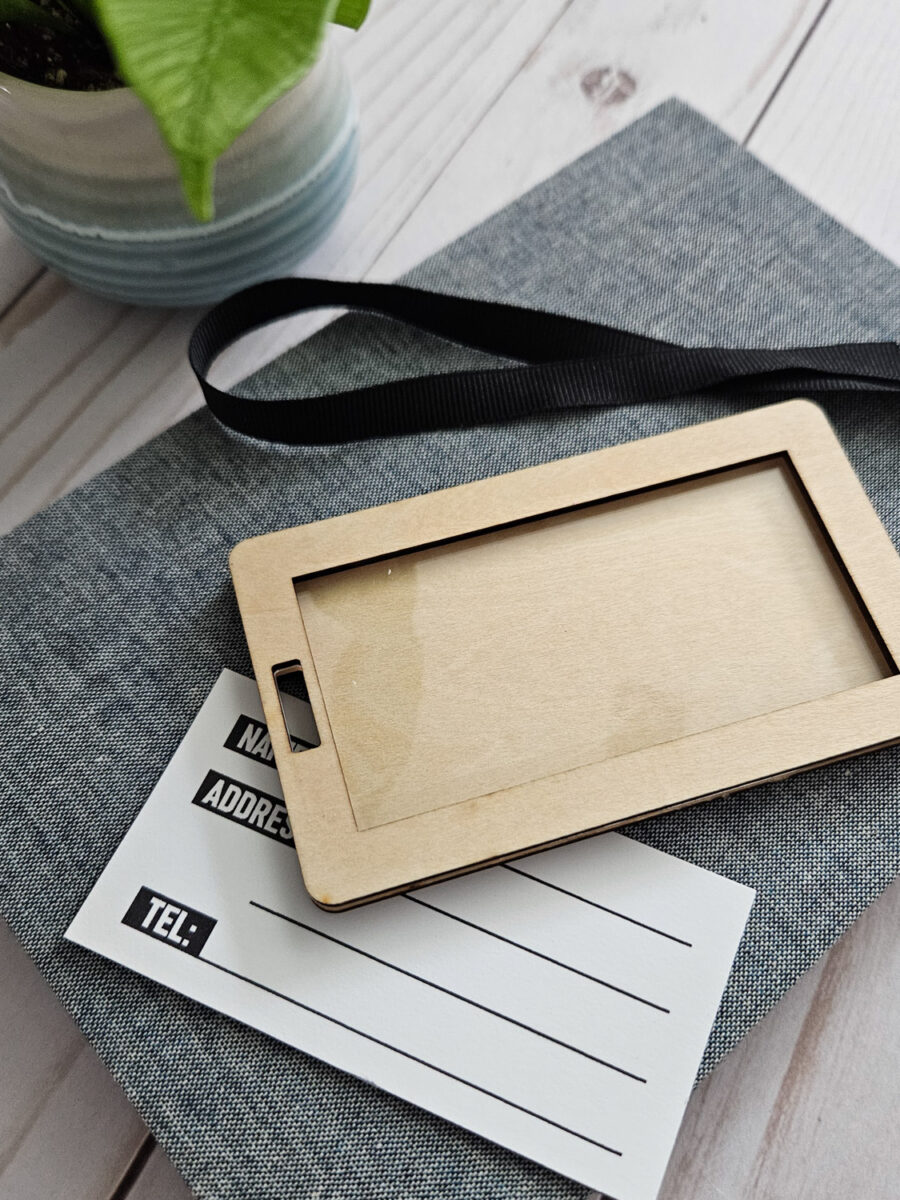
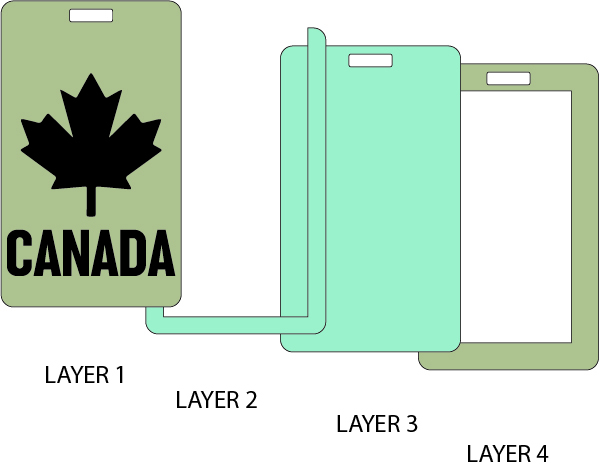
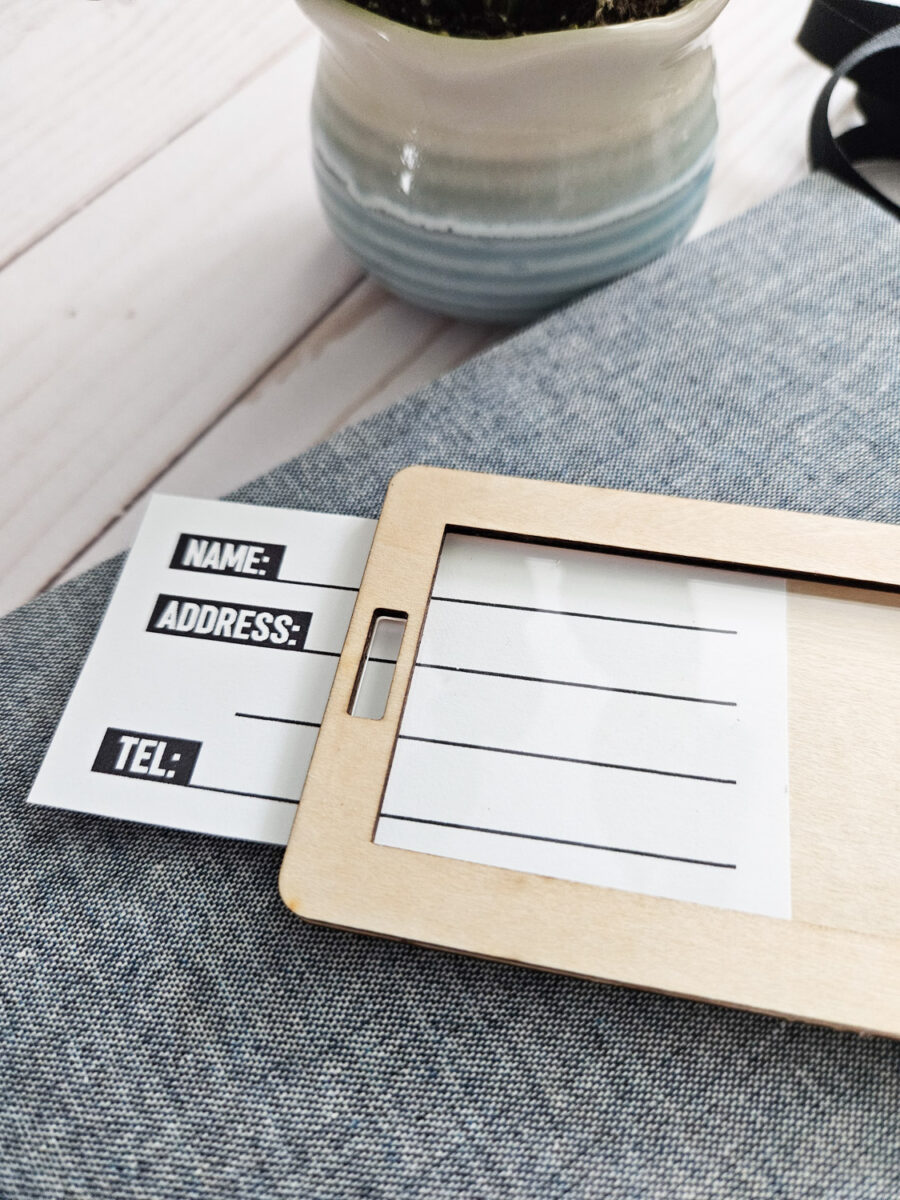
Layer the pieces as shown in the image by applying a thin layer of glue along the outer edges of each layer to hold them together.

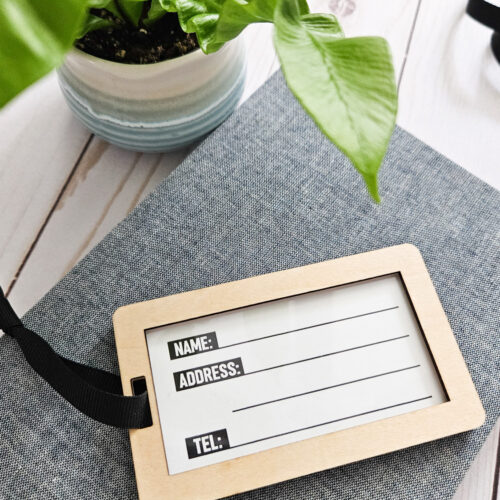
Print out the luggage name label template on white cardstock and cutout along the dashed lines.

Fill out the label with your information and insert into the tag.
Secure the luggage tag with a piece of ribbon or zip tie.

Tips & Troubleshooting
Size & Finish Options
Standard tag sizes work well, though oversized tags stand out fast on busy luggage belts. Seal with clear varnish or outdoor Mod Podge for travel wear.
Common Fixes
Rough edges? A quick sand with fine-grit paper smooths things out. Paint bleeding usually means the wood needs sealing first.
How to Display / Style Your Project
- Attach to suitcases or backpacks as a practical travel accessory
- Use as gift décor idea for honeymoons or family trips
- Hang on storage bins at home as a simple home décor idea
Travel in Style
DIY wooden luggage tags are quick to make and genuinely useful. They hold up well, look great, and make travel gear feel personal. Once you’ve made one, you’ll probably end up making a whole set. Don’t forget to pin or save this project for your next craft session.
More XTool Crafts to Make
- Laser Engraving on Driftwood
- DIY Stocking Tags
- Personalized Trinket Trays
- Mirror Acrylic Keychains
- Laser Engraving Jewelry




Stay in the know on our latest crafts, special offers and freebies by joining our mailing list.
Like it? Pin for later!
DIY Wooden Luggage Tags
Materials
- xTool P2 or other laser cutting machine
- 3 mm Basswood 1 sheet 12”x12”
- 1/16 " Clear Acrylic sheet
- E6500 Glue
- Paint Pen optional
- Ribbon or Zip Tie
- Lacquer Wood Sealer
- Luggage Tag SVG
- Luggage Name Label printable
- Printer with Cardstock paper
- Scissors or paper cutter
Instructions
- Open Creative Space and select a new project.
- Insert the luggage tag svg image to the canvas.
- Set the material type to 3mm Basswood and use your preferred basswood cut settings. Set the flag/text to SCORE and use your preferred basswood score settings.
- Move the shapes to be cut in acrylic on to a separate canvas and set the material type to clear acrylic with the settings set to your default power and speed settings.
- Starting with the wood, insert the material into the xTool P2 and refresh your screen.
- Position the design onto the surface and proceed to cutting and follow the prompts on the screen. Hit start and then remove when finished.
- Take care to position the design onto the surface.
- Hit start when settings are ready and then remove when complete.
Assembling
- Apply a coating of wood sealer over top of the wood cutouts.
- Layer the pieces by applying a thin layer of glue along the outer edges of each layer to hold them together.
- Print out the luggage name label template on white cardstock and cutout along the dashed lines.
- Fill out the label with your information and insert into the tag.
- Secure the luggage tag with a piece of ribbon or zip tie.