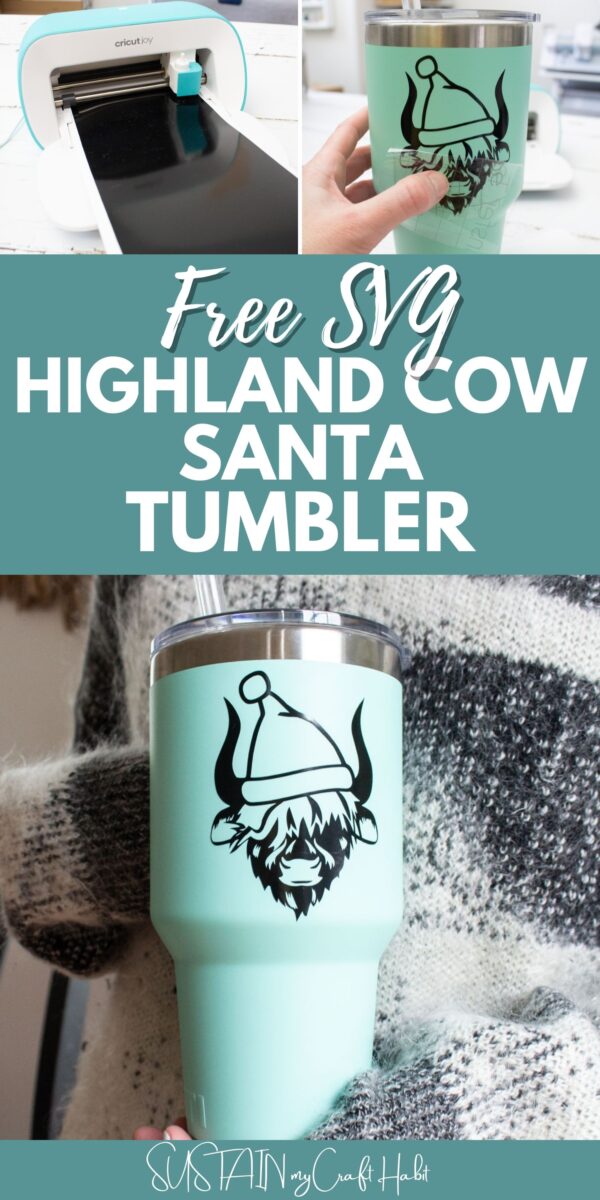
DIY Highland Cow Santa Tumbler – Free SVG
Do you love creating unique and personalized gifts for your loved ones during the holiday season? Are you constantly on the lookout for fun and easy DIY projects to add a personal touch to your Christmas presents? Look no further, because we have the perfect project for you – a DIY highland cow Santa tumbler!

Why You Will Love this Highland Cow Free SVG
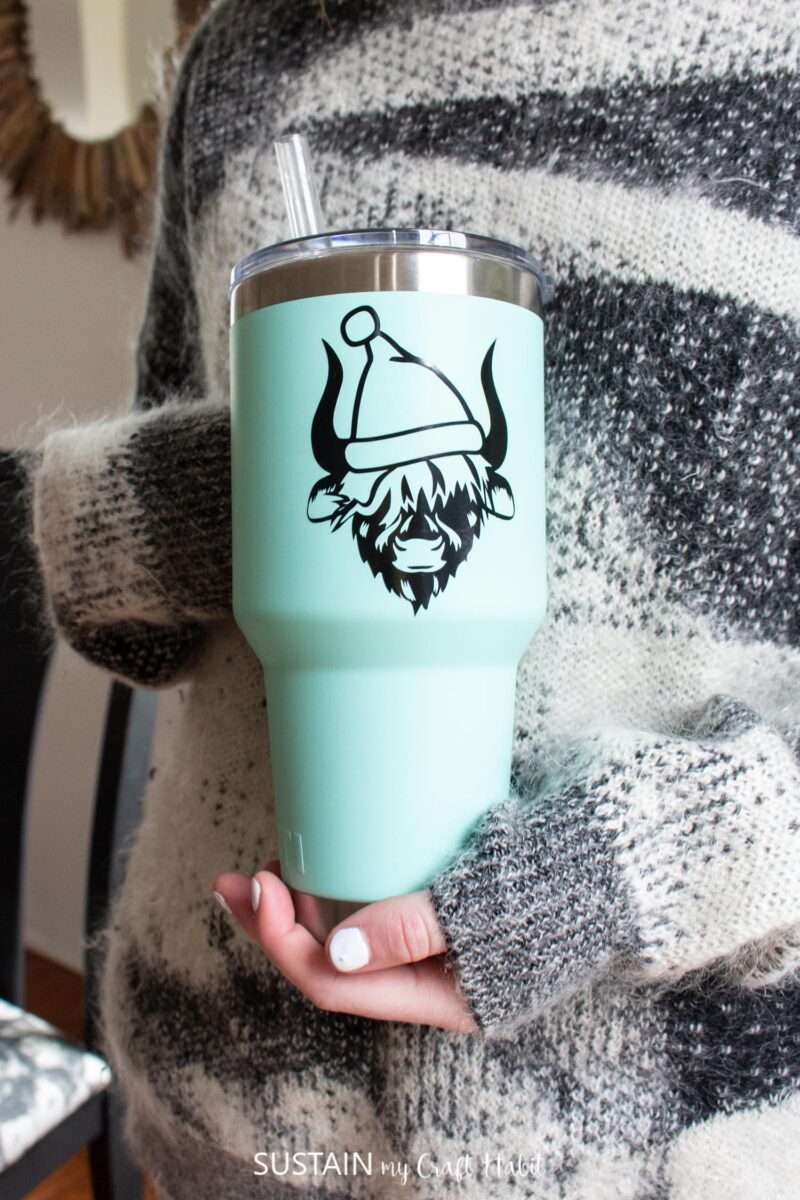
Where to begin? There are so many reasons why you will absolutely love making this DIY highland cow Santa tumbler. First and foremost, it is a unique and personalized gift that will surely bring a smile to your loved ones’ faces. Who wouldn’t want to receive a charming tumbler with an adorable cow dressed up as Santa?
What’s more, this project is incredibly easy to make, even for those who may not have a lot of experience with Cricut or other cutting machines. All you need are some basic supplies and our free SVG file – no special skills required! It’s the perfect project for beginners or for anyone looking for a quick and fun holiday craft.
Can I Use This SVG On Other Items?
Yes, you can definitely use this SVG file on other items as well! While we’re using it for a tumbler in this tutorial, the possibilities are endless. You could use it to decorate mugs, notebooks, water bottles, or even clothing items like sweatshirts or tote bags. Get creative and make your own unique gifts for any occasion – birthdays, anniversaries, or just because!
Get access to our resource library filled with SVG cut files and other Cricut craft ideas!
Materials Needed
Disclosure: This post contains affiliate links for your shopping convenience. Should you choose to purchase through them, we will make a small commission at no extra cost to you. You can read our full disclosure policy here.
- Tumbler
Cricut Joy Smart Vinyl, Permanent in black (or color of your choosing)- Highland Cow Santa Free SVG file (grab it for FREE from our digitial shop here)
Weeding tool Transfer Tape - Scissors
How to Make a Highland Cow Santa Tumbler
Uploading the SVG Pattern
Upload Highland Cow Santa SVG File into Design Space.
Adjust image size to fit your tumbler accordingly or maintain size as provided.
Cutting
Ensure the machine is set to Cricut Joy and select “Make It” in Design Space.
Choose “Without Mat” as the option for cutting when using Smart Vinyl.

Set material type to Smart Vinyl.

Follow prompts for loading the mat into the Cricut Joy and cutting the Smart Vinyl. When prompted, unload the vinyl from the cutting machine.

Applying the Vinyl
Cut around the image with a pair of scissors.
Using the weeding tool, peel away the excess vinyl around the cut image and discard.

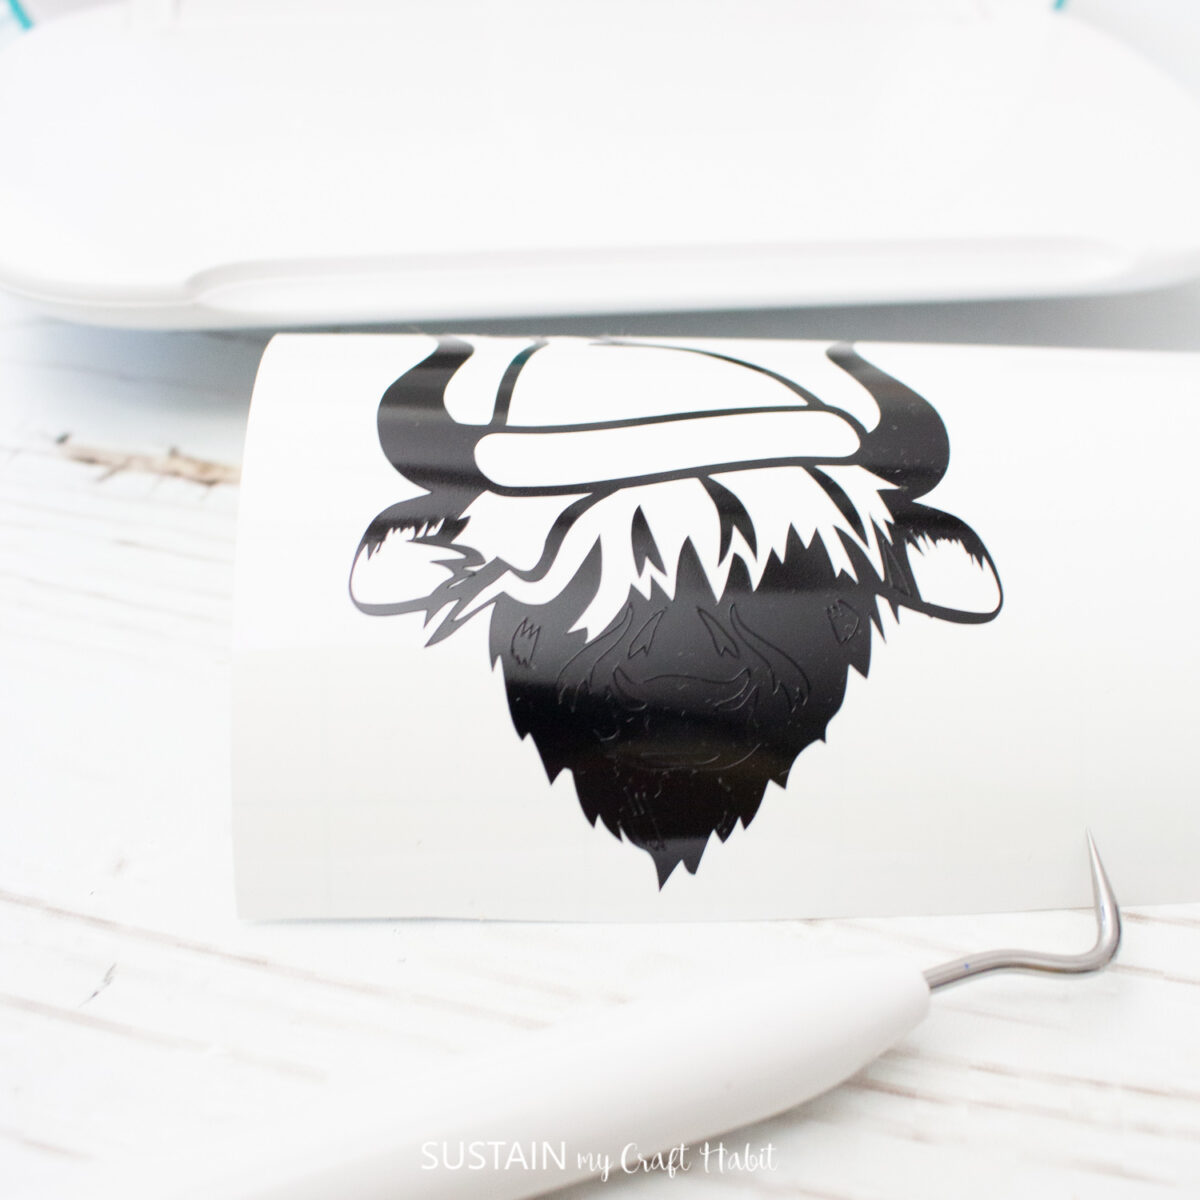
Cut a piece of transfer tape a bit larger than the size of the image.
Peel away the transfer tape backing and place the transfer tape overtop of the cut image. Gently rub the vinyl to help it stick to the transfer tape.

Peel away the vinyl backing and place the image on to the tumbler.
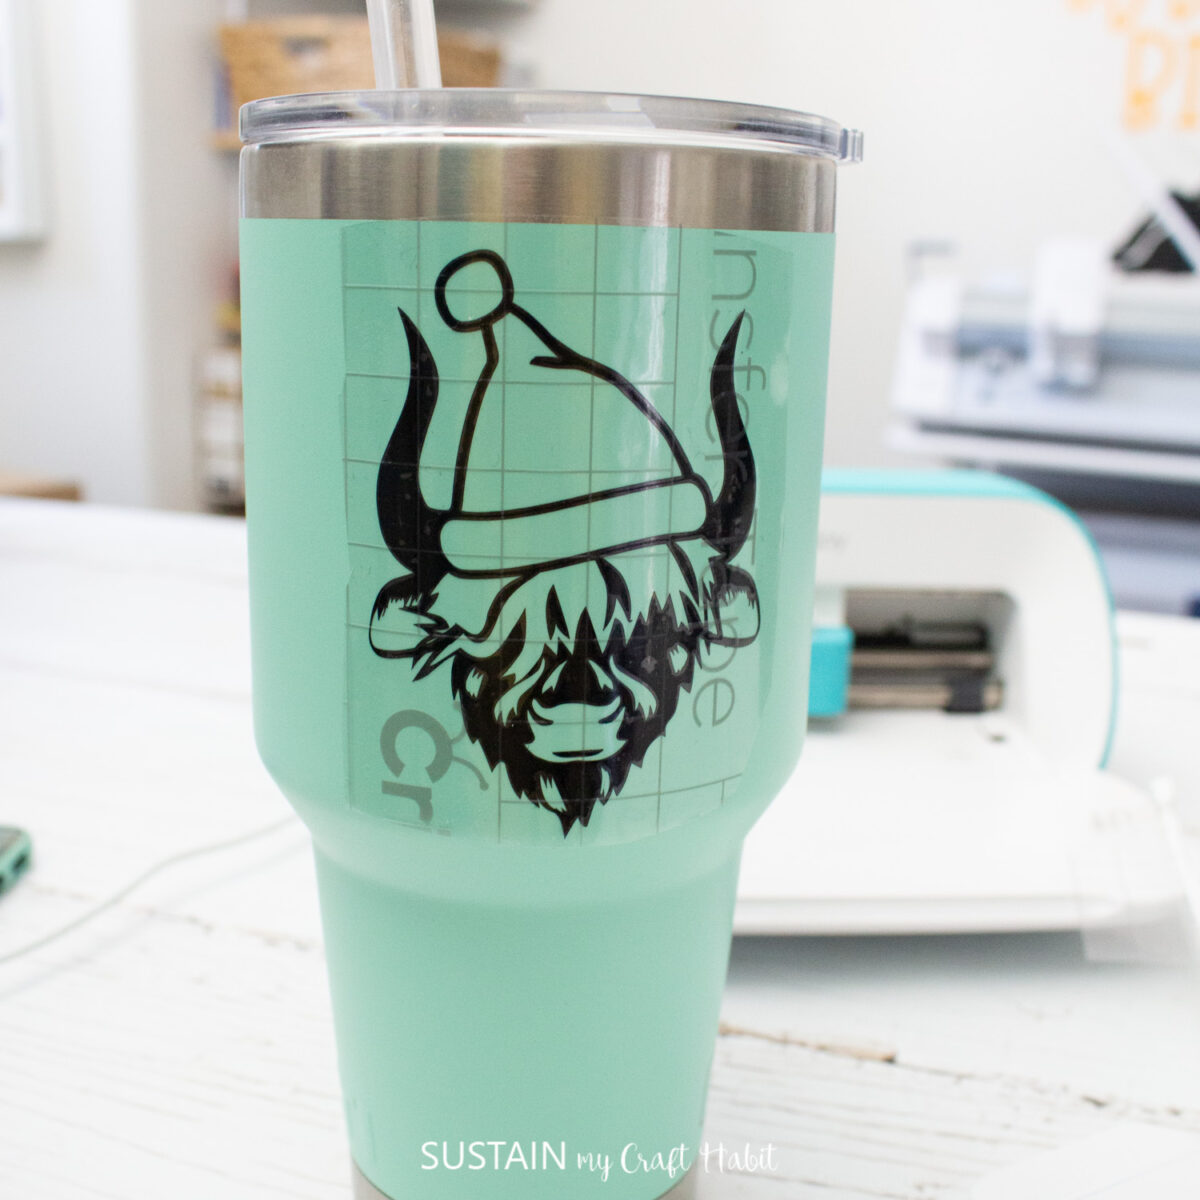
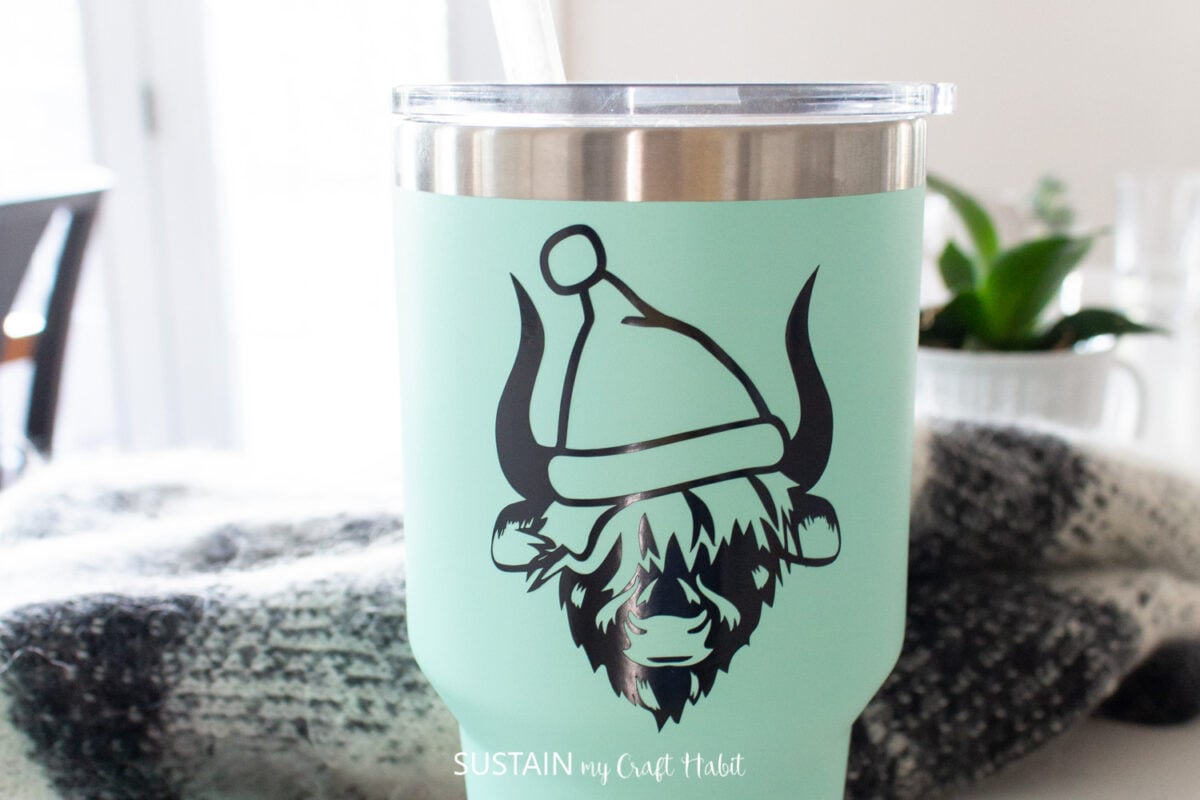
Peel away the transfer tape and voila! The highland cow Santa tumbler is complete!

Handcrafted By You!
This fun and easy project will not only bring joy and satisfaction but also allow you to showcase your artistic flair. Imagine the delight on the recipient’s face when they receive this thoughtful and unique gift, lovingly handcrafted by you.
We can’t wait to see the intricate details, vibrant colors, and personal touches you incorporate into your DIY highland cow Santa tumbler. So gather your materials, let your imagination soar, and enjoy the process of bringing this adorable craft to life.
More Cricut Joy Crafts to Make
- Spring Thrift Store Upcycle
- Making A Card With Cricut Joy
- Personalized Gifts
- Wood Slice Garden Markers
- Mason Jar Labels with Cricut Joy
Stay in the know on our latest crafts, special offers and freebies by joining our mailing list!
Like it? Pin it for later!

DIY Highland Cow Santa Tumbler – Free SVG
Materials
- Tumbler
- Cricut Joy
- Smart Vinyl Permanent in black
- Highland Cow Santa Free SVG file
- Weeding tool
- Transfer Tape
- Scissors
Instructions
Uploading the SVG Pattern
- Upload Highland Cow Santa SVG File into Design Space.
- Adjust image size to fit your tumbler accordingly or maintain size as provided.
Cutting
- Ensure the machine is set to Cricut Joy and select “Make It” in Design Space.
- Choose “Without Mat” as the option for cutting when using Smart Vinyl.
- Set material type to Smart Vinyl.
- Follow prompts for loading the mat into the Cricut Joy and cutting the Smart Vinyl. When prompted, unload the vinyl from the cutting machine.
Applying the Vinyl
- Cut around the image with a pair of scissors.
- Using the weeding tool, peel away the excess vinyl around the cut image and discard.
- Cut a piece of transfer tape a bit larger than the size of the image.
- Peel away the transfer tape backing and place the transfer tape overtop of the cut image. Gently rub the vinyl to help it stick to the transfer tape.
- Peel away the vinyl backing and place the image on to the tumbler.
- Peel away the transfer tape.

