Painting a Bathroom Vanity the Easy Way | One Room Challenge | Spring 2017 Edition – Week 5
When we decided to take on renovation of the small bathroom at our cottage for the One Room Challenge, it seemed pretty straight-forward. We’d be replacing the old shower stall, painting the bathroom vanity and refinishing the tile floor. Easy, right?

Well, the huge wrench in our overly-simplified plans were that the cottage is over 2 hours away and we really only had a few weekends to get it all done. As described last week, we didn’t get the shower stall ordered in time which held everything else up.
If you’d like to get caught up on our progress so far, you can follow along here:
Week 1: The Before Photos and Video
Week 2: The Inspiration, Design Plans and our Sponsors
Week 3: Small Bathroom Remodel Tips
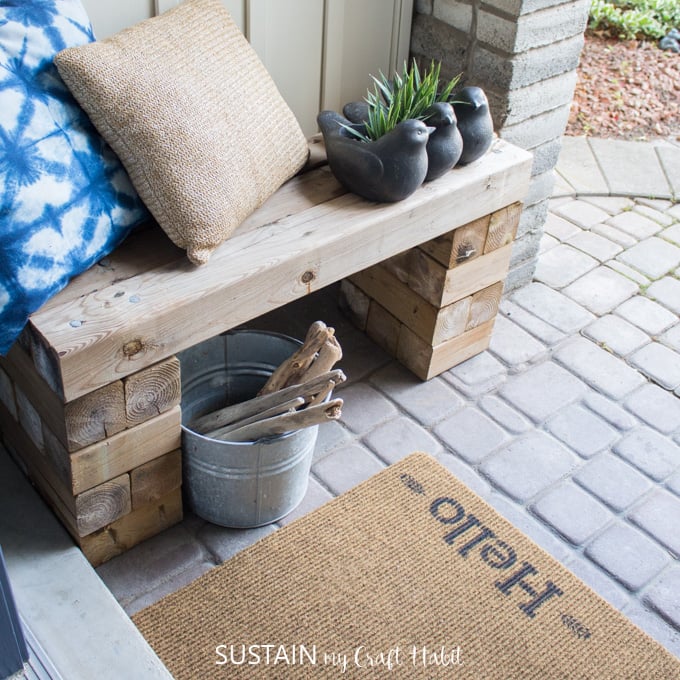
Week 4: DIY wine cork bath mat
Week 5 (you are here): Upcycling the Bathroom Vanity
Week 6: The Final Reveal!
I did however manage to make it up to the Graystone Beach cottage last week for a couple of days. If there was any hope of us getting the bathroom remodel completed for the One Room Challenge I had no choice. So I begged hubby to come and help me and left the oldest two kiddos with grandma.
You can get a quick recap of our progress on the weekend here, and check out below for our instructions on bathroom vanity painting.

“Disclaimer: We have not received any compensation for this post. However, we have (and continue to) receive products from DecoArt. This post also contains affiliate links (indicated with *). Should you choose to purchase items through these links we will make a small commission – at no expense to you. ”

Supplies Needed for a Bathroom Vanity Makeover:
- old wood vanity base
- DecoArt Satin Enamels paint in True Teal*
- Bulls Eye 1-2-3 Water-Based Primer*
- new vanity counter-top
- new faucet and fixtures such as the Delta Faucet Ashlyn Collection 2-Handle Centerset Faucet in Stainless*
- new door knobs/drawer pulls*
DIY Bathroom Vanity Painting the Easy Way:
Step 1: Preparing the vanity for painting
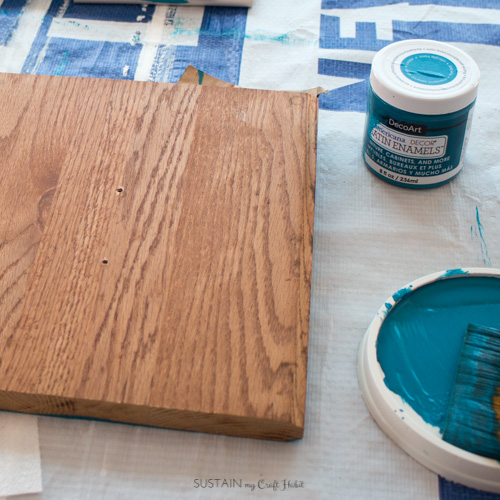
Disassemble the existing vanity: disconnect from the wall, remove faucets and disconnect plumbing (ensure your valves are closed!) and take off the vanity counter-top. Thoroughly clean and de-grease the vanity surfaces with warm soapy water.
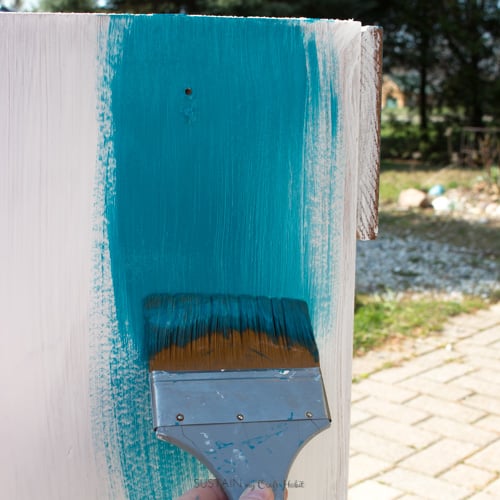
Step 2: Painting the bathroom vanity cabinet
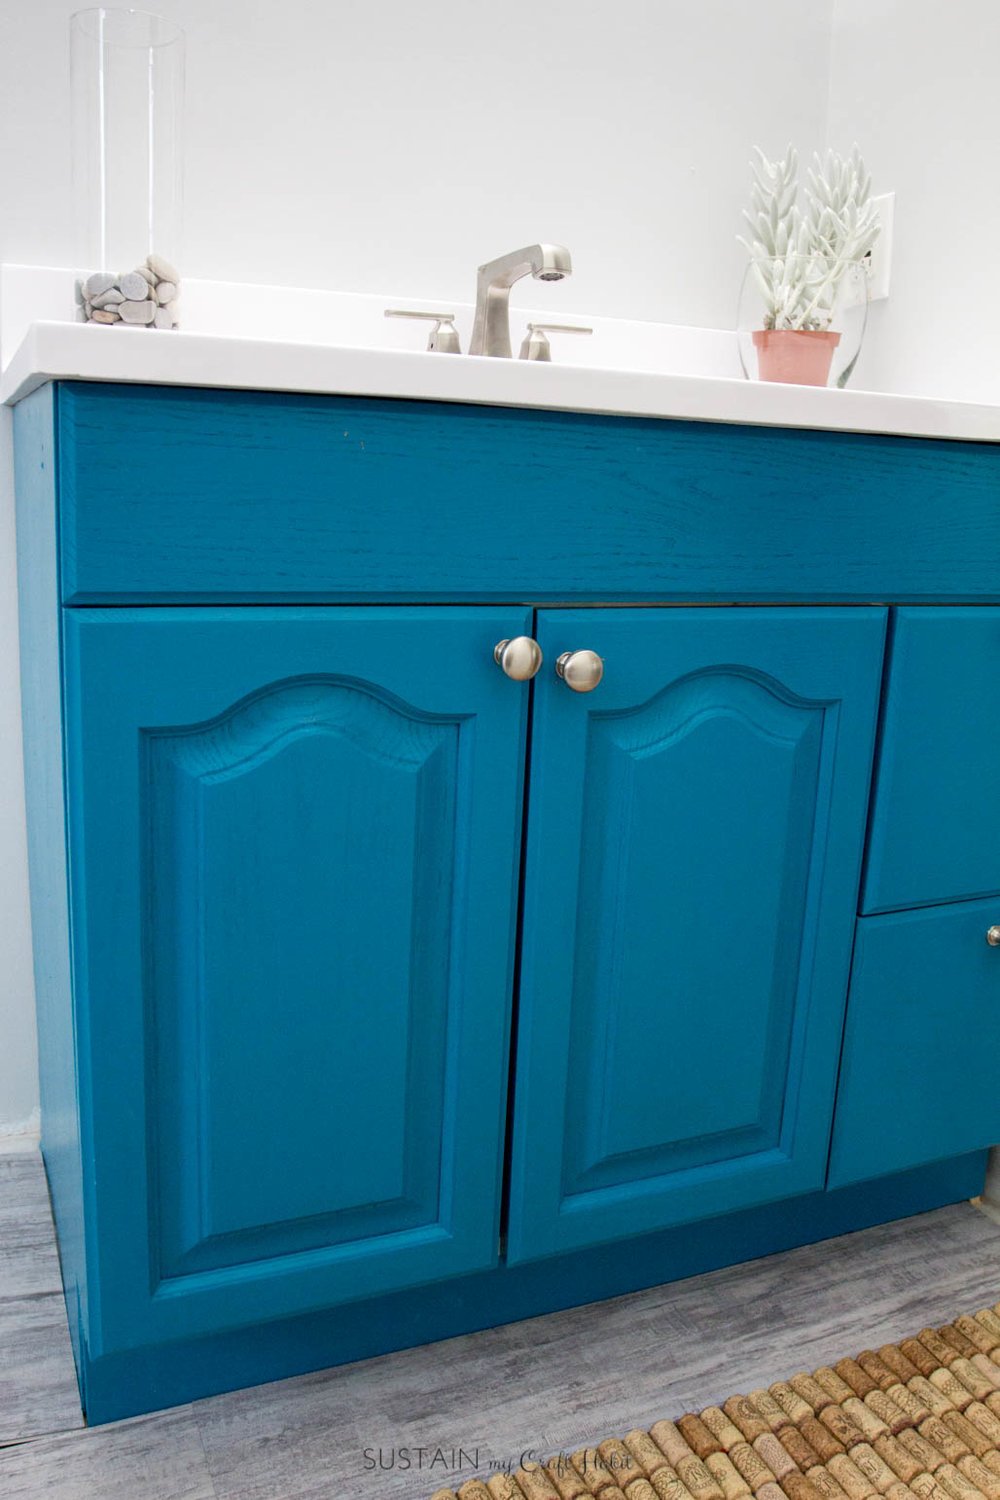
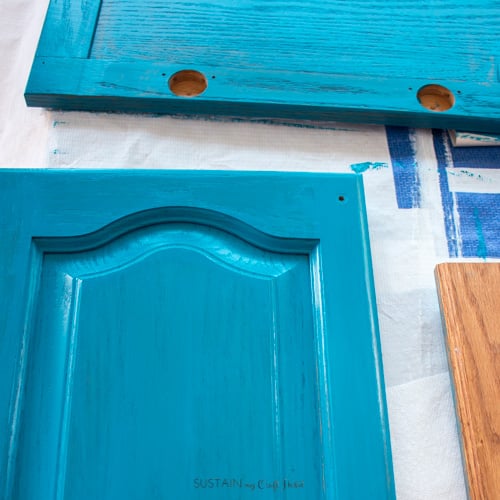
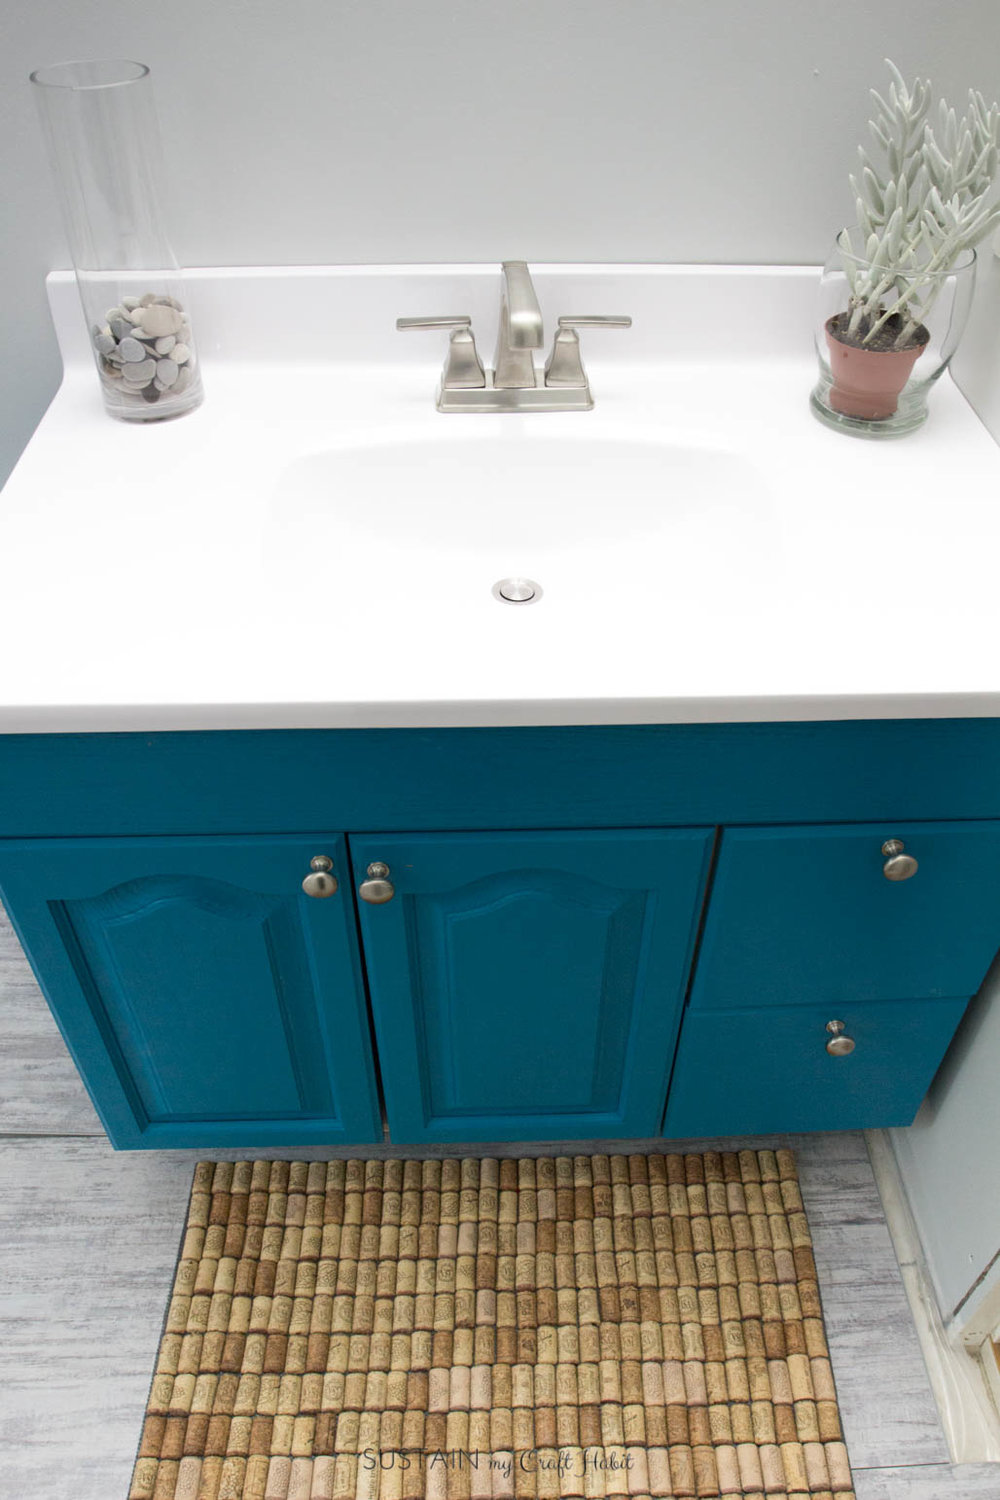
We used DecoArt Satin Enamel paint in True Teal directly onto the wood surfaces of the vanity. This paint gives a durable satin finish and is great for high-use areas such as bathrooms and kitchens. We didn’t need to sand or prime the wood surfaces. It took two good coats of paint to achieve the nice finish we were looking for.
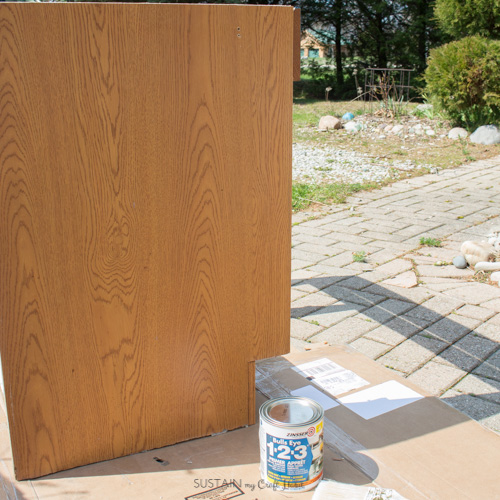
However, we found that the paint didn’t stick very well to the sides of the vanity which are a laminate finish. So we applied one coat of Bulls Eye 123 Primer, let it dry for a couple of hours, then painted two coats of the Satin Enamel paint. Let all the paint dry fully before proceeding.
Step 3: Reinstalling the vanity cabinet to the wall
The type of floor you choose for your bathroom will affect whether the vanity needs to be reinstalled before or after the floor is in place. Generally for tiles and hardwood flooring which isn’t floating you can install the vanity over top.
However, we’ll be installing floating plank vinyl flooring which is meant to be installed “around” the shower, toilet and vanity. Be sure to read the instructions for your specific flooring.
When ready, re-install the vanity (in our case we re-affixed it to the back wall) and ensure that it is sitting completely level. We needed to add a few shims underneath the vanity to get it completely level.
Step 4: Reinstalling the vanity counter-top
We purchased a simple, one-piece made-to-order fiberglass countertop. For some reason the back edge of the countertop bowed outwards and wouldn’t lie flat against the wall. So we needed to shave some off using a Sisal saw. Then the countertop just sat firmly on top of the vanity.
Step 5: Installing the Faucet and Drain
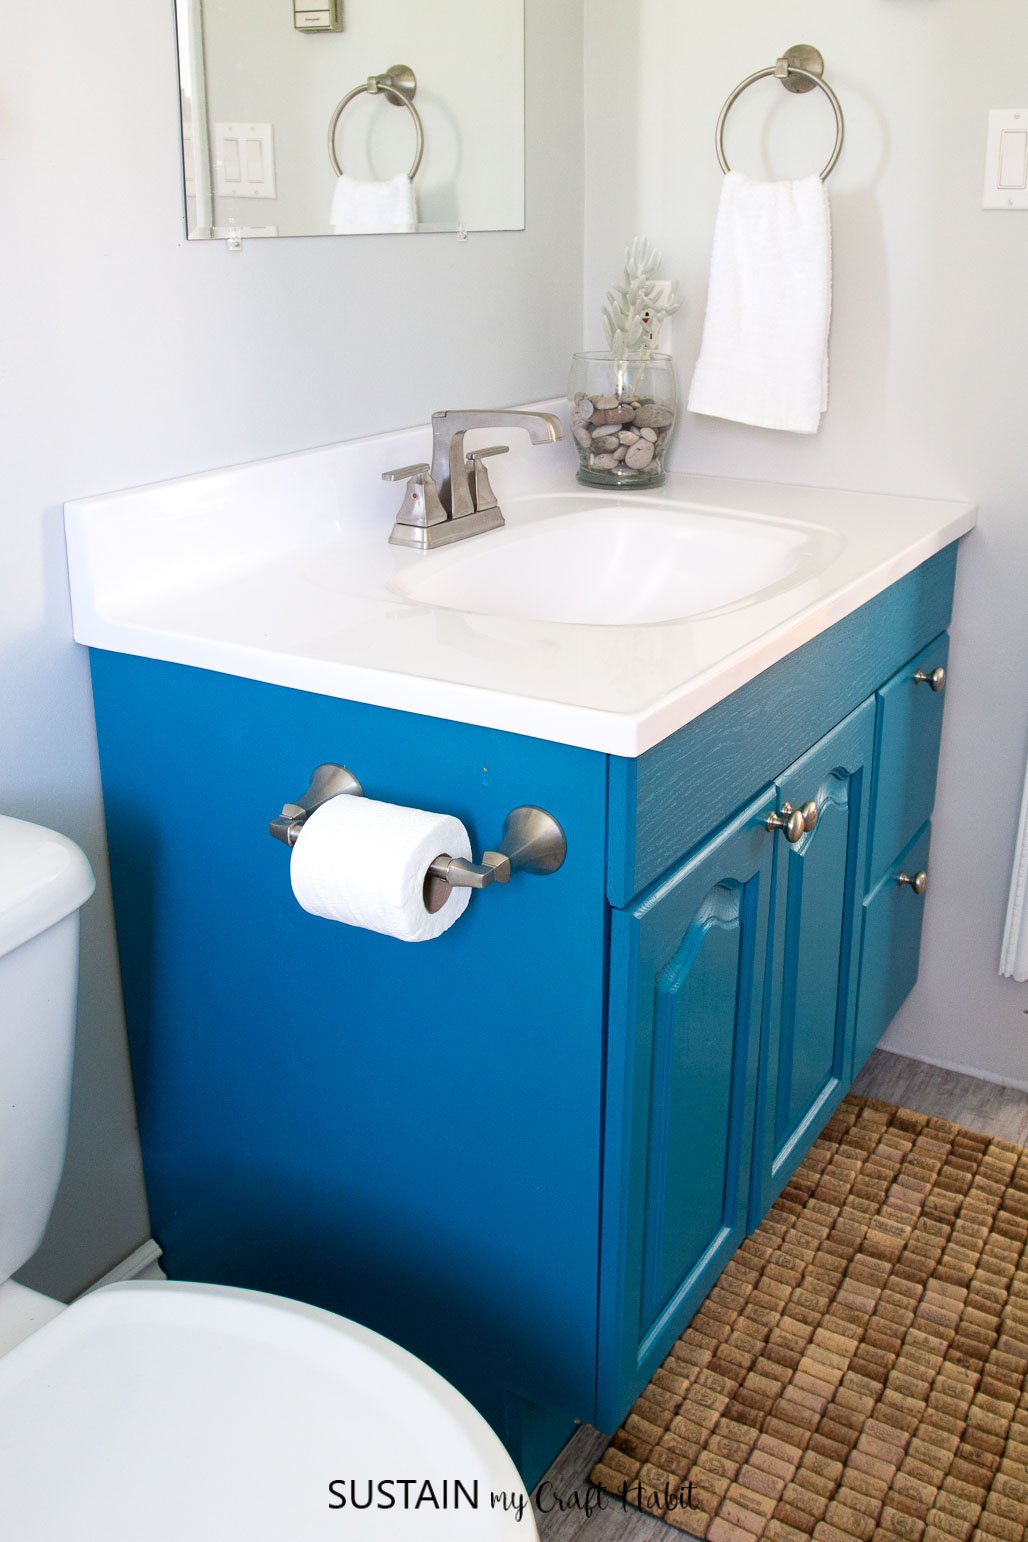
We were so fortunate to be able to collaborate with Delta Faucet Canada on this bathroom makeover. We selected faucets for both the vanity and shower, as well as some accessories from the beautiful Ashlyn Collection in the Stainless finish. The vanity faucet has a really nice, clean modern shape and isn’t too large for the vanity.
Following the instructions which came with the faucet kit, hubby was able to install it with a bit of time and patience.
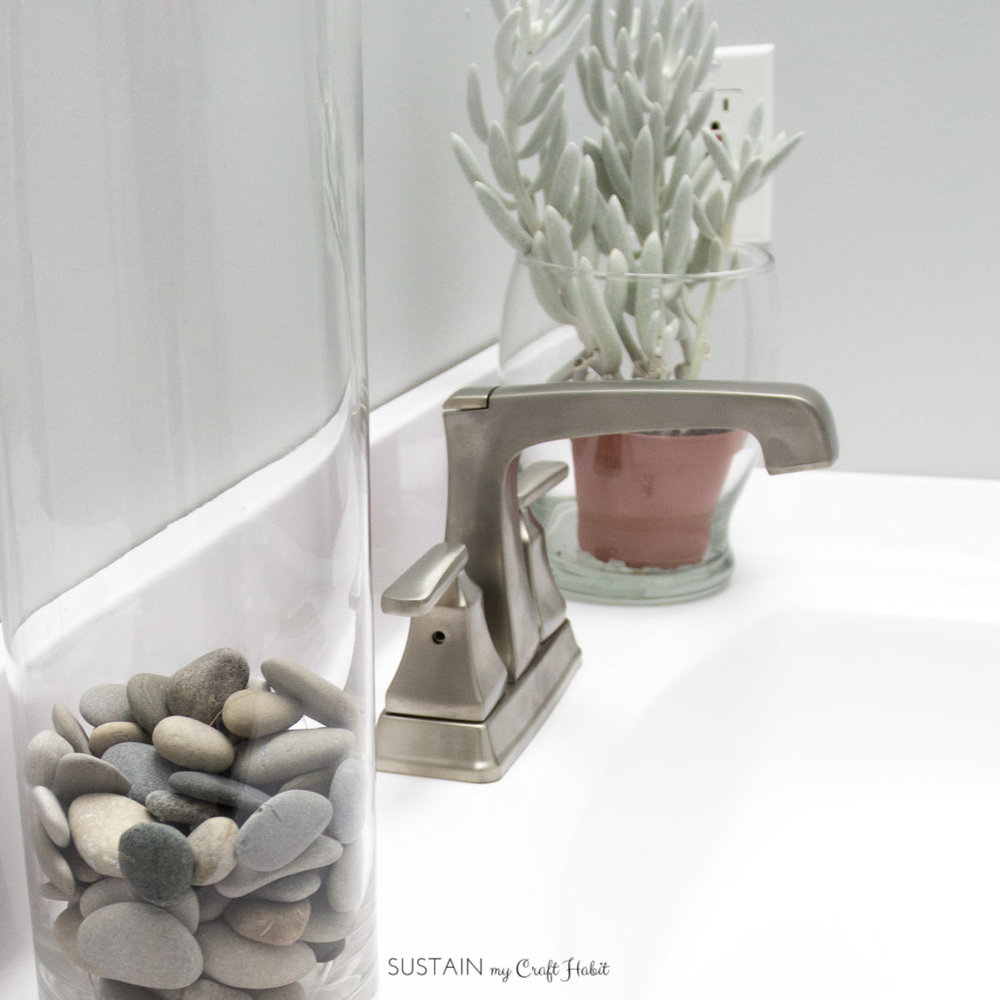
I’m really loving how fresh, bright and clean the room is looking so far. The True Teal paint on the vanity is the perfect splash of colour for the beach-themed bathroom and the new faucets give the entire vanity a nice modern touch. Even our new succulent Furry is super happy in her new home!
OK friends, so we have one more week to finish it all before next week’s One Room Challenge final reveals? Will we be able to pull it off? We’re heading up this weekend again and are super-hopeful, but as you could tell from our video above, there’s still tons left to do. So we’ll see…


that color looks incredible on the cabinet!
Thanks, Cassie! It’s exactly the pop of color that bathroom needed.
I love the vanity color! And the flooring and countertops are perfect for the space. I can’t wait to see the finished space!
Thank you Brittany! Unfortunately, we couldn’t salvage the old counter top but this new one is so bright and fresh.
I love that color! It really updated the cabinet! Great job!
A little paint goes a long way! We absolutely love working with this paint. It’s durable and the color options are great.
Very pretty color! Nice job! Good luck finishing up!
Thank you! Thanks we could use a little luck in this last week:)
Lovely colour on your vanity and I love your video! Great job! Looking forward to seeing it all done. 🙂
Thanks so much! Painting the vanity was actually a lot of fun. We don’t normally use such intense colours so the change was refreshing.
It turned out great! I’m obsessed with that paint color! ❤
It really is a great colour, isn’t it?!
Looks great, I love the color of the vanity!
Thanks, Jessica! It is a very happy colour.
YAY…I finally see the comment box. 🙂 Looking good ladies! You’re giving me fuel to get done. 🙂
Thank you Lisa! It’s tough staying motivated during a reno but keep looking towards the finish line!
That shade of blue really looks great!
It’s a lot of colour for us neutral girls, but we love the look!
Such a pretty shade of blue!! Looks great!
Thanks, Jessica! We were very happy with how it turned out in the space.
We had the same problem as you but in an opposite way – ie. our project is at home but we were always having to go away! Haha. But we managed to finish too. Hooray! I love the teal colour and I’m looking forward to your final reveal.
That’s funny, Joann! Guess there’s no such thing as a challenge-free reno.