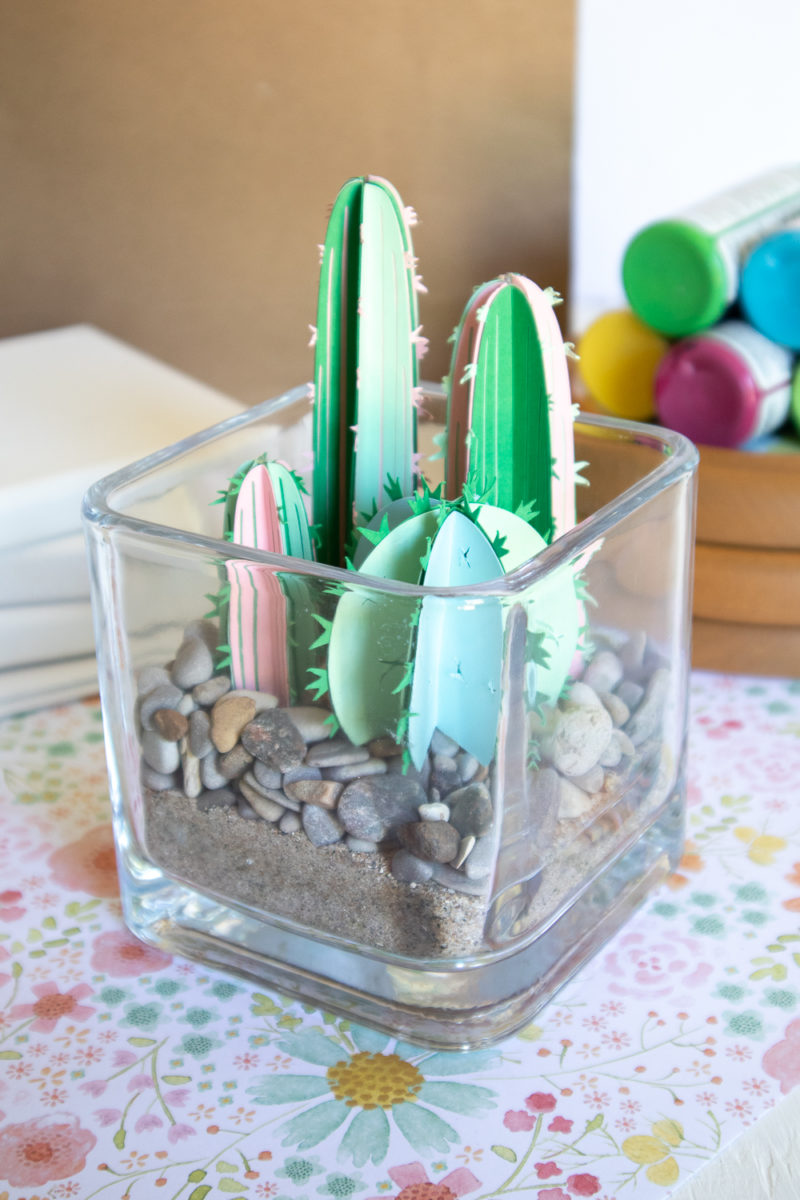
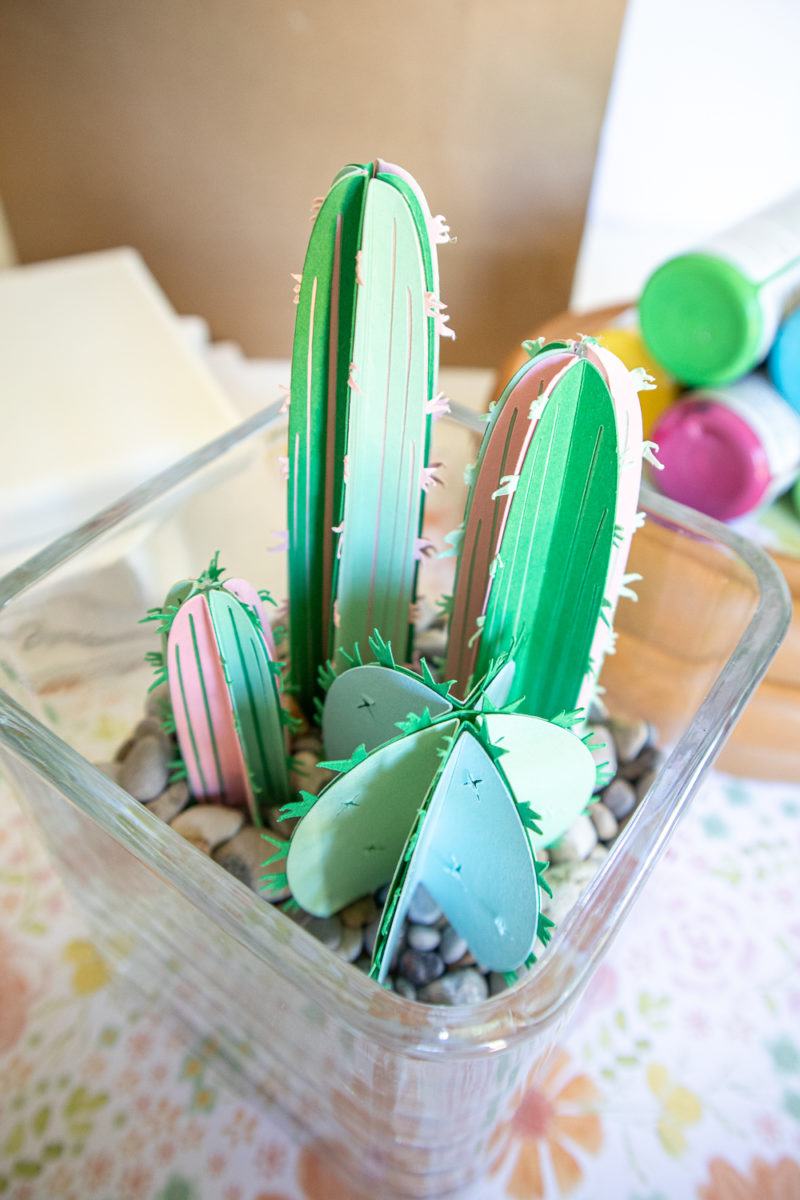
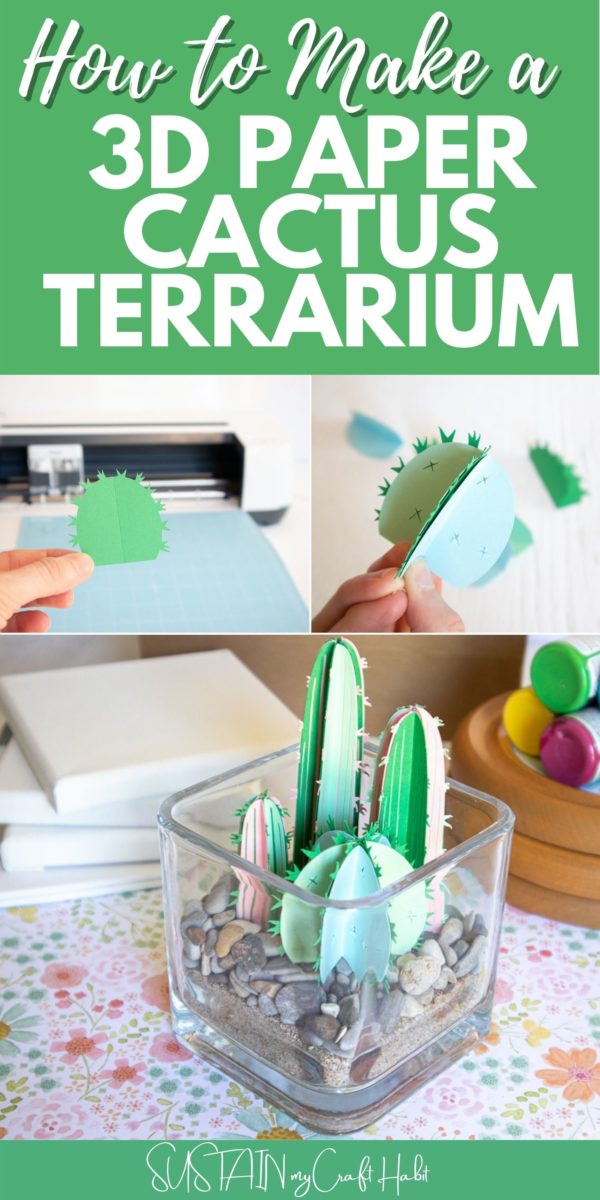
Adorable DIY 3D Paper Cactus Terrarium
I’ve always heard people say cactus plants are the easiest plants to take care of, however, from my experience I would have to disagree. So today, we’re sharing this craft for making a 3D paper cactus terrarium for those of us lacking the green thumb gene (or for those creatives that simply love paper crafting!).
Paper Crafting and More
Watching my neices make paper dolls recently, reminded me of my crafting days as a kid. Is that when my passion for crafting first began? Perhaps it is.
If you’ve been following along with our crafting over the years, you’ve probably noticed that we LOVE paper crafting. With so many beautiful colors and prints, there are so many amazing things to be made with paper. Be sure to check out these step by step tutorials for making paper wall hangings, garland, framed art and more!
- Earthy paper flower wall decor
- Framed paper peony flowers
- Cherry blossom paper flowers
- Paper daffodils
- Paper bow fridge magnets
- Summer garland with paper popsicles
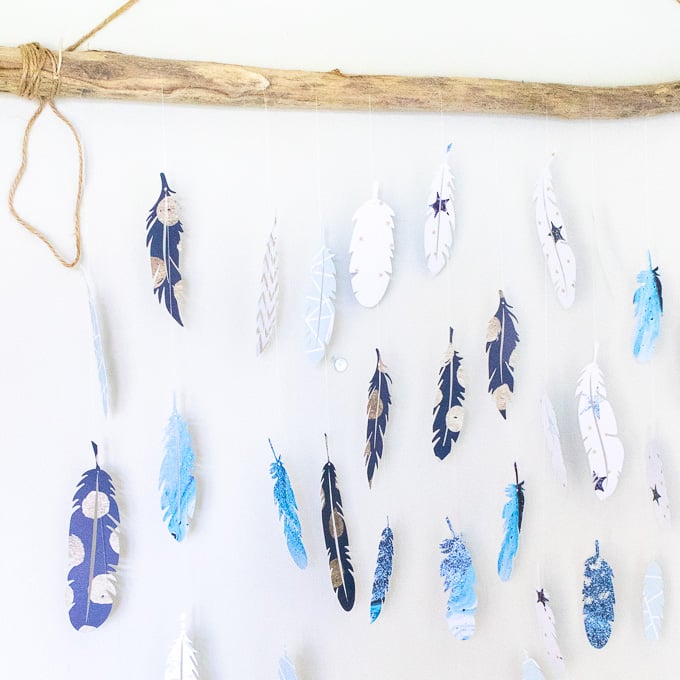
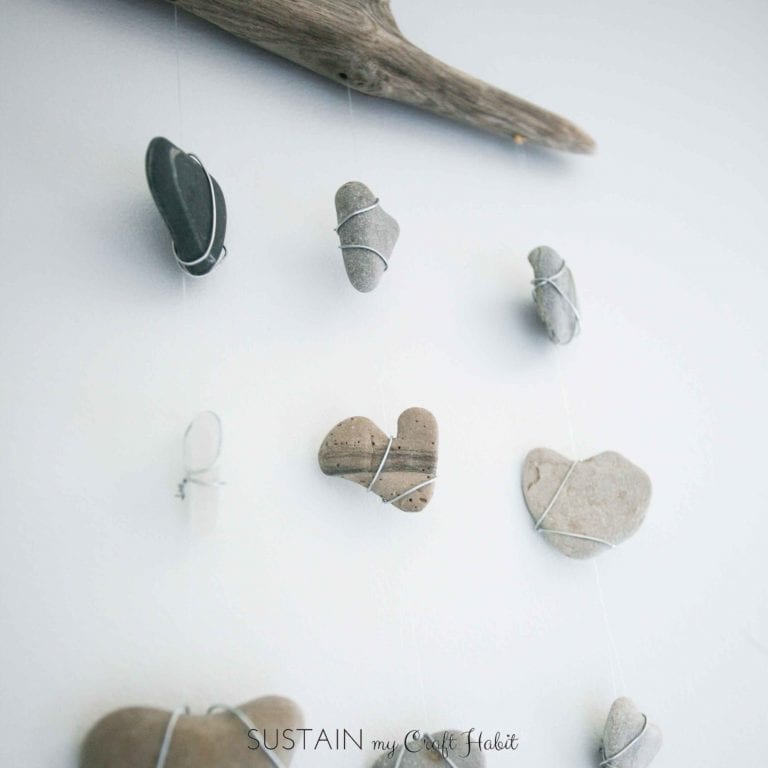
Paper Feather Wall Hanging 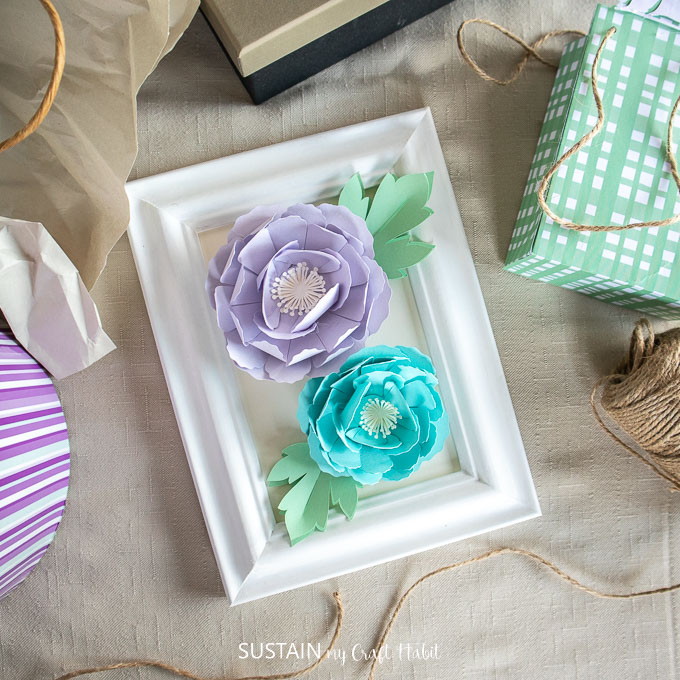
Paper Peony Framed Art 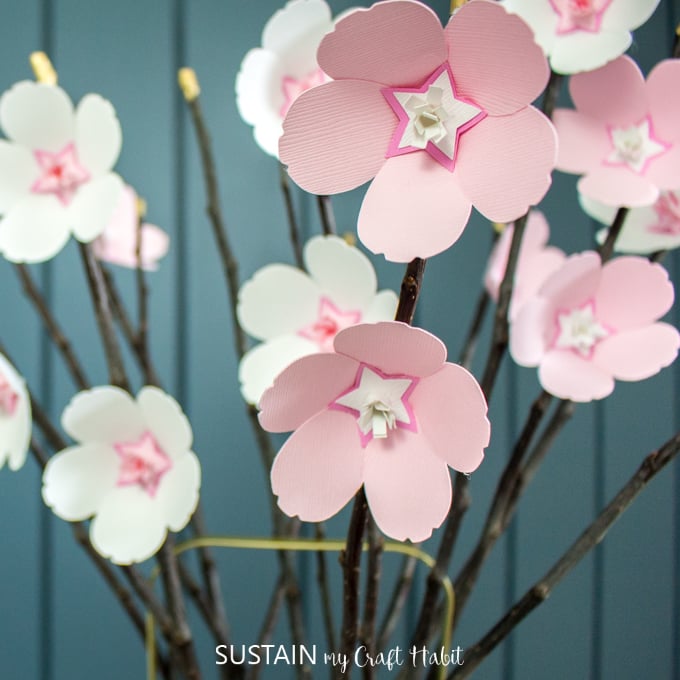
Cherry Blossom Paper Flowers 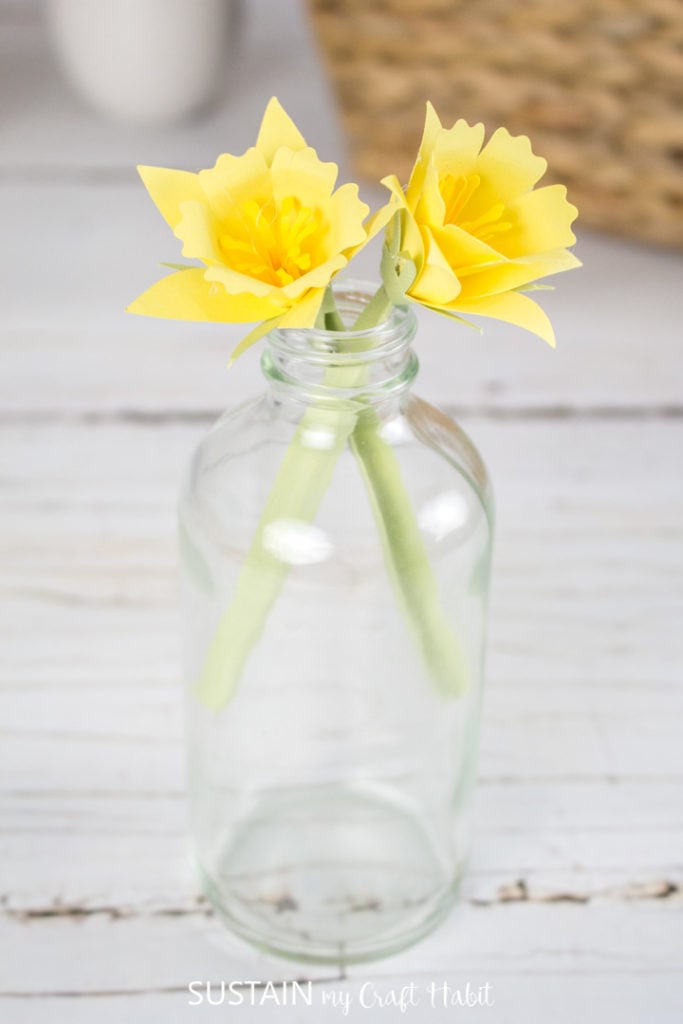
Paper Daffodils 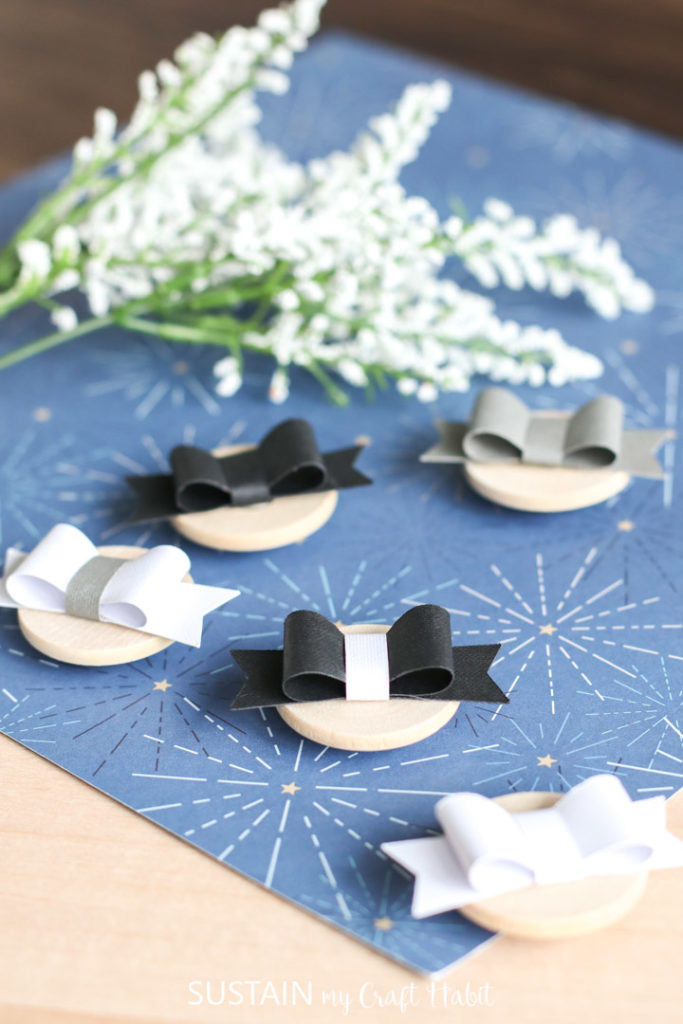
Paper Bow Fridge Magnets 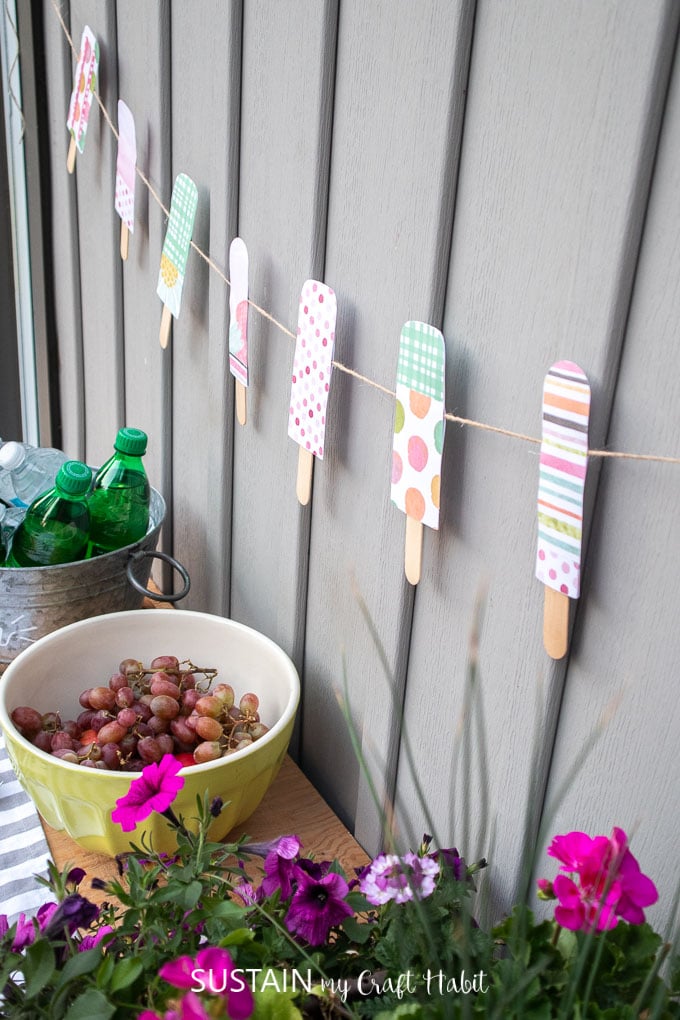
Summer Garland
These 3d paper cacti are made easy with a
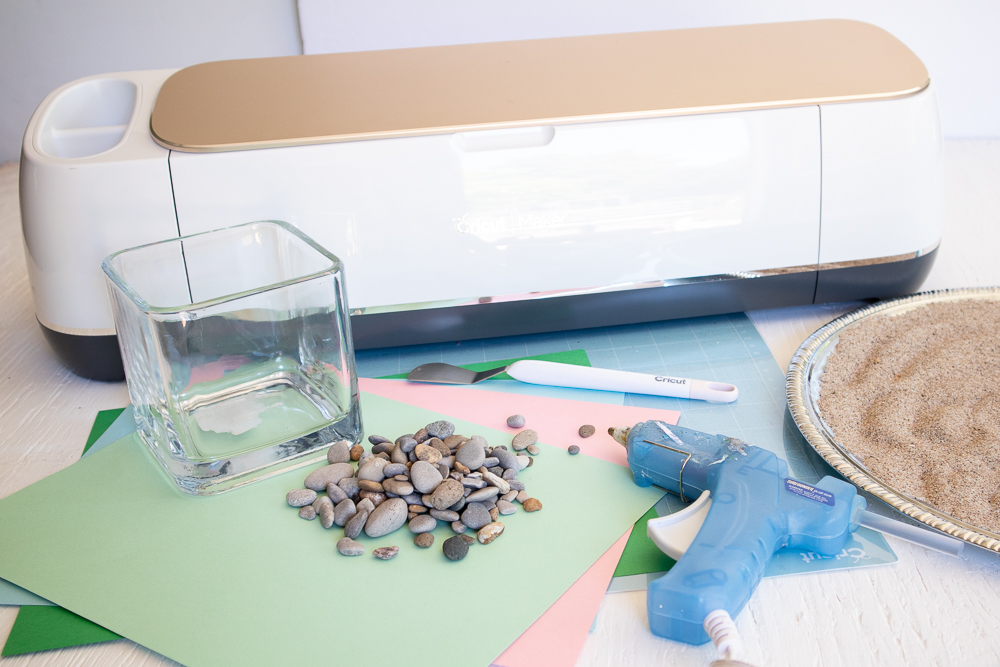
Materials Needed:
Disclosure: This post contains affiliate links for your shopping convenience. Should you choose to purchase through them, we will make a small commission at no extra cost to you. You can read our full disclosure here.
- Torch Cactus template in Design Space, #M103661F + #M102CADB
Cricut Maker (or other cutting machine) with Fine Point Blade andScoring Wheel tool Cricut Light Grip Mat Cardstock paper in light green, dark green, coral pink and cream colors- Square Glass Vase, 5”
- Spatula
- 1 ½ cups small pebbles
- 1 ½ cups sand
- Hot glue gun with clear hot glue sticks
How to Make a 3D Paper Cactus Terrarium:
Uploading the Cactus Pattern
Open Cricut Design Space and click on the “+” sign to start a new project, opening up a blank canvas.
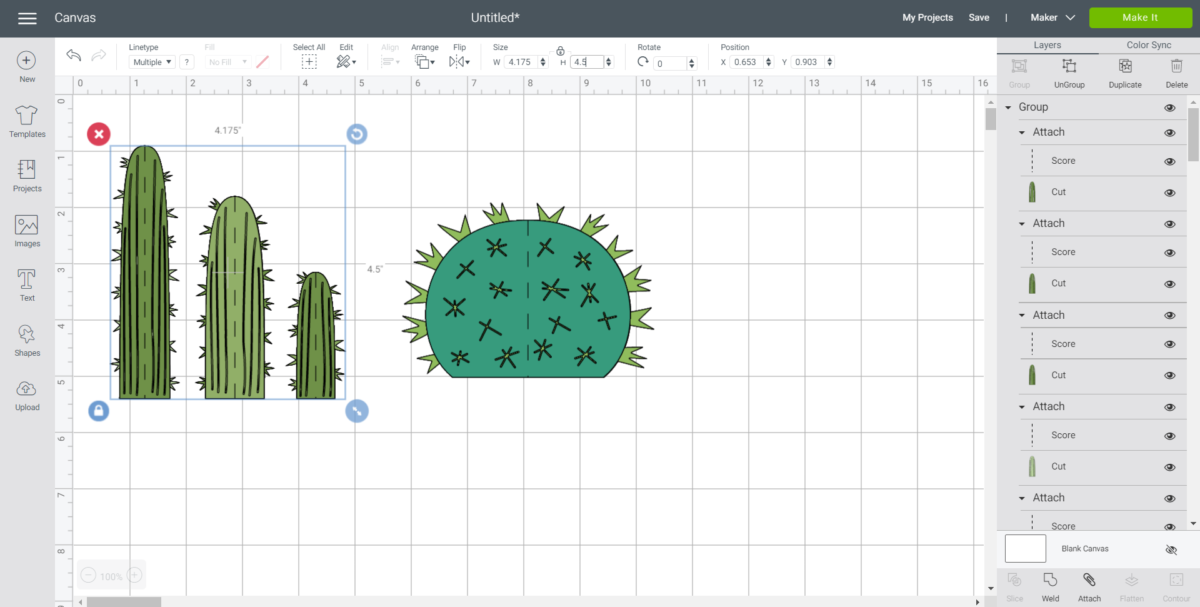
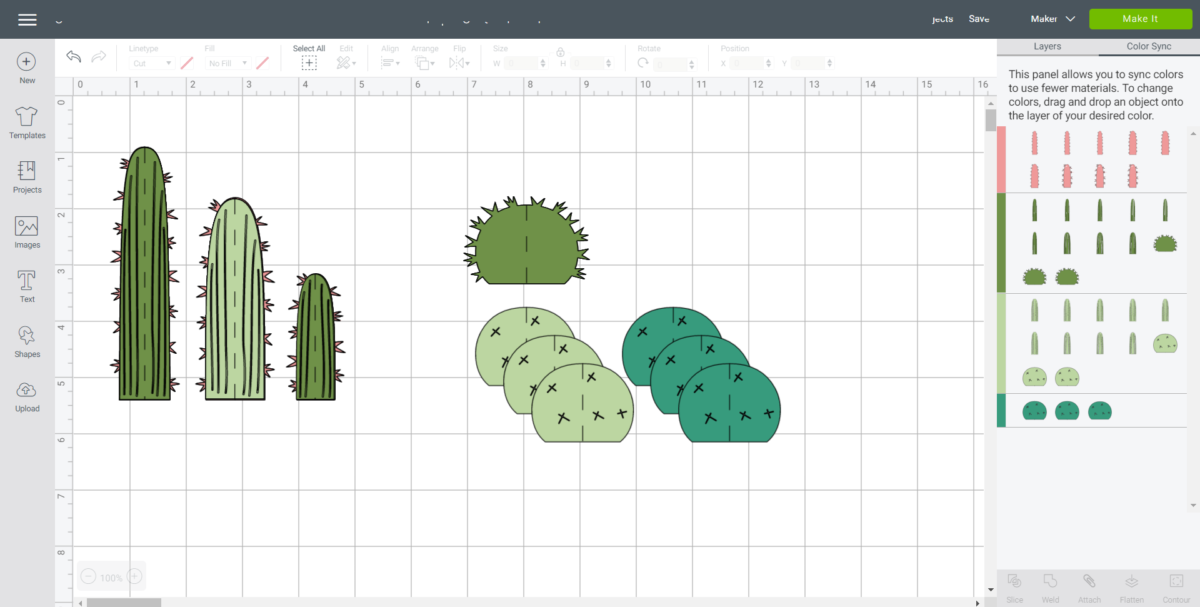
Click on the Images button from the toolbar and search “torch cactus” image (#M103661F) and then click on the image to insert the pattern on the canvas. Resize grouping to double its original height (4.5” high).
Search “barrel cactus” image (#M102CADB) and then click on the image to insert the pattern on the canvas.
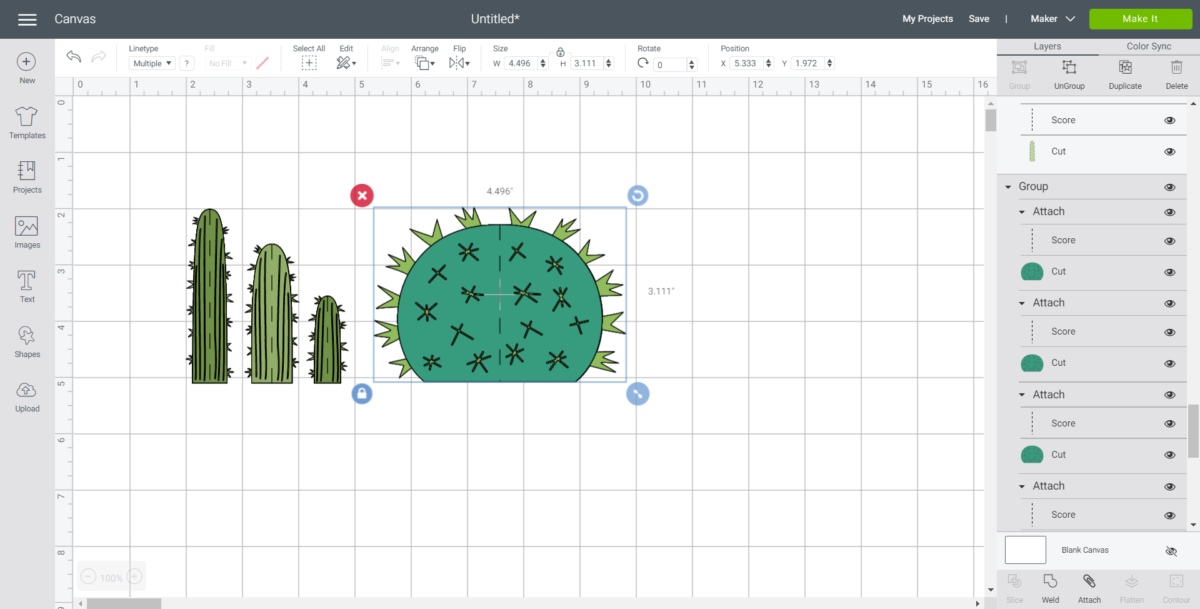
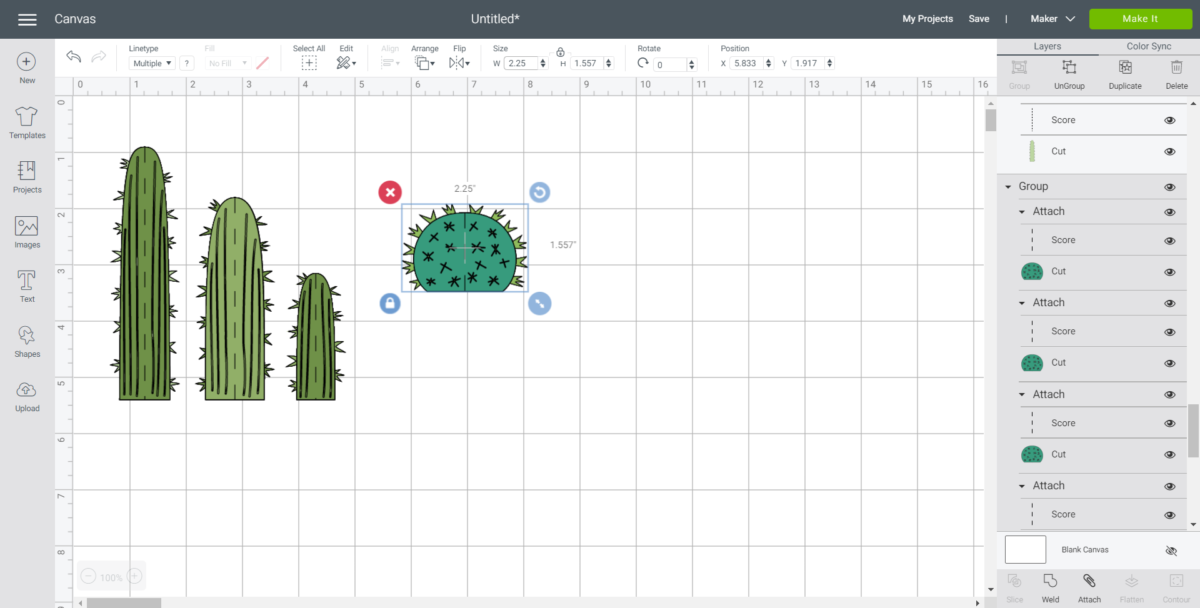
Resize the cactus to 2.25” wide. Duplicate the pattern and resize the second cactus to 1.5” high.
Change the color of the prickly torch cactus pieces to pink and change the color of the prickly barrel cactus to dark green.
Next, change the color of the other torch cactus pattern pieces to a mix of light green and dark green. Change the other barrel cactus pattern pieces to a mix of light green and dark green.
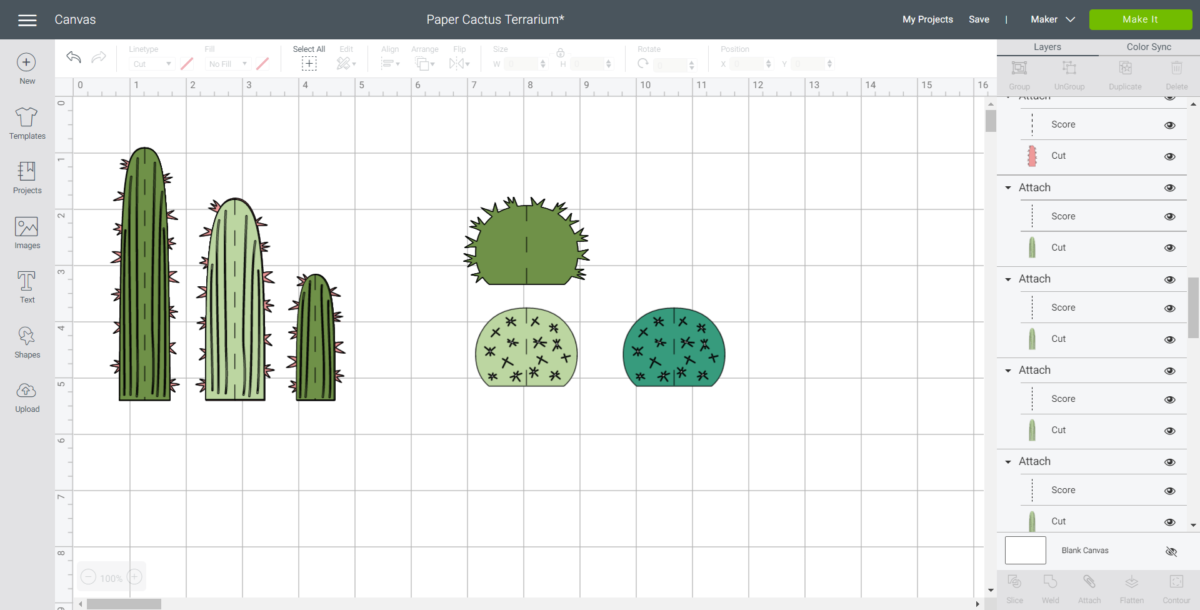
Move to the color sync tab to see all the pieces sorted by color.
Cutting
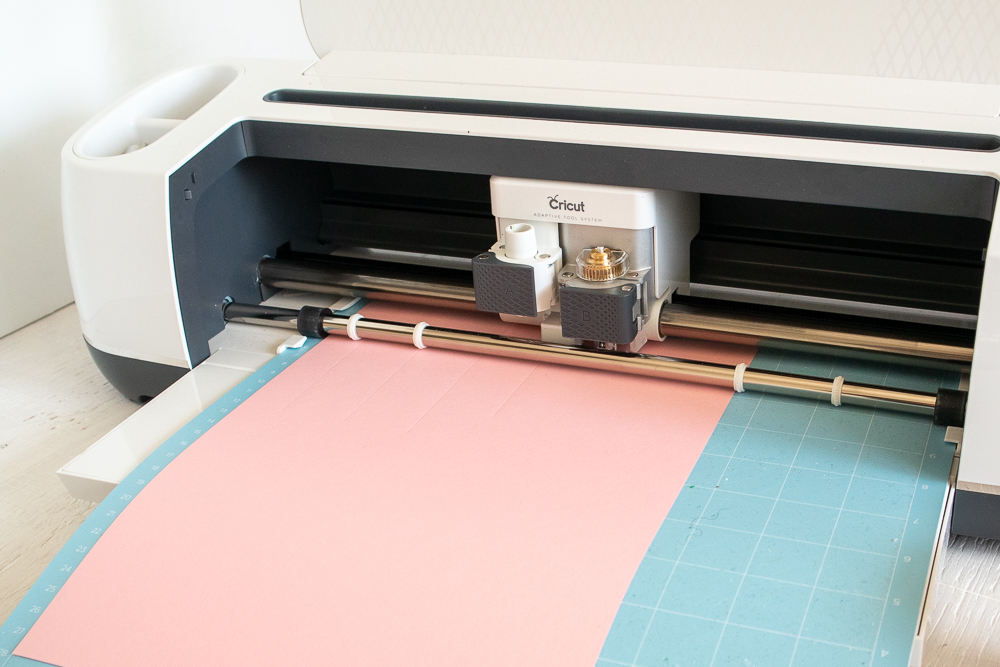
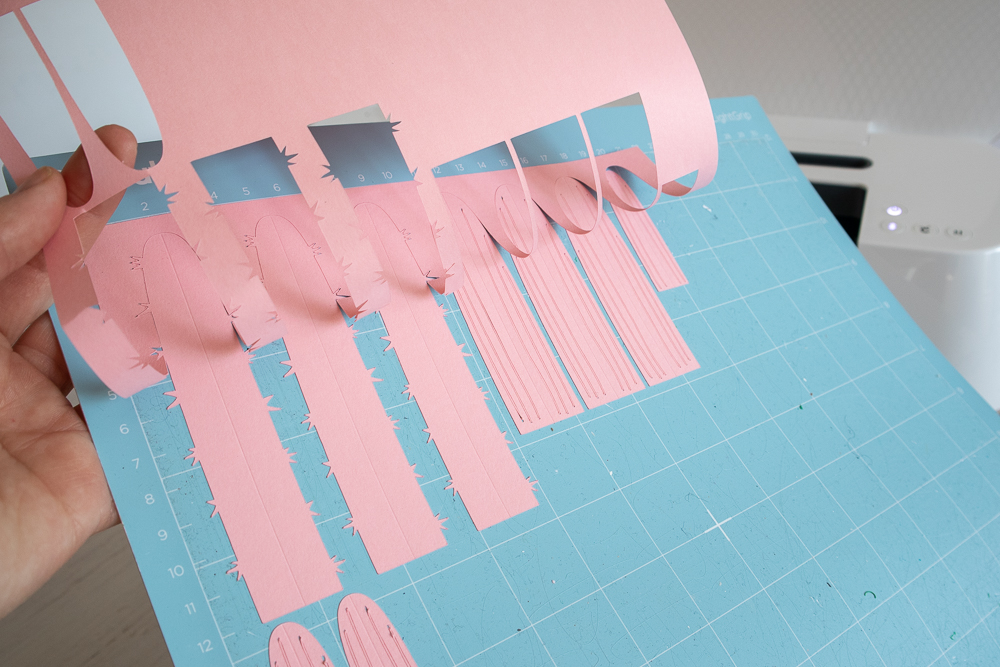
With the machine set to Cricut Maker, select “Make It” in Design Space and set the material type to Medium Cardstock, choosing the appropriate weight based on your paper. Place the first paper color onto the light grip mat.
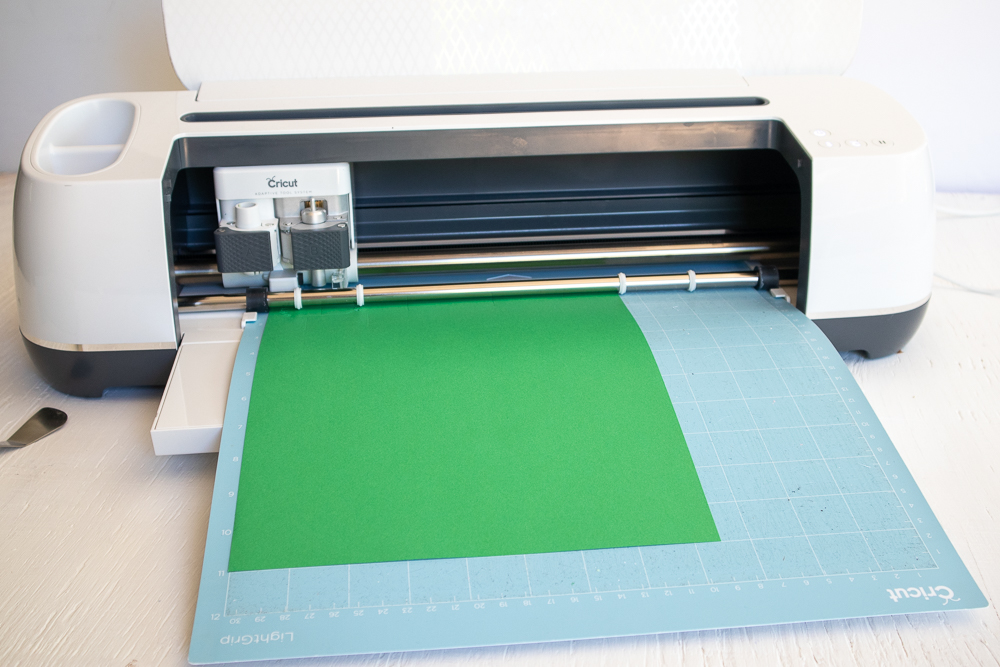
Follow prompts for loading cardstock paper into Cricut Maker and cutting. When the cut is complete, unload the mat from the machine. Remove the cut pieces from the cutting mat using a spatula tool.
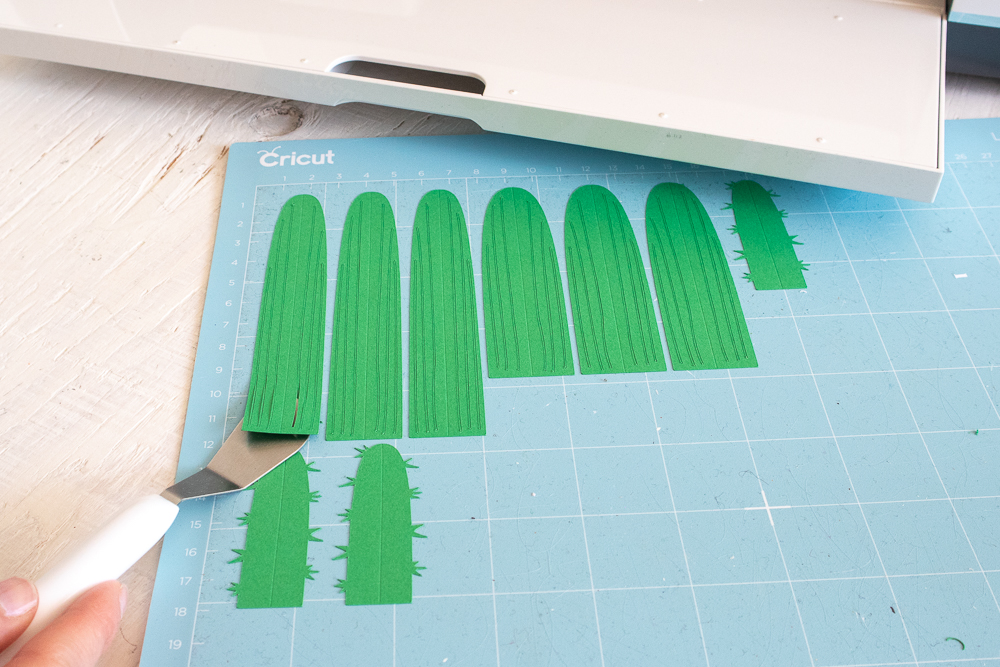
Repeat for the remaining cacti pieces and papers.
Assembling the Paper Cactus
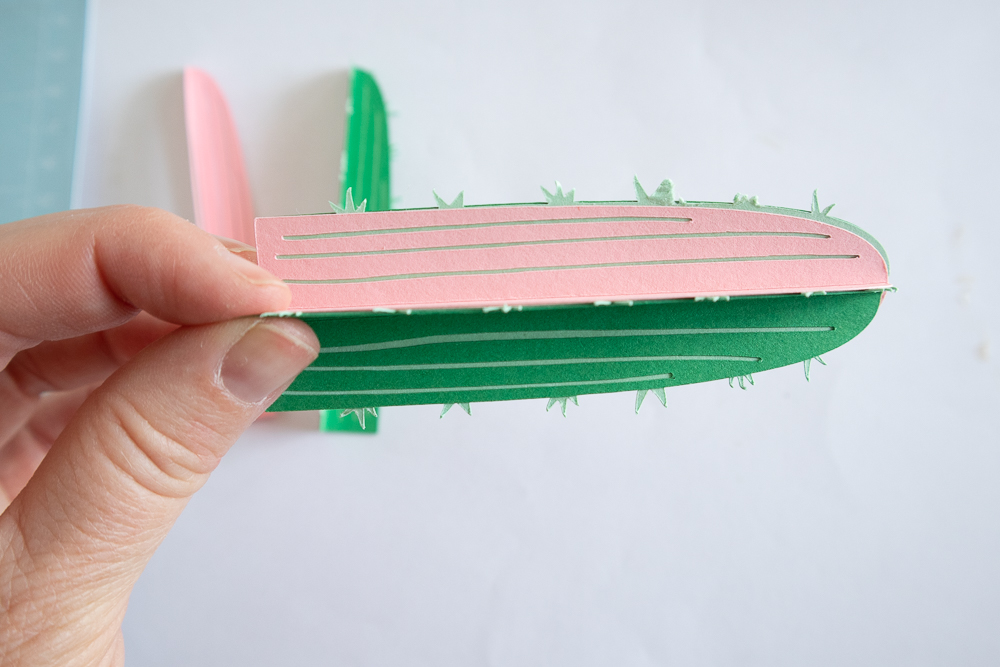
Fold the cactus pieces along the score lines.
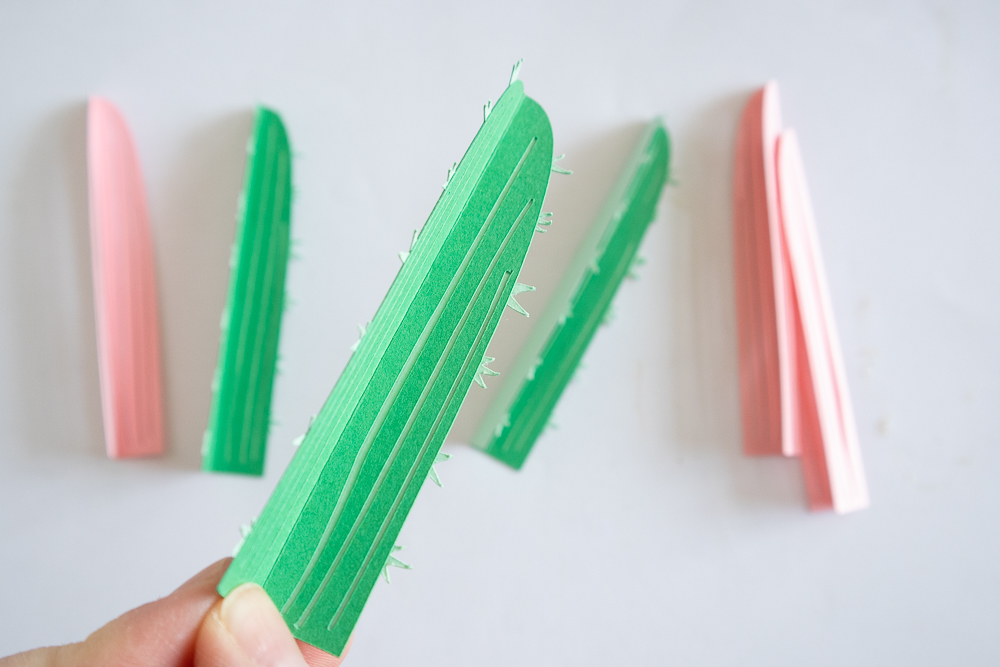
Group the similar sized pieces together. They will create three separate cacti. Start with the smallest sized cactus. Using a glue stick or hot glue gun, glue the pieces together, sandwiching the prickly pieces between the other colors, alternating them as you go along.

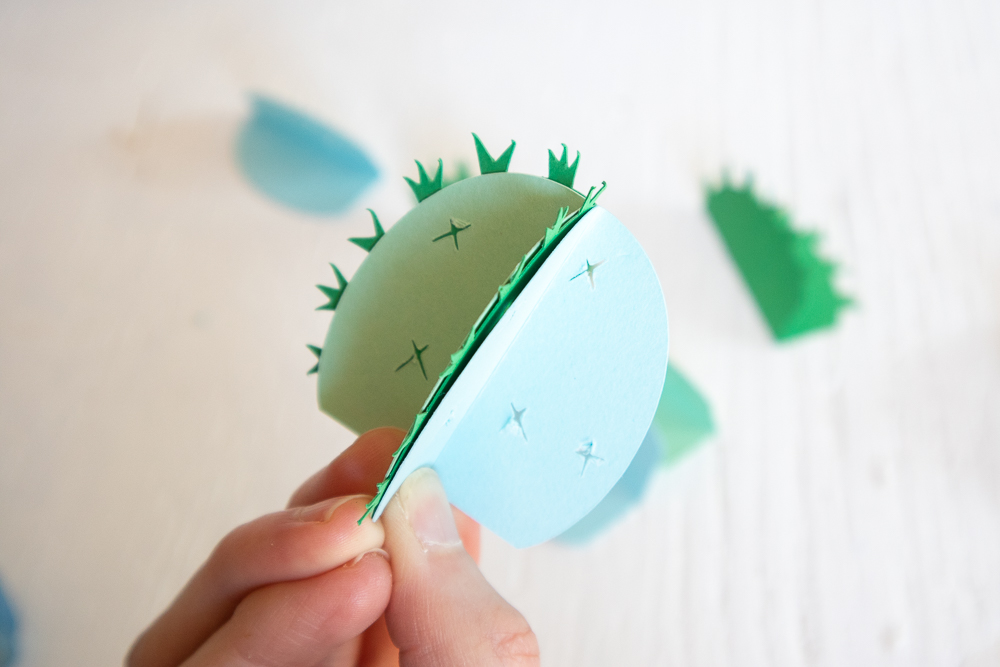
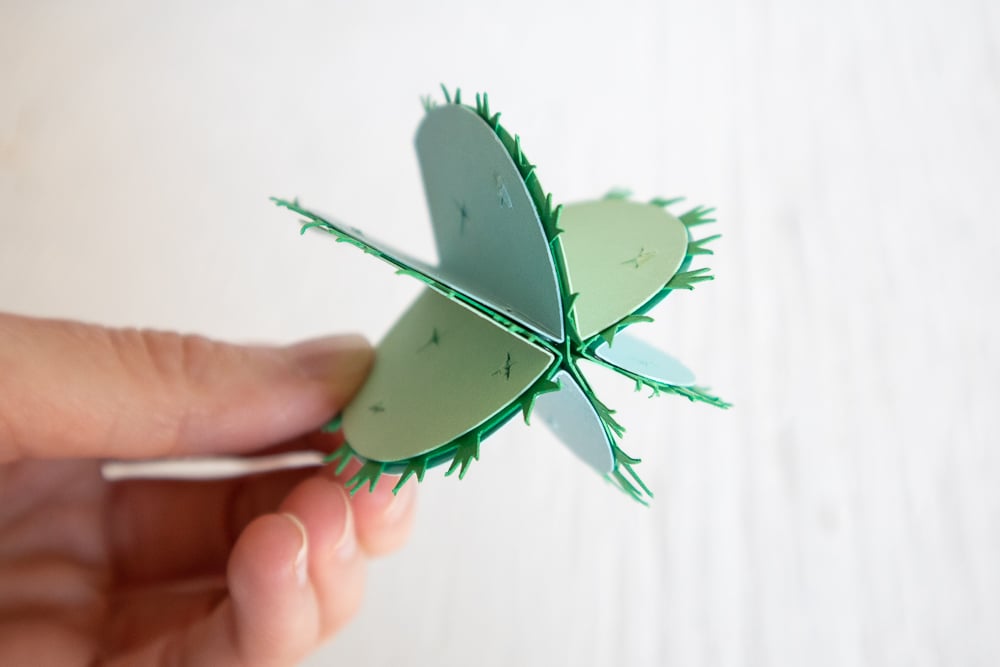
Repeat with the other two sizes of the torch cactus and for the other barrel cactus.
Assembling the Terrarium
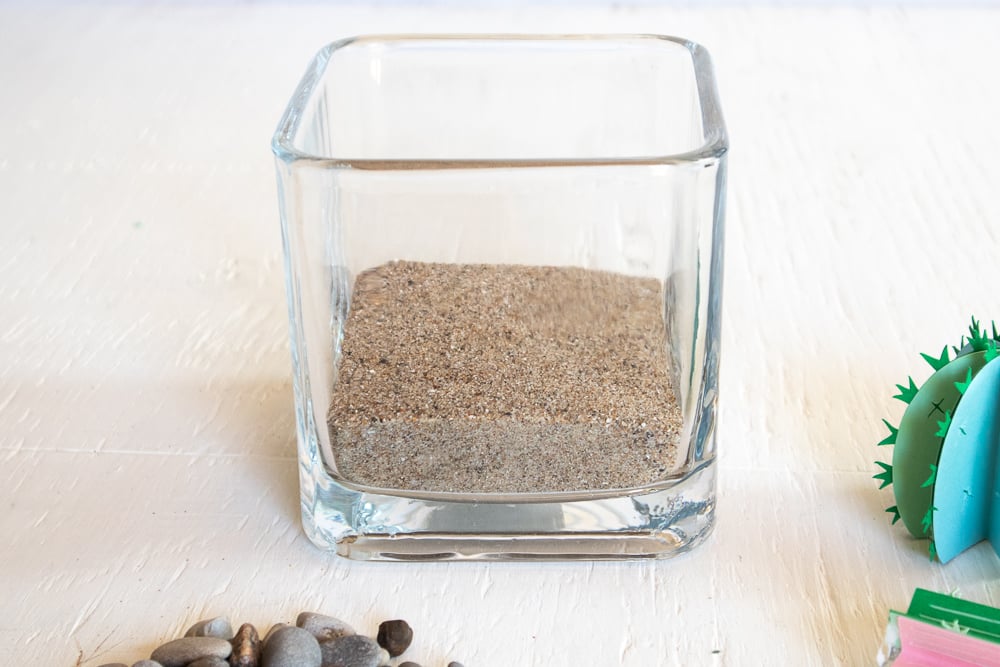
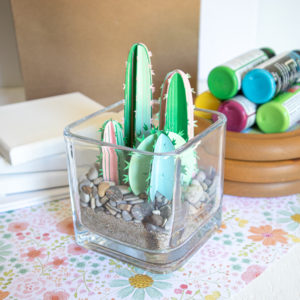
Pour the sand into the bottom of the glass vase.
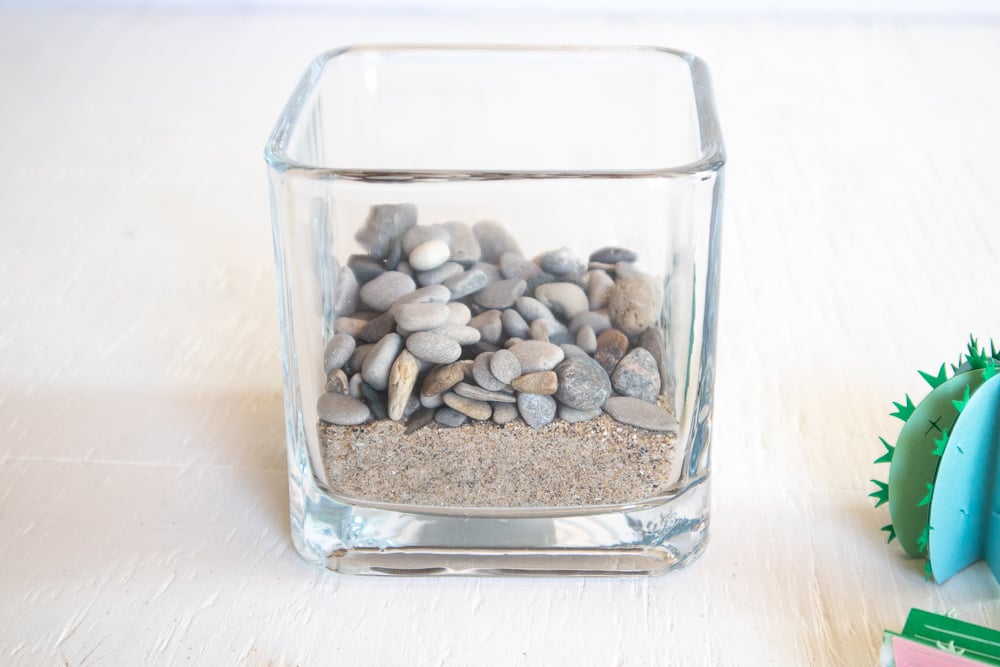
Next, pour the pebbles over the sand.
Place the paper cacti into the vase, burying them into the pebbles to secure in place or add a bit of glue to the bottom to help hold it upright.
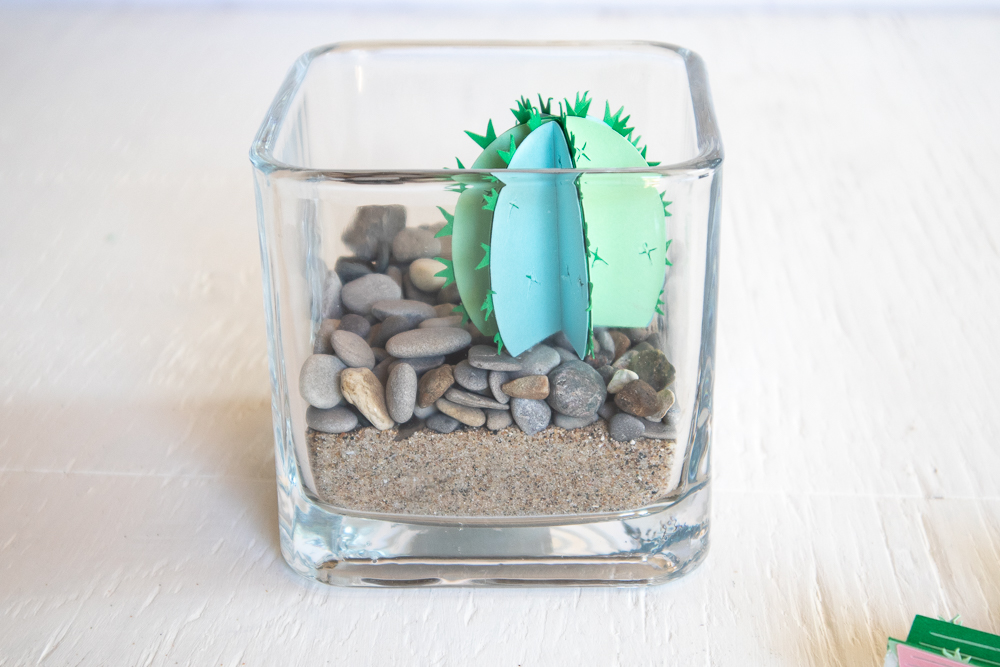

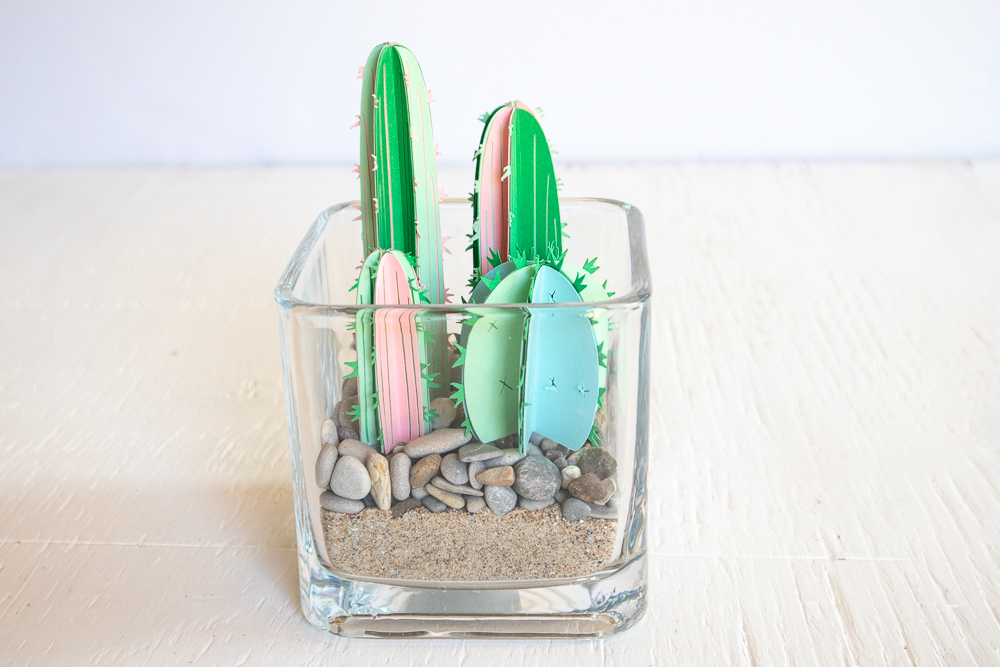
Move the 3D paper cacti around until your happy with the placement. I love the look of my terrarium and I especially love that it won’t need any watering from me! If you wish to make your own paper terrarium, be sure to get yourself a

Like it? Pin it for later!
Adorable DIY 3D Paper Cactus Terrarium
Materials
- Cactus templates in Design Space #M103661F, #M102CADB
- Cricut Maker or other Cricut cutting machine with Fine Point Blade and Scoring tool
- Cricut Light Grip Mat
- Cardstock paper in light green, dark green, coral pink and cream colors
- 5” Square Glass Vase
- Spatula
- 1 ½ cups small pebbles
- 1 ½ cups sand
- Hot glue gun with clear hot glue sticks
Instructions
Uploading the Cactus Pattern
- Open Cricut Design Space.
- Search “torch cactus” image (#M103661F) and then click on the image to insert the pattern on the canvas.
- Resize grouping to double its original height (4.5” high).
- Search “barrel cactus” image (#M102CADB) and then click on the image to insert the pattern on the canvas.
- Resize the cactus to 2.25” wide. Duplicate the pattern and resize the second cactus to 1.5” high.
- Change the color of the prickly torch cactus pieces to pink and change the color of the prickly barrel cactus to dark green.
- Change the color of the other torch cactus pattern pieces to a mix of light green and dark green. Change the other barrel cactus pattern pieces to a mix of light green and dark green.
- Move to the color sync tab to see all the pieces sorted by color.
Cutting
- With the machine set to Cricut Maker, select “Make It” in Design Space.
- Remove the cut pieces from the cutting mat using a spatula tool.
- Repeat for the remaining cacti pieces and papers.
Assembling the Paper Cactus
- Fold the cactus pieces along the score lines.
- Group the similar sized pieces together. They will create three separate cacti.
- Start with the smallest sized cactus. Using a glue stick or hot glue gun, glue the pieces together, sandwiching the prickly pieces between the other colors, alternating them as you go along.
- Repeat with the other two sizes of the torch cactus and for the other barrel cactus.
Assembling the Terrarium
- Pour the sand into the bottom of the glass vase.
- Pour the pebbles over the sand.
- Place the paper cacti into the vase, burying them into the pebbles to secure in place or add a bit of glue to the bottom to help hold it upright.