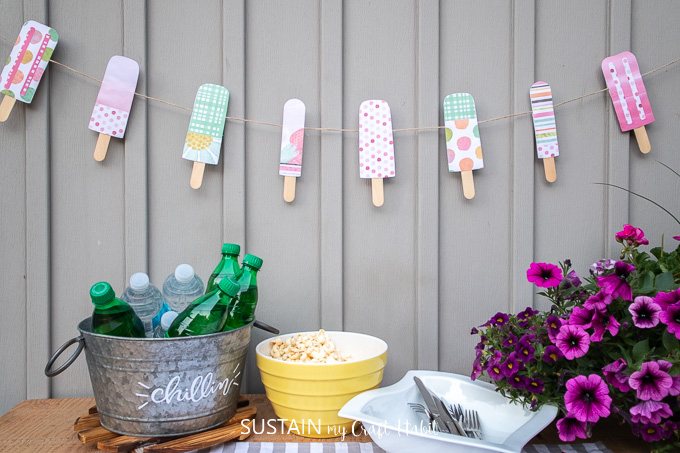
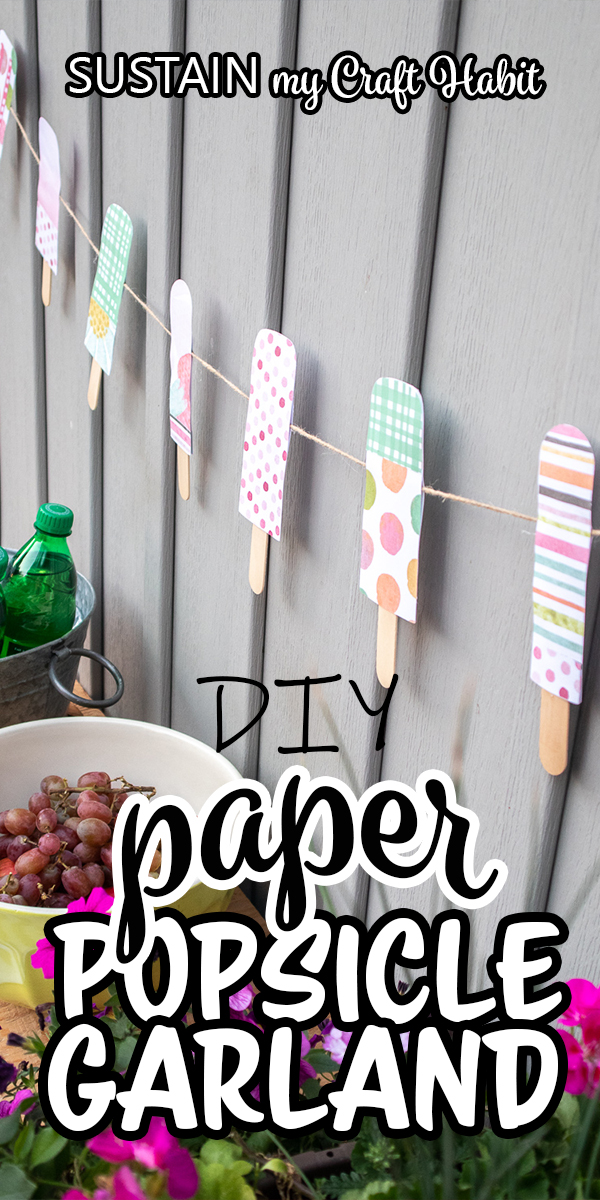
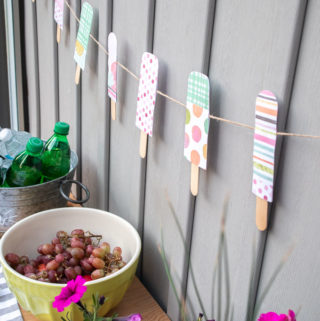
Colorful Summer Garland with Paper Popsicles

Do we need a better reason to celebrate other than simply Summer is here? We think not and so we created a fun Summer garland using colorful paper popsicles.
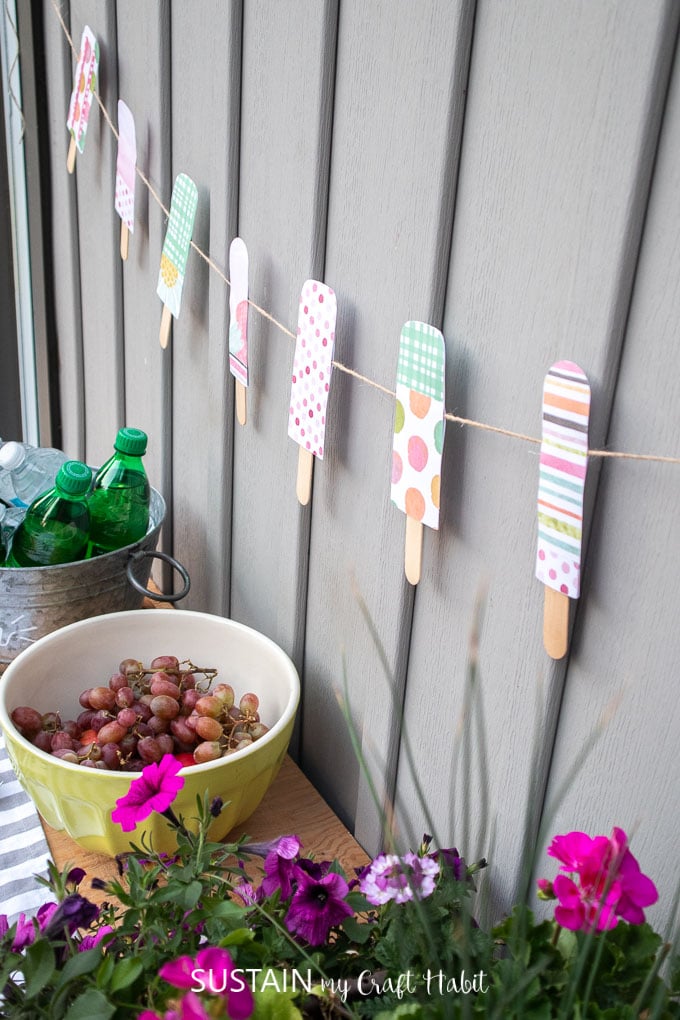
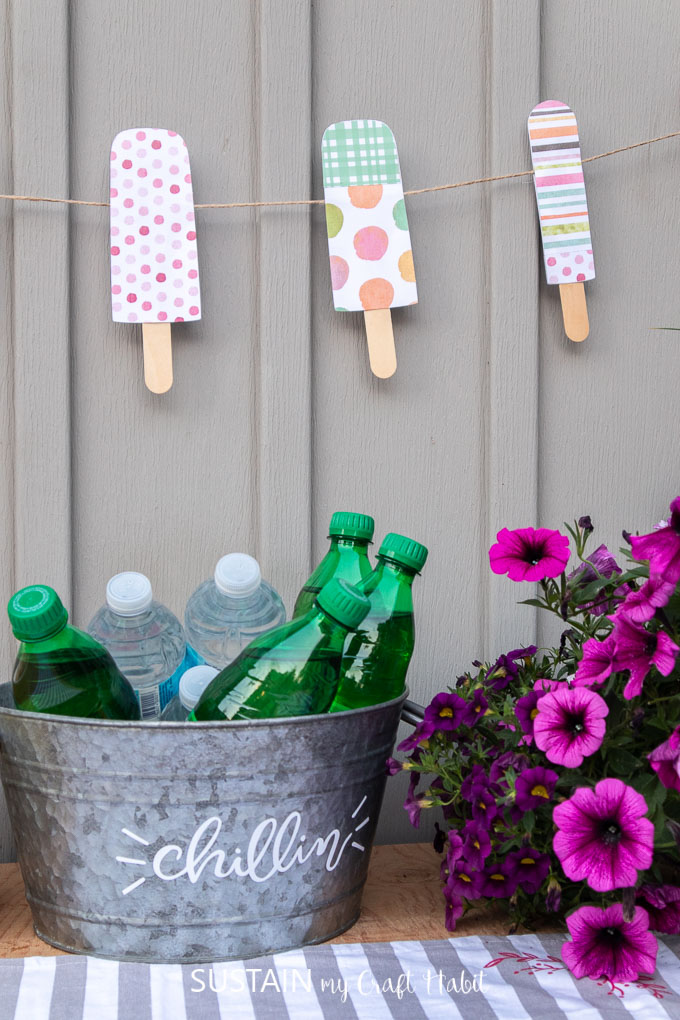
Whimsical Paper Popsicle Summer Garland
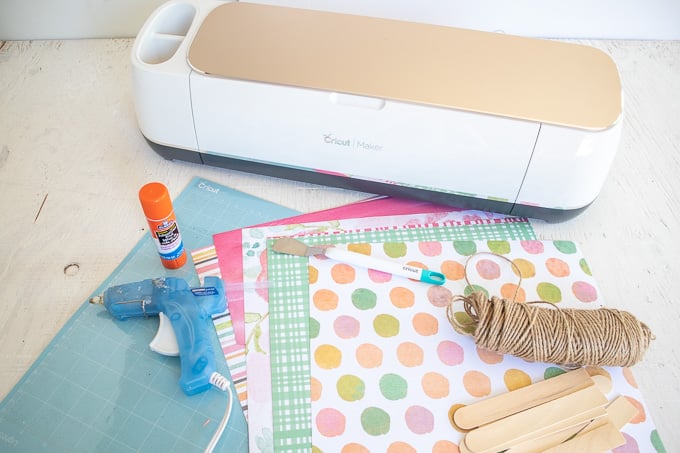
Although we created these paper popsicles using our Cricut Maker with this free downloadable SVG cutting file, the patterns themselves are super simple so cutting them out by hand is also an DIY option.
This Summer garland can be strung inside or out for a little playfulness during the Summer months or can be used as a decoration for a birthday picnic or other similar gathering.
Then use up any leftover popsicle sticks for these fun crafts!
Materials Needed:
- Popsicle SVG File or Popsicle PDF file if cutting out by hand
- Cricut Maker with Fine Point Blade
- Cricut Light Grip mat
- Decorative Copy Paper in coordinating colors (we used Recollections Blossoms & Bliss Paper Pad)
- Wooden Popsicle Sticks, Large
- Scissors
- Cricut Scraper Tool
- Glue Stick
- Hot glue gun with clear glue sticks
- Twine
How to Make a Paper Popsicle Garland:
Uploading the SVG Pattern
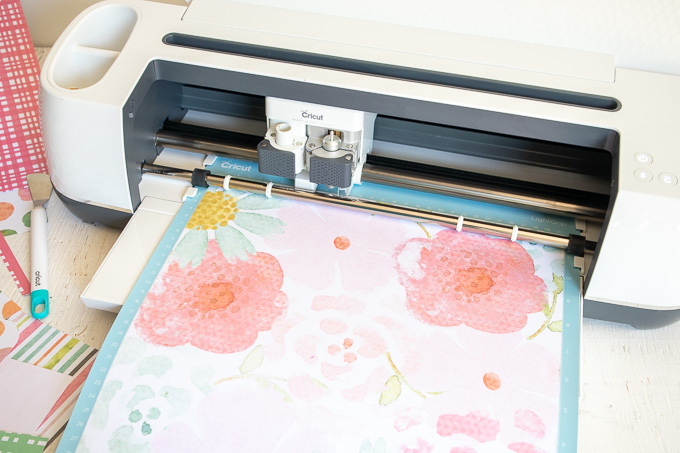
Upload Popsicle SVG File into Design Space and click ungroup to separate the pieces.
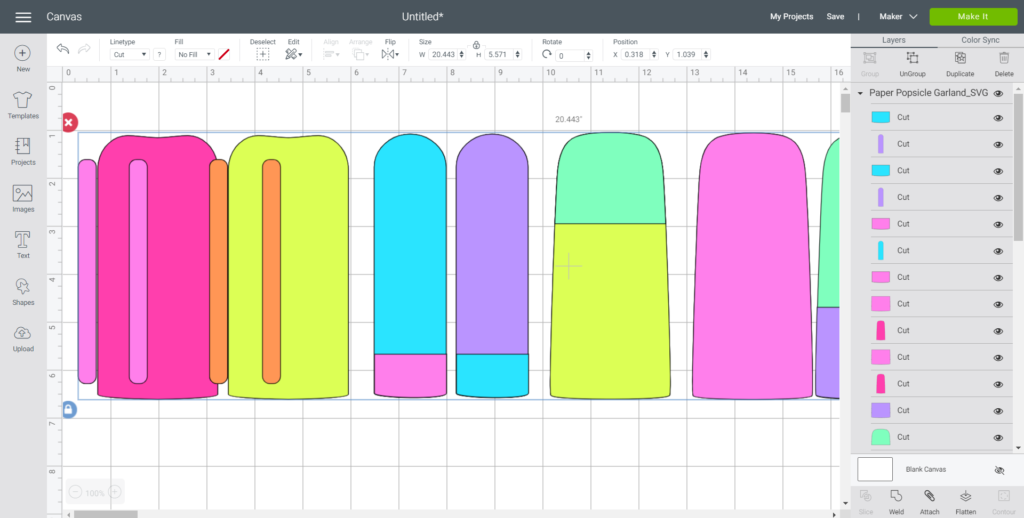
Cutting
Select “Make It” in Design Space.
Set material type to Copy Paper, lightweight and adjust the default pressure to “more” if needed.
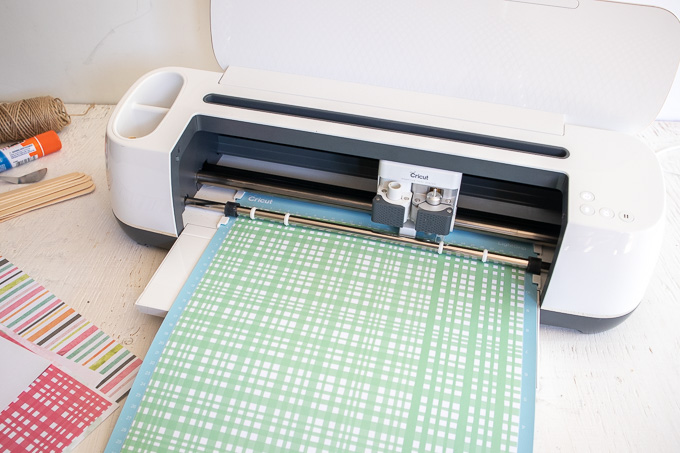
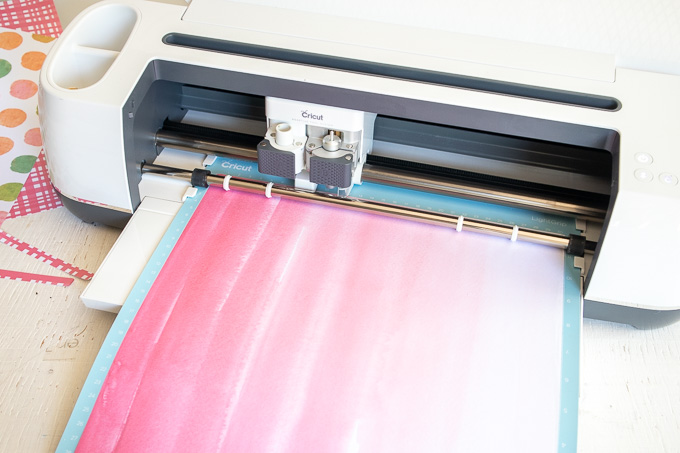
Place a sheet of decorative paper on the light grip mat.
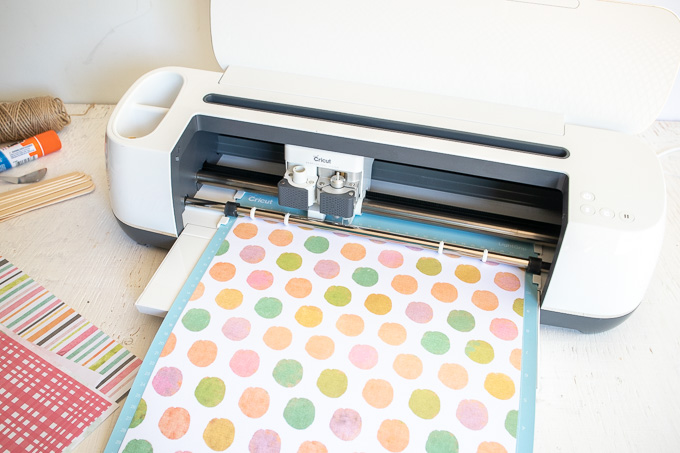
Follow prompts for loading the mat into the Cricut Maker and cutting the paper. When prompted, unload the mat from the cutting machine.
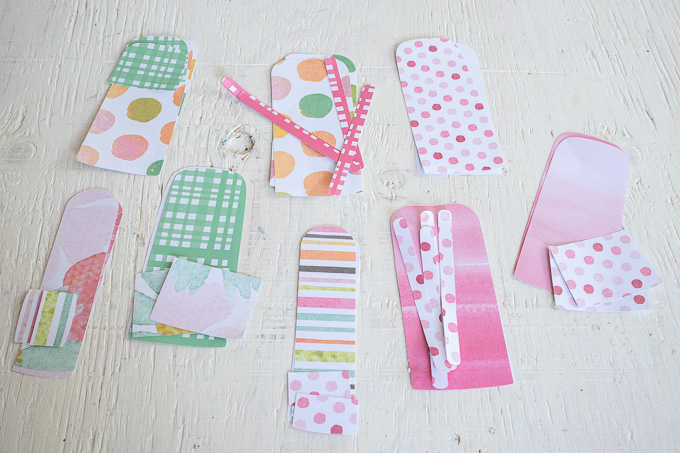
Peel off the paper from the mat and put the cut popsicle pieces to one side for assembling later.
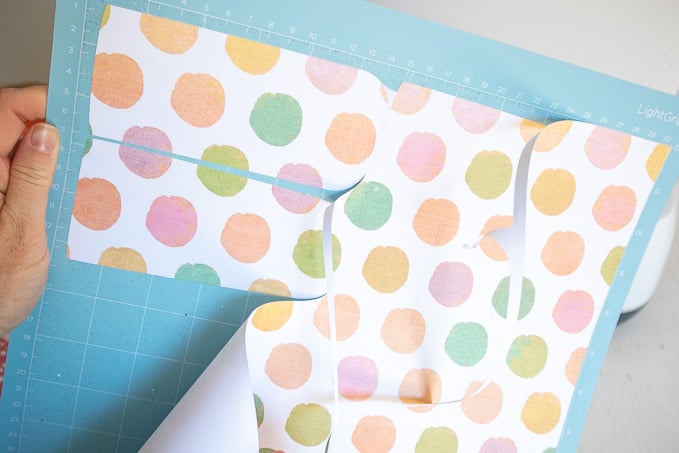
Repeat for each different paper color until all pieces are cut.
Or alternatively, download and print the PDF version of the pattern and place over the decorative paper to cut out individual popsicles.
Assembling the Summer Garland
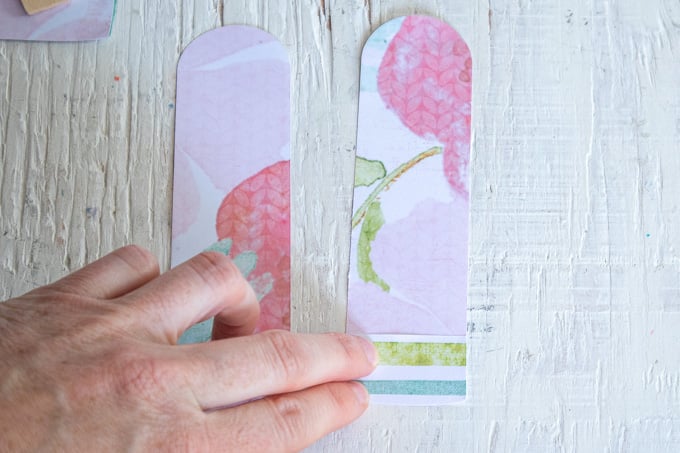
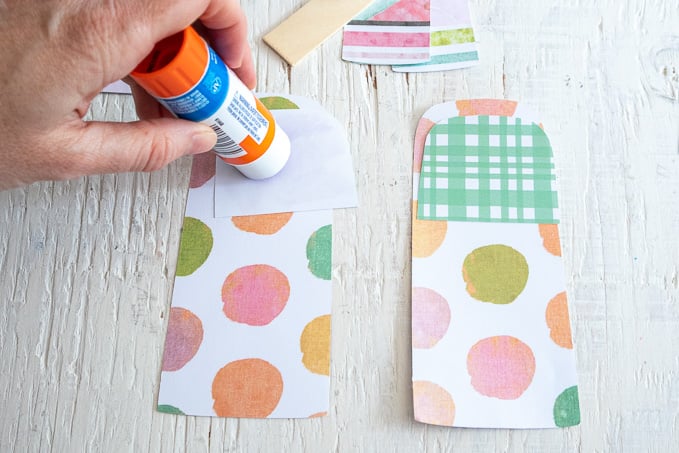
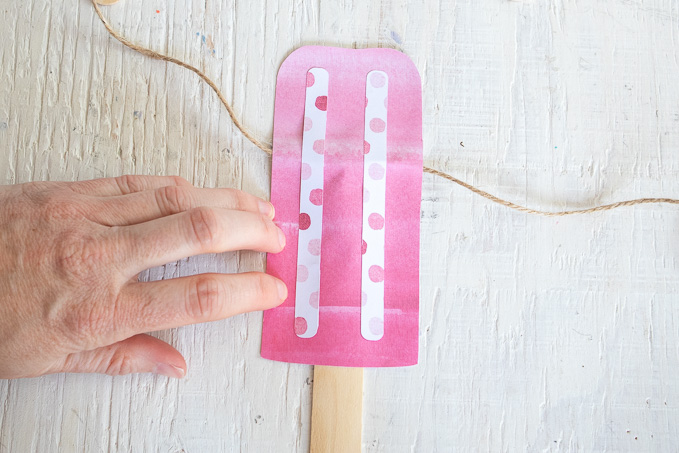
Each popsicle has two sides. Place all the pieces for each individual popsicle together on a flat surface to assemble.
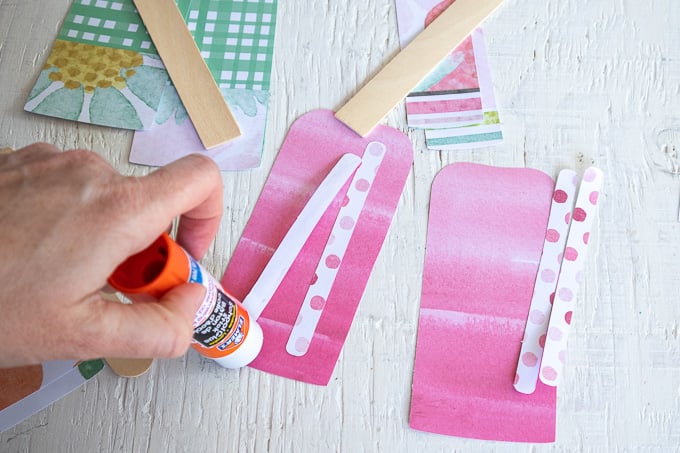
Using a glue stick, apply glue to the back side of the smaller decorative cut pieces and press them on to the larger cut popsicle pieces as shown. Repeat for all popsicles.
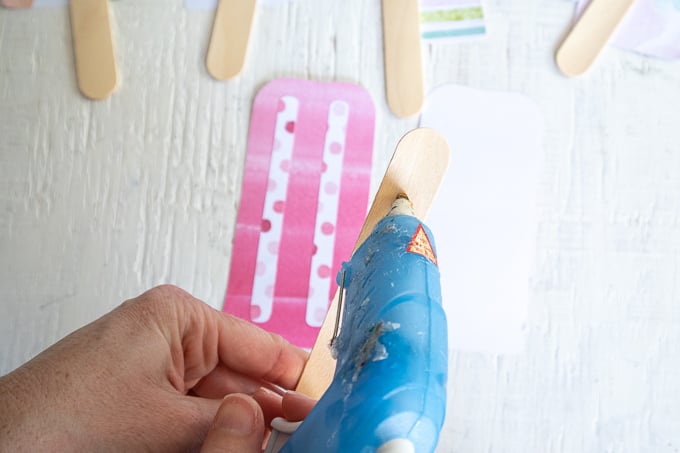
Preheat the hot glue gun and cut a piece of twine 60” long.
Working one popsicle at a time, place both sides of the popsicle face down. Add hot glue to the upper half of one side of a wooden popsicle stick and press it down on to the wrong side of the paper popsicle.
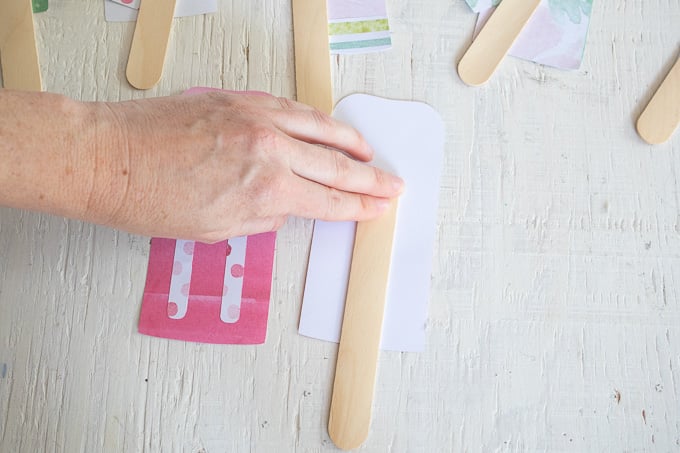
Add a bead of glue at the top of the stick and carefully press the twine into the glue across the width of the paper popsicle leaving about 15” of twine on the starting end.
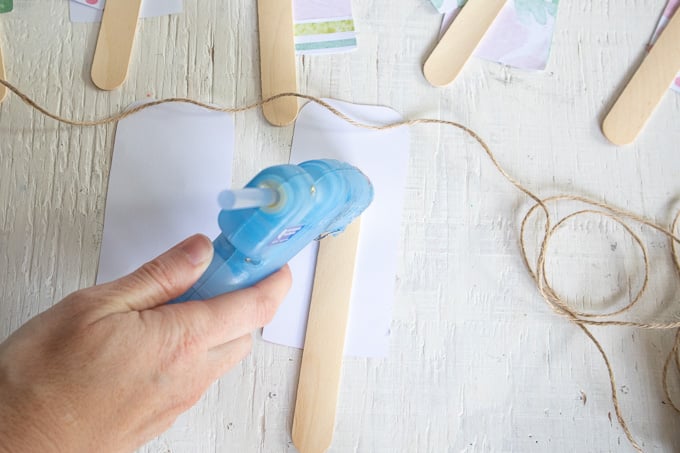
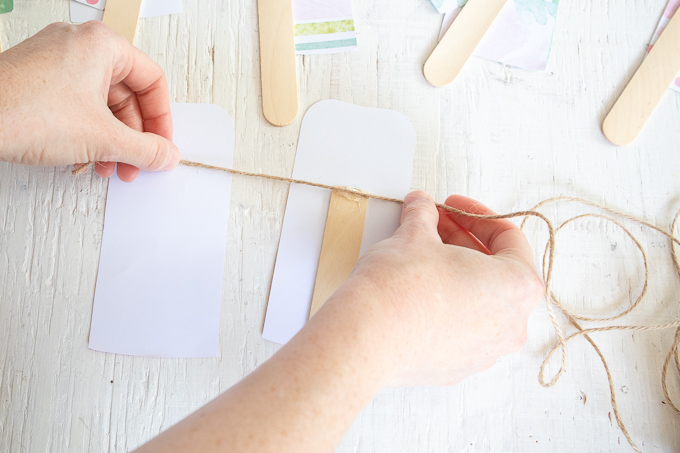
Apply glue to the other side of the popsicle and press it on top with the wrong sides together, sandwiching the glued twine inside.

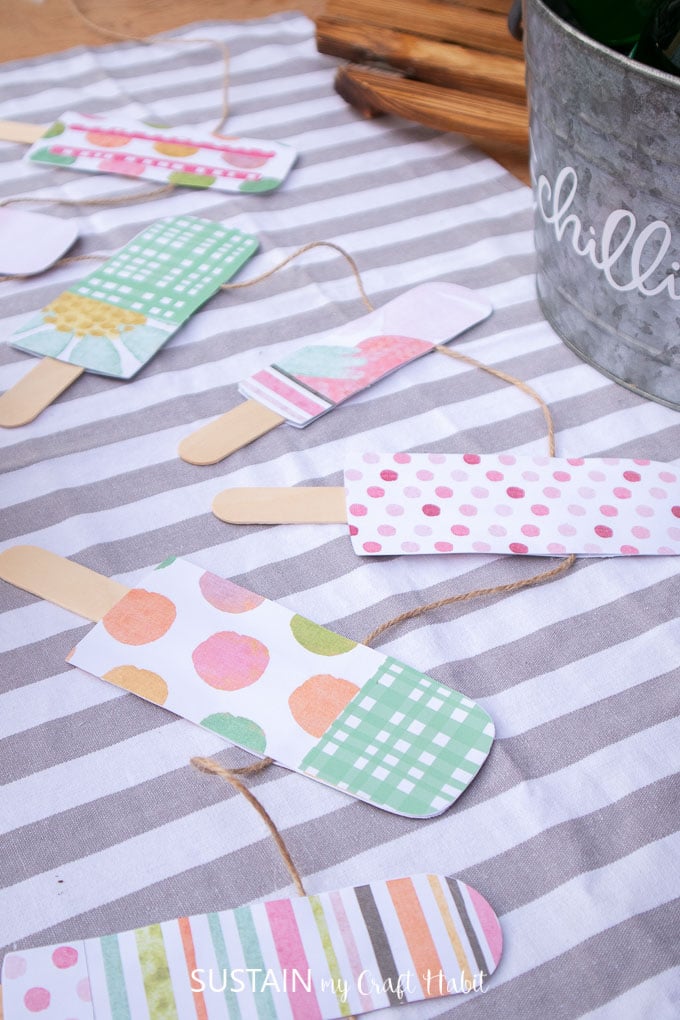
Continue with the remaining popsicles keeping a 4” spacing between each paper popsicle until all popsicles are attached.
When finished, hang to enjoy!
More DIY Garland Ideas:
Since garlands are a great way to decorate all year long, here are some of our favorite DIY garland ideas:
- Mini pom-pom garland
- Bunny-full Easter paper garland
- any of these 25+ holiday garland ideas
- upcycled egg carton spiderific Halloween garland
- scrap fabric heart garland
- sparkling star garland
Like it? Pin it for later!
Colorful Summer Garland with Paper Popsicles
Materials
- Popsicle SVG File or PDF file
- Cricut Maker with Fine Point Blade
- Cricut Light Grip mat
- Decorative Copy Paper in coordinating colors Recollections Blossoms & Bliss Paper Pad
- Wooden Popsicle Sticks Large
- Scissors
- Cricut Scraper Tool
- Glue Stick
- Hot glue gun with clear glue sticks
- Twine
Instructions
Using Cricut to Cut
- Upload Popsicle SVG File into Design Space and Click Ungroup
- Select “Make It” in Design Space.
- Place a sheet of decorative paper on the light grip mat.
- Follow prompts for loading the mat into the Cricut Maker and cutting the paper.
- Repeat for each different paper color until all pieces are cut.
- Each popsicle has two sides. Place all the pieces for each individual popsicle together on a flat surface to assemble.
- Using a glue stick, apply glue to the back side of the smaller decorative cut pieces and press them on to the larger cut popsicle pieces. Repeat for all popsicles.
- Preheat the hot glue gun. Cut a piece of twine 60” long.
- Working one popsicle at a time, place both sides of the popsicle face down.
- Add hot glue to the upper half of one side of a wooden popsicle stick and press it down on to the wrong side of the paper popsicle.
- Add a bead of glue at the top of the stick and carefully press the twine into the glue across the width of the paper popsicle leaving about 15” of twine on the starting end.
- Apply glue to the other side of the popsicle and press it on top with the wrong sides together, sandwiching the glued twine inside.
- Continue with the remaining popsicles keeping a 4” spacing between each paper popsicle until all popsicles are attached.
Using Scissors to Cut
- Place the printed pattern pieces over the decorative papper and cut along the solid lines using a pair of paper scissors.
- When finished, hang to enjoy!