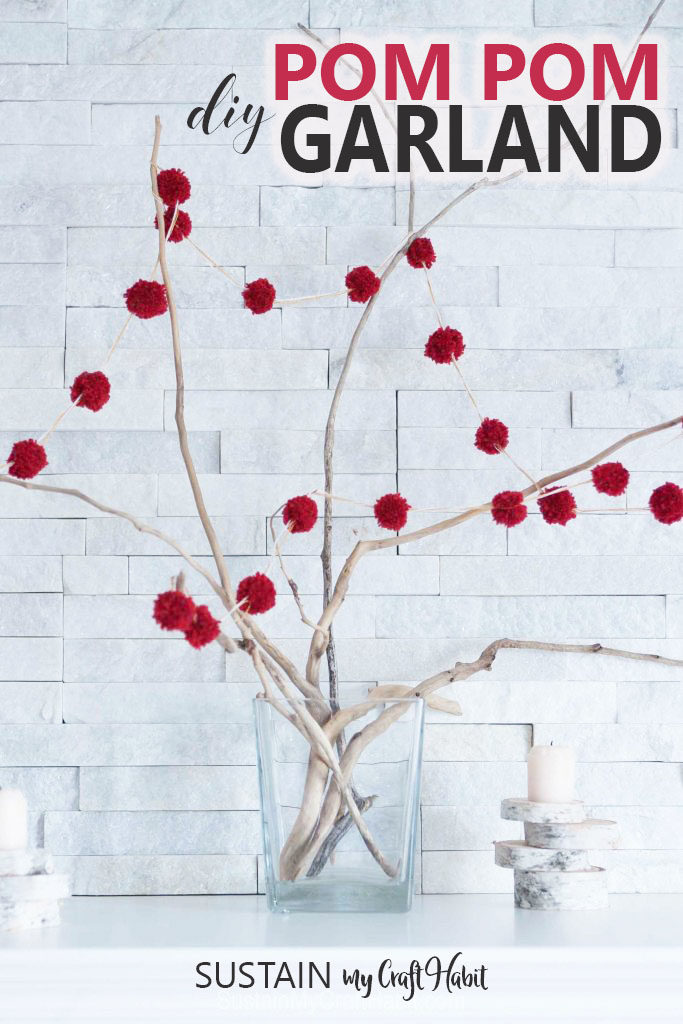

I have a new obsession: pom poms. Ever since I made my very first DIY pom pom last year to top a knitted toque, I’ve been looking for excuses to make more fluffy pom poms. I rummaged through my basket of leftover yarn and found one small skein of red wool. This would be perfect for a mini sized DIY pom-pom garland!


Versatile and Easy Pom Pom Garland
It was fate that I chose a red yarn because it ended up being really versatile! We were able to use it for the Christmas tree, Halloween, Canada Day and even decorating for the 4th of July to celebrate with our American friends.
My DIY pom pom garland also made an appearance on Jane’s rustic Christmas mantel several seasons ago.


With our easy tutorial, you don’t need any special tools – just a fork!
You could easily make different sizes and different colors of pom poms. Or add other small elements to your pompom garland. I love how The Happy Housie made hers with small pine cones as well.
What you’ll need For this Simple Craft Idea:
Disclosure: This post contains affiliate links for your shopping convenience. Should you choose to purchase through them, we will make a small commission at no extra cost to you. You can read our full disclosure policy here.
- Medium weight 2 ply acrylic yarn in color of your choice
- White fine gauge single ply yarn
- Fork
- Scissors
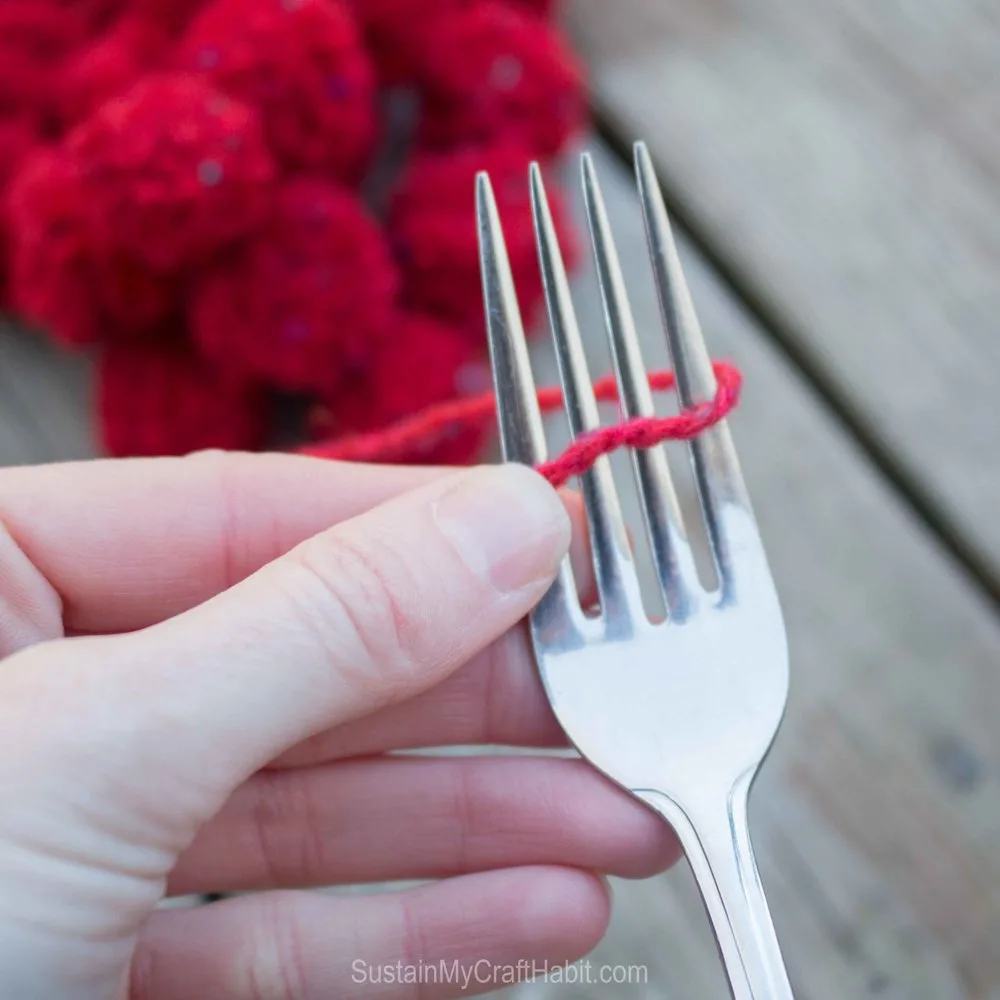
How to Make a Pom Pom:
To make the first pom pom, start by wrapping the yarn around a fork approximately 40-50 times. No exact science here but there needs to be enough wrapping to make a good, fluffy pom pom.

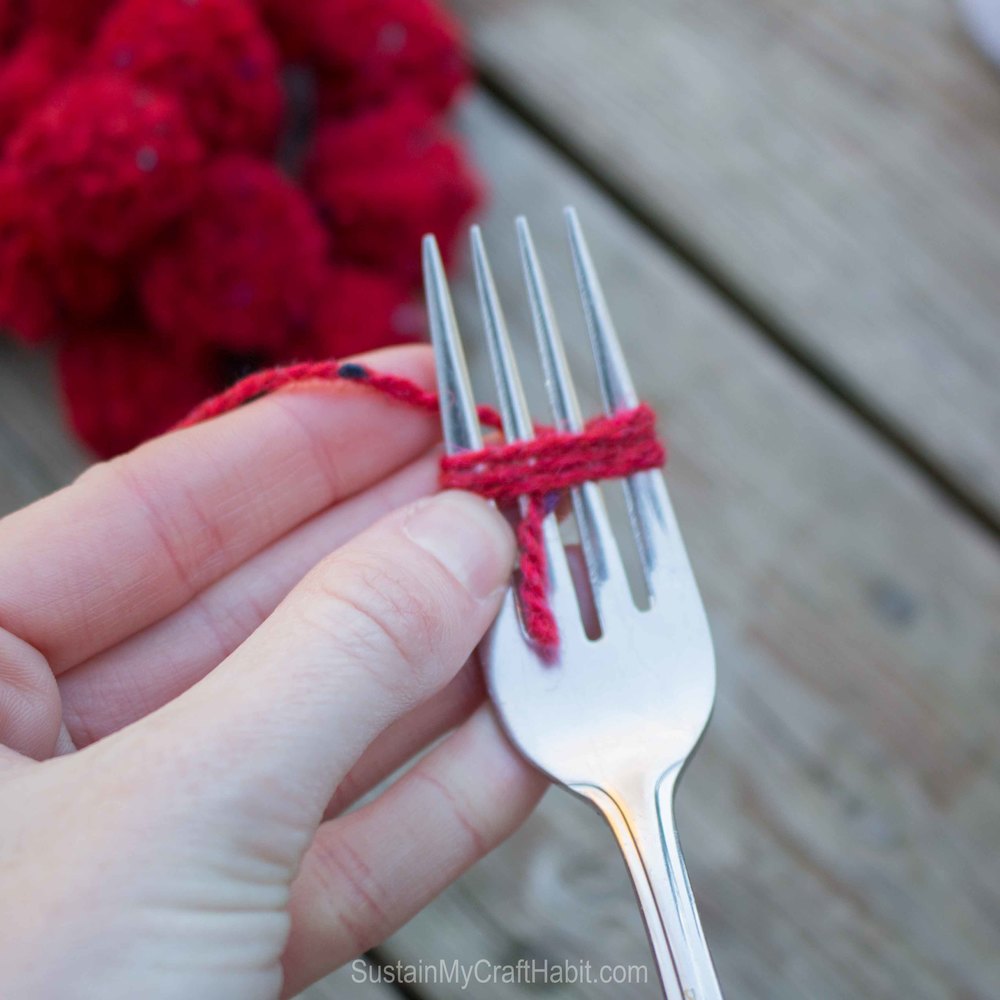
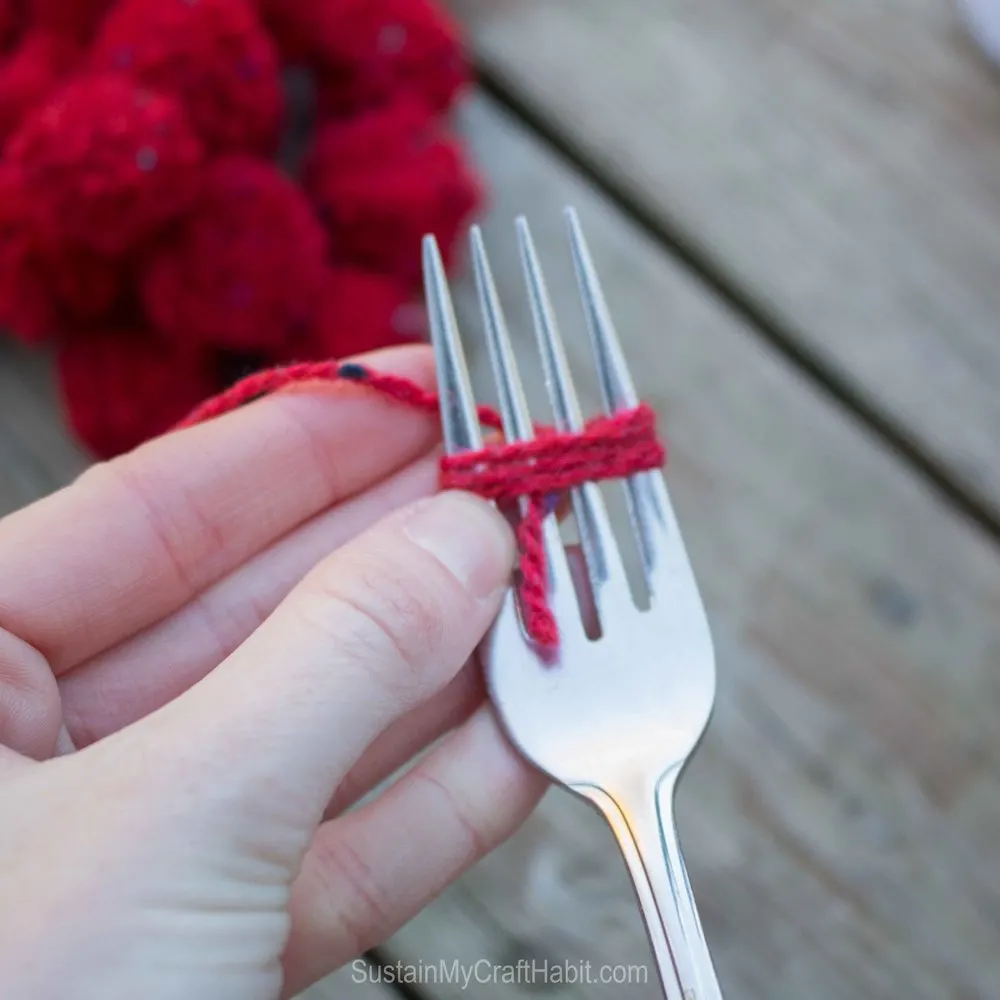

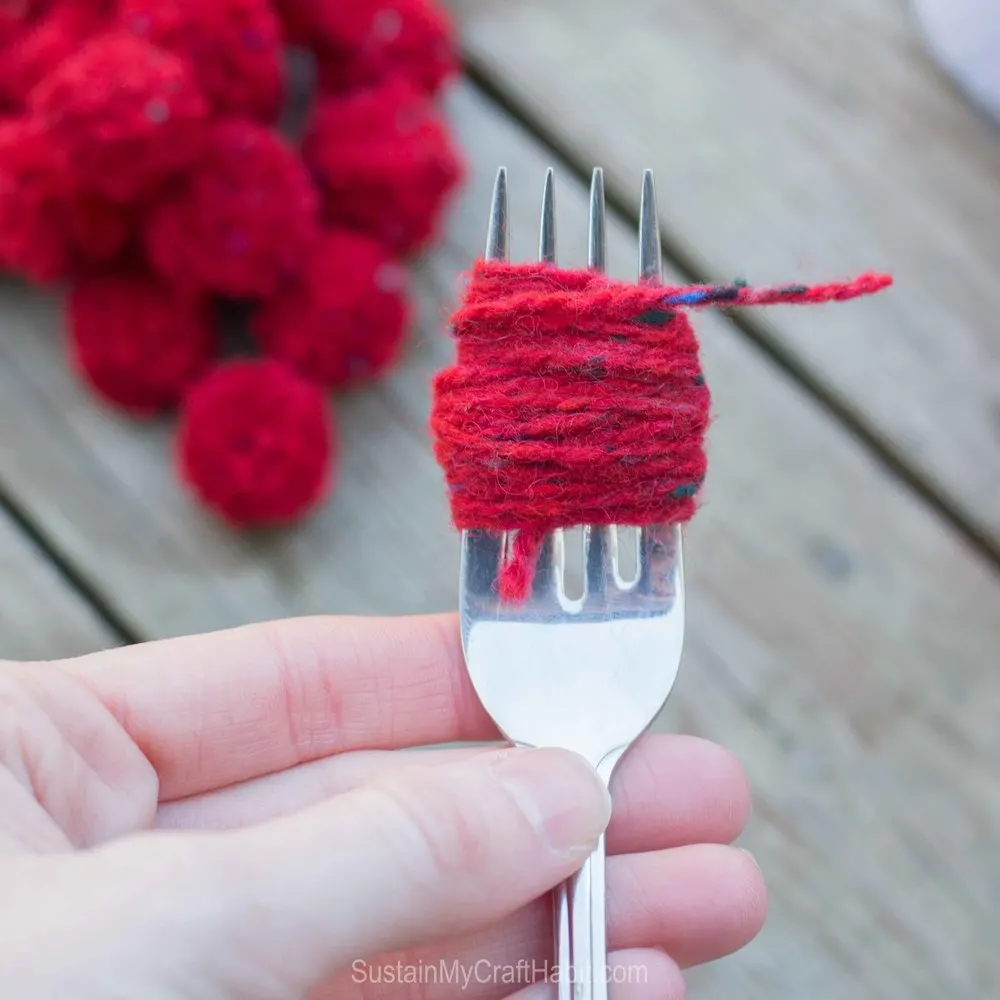
For the next step, take a good strong quality yarn to tie around the center of the wrapped fork.


Tie a single knot and gently remove the wrapped yarn from the fork.


Pull the center yarn tightly and add a double knot to secure in place. If your pom pom yarn is strong enough, you can use the same one. In my case, the yarn broke whenever I pulled tightly to form the knot so I went with a different one.


Using a pair of sharp scissors begin to clip all of the formed loops to create loose ends. When all the loops are clipped, you will have a unruly looking pom pom.


Onto the fun part: give that DIY pom pom a haircut so that all the cut edges are about the same length.


And there it is: a individual pom pom.
Continue on and make as many as you want for your Christmas pom pom garland. Or alternate with some holiday yarn colors for a festive effect. In my case, I used up the entire skein of yarn, which made twenty-two adorable little pom poms.


How to make a Pom Pom Garland
To form the garland, I joined each pom pom using a fine gauge single ply white yarn we picked up for virtually next to nothing at a local thrift shop. It had some gold woven in for a bit of sparkle.
To start, unravel a long piece of yarn – at least double the length of the garland you want to make.


Knot the white yarn on either side of the DIY pom pom and space them out evenly. Continue until the pom pom garland is complete.


I was so excited about my cutie little Christmas pom pom garland. I actually really like how the white yarn doesn’t detract from the fluffy clusters.


The yarn pom poms almost look like they’re floating all strung up on these driftwood pieces.


They also look perfect just bunched together on the mantel.


We hope you’ve found this DIY pom pom garland tutorial helpful.
If you’re looking for additional holiday decorating ideas, be sure to stop by our Christmas Crafts section of the blog. There’s all sorts of goodies such as Christmas rock painting ideas, free printable Christmas cards, non-stuff gift ideas for your spouse and more!
How is your holiday decorating coming along?
Like it? Pin it for Later!


How to Make an Easy Pom Pom Garland (DIY with a Fork)!
Materials
- Medium weight 2 ply yarn in color of your choice
- Fine gauge single ply yarn
- Fork
- Scissors
Instructions
- Start by wrapping the yarn around a fork approximately 40-50 times.
- Next, take a good strong quality yarn to tie around the center of the wrapped fork.
- Tie a single knot and gently remove the wrapped yarn from the fork.
- Pull the center yarn tightly and add a double knot to secure in place.
- Using a pair of sharp scissors begin to clip all of the formed loops.
- Onto the fun part, give that DIY pom pom a haircut so that all the cut edges are about the same length.
- Continue on and make as many as you want for your pom pom garland.
How to make a Pom Pom Garland
- To form the garland, join each pom pom using a fine gauge single ply white yarn.
- To start, unravel a long long piece of yarn – you will double it up in making the garland.
- Knot the white yarn on either side of the DIY pom pom and space them out evenly. Continue until the pom pom garland is complete.
Heidi Fuqua
Sunday 13th of December 2015
I love it it's so simple, and it's kind of similar to those felt garlands.
Heather @ new house new home
Monday 7th of December 2015
Super cute!!! Love it with the white branches!
Jane and Sonja
Tuesday 8th of December 2015
Thanks Heather! We were lucky to find those branches.
Susan - saf affect
Monday 7th of December 2015
Adorable and gorgeous!
Jane and Sonja
Tuesday 8th of December 2015
Thank you! There were A LOT of fun to make.
Joann
Friday 4th of December 2015
This is super cute! And good for you for using a fork. We just did a pom pom garland and I bought the Clover pom pom maker because I was hopeless with the fork or even the cardboard template! I love this mini garland. :)
Jane and Sonja
Tuesday 8th of December 2015
Thanks Joann! Funny, I never knew there was such a thing as a Clover pom pom maker! One of the reasons I love making pom poms is because they are so forgiving...no need for perfection here, a fork will do just fine:)